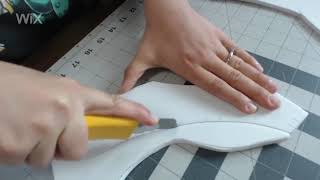
In this instructional video, Kazul walks viewers through the complete process of assembling a versatile anime fox (Kitsune) mask made from 6 mm EVA foam. He begins by explaining the origin of the pattern—derived from a miniature sculpture—and then lists all required materials and tools, including printed pattern pieces, a four‑color ballpoint pen, utility knife, sharpener, contact cement, heat gun, optional pattern notcher, and a Dremel with sanding drum. Kazul demonstrates how to prepare the pattern pieces by cutting out green registration marks and the ear‑curve notch, then shows a color‑coded tracing system (blue for bevel edges, green for registration marks, black for other edges). He details two cutting methods: a precise 90° cut followed by a 45° bevel using the knife, and an alternative Dremel sanding technique that uses a pen‑drawn offset line to achieve the bevel. After all pieces are cut and beveled, he explains a step‑by‑step gluing sequence using contact cement applied in two layers, how to correct mistakes with a heat gun, and how to clean up excess glue. Finally, he shapes the ears with the heat gun, attaches them, and presents the completed mask base ready for sealing and painting. Throughout, Kazul offers practical tips on blade sharpening, body mechanics for clean cuts, and troubleshooting, ending with an enthusiastic invitation for viewers to customize the mask.
Chapters
Hi, I'm Kazul and welcome to my lair. For a while now I've been working on a Kitsune mask pattern. Now what's cool about this pattern is that I started as a miniature and I was able to pull the pattern from this mini sculpt and blow it up to a full size thing. I will be doing a tutorial on that on a later date. But for now, since my pattern is complete, I want to show you how to put it together. This mask base is very versatile. You can paint it and customize it in many different ways. So I'm excited to see how you will use it. Without further ado, let's get this ritual of summoning started. So for the materials and tools you'll need, you'll need the printed out pattern pieces. You can find them on my website. You'll also need 6 millimeter EVA foam. You'll also need a ballpoint pen. I like to use this four color pen. You'll see why. You'll also need a utility knife to cut the foam. And it really helps to have a sharpener nearby so that you can quickly hone the edge. You'll also need contact cement. I use do all 88, but barge will work just fine here. And you'll need a heat gun to help shape the foam. Optionally, you can use one of these pattern notchers. They're useful but not necessary. Also, you'll maybe need a Dremel with a sanding drum bit. This isn't necessarily required, but will help you out a lot. So after you get your pattern pieces all cut out, you'll notice that there's these green registration marks and you'll need to cut those out either using a pair of scissors to cut a little V or you can take your utility knife to cut a V out. And here's where you'll see the pattern notcher come in handy. It's really easy. You just have to punch it out and makes these nice little notch shapes on all the registration marks. And after you take the time to punch out all the registration marks, there's one more detail on this piece number one that you'll need to do. The ear curve. You'll need to take your knife and cut along that edge so that it's loose and open. And with that your pattern pieces are prepared. So I'm choosing to do white foam so that you can see it very easily. And what you'll do is you'll take each piece and trace it out. So I grabbed piece number one and I'm Using my four color pen to indicate the different kinds of lines that are on the pattern. So I use the blue to trace the edge that is indicated in blue that you'll need to bevel in. I'll use the green to do the registration marks and the black around all the other edges. And I'll also be careful and trace the line of the ear curve onto this piece. Some of the pieces say cut to. That means that you'll flip it over and trace it on the backside. Now see, it can show up on darker foam like this. When you trace it, it's just a little bit harder to see but is still manageable. Now it's time to cut it out. So all the black lines that you traced need to be cut out at a 90 degree angle. I'm using my utility knife, going slow, making sure to be holding the knife perpendicular to the foam so that I can get a nice clean 90 degree edge. It helps when you pull from your shoulder and not move your wrist. And that way you can lock it into the right angle and then pull. This will help you greatly on the next step, which is the blue lines, they need to be beveled inward on the back. So you see, I'm locking my blade into a 45 degree angle into the pattern piece and pulling it along. Now this kind of cut will require a little bit of practice, so practice on some scrap foam before cutting out your actual pattern piece. And here's a better view where you can see how I'm pulling from my shoulder instead of my wrist and moving my whole body along with the blade. And that just helps you get a much cleaner cut and, and much more smooth, especially on those curved lines. You'll see, as I cut this piece here, my blade is getting rather dull and it takes me a few cuts to get through. So that's a no, no, you don't want that. So it's a good idea to sharpen your blade when it gets like that. Or if you have a snap off blade like this, you can. And the sharpening on this tool won't work. You can snap off a segment or two of the blade so that you can have a nice sharp piece. It's really important to have a sharp knife, especially for those beveled in cuts because it just helps make it a ton easier. Now if you're not feeling very comfortable with holding your knife at that kind of angle and cutting, there's another way that you can get those bevels which I will show you here. What you'll do is Go and cut out the entire piece at a 90 degree angle all around, even the blue edge where you'll need to bevel. Flip it over on the back because that's where the bevel needs to be. And take a pen and I'll take and measure the thickness of the foam with my finger and then press my finger into the pen so that I can hold that same thickness. And that way I can go and trace around the edge and and have the thickness of the foam draw a line in inwards. Then it's easy. You just take a Dremel with the sanding drum and you're able to sand away from your drawn edge to the opposite corner. And you can get a nice 45 degree angle that way. And you'll notice that I also have the tube of a vacuum there to help collect the dust as I sand it. But all your pieces can be done this way if you're not comfortable with cutting the bevel with the edge. So on the eye pieces, the red lines that are there means that it needs to be beveled on the front. So you can do that easily with the Dremel method. Careful, those edges get a little tricky. You can change your angle that you approach it to get it down. But if you like cutting it with the blade and want to do it that way, you'll have to cut the pattern piece and at that dotted line instead. Then when you go to cut out that angle, instead of angling it in, you angle it outwards and cut that way. And that's how you get those beveled cuts. Now that you have them all cut out, it's time to glue them together. And I like to do it in sections. So the first section will be Both pieces of 1 and 2. Then pieces 3 and 4 to attach to each other, then both of piece 6 and 5. Contact Cement. How you use it is you paint on a layer on all the edges that you want to glue together and you wait for it to dry. I like to do two layers of glue, but after it's dried, then you can press them together and it creates an instant bond. So here I am putting together both piece one. And then attaching piece two, making sure that those registration lines line up. So now I take piece six and attach it together and then put piece five on. Then for piece three and four, I like to start at one end and line up the registration marks. Then go to the back and line up those registration marks. Then fill in the middle. Now if you mess up, you can take your heat gun and that will soften the glue so that you can pull it back apart and put it back together. And of course, you'll also have to glue that front beveled edge together. It may require a little bit of cleanup. You can do that with your knife or the dremel to clean up that edge. Now you have these four pieces. I like to take these two pieces together again, starting at one end, then going to the other, and then matching up the middle pieces. It's really easy to get the glue to touch and link in a part that you don't want. Just soften the glue back up, pull it apart, and put it in the right spot. So now for the final piece of the mask. Lining up the two end pieces, then a little in the middle and filling in the rest. It's time for the ears. You use your heat gun to heat up the foam and then hold it into a curved shape. Then just apply the glue along the ear curve line and you will have ears and a finished mask. And there you have it. Now you have a kitsune mask base that you can customize, seal, and paint in in any way you want. So thank you so much again, I'm Kazul, reminding you to embrace your inner beast.