7 Genesis System Training Part 7 Processing a draw request
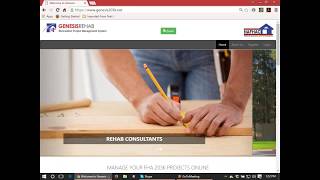
Catherine Hall walks through how to process a draw request in the Genesis System. The video covers logging in, entering draw information, and managing documentation and signatures for draw inspections.
Questions this video answers
Chrome
Four (completing Draw 1 of 4)
25 megabytes per photo
supportenesis203k.net
Chapters
Welcome to the national association of FHA Consultants and the Genesys Rehab Project Creator. This is a brief video on the process of completing a draw inspection using the Genesys Rehab Project creator.
First of all, you should always utilize Genesys inside Chrome where possible as other browsers may provide different results in the visual display of the program.
Once you've logged into Genesys and are displaying your projects.
You want to open the green button that shows you the Draw Inspection task list. This is only going to be available in files where you have successfully completed and finalized your work. Write up activities.
Here you will see we are completing Draw one of four that are able to be scheduled for this project.
Every one of the draws will create all of the elements that must be specialized for this draw. Things that are automatically created and not necessary to be edited or if not used will automatically have a checkbox saying that they are complete. However, you can go into any of these line items and make modifications should you seem necessary.
This is our first draw and as it is the first draw there will be a permit notification given if in the permits and certification form you indicated that there were permits required. So for this project we have three permits.
So the preview of the draw package cover page will look like this.
Here you see that it is in PDF format. It shows the current date automatically entered, your name and your consultant id. The borrower details. If you have not yet provided the lender loan number or case number, it will show blank this. This information can be added by going into the Update project field on the main dashboard. Here you can see that the number of permits that are going to be required with this first draw are now listed. The checkbox is next to the draw request form and the lien waiver and the invoice for the inspection fee. If we are doing change orders with this first draw, we would then enter those change order information and these boxes would then be added. Edit it.
The next step is to enter the information on page one of the draw. Here you can see that only categories where money was allocated in the initial draw process will be able to be entered here in this draw escrow sheet.
What you want to do is you want to enter for this draw as you can see what currently is available.
So here we're putting in.
And it shows that this is 100% and now there's nothing available remaining for this category.
And you can see now it automatically updates.
And now I'm entering categories where I have information.
Once you have completed all the entries that you want to make, you'll see the Total appears and the percentage of work completed and you hit update request amount.
You can then preview this report.
Here you can see that the draw has the client's information, the date, the signature of the consultant. All of the amounts including percentages and the information is included on page two with the amount being paid and the fee for the draws as established by the fee schedule. The box indicating that this is a draw inspection has now been blackened to indicate this is the draw.
The information and the fees are listed here and this is the government form and the third page is informational only.
Should you have any changes you'd like to make to the Draw Request Page 2.
You can enter this information here and it will update on the actual inspection report. For example, if you definitely want to indicate no non compliance was observed.
And you make a note here.
And then you can submit the data, this will now update on the report.
Should you need to complete a change order, you would enter this information here. Please refer to the separate video on change order processing. Next you will enter a lien waiver.
And you have several options of the different types of lien waivers that you can utilize.
There is a general lien waiver, a Wells Fargo lien waiver, and a generic final lien waiver. If you have another type of lien waiver that you would like to have added to our list for a popular lender, please email us at supportnifec. Excuse me. Supportenesis203k.net.
Here you can view the preview. You can see that the name of the borrower is here, the date and here at the bottom is where.
The contractor will sign and print his information.
The next thing that you're going to do is enter the inspection photos that you took at the time of the inspector. You may enter just as when you are creating the feasibility preliminary work. Write up report 25 photos at a 25 megabyte limit per photo. You use the choose file button to locate in your computer where the files for your draw inspection are located.
A very simple way to select your draw photos is to simply take and click the first image, then press and hold the shift key down and then go down to the section where you want to include through. So this is 5, 10, 15, 20, 24. So I'm going to click here and it will select all the photos between that first picture and the last picture when you have the shift key held down. So we'll now open these vitals. We'll now open these files and import them and into Genesys. It can take up to 90 seconds to import your photos and during that time you'll see the blue squirrel link circle indicating progress.
Now that all the files have been uploaded, I'm going to continue to the next phase which is entering the information on the loan disbursement company and the loan disbursement officer. Here you have the ability to enter these separately as one loan company might have multiple disbursement officers that you will be working with. So here I'm going to enter the loan disbursement company.
And I'm going to enter their address in full.
And you can stretch it out so you can see how it's looking. Now I'm going to add this company.
Now I'm going to go back and enter the actual loan officer.
After I added them, however I needed to select them.
So now I've selected this company.
And I'm going to update the information with this new company selected.
Now the box will be green. Before it was not because I had not actually selected it, I just added it new. Now I'm going to enter the loan disbursement officer.
Now while you may have an email address separately for the loan disbursement officer, most loan companies request that the draws be sent to a single email account. So you may want to choose that information or you might simply want to keep track of that in your records. I'm going to put in the actual email address for the actual loan disbursement officer. However, in my distribution list on the email that I will send out, I will then put the details about his personal information.
Well, if I can type.
I can enter the telephone number for him.
I'm going to use the toll free number.
And I'm going to enter the extension.
So you can see I couldn't enter the extension.
And so I'm going to put that here under the fax as optional information.
If possible. I might not be able to get it. I don't think I knew that actually.
I will stick it next to his name.
Or not.
So I can't get that in there.
Alright, so I'm going to stop at this point and I'm going to cut and paste. So we're going to.
Stop recording.
So I'm going to crop it from here forward.
The next step is to create a loan disbursement officer.
And if I do not have one established, I'm going to enter his name.
I'll use their toll free number.
And I'm going to add him.
And we're in. So he has been added.
So now we have an invoice that's automatically generated.
The consultant's combined draw mileage fee. So now we're going to add will automatically be included on the draw invoice, so you don't have to do anything. Only if you're doing a change order, invoice fee or any additional service fee do you need to do that. Your.
Invoice will automatically include the draw and mileage fee.
So now this draw is ready for processing, I can print and preview this report.
Right now.
Here you see we have our draws, the COVID page.
The page one of the draw.
Page two of the draw with comments noted.
Page three, the lien waiver ready for signature by the contractor and the draw invoice.
So here you can see the final output ready for printing.
The COVID page, page one of the draw, page two of the draw, page three, the lien waiver.
The invoice, the photo album. Now, many of you will be doing this after you've come back from the field where you will have already gotten signed documents from the contractor and client. In that circumstance, all you need to do is select the specific pages that you want to print that were created by Genesis, scan in the pages that were hand manually signed by your client and contractor, and then you're able to submit your package. However, if you have not gotten the signatures on site for whatever reason, you can save this PDF file and using Adobe Acrobat Reader, EchoSign or other PDF signing program, get your client and contractor to sign at the specific locations using that system. So for me I'm just going to print off the specific pages as I already have the other pages scanned in.
Following the.
Importing of the scanned documents necessary to complete this draw, you'll now see that I have the COVID page.
The page one of the draw request.
The permits scanned in, page two of the draw request that was hand signed and hand completed.
The hand completed lien waiver and there you see it's missing a signature which I can easily correct that using.
Adobe Pro Acrobat Pro. I can add the signature right here on the form.
There we go.
And the invoice.
All complete photos and done. I'll save this now.
I made modifications to it and we're done.
Thank you so much for reviewing this training video on how to complete a draw inspection report. If you have any questions or would like further information, please email us@supportafac.org or supportenesis203.net thank you.
More from Catherine




Getting last minute details ready for the 203k Discovery Days just 5 days away!



Savvy real estate pros are attending the 203k Discovery Days Livestream event 2/25-26...are you?