Your Guide to a New Year in ClearPoint (Webinar 42)
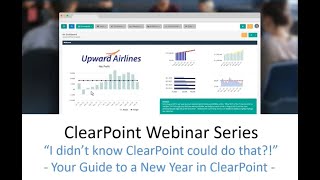
Katherine and Rachel walk through setting up ClearPoint for a new year, covering scorecards, user permissions, reporting periods, custom fields, and notifications. Learn how to organize your strategic planning data before the year starts.
Hello everyone and welcome to the I Didn't Know clearpoint Could do that webinar series. Today we'll be covering the best way to prepare for a new year in your clearpoint account. Before we get started, here are your smiling hosts. I'm Kathryn. And I'm Rachel and as a few housekeeping announcements, we will be recording this session and we'll make it available within a week. The webinar will last about 25 minutes with time for questions at the end, so submit your questions to supportlearpointstrategy.com any that we don't get to at the end we'll follow up with over email. On our last installment, we walked through configuring notifications in your clearpoint account. To keep your whole team up to date on important changes, I highly recommend checking out that recording on our blog, video channel or support center. Just search webinar now. Today we'll be focused on updating your account to prepare for a new calendar year in clearpoint. And maybe some of you have already been completing these changes over the past month to get ready for 2019. As they say, new year, New Clear points. Oh, I was hoping someone would say that. Anyway, we'll start by addressing the structure of your account. So any changes to your scorecard hierarchy or to the alignment of objectives, measures and initiatives that you need reports or summary reports and other scorecards in clearpoint. So if you're overhauling a lot of those reports anyway, it might not really matter whether you use the original or the duplicate copy to move forward, but otherwise you probably want to stick with the original scorecards. Also, if you have a community dashboard, keep in mind that the dashboard information is linked to the original scorecard too, so our team is happy to assist with any changes about annual updates on your dashboard, so feel free to get in touch with questions. All right, Now I can see that our duplicate scorecards have appeared here with the archived copy label that we created, and the last thing that we want to do here is to lock these archive scorecards, which I can do from the Edit scorecard window. Locking does exactly what it sounds like it would. It locks the scorecard to prevent users from making any further changes, right? So in a way it becomes like a view only scorecard for everyone, even administrators. And I can just click through each one to check the box next to locked in our Edit scorecard window. Perfect. Now our archive is preserved and we can go ahead and begin making changes for the new year. And to go back to our earlier example, we're going to be adding city level scorecards to redistribute our strategic information in our account. So we'll want to add these additional scorecards on the Manage Scorecards page. It's very similar to adding an element. I'll just use the plus icon in the top right corner and give the scorecard a name. Now, because our Boston office falls within our Eastern Division, I'm going to want to assign the Eastern Division as the parent scorecard. Remind me what a parent is again? Sure thing. So the parent child links are going to determine the hierarchy you see in that score tree in the left navigation. If one scorecard is indented under another, the indented scorecard is set up as a child and the higher one is the parent. It helps to show your organizational alignment within clearpoint. The warm and fuzzy family feelings that you get when you log in are just a side effect. And you can change the wording and admin options for parent and child if you really want to. Got it. So if you're reorganizing, you might need to adjust parent child relationships for your existing scorecards too. Yes, that's a good point. Just make sure that it matches your organizational structure. So, moving down our list of tabs here in the Edit scorecard window, if you're using categories or perspectives to organize the objectives in your scorecards, this is where you can find those to add them to your new scorecard as well. And here on our bottom tab, the User Access tab, I'll want to click to assign user permissions and identify who should be able to see or edit our new scorecard here. The beginning of a new year might be a good time to verify that your other scorecards are set up with the right user permissions too. Great point. All right, now that that's set up, let's save our new scorecard and I can see it appear here under the Eastern Division. I could continue adding the rest of my city scorecards that exact same way. Or if the Boston office is already configured with the categories and user permissions that I want, I can duplicate it to add additional scorecards as well. So I'll do that to add our DC office as well as our Atlanta office. And now my Eastern division is complete, so our next step is going to be to move around any elements to account for changes in alignment or responsibility. Sounds good. So you may be wondering if restructuring your elements will mess up your scorecards and thus derail your entire strategic plan. But no need to stress it's easy to unlink and relink elements or even reassign which scorecard an element lives in. So if we go back here to our Eastern division now that we have our new office level scorecards, I actually think it makes more sense for our percent of employees that are happy measure to go in the Boston office instead. So to move which scorecard the measure lives in, we'll click into the Detail page here and then we'll go to the green Edit pencil and go into the Edit Measure tab. And from here under the scorecard drop down, we can select Austin Office. Then the notification will pop up here letting us know that it's moving the home scorecard. And we'll click ok and then we'll click Save and you can see right away this element is now showing in the Boston office in our scorecard tree as well as in the Measure Detail page. While we're here, it looks like this runaway measure seems to have lost its owner. Since we're going through some reorganization, this is a good time to redefine users roles and responsibilities. And spoiler alert. Assigning ownership is key when creating reminders, which we'll talk about in a few minutes. I can't wait. While we're on a reorganizing role though, let's take a look at the alignment of our measures. We want to make sure it's still linked to the appropriate elements. To do this, we'll click back into the Edit icon and this time we'll go to the Links tab. So the employee satisfaction objective is definitely a logical objective for this measure, so we'll keep this linked. However, I'm not sure. And the last thing that we want to do here is to lock these archive scorecards, which I can do from the Edit scorecard window. Locking does exactly what it sounds like it would. It locks the scorecard to prevent users from making any further changes. Right? So in a way it becomes like a view only scorecard for everyone, even administrators. And I can just click through each one to check the box next to locked in our Edit scorecard window. Perfect. Now our archive is preserved and we can go ahead and begin making changes for the new year. And to go back to our earlier example, we're going to be adding city level scorecards to redistribute our strategic information in our account. So we'll want to add these additional scorecards on the Manage Scorecards page. It's very similar to adding an element. I'll just use the plus icon in the top right corner and give the scorecard a name. Now, because our Boston office falls within our Eastern Division. I'm going to want to assign the Eastern Division as the parent scorecard. Remind me what a parent is again? Sure thing. So the parent child links are going to determine the hierarchy you see in that scorecard tree in the left navigation. If one scorecard is indented under another, the indented scorecard is set up as a child and the higher one is the parent. It helps to show your organizational alignment within clearpoint. The warm and fuzzy family feelings that you get when you log in are just a side effect. And you can change the wording and admin options for parent and child if you really want to. Got it. So if you're reorganizing, you might need to adjust parent child relationships for your existing scorecards too. Yes, that's a good point. Just make sure that it matches your organizational structure. So, moving down our list of tabs here in the Edit Scorecard window, if you're using categories or perspectives to organize the objectives in your scorecards, this is where you can find those to add them to your new scorecard as well. And here on our bottom tab, the User Access tab, I'll want to click to assign user permissions and identify who should be able to see or edit our new scorecard here. The beginning of a new year might be a good time to verify that your other scorecards are set up with the right user permissions too. Great point. All right, now that that's set up, let's save our new scorecard and I can see it appear here under the Eastern Division. I could continue adding the rest of my city scorecards that exact same way. Or if the Boston office is already configured with the categories and user permissions that I want, I can duplicate it to add additional scorecards as well. So I'll do that to add our DC office as well as our Atlanta office. And now my Eastern Division is complete, so our next step is going to be to move around any elements to account for changes in alignment or responsibility. Sounds good. So you may be wondering if restructuring your elements will mess up your scorecards and thus derail your entire strategic plan. But no need to stress, it's easy to unlink and relink elements or even reassign which scorecard an element lives in. So if we go back here to our Eastern division, now that we have our new office level scorecards, I actually think it makes more sense for our percent of employees that are happy measure to go in the Boston office instead. So to move which scorecard the measure lives in, we'll click into the detail page here, and then we'll go to the green Edit pencil and go into the Edit Measure tab. And from here under the scorecard drop down, we can select Austin Office. Then the notification will pop up here, letting us know that it's moving the home scorecard and we'll click ok and then we'll click Save and you can see right away this element is now showing in the Boston office in our Scorecard tree as well as in the Measure Detail page. While we're here, it looks like this runaway measure seems to have lost its owner. Since we're going through some reorganization, this is a good time to redefine users roles and responsibilities. And spoiler alert. Assigning ownership is key when creating reminders, which we'll talk about in a few minutes. I can't wait. While we're on a reorganizing role though, let's take a look at the alignment of our measure. We want to make sure it's still linked to the appropriate element. To do this, we'll click back into the Edit icon and this time we'll go to the Links tab. So the employee satisfaction objective is definitely a logical objective for this measure, so we'll keep this linked. However, I'm not sure I see the connection between employee happiness and traffic. Just the thought of rush hour in D.C. is already putting a damper on my mood to unlinked airport traffic. All we need to do is simply click the red Unlink button and let it go. As Marie Kondo would say, if it doesn't spark joy, there's no need for it on our employee happiness measure. And it's also important to remember that unlinking an element from another one does not mean that you're deleting that measure or initiative as a whole. The airport traffic initiative still exists in the account, but we're no longer showing alignment between these two elements. Luckily, there are some other projects in our strategic plan that will help us better achieve our employee satisfaction goal, such as creating a new employee satisfaction survey. So to add this link, we'll select Eastern Division from the scorecard. For link types, we'll do Initiative and then we'll select Create New Employee Satisfaction Survey. We'll click Add Link and woohoo. We're in business. Now that our scorecards and elements are all cleaned up, we should take a look at our reporting periods and frequencies. Adding the reporting periods for 2019 to your account is crucial if you want to keep moving forward with your strategic plan. Given that today is the last day of January, it may be alarming to come into the office tomorrow morning and realize that you can't report on the January 2019 reporting period because it doesn't exist yet. So let's take care of that right now and avoid a Y2K esque scare. Adding multiple periods for the upcoming year is super quick and easy. We'll just go to System Settings Reporting period and we'll click the drop down arrow next to the plus to add multiple and I've actually already created an Excel sheet with our month and our dates here to speed this up even more. And while Rachel is setting this up, I'd just like to point out that all of these periods have the same format as our existing periods in Clearpoint, so she's just pasting them in here we can see the period name with the shortened month and two digit year, and then the period end date is always going to correspond to the ending date for each month, right? Then from the Reporting Frequencies tab here, I can go ahead and add these months, these, excuse me, these periods to the monthly reporting frequency right away since all of the 2019 periods are included. Then we'll click Save and click OK to bulk add the period. And now we have our new 2019 periods here. Then I'll click into the Reporting Frequencies page and I'll add them. I'll add the 2019 periods to our other reporting frequencies as well. So we'll look at Annual as an example and I'll click into the Reporting Periods tab and scroll down to add the December 19th period for this annual reporting frequency. And then we'll type in 2019 to give it a custom name. And while I was scrolling through, I noticed that we're still including some of our older years, like 2013 through 2015. We can go ahead and hide those in the grid now so that they don't show up on our measured data tables and kind of clutter things since these fears are not as relevant anymore. Great. And while we're here, this might be a good time to make sure that all of your reporting frequencies are still relevant since they're so simple to create and measure. Data starts being tracked at different times. It can be easy to end up with too many reporting frequencies and not have your users know which ones to use going forward. You're totally right, Katherine. I actually don't recognize this trimesterly reporting frequency, but it seems to be in use somewhere in the account since the trash can icon is grayed out. This is helpful because it prevents me from deleting the frequency when doing so might impact elements in our account. Luckily, I know a really cool way to figure out where I'm using this reporting frequency throughout the account. That way I can decide if I should keep using it or not. So from Manage Measure Reports here we'll go ahead and create a new report and I'll call it Reporting Frequency Cleanup. Then in the Columns tab we'll select to include our measures as well as reporting frequency. And on the Measures tab we want to make sure to include all of our scorecards so that we're looking at all of the measures in our account. And then on the Filter tab we'll click to add a new filter and we'll select when the reporting frequency is equal to the trimesterly reporting frequency. Then we'll click save and I'll click into our new report here and Looks like just this one measure internal cost per flight is using the trimesterly reporting frequency. So if we click into this detail page here it looks like this could probably be using our quarterly reporting frequency instead of so I'll go ahead and click edit and edit the measure and down here at reporting frequency I'll go ahead and I'll change this to quarterly instead. Now that none of our measures are using the trimesterly reporting frequency, I can go back to System settings reporting period. I'll go over to reporting frequencies and now you can see that I am able to delete the trimester early reporting frequency. So I'll go ahead and do that now. Awesome. So this is looking nice and standardized. And just as a reminder, deleting your reporting frequency won't delete any data since it's just a combination of your periods. But you do want to make sure to be extra careful about deleting reporting periods since that is where the data is stored. And now that we've got our time periods configured for a new year, let's focus on our strategy review process. So the beginning of the new year is a good time to think through any changes to how you'll be reviewing your progress, also known as your reporting calendar. So are you still going to be holding strategy review meetings on the same dates? Will they still be held monthly or quarterly? And will the same people attend your same meeting audience? If there have been any changes, the most important step is to inform everyone who's involved whether you do so through clearpoint or not. That's right. So even if you're still sorting through some specifics, it's best to give people a heads up that certain parts of your strategy review process are going to be changing now. If there are changes to your meeting structure, the reports that you plan to review during these meetings might change as well. By reports, we mean anything you review. This can be detail pages and summary reports in clearpoint briefing books or HTML exports, right? And the beginning of a new year is a great time to take stock and make sure that all these reports still fit your needs. That is, do they show the amount of information and types of information that will be helpful for your intended audience. So for example, in our Upward Airlines Corporate Scorecard, we typically review this red alert report with leadership to make sure that we know how things went off track. But we've been finding that only having the analysis pulled out on this report leads to a lot of discussion in our meetings about what went wrong and why, but not as many concrete suggestions for what we can do better in the future. So to encourage more conversations that are forward looking, I might choose to edit the report, go to the Columns tab and pull out our Recommendations column, just adjusting the width to make sure it's the same size as my analysis, and then clicking Save. So now we have a report that will encourage us to discuss both the past and our next steps forward. And you might also take a look at your reports from the standpoint of how users are going about making their updates. For example, if people are still clicking into individual detail pages, you might remind them that inline editing is available on summary reports. So just on this report alone, we could double click into as many fields that we need to and then click Save centrally when we're done. So you might consider creating a report that has all of the information users need to update in one place and then directing them to favorite that report if they choose. There's so much potential at the beginning of a new year, so why not use that momentum to encourage people to get more engaged and save even more time? With clearpoint and over in my briefing books, chances are that I'll need to adjust the content to accommodate our scorecard reorganization too. So on our Briefing Books template page, let's take a look at our Eastern Division Briefing book. Now that we have citywide scorecards in each division, we might need to include summary reports from those offices in addition to the Eastern Division overall. So on my Scorecard tab I can click to include Boston, D.C. and Atlanta, and then click into each one to just get a summary of how our various offices are performing. And while we're here, if this briefing book is running on a schedule, you'll want to make sure that your schedule still corresponds to the proper timeline for Your review meeting. If you don't have a schedule set, now's a good time to set one up. So I'll click to add a schedule and I'll name it based on when it's being delivered, and then I'll set it up accordingly. So we'll set this to 1pm here, and then it's repeating monthly and we'll do it on the first Monday of each month. Great. So not only can I schedule that briefing book, I can also make sure on the Recipients tab that the correct recipients are going to be receiving this briefing book on that reminder schedule. So this should match the group of people who will need to review this report before each meeting. And speaking of schedules, it's always good to make sure that your automatic reminders will be set to run on the appropriate dates and that they'll include all the content you need to remind users to update. So I can click over under Notifications to send reminders. I can see here that it's scheduled, so I'll click in to edit my schedule. And if you've been finding maybe that users aren't quite getting their updates enough time, we could just move up the date of this reminder so that they'll have a little extra time before you need to start reviewing the data and gathering your reports together. Now, if you're worried about getting alerts about particular changes, you might think about adding some new notifications in the new year as well. From a broader standpoint, you could add any of these pages that you want to keep track of to your favorites, and then head over to My Favorites and select Notify on Changes so that you'll get an alert about any changes made to those elements you've selected. Then, to get more specific, as an administrator, you can go through and make sure that your notification templates are linked to all the right elements in your account. So, editing our template, I can see that this is a custom notification to show us when any of our objectives fall below plan. And on the Elements and Recipients tab, I can make sure that any relevant objectives stay linked and that the right recipient is assigned to each one. So we'll want to make sure to notify Abby if people aren't having fun. Great. Now, once that's set up, we want to touch on one last area of your account that's good to take stock of at the beginning of a new year. Great. As you're going through and updating your reports, you might realize there are other types of information you need to track to support new leadership goals or types of conversations. And you guessed it, custom fields can come in handy for that. Do a quick refresh of how to create these new types of fields. So we'll go to System settings, Admin options, and now we'll go to the custom fields here. And on the left you can see our different element types that we can create custom fields for. Let's create some initiative custom fields right now. So I'll click into the Initiatives tab. I want to be able to label the priority of my projects as high, medium, or low. Is there an easy way I can do that? Definitely. Clearpoint has a ton of different types of custom fields available, and it sounds like a pick list is your best bet. Great idea. I'll click the green plus here and we'll call this priority. And then for the field type, I'll select Pick list. And then we'll do high, medium, and low. Oh, medium and low for the items here. And then we'll click save. This is awesome, but I can barely find my new priority custom field among all of these other custom fields. Some of these I don't even recognize. Yeah, so just like Reva's reporting frequencies, this might also be a good time to get rid of any custom fields that we're not using. Good thinking. Although I have to be more careful here because deleting a custom field that is in use will delete all of the information in the field. Looking through these, I don't recognize this Quick Update field here. It actually seems pretty similar to the type of information I would include in the Analysis field. To see if the Quick Update field is in use and compare the information to that of the Analysis field. I'll create another filtered summary report, this time for Initiatives. So we'll go here to manage Initiative reports, and we'll create a new report and we'll call it Custom Field Cleanup. Then here in the Columns tab, we'll include our Initiatives, and then we'll include the Analysis and our Quick Update custom field. Then again on the Initiatives tab, we'll select all of our scorecards to make sure we're looking at at any initiatives that could be using that custom field. And then in the Filter tab, we'll add a filter for when the custom field of Quick Update is not blank. So when there's information in that field, it'll show up in our report. Then we'll click save and we'll click into our new report here. And it looks like the Airport Traffic initiative is using that Quick Update field, but that's the only one in our account. Let's look at the information here. It looks like it's the exact same information in both the analysis and the Quick Update field. So we can go ahead and delete that Quick Update field with a clear conscience. So to do that, we'll go back here to Admin options, back into our custom field, go to the Initiatives tab. And now we can delete Quick Update, knowing we won't be losing any important information. Perfect. So our account is organized and ready to go for a new year. And with that we are reaching the end of our time here today. So we want to make sure to answer your questions as well. So here's a question that's come in. What if I delete something by accident as I'm reorganizing my account? Is there any way to get it back? And yes, you are in luck for anyone, any user who is able to delete things from clearpoint, whether it's an editor, scorecard, admin or a full administrator, they can click into the Recycle Bin and undo any changes that we decide were made by mistake or need to be undone within 30 days of that initial deletion. So if we decide we need our Quick Update field back, I can click the orange arrow to undelete, confirm the undelete and Quick Update will be added back to our account. So as far as permissions, editors and scorecard admins can see and undelete anything that they themselves have deleted, while administrators will have access to undelete any changes that have been made across the account. So here's another question that's come in. What if all my measures need to be moved from one scorecard to another? Do I have to do that one by one? Rachel, do you want to tackle that? Yeah. So it's actually super easy to bulk change the home scorecard. To do that we'll go to Manage Measures and then we'll select the checkbox here to select all of our measures and we'll confirm we mean all 26 of those elements. And then from the drop down next to the green plus we'll click to Edit multiple. We'll scroll down and select Scorecard as the Edit field. And then in the Edit Measure field here, we'll select to move everything to the D.C. office, we'll select okay and save. And it's just that simple. I know we had a lot of measures in our account, so now we can see we're in the D.C. office. Perfect. And we had one question come in which is is it possible to create reporting frequencies specific to a measure for example. Thank you for that example. This is really helpful. In our financial measures, we may want to show the last five years, but on a strategy measure, we may want to show only the past year. So this is a good example of an instance where you want to show different numbers of years in your data tables and you can certainly set up different reporting frequencies to do so. You know, we would just encourage you to occasionally take stock and make sure that you've got a succinct group. But for example, so we've got our annual frequency here, and we might decide to label this annual last five years, and we could even indicate that this will be used for our finance measures, if that's its only purpose in your account. And then we could just make sure that the last five years are the only ones included. So December 14 through December 2019, and then keeping the labeling consistent, you could say last one year in a new frequency. For strategy measures and for our reporting periods, we can just select a different group of measures or, excuse me, of reporting periods to make sure that they match number of periods you want to use for your strategy data. It's best if you're not, you know, creating a reporting frequency for every single measure in your account. But in this instance, it seems like there's defined groups that are really going to benefit from having these two frequencies. And it's not like this is an overwhelming number of reporting frequencies for people to choose from. You've made it really clear when to use these frequencies and what they're going to put into your data table. So that is all we have time for today. Thank you so much for joining us on the I didn't know clearpoint could do that webinar series. We hope to see you next time. And happy reporting.
More from Ted




AI in Local Government: How the City of Durham Analyzes Strategy, Risk & Performance

How Coral Springs Won the Baldrige Award — Blueprint for City Excellence | ClearPoint Strategy



AI, Data, & the End of Gut-Feel Strategy: Why Strategy is Becoming More Data Driven

Strategy Needs Accountability: How to Drive Project Follow-Through and Execution

