CURL CULT Barber Series Launch Event at Takara Belmont
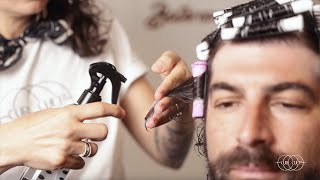
This is a YouTube video titled "CURL CULT Barber Series Launch Event at Takara Belmont" featuring a detailed workshop and demonstration led by Janine Jarman, founder of Pro Cult, alongside barber Taylor Hernandez. Recorded in September 2022, the content includes in-depth discussions and practical techniques on modern perming and barber haircutting, highlighting innovations in perm technology, styling, and product use. The event is set in Takara Belmont's showroom and targets professional hairstylists and barbers, focusing on elevating perm services and barber certifications.
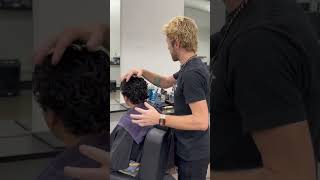
Invite Sheila up. Before we get started, she is the, the brains behind having us here. We met at the ice show. She's like, do you want to teach in our really, really pretty showroom, Irvine? Sure do. Hi, everyone. I'm Sheila Crowder with Takara Belmont. I just wanted to welcome you all here to our Irvine showroom. We are Belmont. I don't know if you guys are familiar with the brand, but we've been around for 100 years. Based in Osaka, Japan, we have 27 showrooms across the country worldwide. We are known for our barber chairs and styling chairs. We also do dental, medical, and construction equipment as well. But our equipment is top of the line, best in the industry, very well known. So if you guys have any questions about any of the products, we're here to help you. And please help promote us because that's why we thought it would be great to get together kind of cross brand and bring more brand awareness to everyone now that we're not really doing trade shows as often and the world has gone so digital. So bring everyone back to a showroom and kind of have that one on one experience and really teach you guys about the traditions of Takara Belmont and the history of the equipment. Equipment is built to last and really next level. So if you guys have any questions, we're here and the restrooms are in the back left corner. If anyone needs anything, don't. Or feel free. You can reach out to myself or Julie. We'll be here to help you guys all day. So best of luck. I'm so excited to see this. I can't believe we actually made it happen, huh? I know. We're like. We threatened it. I know. But here we are. Here we are. Here we are. So I'll let you guys go on with it. Thank you so much. All right, so. Hi, I'm Janine Jarman. I am the founder of Pro Cult. Yeah, I'm the weird girl that is obsessed with perms and everyone else hated them. I love them even more than I did before, and I've always loved them. I. I get. I'll give you a little bit. First of all, who's perming? Let's get that out of the way. All right. Who's like, weird? I'm going to. I'm going to go to a perm class. It's weird. Okay, cool. Welcome, welcome. So, yeah. Why did I launch a perm? Right. Well, I was leaning into perks for the last few years. I was somebody that was always comfortable with it, and I kept leaning into it. As a way to problem solve for my client. So it wasn't like I didn't have anybody. Just like I want really crispy ramen hair. You know, something that shouts perm when I walk in and smells perm. They wanted as a way to not have to style their hair or for their hair to behave better. And I was leaning into perms for years. Just use every single kind. But never was really like, oh man, this is the best. This is my favorite perm. They were always like, just okay. And with the rise of selfies, it was like, and it'll look good in two weeks. That wasn't very good for business because no one ever sends you the after photo like they promised they will. Right. So I being curious as I am, it took me to Italy to meet with a chemist about seven years ago. And over the course of five years we worked on revolutionizing the perm. I knew for my people, my hairdressers. I'm a salon owner. I've owned a salon for 16 years in Los Angeles. Six of it. We had one in New York as well. I own heroin salon in la and I love perms. I had all this business coming in. Refinery 29 even did a piece on me that like went viral. And no one in my salon wanted to do perms. And I was making more money per ming doing permanent texture than I was doing color. And in less amount of time too. And why. Why don't people. Why don't. Why would you hesitate to make money with perms? There's a. There's like a handful of main reasons. 1. What. Why don't you like perms? You guys gotta interact. It's. I'm. I'm gonna just sit here and get awkward. Same with me. But we're. Weir were weird, but they smell. They're kind of. They're pretty stinky. The client time consuming. What else? Super messy clients get showers they didn't ask for. Your friends next to you get showers. It's like. And then you're supposed to charge a premium price. It doesn't feel very premium. Right. It hasn't elevated in ever, essentially. And there's been one that said they were gonna. And I tried those and I'm like, yeah, this is exactly. Pretty much the same. So that is one thing. I will show you. And we're gonna focus mainly like on technique. Getting questions out of the way from our online people. Welcome. Thank you for joining. But few things about our perm. One, you guys ready for this? We neutralize over top. If anybody knows how to permit. Yeah, mic drop. That means no rinsing, no blotting. That step is completely eliminated. You neutralize on top, so. Right. Thank you. My perm in the back, it makes it way more comfortable for the client. 95 of the service is now done at the chair. I even take my rods out of the chair. The only time I'm rinsing that client is with my client is without rods in their hair. Yeah. And this is more, probably more for those like long links. Especially like for him. We'll maybe apply it at the shampoo bowl. Probably not. I like doing it up here, so we'll do that. But it makes it easier. It makes it an actual different service. Another thing, it smells quite a bit better. It still has a sour kick to it. But I promise you that client's not going to smell like perm for 48 hours when they go home. And that's really, really the most important part. And it's sour. It dissipates the second that you neutralize. So for a week later, people aren't like, oh, who did a perm in here? You know. And with the increase of salon suites and stuff, that's super important. So we're going to go through all that. So that's me. That's why the perm. We also have pizza Protex technology in it, so it's a pea protein plex technology in one. So our perms look and feel way softer in most cases than before they got the perm. Which as long as I've been perming said no one ever. That was probably the biggest, most exciting thing was that clients like the texture of their hair, the shine of their hair more after they get a chemical perm. So lots of exciting stuff. This is our very first barber certification. We just launched our barber certification online. Really excited about that. And how that came about was that's been the most like kind of underbelly tick tock trend pushing the modern day perm. Right. And we have like all these young boys coming in. So I was like, all right, we've got our regular certification. We can show you how to do our mid length long hair. But let's play with the barbers. Let's put that out there so you guys get to see the very. This is the first class ever, the first launch of it. And I'm so excited to do that with an actual barber. Mr. Taylor, tell them about you.
Let's see. My name is Taylor. I'm a scumbaster with Rusel. I've been with Rizle for like two years. I'm a barber. Cosmetologist. I'm a cosmetologist first. What I love about barbering, especially nowadays, is that barbering is like cosmetology and barbering kind of all mixed into one. And I love that. I remember, like, getting it out of school, I got my cosmetology license and like, barbering wasn't like that cool yet, I guess, back in like 2007 and.
Yeah, that's right.
Yeah. So, like, I got into the shop and I. What I found immediately is I gravitated towards shorter hair. And I think with shorter hair, what I love about shorter hair is to get to cut that shape and then you get that instant gratification of seeing that shit come to life in like the blow dry and the styling. So I went and got my barber license. I started working in a shop. That's where I was introduced to Rusel. How many of you guys have heard about Russell? You guys? Yeah. You guys have worked with it a little bit? None. None at all. Well, we're a company from Rotterdam, Netherlands. The first time I was introduced to Rizzle, I got invited to a hair show in Long beach.
And.
And Rob and Lean, which are the founders of R, they're from Rotterdam. They were doing a hair show at this, like, venue, and it was like a stage. And I walked in and like, I felt like I grew up playing in bands and going to shows. And I saw, like, I felt like I was watching a band play at this, like, bar and they were doing these amazing shapes. If you guys don't follow Rob on Instagram, he's the Bloody Butcher. Super, super entertaining guy. He's like this old, like, punk rock dude, but he does these amazing shapes. He's very talented. And so I immediately dove into the shop and got my hands dirty with Rusel. And what I found immediately is that it catered to all my clients. So because we have such a wide variety and it gave my clients an experience right off the bat. One of the first products that I found was the grooming tonic. And that's kind of like a foundational product you put in the hair before you blow dry. But my clients would get the smell. They'd smell it. They'd instantly like, what is that? And then they'd see the results it gave after a blow dried it in and it basically sold itself. So it really added value to me a little bit about Rusel. Like I said, Robin Lean, they founded this barber shop called Scorum in the Netherlands, and it created this Giant buzz. They specialized in classic ships like pomp doors, whiffs, flat tops, punk rock styles, rockabilly styles. And they needed a product to help support the style. So they actually created the first two pomades in the shop like mad scientists. The green grease pomade and the red pomade. So the green grease pomade is kind of your like old school traditional pomade. And then the red pomade is kind of like a water soluble pomade. And we've grown into like seven other pomades and tonics, paste shampoos, skincare and beard care. So we've come a long way in a very short amount of time compared to the grand scheme. Things like Drizzle really hasn't been around. We've been around for maybe around like 10 years. And we've created such a buzz around the world and created this like culture. And I'm, I'm excited to be a part of it and I'm excited to kind of share it with you guys. So I'm going to do three textured looks and produced to you by Curl Cult. I'm excited to be teaming up with Curl Cult and we're just going to show you, go over some of the techniques that we have and if you guys have any questions, please feel free to like, we're all just hanging out, we're geeking out on hair.
So yeah, yeah, it's definitely going to be a looser format because I mean, I think it's way more fun when you get out of this what you want rather than me. Like I'm not even, I'm not sad that there's not a PowerPoint because I don't know, it feels very like anti hairdresser to do a PowerPoint. But yeah, let's like lean into this and ask the questions. I really want you to. Well, before I even say what I want, what did you think when we hit you up and we're like, hey, you want to teach a haircut class with my perm class?
Well, the first thing I thought was I don't do perms. I haven't done a perm since beauty school. Right.
You need to tell them your confession.
So I told, I confessed to her that in beauty school I like, you have to do a certain amount of perms, right? So like I kept like a pre rolled perm underneath my station when I needed and I take like three out, you know, just like, and then I like be rolling it. Like I just did a full one and then I turned it in. So I immediately regret that Decisions are definitely back. These textured looks, I think it can offer your clients, like, a whole new look and an experience with just as easy as a perm. And increase that ticket sale for sure.
Now let's talk about this cut you're about to do. This one threw me for a little. Okay. Because apparently I got to discover just how old I was with this request. What haircutters doing.
Do you know what hair covered taper. What do they call it out, like the line?
What did you call? What'd you tell me?
Oh, Edgar.
Yes. Anybody doing that right now? This was a first for me. I was like, we had to go into a deep dive. And what do we. We renamed it the Hong Kevin. We called it the West Coast Blowout. Yeah, yeah. Take pictures, do the thing. And all of our social handles are curl call. So at Curl Cult on all the things. And what is your social handle, friend?
I am Taylor T A Y L O R Hair Nandez.
Love a good hair pun.
Obviously in school we had to, like, have name tags and call them Todd school.
Yeah.
In 2007, and I was at the mall at this place that made names. I was like, Taylor Herring.
That's good. That's a good one. Okay, so he's going to be going through the cut. I'm gonna roll my friend here. This is his second perm. He was at the high show with us. Now he's a per. Permer for life. We're gonna just roll it back so that it gets this kind of like, blowback wave. I'm going to be using these rods that I love. They're called Nano Ionic. I don't know their fancy name. I got them on hairbrained. They have. I'm sure you guys got like, the ads, right? You're like, what are those? These are them. And if you want to, I'll pass them around so you guys can see they're really lightweight. And they have external rubber bands. Yeah, you can. Oh, okay. Yeah, sorry. Rubber bands come with. Yeah, they do. There's like a back. Back of external rubber band. Yeah, they're pretty cool.
All right, so with this haircut.
Yeah. Like, how would you describe it? What's different? What.
So basically, I, I, I would think, like, this kind of haircut is kind of like a crop, but just like a longer version of a crop. How I'm going to do this is kind of, kind of, kind of wearing it forward, kind of outline. It's like a face frame, his face. So he's going to wear it forward texture, have some Length on the sides to play with. But where this haircut kind of, like, gets its name, I feel like you get those tight, aggressive tapers on the sideburn and in the back. So I'm going to give them a nice shape with shears, and then I'm gonna go in with clippers at the end and give them a nice taper. So what I like to do before I do anything is just kind of. I have the grooming tonic or the hair tonic in this, my water bottle. And this is just like a cutting lotion for me. So I put about two parts of the hair tonic in eight parts water. And basically what I'm just doing is just kind of assessing the hair. I've never done it here on a platform like this, so this is exciting. So I'm just gonna, like, look at growth patterns, density. He's got really thick hair. Obviously he has some texture in it now. And, yeah, I'm just gonna kind of just assess the hair, assess the situation. And the first thing I like to do when I start a haircut is basically just separate the top half of the head from the bottom half of the head. And that's just really going to keep me organized. How I like to do it is like, I'll just set my comb on the side of the head, and right where it starts to rock, that's typically where the round of the head is. And I'll do that all the way back to center back. And you can notice that it kind of drops a little lower in the back. Not because it's like a curved line or anything. It's a straight line on a curved surface. So dropping it lower in the back also allows you to incorporate that cowlick, especially with, like, all these classic shapes. When you incorporate the cowlick, I think of a successful haircut because you get that longevity. I know sometimes, like, with guys, we just kind of chop the calc up right in the chair, right. And then a week later, that calyx going to stick straight up. So I'm going to drop it a little lower in the back, and I'll do the same thing to the other side.
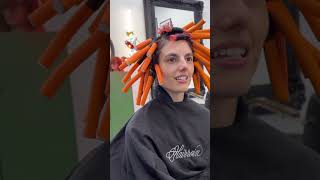
Now he's been pre permed. I permed him on Thursday. Yeah. Yep, we permed him on Thursday. And he has stick straight hair, like, as straight as it can be. And you would not think that, right. That he's permanent. Oh, he has wavy hair on his side, which I knew they were getting cut off. I still combed the solution through the side to just chill it out a little bit. And soften those bonds so that it had that the same texture as the top that we were actually like. The goal was to create some wave and some pattern here and help break up that front fringe. Because the before pictures and stuff, it was really severe and didn't have that like full effortlessness. It looked very forced and contrived and he was trying to back comb it up and do all this stuff. We had such heavy hair. It was really challenging. And now it'll style itself and especially with the right haircut, it's gonna texture style itself plus size rods. Would that be purple? I'm just curious. Yeah, sure. I think so. It's like the pinky purple color one with our perm too. It's a softer in nature permit amino acid perm, cysteine and cysteamine is how we break down the dosulfite bonds. So you're going to want to drop one to two broad sides in. Why? This is really great news. So when you're perming on shorter hair, you're always kind of like, oh my gosh, it's going to be way too curly. Now you can comfortably perm on shorter hair, like even. You'll see. That's why we want to do a really tight mullet. So what tight rods I used on it, it's not going to be that traditional really crispy Ramany shape. It still it's going to be very activated curl, but much softer. But it's nice. I can comfortably get smaller rocks in shorter lengths because of that. Does he usually part his hair down the middle or down the side? He lets it just kind of kick back. Okay, can you repeat the question? Oh, the question was, does he normally part his hair down the middle or down the side? He is a just wash and go. Well, you do use curl cream now. I do. We've like, he's changed, man, you guys. His first permit, like Linda talked him into it and he's like, I don't know, I guess. And then, and I quote, this is the hair that I've always wanted. So there's that changing lives here, people. But we showed him, you know, hey, now that you've curly hair, it's a different kind of thing. You put curl cream in it, scrunch it with the T shirt or an approved curly towel. And yeah, his goal was because he had stick straight hair, typically this perm still on the like itty bitty end. Our perm again, because it's softer in nature, grows out really nice. So it's not just like, okay, in four months you're going to look crazy. That was a big hurdle to overcome, too, with new clients that, you know, with perming, I'm not looking to go after, like, the box perm. Mature clientele that loves their crispy perms. Leave them there. They love it. That's a different clientele. I'm looking to go after the clientele that's all. Constantly looking to you as a problem solver. Like, how can I? How can we do that? Like, can I? You know, the ones are like, if I use this mousse, it'll just blow dry my hair, right? Like, no, that's not how this works. But yes, with a perm, technically, kind of with a little scrunching, they can achieve those really effortless results. Just really looking to perms, especially the croco perm as a, you know, just a liquid tool is a liquid styling tool. And for him, I'm just taking not perfect sections. If you notice that. Sorry. For any of those type A hairdressers in the audience. Probably like making your eye twitch right now. But this is on purpose. Because if I have curly hair, is it all exactly the same size and shape? No. And I'm trying to create it so that nobody knows you got a perm. I want it to look effortless and like it grew out of his head that way. So taking imperfect sections, utilizing pulling and pushing in larger sections to manipulate how the hair is going to fall, just like you would with a curling iron, Right? It's like around the faith. You're going to take larger, wider sections so that it pulls that root in and gives more of an activated curl. The same applies when you're doing perms. Okay.
So I just. So, like, I just separated the top half and the bottom I set in my primary parting. So the first thing I did. If you've ever taken a class with Rusel, we'll talk very highly of the baseline when we do our men's haircutting. So we started with the baseline. The baseline is going to live right below the primary parting. Right. And that's right along there. So I said in that first, at the widest point of the head, right behind the ear, at that mastoid bone. And I set in that baseline. And the reason why I started there is because I'm trying to create a square shape from the front. So if I came in from the right here, it's going to come off and kind of collapse that square shape. So I came in here, I'm creating a nice square shape all the way around. I want this Baseline to be even around the entire parietal, because this is going to be our transition into the top. So the reason why I start in the interior of the haircut is because it acts as a foundation that will create a safety net for us as opposed to working from the bottom up when. A lot of times when we work from the bottom up, when we're fading hair, we tend to push that fade higher and higher, and then it collapses our shape. So starting in that round of the head will act as that safety net. So we could set in that baseline and then we could determine the length on the bottom, and then that will allow us to transition to the top and determine the length for the top as well. Because this foundation, this baseline is going to be the foundation of the entire haircut. So once I set it in, it's going to be in there. So I set the baseline in already pre cut this side. So now that I've set the baseline in around the parietal, I just took in like half inch sections and just use my baseline as my guide. So I have my guide here. And I kind of dipped my. Angled my fingers to like a 45 just to kind of hug it a little tighter towards the ear, right? And then I'm just going to be moving to center back. And what I really love about just using shears, because I could easily do this with clippers, but I love using shears because one, you're getting that custom shape. And I think with clippers, you kind of get those, like, it's like a perfect cut, right? With shears, you kind of get those, like, minor inconsistencies that create texture. So that's what I really enjoy about this. And I'm not too worried about, like, the hairline right now because I know I'm going to give him a nice taper. I just really focusing in on setting a nice, square, masculine shape for him.
Okay, you guys can get up and look through. Anybody, like, please walk around, get the most out of everything.
So I'm just going to do the same thing to this side here.
Taylor, are you noticing people asking for longer lengths now? Like, are we getting away from the peaky blinders?
You know what? I think the pandemic really did us a favor because everybody, like, had the courage to just grow out their hair and, and they're. They're. We're being more, like, experimental with our hair, and I love that. And I noticed that, like, high school kids, especially in my. I don't know about you guys, but for me, a lot of it's like those Zach Morris haircuts.
Oh.
You know, like, and I love it, you know, because it kind of breaks it up for me. Like I. Instead of just doing like fades all day, I can like play with shears and create shape with shears. And I love that just as much as, you know, using my clippers. So. Totally.
Did you get it to work? Look at you. There we are, guys. Have a PowerPoint. So fish. So here's all the, the kind of call outs of our brand. Vegan paraben free sulfate sulfactant free made in Italy, which is no easy feat, let me tell you. I do not speak Italian. That was very interesting. I got faith when I came over there and I, when I started this project and was so excited to tell this chemistry, you know, hey, we're gonna make a perm. It's so cool. The poor interpreter, as he's shouting and waving his hands at me, she's like, I'm like, listen, I understand. I know he is not pleased with my perm idea. Basically he's like, don't you know, it's like the worst selling skew. Nobody like, nobody wants a perm. This is I guess about seven years ago when I started that process. Now at the time he was right. Like blow dry bars were all the rage. Like everything but super curly hair. But we were getting there. Like natural curly hair was starting to make its way. But I noticed it was leaving behind anybody that had uneven curls, which is majority of people with curly hair and just anyone that wanted curly hair. Like, okay, yeah, you can do curly girl method only if you have perfectly awesome ringlets from root ends. And it's like, well, what about everybody else? Like, we have that underneath. What about on top? Can we do partial perm? Totally. Do we do reformation perms, like stretch out curl that's really tight and compacted? Absolutely. We do calyx fixes, we do braid perms. We do everything and it's all on our pro portal. Okay, we just put him underneath the rollerball processor over there. Oh, I know. I'm gonna use everything in here. You know, they're like that. And we're gonna do a lounge chair over there. So the rollerball will cut the term, you know, processing time in half. So it's eight minute preset on our rollerball. So he's sitting there, he's a far infrared ray that kind of heats up and kind of cuts the color or processing and color time in half. That is on our wall mount over there rollerball. And then we do have the stand version that rolls around the salon. They're all over here. You can see right back here. We adjust it up and down to the styling chair. I like the wall mount myself because you can get it, like, right in front of your station, swinging between stations, which is really rad. I have to tell you, too. Like, your. Even the wheeling one. Yeah. You know, I've been lucky enough to working a ton of different salons, teaching and everything. There is such a significant difference from, like, the one bought on Amazon or wherever else. That's like almost crashing on their head the entire time. Yep. To your guys', like, it's just. It's incomparable. The difference of quality. Yeah. The Japanese design is our third generation of it, and it just uses quicker technology. Uses a carbon gray element that heats up in less than like, 15 seconds. And it's really top notch. Has its ETL approval. So all your electrical approvals. So nothing won't shock or burn your customer. A lot of the knockoffs out there are not ETL proofs. It'd be very acceptable. Because that's important to know because I don't think it's here. Like a lot of. I didn't know that. Yeah. So they can sue you directly versus, you know, we take that pride in having the ETL approval in all of our products. So it's really neat. You definitely see a difference. It gets deeper into the cross section. The Japanese are very meticulous about, you know, really researching everything, every product they launch into the market. So it's really cool. So, Janine, what did you cap and heat? The first. Okay, great question, Lauren. We cap and heat it. Healthy, resistant, coarse. Majority of our perms, we cap and heat right away, especially for barber perm. You know, time. Time is money for us. And unless you, like, really enjoy watching someone process, cap it and heat it. The only time I don't is that they have fine, sensitive hair. That's already where I'm like, you know, they're going to. They're going to process really fast. Then you're going to want to wait to cap and heat that. Check it within five minutes. But if it's taking a little bit of time, then go for it. Cap and heat it. We have special caps when you. Or when you get an intro kit with us. It's our jumbo thermo caps. And these are specially designed for the perms, so they're great for color work, too. They have a Mylar interior, so they help extra heat up as they're processing. And they're gigantic. So they actually go over an entire set of big rollers.
So I'm. I'm transitioning into the top here. I created like a little five template sectioning. I parted him right down the middle. I have a little triangle. So I started right at the recession, created this little triangle in the front. I like to call this triangle like the Tinder triangle or like the bumble bump, you know, because this is like the money shot. This is what everybody is going to see. So I kind of section that out, and I have a section here to one section here, one section here, and I split it right at the crown of the head. If you want to tilt your head, I don't know if you guys can visually see that it's a little dark. But I have 1, 2, 3, 4, and then my tender triangle here. And basically now I could start at any section that I want, because I created a baseline all the way around, and I could. I'm just bringing everything down to that baseline.
And.
And I'm. I'm transitioning horizontal. So when you transition to horizontal, like, what do you typically get? Create weight. Right? So when you go in, like vertically, you're kind of reducing weight. So I want to build weight. I want to. He wants to maintain most of this hair. Most play with all this texture here. So I'm going to build weight right at that baseline, and we're gonna just bring everything down. So I'm. I'm basically. I did this section. I just kind of went in half inch subsections. I started to run out of hair, and that's okay. I just left it. I'm just gonna go until I run out of hair. And with the. When transitioning to the top, you really just want to use loose tension. You don't want to like, like stretch it to the baseline and like, because then it will snap back in. And I'm. I may be bringing everything down to the baseline, but anytime we're using the baseline as our guide, that baseline is coming off tabletop section just like how we cut it. So even though I'm over directing this hair down a little bit, that baseline is tabletop sections. Just work your way up to the crown. So I guess this would be stationary guideline. Just everything to this point, like wet is just creating the sketch. So I'm gonna dry it after, and then I'm gonna, like, enhance the texture of the curls. We have a few different products that we can go with. We. We have foundational products. Like, we have sprays that you can spray in to enhance some curl texture. We have different ones where you can have shine or you could have no shine. We even have finishes like paste or pomade with shine or no shine. So it's just whatever. I kind of ask open ended questions to my clients and I just kind of get a vibe of what they want to do. And then so my clients get mad at me because, you know, they'll buy a product for me and then the next time we'll use a different product because we have products that are similar but slightly different. So I'm not that barber that just has one pomade in my back pocket and I just bust out on everybody. I get everybody hooked on everything. So they're like, oh, crap. Well, I need that now. So we have different options. And I'll go over that when I get to the styling part.
Okay, so now I'm going to apply probe solution to him. You can put the towel up to your face and lean back. Jenny, can you walk us through the application instructions? Yeah. So to apply, we double drape. So it's a chemical draping. And then we do. Once you're rolled, we apply cotton around the hairline. And then now I'm applying the firm solution directly on. It's called liberate. And we like for him too. I'm gonna cap him and eat him right away. Is really like every single model today. I was like, let's really make our jobs hard. Everyone's like, courses resistant. You haven't noticed, but it really helps. It's like these are the clients that couldn't have had, you know, a wavy mullet before. He couldn't have had that. He was just keep wearing his hair quite short because it didn't do. Do the thing and same thing. I'm going to kind of dribble this around his hairline so we can soften his hair because he does have such sticky outy hair. That's a technical term, sticky outy hair. I'm just combing it down. That's the main thing I want you guys to get though is perms don't have to be scary. Perms don't have to be boring. They can be fun and creative. And you can really, you know, reimagine how you want somebody's hair to hang out. How much liberator are you using? Oh, let's see. I filled this up to 4 ounces and I've used it now almost on him and my other one. So like two ounces on each? Yeah, two for like a partial head to Two to three ounces for partial head. You want to make sure that's really well saturated. I like to cap always just to keep it. Not even like, you know, it always depends. What kind of flor are you in? Like I'm right under the vent here. So if I didn't cap him, it would dry out and take an extraordinary unnecessary amount of time. So yeah, it's really healthy hair. I'm gonna. I don't have a mirror like on his eye, so I'm just going to cap him and heat him up as well so that we can just get it going well. All right, we have with a question from the Zoom audience. Yes. All right, so what are your views or suggestions on either cutting first, perming first or doing two separate appointments? Oh man. And now like there's no like hard pressed rule. Cutting it first. The only reason we don't like especially with some like these short ones is that a crisp line is really hard to roll, you know, because it just like jumps right out of that ruler. If I'm taking up significant length, I'll definitely take a majority of it off with like a feather razor, which actually my favorite feather razor is also made by the same company that our Fuji papers are. Our barber kit too. Comes with this dispenser which you guys are so lucky. I did all the work. I used all the things that didn't work, found the things that did. So this is like. Were you noticing how easy I'm using end papers and not fumbling with them Pre folded. These are great. And the paper too is really nice. Sorry to be extra about end papers, but I've used every single kind and these are the best. But they also make it's jatai. They also make the feathering which I love. Pre cutting. If I'm going to pre cut it firm, I will do a soft feather razor. Cut all one length around the perimeter to take off the bulk of that. Just because you'll be wasting product anyway, you know, and time and effort. If you're rolling and like planning on cutting off 6 inches. Did that answer it? Oh, and then cutting it after. So you want to keep the hair very saturated if you're cutting after the perm because it almost like suspends the process in midair, you know. So if it's really, really saturated, we use that 48 hours after the perm for air oxidation. Neutralize it, which I'm going to do on him right now. That closes those. So firm solution or liberate opens those dopal pipe bonds up. Neutralizer lock clicks them back together. 48 hours locks them back together. So that's why in the 48 hours, don't shampoo. No excessive sweating, no like big scrunchie. Nothing like overly disruptive or reshaping the hair. And after that, wash away, do your thing. So when it comes to haircutting, you want to keep it really, really damp as you're cutting to make sure that you're not pulling that curl out as you're going. And oftentimes after I if I'm doing a big haircut on Sunday, after the perm, I will take them back, rewet them, apply the curly products, and then do the curling curly styling method after that. Does that make sense? But in perfect scenario, which I never get this scenario, I'm in L. A and parking lot. Nobody comes back two days later for me to cut it. But I sure do wish they did. That would be the most fun. Like I want to see it. I want to see that. All right, so now we're neutralizing. Here's my magic trick, you guys. I'm going to take off this cotton and reapply how you know it's ready. Yeah. Lauren's our education director, you guys. You didn't get her that bossing you around without all the things, important things I'm not saying. Janine, how does this actually work? Okay, so I'm going to show you. So old school programs, you're like wiggle, wiggle, push. And you can already notice it's not as like intense. Right? Everyone's scared. This side's wrong. We're looking for. So he has really coarse hair. So two strands of hair I'm going to pull up and I'm looking for that bounce like a rubber band. You guys see that? Now if I zoom highlights, you're screwed. But we're doing a perm and it's supposed to do that. That means that it'll sulfate bonds are broken real quick for the online people, I'm gonna give you a backdrop. Oh, I was like, what are you doing? Oh my gosh. My like nubby nails. Then you can go ahead. Can you see that? Oh, and there's. Oh because they're wet. Yeah. Here. See, Brooke, I tell them why I don't. I use it only when I need to. I use it when it's like I need the like the shorty sticky out of here. I need a papers on hard drops, you know. But a lot of our like mid length longer haircuts, I use bendy rods for majority of those Longer length ones. And I don't use papers in those cases, so definitely. Like, I. Also true. I want to break down all those, like, signals. I'm like, you have to roll it in, like, exact sections and run a train down the side to be able to see the parting. I don't. None of that, because none of that's fun either. Use what you need to when you need to. So use that papers if you're struggling with it, you know, Otherwise, get going. Just roll that. All right, so neutralizer. Now's my magic trick. You have your towel still? What is. So hold this up to your face, both hands. Okay. There we go. Magic trick, guys. No rinsing, no bodying, Just going right over top. Like, don't you feel like if you did this in beauty school back in the day, you would have been a lot more inclined to permit.
Yes.
And because there's not scent vision. How's the smell? Like, we're perming in a. A tight, you know, with air conditioning blowing it right in your direction. You're not dying. No one's throwing up in the front. It's crying and complaining. I'm. That's what it is in the sun normally. Perfect. Like, oh, God. Oh, I know. So, yeah, just for the people that work at my salon alone, I had to change that because they were like, oh, yeah. Our owner's super independent. Real cool. Janine. All right, I'm gonna let it dribble on the side a little bit just because those don't have, like, a smaller one. I didn't have enough of the smaller one. Okay. Like, they do. They came with, like, a assorted set. I only. So far, I only have one set. I need to get another one. Yeah. I just didn't have enough of the tiny one, and I wanted, like, a, you know, something more funky, like, he's young baseball player. I want to give him that, like, kind of more consistent, like, edgy, firm. There you go. Right. Well, hang out. How's it going over there?
So I created, like, my entire foundation with the. With my. My shears. I went ahead. Went ahead and tapered the sideburns, so I. I went tapering the sides, especially, like a sideburn. I'm not going to come in straight. Right. I want to come in at more of an angle and kind of work my way up. And I want to keep in mind that I don't want to destroy the baseline that I already set in. So I'm kind of fading up to that baseline. It is a little heavier right there. And that's completely fine. If I need to at the end, I could kind of adjust it at that when I go to detail the haircut. But now you can see. You could visually see, like, I have this, like, nice shape set in. And now I have, like, all this weight, like, blasted back here, and I'm going to make that look real, like, tight and clean. It's kind of got a mullet going on right now, so I'm going to kind of tighten that up for him. And when I get rid of this bowl, I like to go in with. Are you guys. Is anybody a barber in here? Just hairstylist John the barber. So I have. I'm going to go in with my two guard, right? And this is a wall guard. I know they're slightly different, but this is a two. And I like to. When I. When I'm fading, I like to fade mostly with my lever open. And when my lever is open, it means I'm, like, leaving on more hair. I like to have it open because, like, when it's shut, it's just so perfect, as opposed to when it's open, I kind of get more of, like, a sheer kind of look. Kind of gives it a little bit more texture. So especially with this weight right here. I want it. I wanted his. What's his bone again? Occipital. Right. Science, you know, whatever. So I want to take this below the occipital, right? And I want to come in with my two, which is going to be my debulker, if you will. So I'm going to have it open, and then I'm going to have him tilt inside down. And then I'm gonna do a nice C scoop motion. This is kind of like a freehand kind of deal. And I'm going to make sure I'm, like, all stopping at this point. So I'm going to get rid of that bulk in there, and then I'm going to get into the fittings part. Try and stand off to the side for you guys. But when it comes to fitting, it's all about just seascape motion, right? Because if I just come in like this, you. You don't want to. You just set in, like a harsh line. When you do that C scoop motion, it kind of, like, fades out, and you don't set any hard lines. The more lines you set in, the more problems you're gonna, like, set for yourself, and the more time. And time is money. Right? So I'm gonna come in, just debulk this as far as, like, the outline of the haircut goes. I'm gonna kind of detail that as I go. I'm gonna take this nice blow out this back tape right here, kind of make this far. Has anybody heard of the Edgar haircut before? So it's, like, super popular, especially, like, online, I think, who's gone wild, like, freaking, like, made it, like, like a staple shout out to my wild. So I came in with my two. I default all this weight right here. I can come in with some clip over comb and just kind of get. Clean that up a little bit. Just working up to that baseline, not disrupting that baseline at all. I'm going to get rid of some of that bulk here. And please feel free to come up and hang out with me, because I know I'm, like, trying to, like, be in a position where everybody can see, so feel free to come up. So I have that two, right? So I have a two now. So I want to take this nice and tight down to skin. And that sounds scary, but I'm going to make it less scary for you guys. Okay?
So I have a question for you.
What's up?
Yeah, there's a question. Do you have or do you use both magnetic and pivot clippers?
So these are magnetic clippers, right? So magnetic clippers typically have the lever on them, right. And they don't really cut through wet hair. Right. So that's more for, like a rotary motor clipper. I could totally go in with my rotary motor clipper, and I use that. My rotary. That's like what people use for dog grooming. And it just like, can take down anything. Wet hair, dry hair, it can go through anything. This is a magnetic clipper. I want to finesse this taper. And so I'm going to be playing with the magnetic clipper. So for this part, I will be using a magnetic clip area. So I set in my two, right? So now I'm going to. I want to make sure I have, like, maybe, like, three fingers before, like, where I set in my. My. My. My first line. So my first line will lie right in there. Okay. So I'm gonna open it up to it. So when it. When this is open with no guard, it's considered a half, right? So I'm gonna take that half all the way to right there. And now that just looks, like, extremely scary. And this is where everybody starts to get the pit sweats, and everybody's like, oh, my God, how am I gonna blend out this light? But it's fine. We're gonna do it together, right? So this Is gonna look really nice on him, especially because, like, he's got that course straight Hispanic hair that really makes the faith pop. Okay, so I got my half. So I got my half in there, and then my two. Okay, so I'm gonna take it one step further and close it all the way down to zero. And I'm gonna take it, like, maybe a finger underneath that. That hat. So I'll go right here and just clean up all that hair underneath. I have my half right in here, and now I'm taking it to zero. So just setting in my lines, getting myself organized, getting ready to get rid of this. This line here. So I said have my zero line, I have my half line, and then I have my two. So I'm going to come in underneath all that with my trimmer and just clean up any excess hair underneath that and just take that all the way down. Now, since we're all cosmetologists in here, has everybody heard of a foil shaver? Foil shaver. So especially since we're. That's like, the only thing that, like, separates us is like, a straight razor, right? So the foil shaver is going to really make your tapers and make, like, your outline just pop. So it's just going to take it down the skin. So I'm going to clean up all this. So I have levels here, right? So I have zero. I have my half. I have my two. I have. So zero is still slightly a little bit of stubble. Right? So I'm going to clean that up. Make sure I'm working in a nice work environment here. And I'm coming with my foil shaver and the same thing. I'm just going to clean up, and I'm going to use you this as, like, a C scoop motion. And I'm only going to be using this. This little blade right here. I'm not going to come in both. I'm going to use just the end of it. I'm going to do, like a C scoop motion. Take that down the ball and just fade that into my zero. And you'd be surprised that using one of these is just really going to make your work just look so clean. I really love it. So I'm gonna wait to blend in that zero into that half. I'm gonna blend out that two line. So I'll come in. Since I went in with a two guard, I'm gonna go in with a one and a half. So when you buy a set of guards, it's just one through eight. You have to buy the half guard. And the one and a half guard separately. So this is a one and a half guard, right. I'm gonna put that on there. I'm gonna work with my clipper open, right. And I'm just going to do a nice sea scoop motion into that too. And you'll start to see a little more scalp exposure. And I'm just going to work down now. So I'm going to be working. The only time I'll be working up is when I'm trying to finesse out this zero to that half guard. So I'm just going to be working with my clipper open and just work down. So I had my two, I worked down to my one and a half, and now I'm gonna slap my one and a half guard on. Okay. So I'm at one and a half. Put on my one guard and just work my way down. Also too. When fading, it's really nice to have good lighting, right. Like I, I work with a ring light on there because it's like those little details. So good lighting is always a plus. So just working that one into that one and a half, just c scooping off of it. So you can start to see that that line just line lightened up a little bit. And I'll go in with a half guard, pick that a little tighter. And this, this half guard should start to make that line start to disappear. So I'm open right now still, but I'm gonna need to close it just to get that little line out. Right. And you could follow like your steps perfectly when you're trying to blend out a line. But it's really all about like using your lever and like, if you're unsure on where to start, start longer and keep it open and gradually shut it to like to make that line disappear. But it's really about just kind of finessing it shut or finessing that line in between these lines. Are you doing like a little small? So the, the longer I'm cutting. So that seat, that first initial two, it was kind of a bigger C scoop. And as I get tighter, those C scoop motions get a little shorter and shorter and shorter.
Okay, we have a question online too.
What's up?
Is it different to use a one inch guard than a one and a half inch closing down the lever? I guess just a one guard and a one.
A one and a one and a half.
Yeah.
Okay, so a one guard, if I had a one guard on here, if I had it closed, that's a true one. So if I had my one guard and Opened it. That's a one and a half. So I could go, I could put a one and a half guard on. That would be the same as having a one blade on and have it open. But you know you can like mess with, mess with the guards as that as you play with like baits. But that's essentially the same thing. So if I had a one guard on and had it open a one and a half. But we also have one and a half blade.
But your lever like helps you dance between an entire half the size. Of course.
Yes.
Got it. All right. So he's fully neutralized. Neutralize for 10 minutes. Perm strainer bucket organization. It's a really easy way. I'm going to drop all these rods out the chair so you can get comfortably rinsed down. And then we're going to take him back, rinse him. Do we shampoo? We don't because we watch legally one and we know better than that, right? No, we condition and then we'll show how to curly style because it is different key. Yes. He has it in there. We're gonna, I think time permitting clean.
It up maybe to clean up this like differently. Society.
Taylor, you, you regularly cut him, right?
Yes.
Yeah. And I we got on our call like hi, you got stuck with me during a prom class. I was like do you have a mullet model? Like I do. It's down to get approved.
They call me the mullet doctor.
Oh really?
No, I wouldn't.
Be specific. Couple questions. 48 or 72 hours, no wash. 48 hours, no wash. And then also what is the average time that you should be able to roll a perm on short hair? I think 20 minutes. 15, 20 minutes. So these are good questions. Depends up. It's a smaller rod, it's a lot more rods going in there. These are like the other model I rolled in probably like 10 minutes. 10, 15 minutes while talking too. One thing that's really helpful too. If you have that really tipped straight hair and you're having a hard time getting it on the roller, do your best. And then about halfway through you can rewrap any that has been stick out pieces because it will soften the hair once you get solution on it. Yeah. And even too like if I know I'm just throwing like a bunch of big ones in there, somebody's resistant. I'll pre apply the solution. I know I can get those rods in in like 20, 30 minutes and that they're going to take longer to process anyways that helps. And you already see it's way less light, old firm. You're like. And that's exactly where the rods were. Nobody wants. That looks cool. Yeah, that's the. And it is hard if you guys. This is a professional service, so it's going to take you guys to explain to them the nuances to this term why you're now using a different from why you're now perming more that they don't have to be afraid because there is a lot of fear around perms and that they always are damaging and ugly and crispy and crunchy and not a lot of positive words. But now with newer technology and a fresher approach, we can make them something that people really look forward to and that really enhances their look without a lot of effort. All right, Janice, rinse real quick. Yeah. Can you go over what the actual set was? Oh, yeah. Oh, you already pull it up for me? Yeah. Okay. So I took it at a diagonal and rolled the whole front in like kind of in a around sweeping motion so that it. It goes with his natural calc. So we're not like this is all forward and then there's a hard line going back and on a diagonal, rolled him all forward. It also helps, like, make it fall nicer because you can even see in that model picture how it, like, kicks to one side. That's going to look a lot better than it just dumping completely on their forehead. And then back here, same thing. I worked it all the one direction and then the other direction and then the other. So almost like you guys remember doing finger waves, how you would do that? Utilizing how we push and pull hair at the root when we're perming. So that it does just gently push and pull that root back and forth to make it a little more disrupted. And again, not just a curl that's dropping out the back of the head. Cool. All right, get you washed, go to your fancy spot chair. And then we have. This is our Umay shampoo unit. So this is our fully electronic. I know the art form models. Like, this is as best as it's ever going to get. You know, in the salon. This is as nice as it comes around. Zero. Okay, we gotta wait to see it.
Thank you.
Taylor, we have a question for you online. Shear over comb or clipper guards?
Excuse me?
Shear over comb or clipper guards? What do you prefer?
Shear over comb or clipper guards? Like using between the difference between using shears and clippers.
Yeah, let's go with that. I do believe we've got a barber school on here, so.
Well, Like I was saying earlier, like shears and clippers, you know, I like shears because they kind of give those little inconsistencies. You can be really efficient and fast with clippers, but taking that time to create a custom shape with shears, you really get those, like a nice textured look that you wouldn't get with like a clip. With clippers, you could totally do a clipper cut and then go in with like texturizing shears and kind of break it up a little bit. But I definitely like to create a custom shape with shears, especially because those longer hairstyles are coming back with like the saved by the bell looks. And I think that's just. If you're just a barber and you just know how to use clippers, you're doing yourself a disservice if you're not like focusing on shears as well, because shears and is just as important as being a barber as using clippers.
Great. And then, Janine, how much can you charge for funds in the men's game? Yeah, so right now we I, on average I'm charging anywhere from 75 to 150, depending on how much time is involved that it's. You really want to be charging for your time when it comes to firms because it's not the client job to be like, oh, would I book for a mid length? If they have a ton of hair and it's forced and it's going to just take more time to process. That's where that consultation comes into play. I've been doing a lot of consultation online too. Such a nice, easy way to consult for a firm online. Doing a video chat. I'll book them like normally on Mondays or Tuesdays. I'll do just a couple hours and I'll get through, you know, 10 consultations in two hours and get a whole like month of business on the book. Book it right there. And that they're fully prepared of, like, hey, here's how long it's going to take. This is. This is why my price starts at this. And it's a much more comfortable interaction to, to talk about and get them ready of what to expect the other part. So I let them know, like, hey, you're going to leave here with curly hair. You're going to need to use products that support this curly hair. So big part for me, if they're not willing to buy the right products that support their look, I'm not willing to do a perm on them because they're not really. They're looking For a miracle. Not. Not an actual texture solution. So that's. That's a big part of it is our perm. Any kind of permanent texture service is only as good as the haircut and product that supports it. That's the really the. The other side of the entire picture when it comes to doing textured hair, be it natural textured hair or more firm textured hair. All right, so he is now processed. Do you want me to show the stretch? And guys want to do the balance again? Okay. How we know. So again, I'm not really looking for. Even though I see like we've got volume building in there. It's a bigger rod though, so I'm not going to get this like tight S. That's not what I want anyways. So what we lean on is the actual scientific chemical thing that happens, which it turns stretchy once the dose sulfide bonds are broken. That's what I'm looking for. How do we capitalize on retail from firms? We show them how to use it and how different it looks. Can you guys see the stretch? Okay, we know he is ready. Well, and more than anything, to anyone who is changing the texture of their hair is going to need a whole new support line for it. So retail is super important. And that's the thing. I'm not saying, like sell people. You know, people stop just as delicate. That's not it at all. I have curly hair. Like, my hair did not look like this this morning. If I promise. Promise you it was a pray I have to have curly supportive product by using, you know, just a straightening spray or like whatever I had underneath my sink. Like, it's not going to get this look. I need something weightless with memory that actually supports curls and gets them to live their best life. So now we're neutralizing right over top. You got your towels up. Can you hit that for me? And on average, we use 1 1/2 to 2 times the amount of neutralizer that we do to perm solution because we're not rinsing it out. The permission. We're wanting to really shut it down using the neutralizer. I also put fresh cotton around his hairline. And then now remember, I combed it through his hair as well. So I'm going to do that with the neutralizer as well.
With these aside that you were going to email to us.
Yeah. Yes. Everyone here who's live and everyone on Zoom will get the whole presentation so you can review. And then, Janine, do you want to walk over his set while he's Got rollers in? Yeah. So this is what we call the. The debonair set. You can. There's two ways to do this one too. You can do it with the roll, the rollers going towards the face. And it'll. And a smaller roller as well. It'll give a totally different look. In the one that we're doing here that's also pictured, we're rolling it away from the face and what this is going to do again, just to recap, he had stick straight hair, so the style he wanted would never happen without a texture service. It would just keep going. Stick straight Andy and kind of just flop down the middle. So this helps. I broke that where it would. The weight of it would normally just like part it kind of, you know, flat McDonald's arches. I broke that to help give that more broken up, wavy back texture. And then worked it in Berkeley section. Working back. And then you see my gorgeous drawing of a comb. You comb the solution down the sides just to lay it down and retexturize it. And then we'll let it process for like 15 minutes. My kick in there a little bit more. Right. You can grab. Let's see where.
How I enhance this texture. You know, for me, curly hair was like. I hated my curly hair growing up. I have natural curly hair. And it's because I feel like I didn't really know how to like do it. It's not what everybody else looked like. Like all the haircuts I wanted to have. But now that it's coming back, I love that, like, these textured looks are good. So when I, when I went to texturize this, I. I used our surf tonic spray. So this is just a light whole matte finish product. It's really just going to enhance that texture. And I kind of cocktailed it with. And that's what I love about these products, that is you're able to create a cocktail whatever you want. So since we were going with the matte look with the surf tonic and just enhance that texture, I also threw in a little bit of the matte styling paste in like a dime size with it while it was towel dried. And then I just kind of scrunched that in and then I finished over it with the matte styling paste. And it kind of gave this cool little texture to it. And this is kind of the finished look, the kind of crappie look to it. And I think what separates this from just like a bowl cut, right, is those nice tapers. And it just, it really makes the haircut pop. So Cool.
It looks so good. Now you guys can start giving them that for the. The west West. Yeah. You did nothing just so bad. All right, you want to. You ready for your next one?
Yes, please.
So he's permed, you guys. How is that?
It was awesome. So happy with this.
None of them have seen it, by the way.
This smells amazing.
Thank you. Said no one ever bought a perm until mine. That was the goal. It. Because it was mortifying to send these clients home, and then we would be like, okay, make sure you're not, like, getting married in the near future, doing anything worth anything. They can go home looking exactly how they actually want it, smelling great and not having to worry about it.
Now with. With the mullets, right? Have you guys noticed, like, mullets are kind of trending back, like, in the shop a little bit? Yeah. So, like, I think that there's a difference between, like, a guy coming in wanting a mullet. Like, usually they don't mean Joe Dirt mullet. You know, they mean, like, more like, I don't know, modern mullet. And when I think of a modern mullet, I definitely think of, like, some nice. A nice taper on the sides, definitely that length in the back. But I think where the modern comes in, we kind of reduce weight in through here. Right. So I'm gonna bring all that hair kind of square, so I'm going to cut it all nice and square. So when it falls, he's going to have that. He's going to have this hair up here, but have this, like, I call it lettuce. You know, he's going to have that extra lettuce in the. On the bottom, which is going to be sick.
You know, I did notice that, like, going. It was really nice that there was actual left in there. Yeah.
Okay.
See, you're going to be so happy. I apologize, though. You're going to want arms now.
Oh, I got you.
So, you know, you all leave certified after this, too, so make sure you sign up on our pro portal so that we can get you on our salon map. That's how a lot of clients find stylists in their area that are now offering these services. What are your three top things to remember when you're learning how to do. So the top three things to remember when you're learning to do a curl quilt perm. 1. Do not be scared of small roller sizes and small sections. This perm is your friend. It's not going to accidentally, out of nowhere, just give you ramen. I promise. In most cases, people Wish it was tighter. Like I've yet to have a client return and be like, oh my gosh, that was way too tight. They're like bigger, more bigger. So go for it. Don't be scared. You know, practice on a, on a mannequin head. Practice on a family member until you get cozy with it. But don't be scared. Second thing, let it sit. Don't worry, it's not going to go from zero to pride in a couple minutes. This is not your mama's perm. This is designed to be softer, gentler, to perm on things you maybe wouldn't have felt comfortable perming on before. So lean into it. Third, be creative. Have fun with it. Try different sections. Use different tools. Like play with this. This is your liquid tool. Do not think of it. I want you to color outside the lines with the permanent texture surface. So those are probably my three, like go out and get it type, type suggestion. Did you want more literal suggestion like rules? Okay. All right, cool. And what's kind of heavy with that? So is there a minimum time that you leave it on for and you kind of have to judge. Yeah. Obviously the more force that area leave it on longer. Familiar with the product and you're going to do, you're going to know the timing a little more. Minimum 10, 15 minutes usually. Great. Great question. Is there a minimum time to process the perm? The least amount you can do the liberate firm solution is 10 minutes. So that's going to be for your life. Probably wouldn't use a regular perm on this client type of client, but. And that too for when you're doing a test strand. When I'm on the fence and do a test strand, it can go 10 minutes before getting really stretchy. I feel comfortable firming them and then did I see on there? So that you don't really use it on. Let's say something beach here. Right. So yeah, let's, let's talk about that. Who don't we use this time? Anybody with a relaxer. You know that those two things we. They don't get along. They've already talked about relax. A regular, a traditional relaxer, Brazilian blowout goes on the outer cortex layer. So anything that's gone in there and like really broken and restructured, it's already been done. We can't give it new do sulfite bonds to break. Same with all over bleach and tone. Now is it going to melt the hair off? Maybe not. That's not why we're saying gel perm. On it, it's more that those bonds have already been broken. We've already gone all the way in there to decolorize it. There's not a lot for me to re. Break and reshape into a curl. So you'll just. The more bleach, the more damage, the weaker the curl pattern. And then in some cases, of course, if their hairs are. This isn't going to reverse damage. This is a perm, although softer in nature, has the protein flex technology in it. We're not going to reverse damage. So just being sensible. The best perms are unhealthy hair, of course, you know, and that's a huge range. There's a lot of full highlight clients whose hair is super healthy. And I claim that just do a base color and their hair is much more fragile, you know, so just really taking in the density, the texture of their hair. Heat styling can oftentimes be more damaging if done frequently, then even color can be. So all those kind of things, like, what's the fabric that I'm working with and what's the goal that we want to end up on? It's always easy, correct? Not always on more fragile, like hair. One that I know that, like, processes in 10 minutes. I won't cap it and I won't heat it. I'm only heating something that I know I'm going to sit here and have to watch the process for a while, and I'm only using the heat to not sit here and watch the process, because otherwise, had we just kept him under this vent, that my last two perms would be here probably an hour. Yeah. And it'd still be like, we probably could still be waiting where. Get it on there, Heat it up. Drive that. Drive that solution into the inner cortex layer. Okay. I'm trying to remember all the parts. It's going to be random, but. And then keep it coming like 48. 48 hours before you kind of do anything. Right. And would they also be within the color of their hair? I would recommend, if you're going to do a color service, 48, at least 48 hours, maybe even a week after, after the firm. My colors and highlight, I like to just kind of scatter them, you know, apart anyways. Do you do perms or something? You know, all the good question. So the question was, does it decolorize the hair when you do a perm? It can shift the level 1 to 2 levels. Also, it all depends. Like, if somebody's colored red, you're going to see a lot more shift. But the Bigger, you know, a larger dilo. So you'll see that kind of loosen up and come out. So probably not as much like the old school perms where you're a little bit. Yep. But it's definitely going to shift it less than a traditional perm because it's not as harsh in nature. But you will see some shifting going on. Blondes, the blondes will appear brighter. So when they come in to get their color done, you probably will. They'll be in a sense like almost pre lightened a bit. Right. Because I would want them to come in, I mean, ultimately two, three days later. Within that week. Yeah. Otherwise, you know, a lot of cases of my, my firm clients, a lot of them, it ends up softening up their mid shaft and ends and getting almost like a natural balayage kind of sunkissed look to it. Yeah, it is nice. And really like, who's this? What client is this for? Beyond, you know, beyond barber perms. I will say probably 40% of my perm business is on my male clientele. They love it. This is an easy way. Every three haircuts we just add a perm on there. It's an extra hour, maybe an hour and a half depending on how long their hair is. A couple hundred bucks. And their hair is now, especially during the summer when they're getting out of the pool, going to the gym, doing all that stuff, they now know their hair will just style. It'll look fuller, it'll look more done. It helps them in the long run. And it has really appealed to my male clientele for longer lengths, you know, for them that I suggest this to clients. I wait to be prompted. They're not. Most clients aren't going to ask me for a perm. They don't know that there's this product out there that can solve for this. What I'm looking for from both my male, female clients alike is I want something that's easier. I am struggling with volume. Ugh. I would love to wear my hair in this style, but my hair just won't do that. So I lean into asking them what are their goals? What are like dream scenario hairdos they would like. And in most cases, I can do a perm that's going to help them get there a lot easier than if we didn't. I find it too, like some of my clients that have fine hair, they're a little bit older now that their hair is maintaining their curls. So I mean, that's a good suggestion for them as well. Even for, for our viewers Online, a great suggestion was, you know, uneven curl patterns. Curl patterns, as you mature, tend to fall out and be more inconsistent after surgeries, after babies, after all sorts of stuff. This is. I do a ton of partial perms or just like to even out their curl texture and make it more cohesive and easier in the long run. Let's piggyback to you. What do you. What do you got going over here?
So the first thing I did, same thing, is, like the last haircut, I sectioned it off at the. The round of the head, right. I set in my baseline with clipper over comb. I really. I really just focusing in right in front of that ear. So I tapered it. I set in that baseline. I gave him a nice little taper, like a very low taper. So now what I'm doing to create that kind of mold effect is now I have this in right in front of that ear. So I tapered it. I set in that baseline. I gave him a nice little taper, like a very low taper. So now what I'm doing to create that kind of effect is now I have this guideline right here, and I'm bringing everything over to this line right here. So I'm just. Everything in the middle, I'm just pushing over, directing. And when we over direct hair, we obviously we create length, right. So bring everything from the center, Andy. And I'm kind of pushing it to that guide, and I'm just kind of following that line all the way down just to create that nice mullet. And I'm going to do the same thing on the other side, and I'm going to bring everything to the other side as well. And then I'll kind of have like, this little, like, weird length in the middle, and I'll adjust that at the end. So I'm just going to focus in on kind of setting this in. He doesn't want to take too much length off, just kind of cleaning it up. But you can see already that looks like super red. Jealous.
He's neutralized for 15 minutes. I neutralized him longer. He has softer, larger rods on, and he has even more resistant hair. So you can neutralize anywhere from 10 to 20 minutes. My typical neutralizing time is 15 minutes down.
All right. So I'm on my. My left hand side, right. So I'm going to do the same thing as I did on the other side. I have it sectioned off at that primary part. I'm going to set in my baseline, and my baseline is going to be more like this as Opposed to like this. It's going to be more set in like that. So I'm going to come in with my first. You got to grab the cutest comb you have, and then you come in. I'm at a. I'm at an angle right here. I'm not like this. I'm at an angle. I'm coming in and setting in that baseline. And I really like these combs. This is a wall comb, and I used to buy, like, wall clippers and, like, throw this comb away immediately. But I love this combination. So, like, I know visually that this comb, like, on the scalp is going to give me a one and a half. Like, this is a one and a half guard. So visually, I know I'm setting this into a one and a half. So I'm just kind of setting this in. Get some. I'm gonna get some nice scalp exposure at those temples just to make that mullet pop. Okay, so I got my one and a half here. I have my baseline. I'm going to work everything up to this baseline. I'm gonna set in my bald line. Just notice it. Notice it's at an angle. I'm not like, coming in straight. I'm gonna clean that up. Dust light off this hair. So damp. It's a little damp. Yeah. I would probably would work in a little dryer. Yeah. Just I didn't want it to be courteous, so I didn't want to, like, voice up. But it is still a little damp now. If it was soaked, then that would be a problem. But the other side, if you notice, I did dry it off down a little bit. So I sit in my zero. Now I'm going with my hat, and I'm wiping off those little hairs just so I can see what's really going on. Because it could look a lot worse than it is after you wipe it. Airway. You kind of can see what's going on. See a little darker area right there that I'm just gonna close my. Close my blade and then just open it up ever so slightly just to kind of work those lines out. And just working with the teeth of my, like, the corners of my blade. I'm not. I don't have. I'm not have my full blade on there. I'm just working with those corners. And then I'll come in with my one guard and open it up to open it up all the way, which is a one and a half, which is what I set it into. I'm just gonna scoop that out into my baseline.
There.
You can see that blends in nice and easy with that clipper over tone. And then I'll just erase this line with my half guard. So I'll come in open, erase this line, just kind of C scoop. And just like I said before that question, you know, as I get lower and tighter with the hair, those C scoop motions become tighter and tighter, and I just. Just gonna start to close my blade until that line just starts to disappear. I'm kind of going with the core corners. When you go in with the corners, you're not like, you're working with a more controlled area as opposed to coming in with the entire blade. Like, I just kind of want to work some of these lines out here.
Man. I've learned today the most that there's no one tool like you. You use every single.
There's a lot of tools thing in the toolbar. Yes, we have a lot of tools. Tools in the toolbox. And it makes. I think it makes barbering fun, you know, because if we just use the same tool, just like products, you know, like, if we use the same product every day, it's just. It gets boring. You know, we're behind the chair, we work long hours, we're working with tons of people. The more, like, we get to like, have like a different brush in our belt, if you will. It makes things fun. So I'm just gonna work this out a little bit right in here, clip it over comb. Just give me unwanted weights. And so now this will be my guide. And I'll bring everything to this line right here. So. And I'll be taking diagonal back sections. So I'm in this. I'll bring all this this way. Bring everything. So my guides up here, and then I'll just work down. And if you want to maintain more length, you know, you can kind of just kind of feather this out a little bit. It doesn't have to be so straight, you know, you can. You can play with all this length at the. At the bottom here. Okay, so I'll bring everything this way, diagonal that. Bring everything over directed to my baseline so I can create that length. See how that just falls. And then I could like, detail anything I see at the end. Just setting in that sketch valve. Make sure I got everything over here. I'll bring everything over. I like to do palm to palm cutting. If you're unfamiliar with palm to palm cutting, I suggest, like, practice on a doll head because you know it's gonna really be beneficial to you in the long run. Because I used to, like, go through haircuts like, you find yourself in those, like, awkward positions. You like, you're, like, in the middle of a haircut, and you're like, what am I doing? Just, like, gotta, like, kind of stand up straight and be able to, you know, take that hair and control it like that, as opposed to, like, breaking my elbow and having it straight up here. Okay. So now I should have, like, this, like, longer length in through here, which I want to lighten up. And I will do that. I'll take. I like to, like, get that bottom length, so this is, like, that longest point of the hair, and then I'll just go straight up with it and just kind of take out some of that weight. So this is a vertical section. So vertical sections, I'm reducing weight and just. But I'm maintaining a nice square shape for Alex here. So I have that little guide in the middle, and then I'll just kind of work around it and just kind of work back to my guide that I set in on, like, that paper side.
I mean, what are best practices for cutting? Best practices is to keep the hair nice and damp. Like, he's even cutting the hair probably a little more wet than he traditionally would. This is going to help, you know, suspend that process. And I would say, too, because we knew he was getting his hair cut, I went even tighter on the rods, knowing that we're going to pull it out a little bit, too. So that's where the fun comes in, where you can really, like, dial it up and dial it back based on what you're going to be doing in the long run. Right. This one, he's all done his. His debonair. You can see that. Not like a real distinct, distinct curl pattern, but we're able to really push that hair back. Like, he never has been able to, or he wouldn't be able to without an actual texture service. But his hair doesn't look dry. Right? You guys, we just did two perms in a row in what, an hour and a half? So, yeah, when I'm charging not adding an extra $150 to my men's haircut, do you think I can make some good money doing perm? Yeah, you can. And there. Here's my favorite part. As somebody is a colorist, for a majority of my career, they are much more. Once you get the hang of it, they're so much more predictable. I am now on time to pick my kids up from daycare, where before, with color corrections, I'm like, well, let me see if someone turns out she's a liar and have the Fox guy. So that too, like, it really gave me some control, you know, 20 years into my career that I can add an additional piece of revenue to my pie. So this doesn't borrow steel from anything else. I'm doing my. A lot of, like, people that come to me for firms, I end up getting them to also do color as well. You know, not on purpose, but they're like, well, I'm already coming to you for perm. I'll just have you do my color as well. And then a lot of my taller clients, we end up doing a perm on them as a way for them to just wash and go. To truly have wash and go hair. And this has added for our salon overall, 20% more revenue just in offering firms at our sales salon Modern permanent. Yeah, you know, and there's not a lot of stuff out there that's so customizable. That's pro. That's the other part, too, that it doesn't have to be like, okay, we only do one beachy weight. Yeah, of course we're going to be chewing, but we can also do, you know, this debonair, a mullet that, like, it's all different stuff without it being like, you know, some crazy, you know, contractions or like, it is all learnable stuff. A couple. Get a couple of these under your belt and you're going to be good to go. This is not a huge, like, level of expertise to feel comfortable firming. You guys can. Can start after today, start doing these perms successfully at this launch. Yeah. And I mean, oh, the best is just posting. When stylists start posting, like, before and afters and, you know, this is a perm. It's like, wait, what? That's a perm. Like that. And that's the. The great reaction. A lot of clients are nervous to even ask you because of, you know, the ill responses hairdressers have had for years. Like, so now we can start having those conversations about creating permanent texture and customizing it to them.
Okay, so I. So the last client used the surf tonic, which is more of a matte look. This time I use the spray grooming tonic. And we have two grooming tonics, one in a bottle and one in a spray. The spray one is a little lighter. This one has. This one has argon oil in it, and this one does not have argon. So I went with the lighter one only because I'm gonna put a little bit of a heavier something in there with it. And the fiber cream and this Has a low shine to it. It's a medium hold, but something to kind of enhance those curls as it dries. With curls, I don't know if you can relate to this. I, I, I explain it like, like, enhancing curls is like cooking eggs. Like, the slower you cook them, like, the better.
Yeah.
You know, like, it just really enhances that texture.
Well, it's tricky because curls, you know, you have to have product but the right product. So it has to be a weightless, moisturizing product. Our girlfriend's amazing for that as well. But it's good to know to have a whole different arsenal of products and teach your clients how to best support curls, because it's a game changer. And once, I don't know, does anybody do curly hair right now? Right. Like, once your client has, like, the, the product that works for them, they are product junkies. They're like, yes, I'm gonna take three of these in case you pulled out next time. Like, that's how it works. Because it really is, it's life changing to have the right product that support the curl. And there's such a vast arena of curl kinds of curls and different kinds of applications and different products that they need.
Check out this side profile and just how that perm turned out like that.
Like, are you happy it pops. Are you happy you got talked into doing a perm class with me?
100%. Yeah. Like, this is so red.
So are you gonna start perming?
Yeah, I think I'm gonna start perming.
Yes, you guys, we did it.
But when I, when I, when I do enhance curls in my shop, could be different for you guys, but I definitely keep that setting on, on low.
Yeah.
Like, I don't, like, go full blown, like, because, like, when, when you put that much heat on or that much, like, strength on curls, it just kind of expands. It's frizzy. I just want to, like, slowly cook it. Really scrunch that product in there. Get it in there. And you could already see, like, it's like it's popping off already. So I put the spray grooming spray in. I put the, with the low shine to it light hold. And then I put the fiber cream in it, which is a little medium hold, but it has a stronger, little stronger of a hole to it. Just going to really scrunch that in. And then I'm going to top it off with the fiber cream again. Throw that in there. Now, Alex, he's a high school kid. He plays baseball. He doesn't spend a lot of time on his hair, like most high school kids. So that was pretty easy, right? I just sprayed it in there, toss them in there, and kind of scrunch some product in there. This is going to dry really nice, so I'll just kind of add a little more. The fiber cream kind of has that, like, tackiness to it, which I like, but it's going to give it a nice little low shine to it. And just like before, you know, he just kind of wears it forward. Sometimes he pushes it back. What I love about especially after you just permit, like, you can literally just let your freak flag fly and it looks cool. Like, literally, like, he doesn't have to, like, push it to a certain side. You can just literally go out like this.
Yeah, you've been doing his hair for a while. So, like, how much is this helping? Like, better support.
She has very straight hair. So, you know, sometimes you struggle with, like, kind of, like, putting that texture in there. So the fact that this. This term literally enhances the haircut, it makes it made his overall, like, look one, easier at home. And two, it just looks really cool. See that? Are we cutting this gentleman?
Yeah, I think we're. We're wrapping up, though. I mean, do we give you guys enough looks in what, two hours? Can you believe that? Done. Three looks. So we'll. We'll wrap up. Am I correct on that? Yeah, we can wrap up this if you guys want to hang out and watch the last cut. I'm happy to, but. Yeah, I just want to share real quick at least with the folks. And we can show you guys, too, what Alex hair looks like, not perms, so you can really. Yeah. Technology. Anyone who's on the zoom, you should be able to see what his last haircut was, as.
You have no idea.
What you look like right now. None of them. I know he was asking for mirror. I'm like, no.
Does he look good? You guys, you look amazing.
If there are any other questions on the zoom, please feel free to add to chat. And in closing, I thank you to Jatai for giving me the best day and papers on planet Earth. For Tari Velma, for letting us sit in all their chairs and use all their stuff. This place is so pretty. And for Rizal for playing terms with us, or just lighting my fur, like, igniting these terms, like, what a good. What a good mashup. I'm thankful. Thank you, Taylor, for being so brave and being like, all right, we're doing this.
Let's do it.
Former from Hater and now from Lover. Yeah. For all Our guests additional tech percentage offering the VIP for our online store that we just launched. So I will be sure to show that to you on your way out. Yay. Thank you. And we'll share the 10 off code with you guys. Do you want to talk about our. Our packages? Our barber perm package? So we do have a barber perm, as you guys do have purple already, which is one of everything and includes the per paper. Sorry, you're gonna start over. And closer. Tell them. Tell the audience online. Yes. Hello, everyone. So with the basset or your distributor, whatever area you are in, we have one of everything with a. I believe it's 11 discount. And you will get the perm papers as well. That. With the dispenser. Yeah, with the fancy Jatai dispenser that you need. Just walk me through. So we'll be able to share with that with you guys as well after. After the zoom. All right. Switch. Yes, she's working on it. All right, so I am Janine Jarmuth, founder of. Thank you guys for getting weird with me. Come to a perm barber class, right? Might be a first.
The first of its kind.
I. I mean, maybe since. Probably since 80s, at least. Right? You know, it's. It's important. Like, I know this. We don't get a ton of time off. And the fact that you guys showed up online and showed up in person to further your education just speaks volumes to the level of hairdressers that you are, level of barbers that you are. And I hope you're inspired to take the tools we gave you today and just run with it to attract new clients and to delight the ones that you have. So thank you for spending your time with me and with us, and thank you to the coat team for just making AV magic happen. We are a tiny but mighty team. Takari Belmont. Jatai R. Taylor. My.
On behalf of RL for sure. Yeah, you guys are great.
Thank you. Kevin, come up here. He's only answering to Edgar now. That's awesome. All right, these are our finished, finished product. We're going to finish cutting this, but thank you, Zoom viewers, for logging on today.