Curl Cult Certification - NEW
This is a YouTube video titled "Curl Cult Certification - NEW" created in October 2022, featuring Janine Jarman, founder of Curl Cult salon, and Lauren Kinoki, director of content, community, and education at Curl Cult. The video serves as a detailed certification training for hairstylists on the Curl Cult perm system, covering the science behind perms, product breakdowns, application techniques, processing guidelines, and best practices. Janine Jarman and Lauren Kinoki provide step-by-step instructions and insights to help stylists confidently offer this perm service to their clients.
P E R M Come join the movement P E R M Come join the movement Join Curl Cult. Hi, I'm Jeanine Jarman, founder of Curl Cult salon, owner, stylist, and this is Lauren. Hello.
I am Lauren Kinoki. I am the director of content, community and education here at Curlcult. I'm also a stylist behind the chair at Janine's Salon Heroine in Los Angeles. And we're super excited to have you take our certification today.
Yeah. Welcome.
So today we're going to walk you through some of the science behind how perms work. Some of the science behind our perms.
Specifically what makes it different and the, like, nuances and how you're going to process it. Yep.
We're going to do a full product breakdown for you and also walk you through our application process step by step so you feel confident and comfortable going to perm on your clients.
We also have the faq, so any frequently asked questions, we made sure to build it into your certification so that you are ready to roll. Pun intended.
All right, we are bouncing back to beauty school and getting into the science behind perms and how they really work in the hair to change texture. So this is the cortex layer of a hair strand, and there are two polypeptide chains of keratin on either side of the cortex layer. There are three different side bonds that connect these layers of keratin, and I'm going to walk you through them and.
How they work in the hair.
This first one, which is labeled in blue, is hydrogen. The second one, labeled in green is salt. Both hydrogen and salt bonds are broken by water or heat. So when you're curling your hair with a curling iron or if you're doing a wet to dry set, you can actually change the texture of the hair temporarily, because next time you wash your hair, that texture will be gone and the original natural texture will be back. This third type of bond, labeled in red, is our disulfide bond. All right, so this bond is two sulfur molecules, hence the disulfide. And this bond is what creates the texture in your hair. So when you're doing a perm, the perming solution, or our liberate permanent styling lotion, if you will, will go in and break this bond, and then you reform the hair on a hard rod, a bendy rod, a braid, a twist knot, any form that you want the hair to take, the bonds break away, which is how we get the elasticity that we'll talk about in a little bit. And then once that these bonds are broken, we will Go back in with our neutralizer, and the neutralizer will actually repair this bond back so that it will take on the new shape. So once these bonds are reformed, it's super, super important to not wash the hair for 48 hours. That means do not shampoo it for 48 hours after the perm is complete. The reason for this is that, yes, the neutralizer brings these two disulfide bonds back together. However, it really takes a good 48 hours for them to solidify and become the new texture that you've created in the 10 minutes that it's processing. It only gets a fraction of the way there. So you need that time for them to really solidify back and then you'll be good to go. Look at this handy dandy chart, the chemicals that break disulfide bonds. We're going to start here with ammonium thioglycolate. And I think we've all heard this before, probably from a little movie called Legally Blonde. This chemical is most commonly used in perm solution and it's highly alkaline. It sits at about a 9.0 to 9.6 on the pH scale. It's for coarse or resistant hair. It creates really strong curls. There's a very strong, almost caustic odor that goes along with it, which I'm sure is the odor that you and many of your clients remember if you've ever been around a perm. And then it's also quite damaging to hair. So this is what can cause your kind of fried, really dry ends from getting a perm. Next up, we have glycerol monothioglocolate, and this is our acid wave perm. So this one's gonna sit more around, like the 4.0 on the ph scale. It's for more porous or dam hair. It creates weaker curls and an allergy can develop if used over and over. I don't know about you, but this does not sound like a winner to me in terms of the benefits that you get from the glycerol monothiogloccolate. Lastly, we have cysteamine. Our Crow Cult solution is a cysteamine solution. It is slightly alkaline. Our croc culture solution sits at a 7.3 on the pH scale, so it's really neutral. You can even use metal clips in the hair as you're using it and it won't affect the process at all. It's for porous or normal hair. It creates medium strength curls and it is far less damaging than the Thio family up here. Now, beyond Being just a cysteamine perm, curl cult also has Psimprotex technology, which helps keep the hair strong from the inside out. Janine's going to talk about that right now.
All right, so let's get into it. What's so different about the curl cult perm? Like, what is the curl cult difference? All right, handful of things. Now, I love perming, but I did not love a lot of the things about perming. It didn't leave the hair feeling great. It was messy. It smelled terrible. First thing we did, we took out the bad smell. We now have a pleasant, fresh berry fragrance. Then we adjusted how it actually processes. You neutralize over top. Why is this important? A couple of reasons. One, it's really messy to rinse rods out at the shampoo bowl. Two, it's pretty time consuming to do that and then to blot them all dry, also leaving a large margin of error. That happens with MIS processing it. Not getting it all rinsed out, not getting enough water absorbed. It really messes with the results. Also, you're really limited on the things you can perm on. They have to be able to withstand a big rinsing and a big, like, towel squeezing. So with our solution, you permit and you neutralize right over top. Why else is this important? Our Pism Protex technology that is unique to our system and our system alone. What is Pism Protex technology? Let me explain it to you with my handy dandy craft setup. Okay, so here's my hair shaft. Here's the hair shaft, the inner cortex layer right here, the raised cuticle edges. Now, PSM Protex is a P protein and plex technology that goes in and strengthens as well as hydrates from the inside out. Because we're neutralizing over top, it locks it in there and doesn't rinse down the drain. So why is this important? And what the heck is pea protein? Well, pea proteins are the tiniest molecules that we could find that actually assimilate to regular natural hair proteins. They just go in all these little edges that are lift up and gently rest in the inner cortex layer, filling in any pockets. There may be any, you know, weakened ends or any of that stuff, and it just, it wedges right in there, gently helping it fix it make it more flexible and which offers a much better reflection, so shinier, stronger hair every time you perm, as opposed to other proteins such as, like, animal protein, keratin proteins that are bigger and just lay on the outer surface layers, unable to really get in there and penetrate and build it a long lasting strength. And shine these over time. Just rinse out clean from the hair leaving your hair exactly as it was, if not worse if you don't keep using it.
All right, so we're gonna do a quick product breakdown for you guys of all of our skus and the highlights of each one. Prepare. Prepare is our clarifying shampoo. It's gonna leave the hair squeaky clean and super easy to comb out to get your client ready for the perming process.
Liberate. This has our pizzen Protex technology in it. This is our permanent styling lotion. Use only as much as you need it because it comes in a pour top bottle.
Regenerate. Regenerate is our step two neutralizing treatment. Once liberate has processed, you can neutralize right over top. Yes, I said it right over top. No need to rinse the rods out first. This allows us to perm on or off rod and it processes quickly in only 15 minutes.
Refresh is our curl coal shampoo. This cleanses without stripping the moisture. This is great on curly hair and permed hair.
Revive. This is our hydrating conditioner. It hydrates and also be used by itself without shampooing as a co wash of sorts. And Janine, what's unique about these bottles?
Their inverted design ensures that all the product goes to the bottom. So it's really easy to get out the very last drop. Magic spell. This is our ph balancing detangling moisturizing leave in conditioner. This can be used as an equalizer before you perm, a detangler after you perm and a great take home product for clients. Use before or after you roll for your perm n hands. This is our moisturizing curl cream with a whipped souffle viscosity. You can easily scrunch this in wet or reapply to reactivate those waves and curls on dry hair curl colts. Jumbo thermo cap. Our unique large design allows you to cover all of your big roller sets. It has an insulated interior to make sure to keep those rollers and that hair protect. Processing at optimum heat. Pro Cult is vegan, cruelty free, paraben free, surfactant free and no water waste. Brewed in Italy, Conjured in Los Angeles.
All right, that is your product breakdown and now we're going to show you how to use these products in the full application of our Cali set.
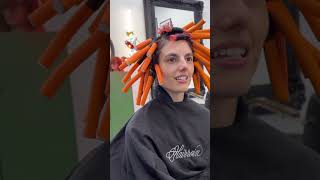
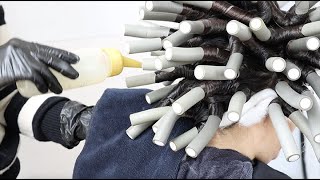
Okay, so this is a really important part before you start perming to drape your client properly so they don't get soaking wet. And so they're comfortable throughout their service. So follow along as I get my client draped. Okay, so when draping your client, you're going to need anywhere from three to five towels, depending on how long their hair is. The longer their hair, the more towels and coverage. You're going to want to help absorb any excess liquid. So first, we are going to start with a towel tucked into the back of your client's shirt like so. Then we're going to start. Then we're going to use another towel. We are going to grab it from opposite end to opposite end so it kind of does like a handkerchief moment. Wrap it right to the base of her hair like that so it makes like a nice little collar of sorts. Then we'll place the chemical cape around, clasping it so it's nice and snug. And then folding the collar down an additional way you can do it for extra long hair, like our client today, before you put the neck one on, you will place a towel like so, then the neck one over. I know this seems like super extra, but I promise you, your client will thank you when they get to leave with a dry shirt. And then this will help absorb any of that fall off from applying to super long hair. Okay, so we are using prepare our clarifying shampoo. This is super important because you want to make sure that you're doing two to three shampoos of this before you start your perm. Why do we do this now? A lot of people think, oh, it's like strip the hair and get it all open and frazzled. Not at all. This is to make sure if there's any metallic deposits, any outer lying product, anything that's going to interfere with the perm process, it's going to cleanse it of that. This isn't like doing anything negative to the hair. This is just so that we have a really nice squeaky clean surface. You want to hear the squeak. That's when you know it's nice and clean. Now we'll take her back, spray her down with some magic spell, and get her all combed out and ready to perm. All right, so now I'm applying our magic spell leave in conditioner. This is a really great product for clients to take home. It has our pizzen Protex technology in it. But this is also a really great prep spray for before you do the perm. It'll help me comb her hair out, which it's so nice too. Our clarifying shampoo does not make it super tangly and gross. For those of you who've ever used clarifying shampoo, normally, it's like, horrendous trying to get it out, get it all combed out. So. Yeah. And you do, though, want to make sure very important to comb out all the tangles before you perm, because you will be perming in those tangles if they are not completely combed out. Okay. We are doing the Cali set. This is our signature set, probably the one you're going to see the most for demonstration purposes, because it is super cinchy with really great results. So we're going to start with the first quadrant of her hair in the front, and I like to start rolling from the bottom up. This is especially for really long hair. This just helps keep the hair all clean and organized. And for her, I'm gonna take sections the same size as the roller so that we can have really good curl from roots to end. This is a really soft body wave, if you will. Beach perm. Let's see, what else is this referred to? Just a really, really soft, natural, wavy set. So we're rolling directly up all the way to base and then just bending it down like so. Next section, same thing, Sam. Okay, so for the front, you can see I followed her hairline, so working my way up and kind of angling it towards the top of her head as I went. This is going to allow it to fall really naturally. So rather than overthinking this, all you're going to do is make sure to keep your sections small as your the roller that you're using. Again, though, if you want a looser look, take bigger sections and work with the natural hairline following it back. All right, so now for the back of the head, I'm going to take all of this sections all the way across. Again, the same size of my roller, and I'll start with two. And as the head gets wider, I'll add an additional either three or four rollers across the back. And then as it narrows out, I will go back to 2. I'm probably landing at 1 at the top, same thing rolling down, starting at the bottom, because it's a much, much easier. I'm fighting with a lot less hair because I can just clip it up out of my way. It also helps me map out what I'm doing. Now that it's a little bit wider, I'm going to add in that third roller now that we've gotten past the nape. So trick for extra long hair, I'm going to show you right here, you're Going to start at the far end and roll down one way and then back the other until you get right back into the middle. It's a little extra long hair. TR Sam So you're going to apply a long piece of cotton. What this does is help catch any of the runoff. And we have her double draped for the extra long hair. So we have an extra drape in the back. I'm going to tuck this all the way under the rods. I also gave her a towel to hold so that she can catch any runoff she may have. Get this all the way around. And I like to do an extra piece for right over the ears. Again, don't hesitate to talk to your client throughout the whole process asking, double checking, triple checking that they're comfortable because there's little small adjustments that you can do to make sure that it's a pleasant experience and that they want to get it again. Okay. Speaking of clients being comfortable, we're gonna start at the nape. This is typically the more resistant section, so you want to start where it's the most resistant. In addition to that, it's a cleaner, easier application. So I'm going to gently lean her head forward. I'm going to put a towel underneath to help catch any runoff. I also have a towel here and a towel on the ground. So we're going to just trace along the entire section and work our way up, remembering doing section by section. So we make sure that we do not miss a single rod, because if it doesn't have solution on it, it is not going to. Now we determine do we capture. Do we heat to cap or to heat? Typically for everyone, we like to wait five minutes before we apply any heat to see if the hair started budging within five minutes. If you see any sort of budge, do not heat and leave a cap off. So if somebody's hair is resistant like her, we're going to immediately cap. Check it in five minutes. Same thing this is. You use the cap and the heat as two additional sources to expedite the process. So a cap will keep it nice and warm. A heat will add additional heat, so determine how much do you need to crank it up or dial it down based on their resistance and their hair texture. Let's check. We're going to take a section and push it on itself to see if any wave pattern is forming. Still no real formation. And then we'll do an elasticity test as well, just to be extra safe. One to three pieces of hair and it's beginning to start to stretch. So we know it's starting to move. It's ready to go. Let's check the curl pattern. All right. Curl pattern is there. You can see as we unroll it, we do a unroll and a push. And then don't forget to also do an elasticity test because you want to make sure that the curl pattern is not just there, but that the bonds are broken inside and ready to be neutralized. You can see that some good stretch. You want it to stretch like a rubber band where before it was like a little bit tight. And that has a good rubber band stretch. Now we know we have the wiggle push and the strand test, elasticity test. We're good to go. Super cool. And unique to our system is that we neutralize right over top the perm solution. Why is this great? Well, rinsing the rods out is not only uncomfortable, but adds a lot of room for human error. So you, if you don't rinse everything out correctly, you can end up with uneven spot and it's really messy and adds about another 20 to 30 minutes to the process. So with our neutralizer, we're going to apply this. I'm unrolling. Oh my gosh, it looks beautiful. We're going to rinse it off with tepid water and you're going to want to rinse it till you can feel that there's nothing left in the the hair, that it's almost back to that like squeaky kind of state that we started in. It's going to feel like a, like it had a protein treatment. Okay, now that it's completely rinsed out, we're going to apply our curl coat conditioner. And remember, I can't say this enough, we do not shampoo out the hair for 48 hours. So remind your client of that at this step. Remember, you don't shampoo it out because the bonds are not fully formed for the first 48 hours. Oh my gosh.
The best part is I don't have to do anything.
Alright, now we're going to review some processing guidelines and best practices when using Curl Cult. For the processing guidelines chart, you're going to begin with color history and hair type. And once you find that for your client, you're going to move along to the right to understand what to prep with before rolling. If you should cap and heat right away or at any point during the process, when to reapply, liberate permanent styling lotion, average processing time and then the neutralization time. You can find a printable version of this chart on our website under stylus support. Now a few things are not recommended when using Curl Cult. First of all, if you don't know your client's hair history, you do not want to proceed with doing the service unless you do a test strand first. You will not want to provide the service on any of the following Anyone who's had a color correction above three levels has been previously relaxed and the relaxer has not been cut out anyone with a previous smoothing system or Brazilian blowout or smooth straightening system still present in their hair or done within two years anyone who has a full bleach in tone and anyone who has had henna color in their hair. For pre lightened hair, you don't want to do a Curl Cult service on anyone with more than four levels of lift. So if someone's a natural level three and they are lifted to a level nine, you would not want to do this service on them. Nothing past a level nine. So this is not for your Platinum card clients. Again, no on scalp bleach and tones. And when you're doing the service on anyone who has pre lightened hair or highlights, you want to use Revive Hydrating Conditioner as a barrier cream in those lightened areas for added protection. With the Pism Protex technology you can apply and neutralize to different sections at different times. So if someone has highlights, for example partial highlight, you can apply to the natural area first in the back, wait for that to start to bounce and then apply liberate to the highlighted areas. And if anything becomes stretchy ahead of another section, you can apply the neutralizer to stop it as you would like. You would pull a foil and when you're applying a perm retouch, we do it very simply by running Revive Hydrating Conditioner through previously permed mids and ends, rolling onto your rods and then processing as usual. Just be sure to test the elasticity of both the virgin regrowth area and the previously permed areas to avoid over processing the ends. Another great tool is our FAQ document on our website under Stylus support. It'll give you many answers to questions that have been asked of us by stylists starting to use Curl Cult and will be a great resource when you're.
Using the perm for the first few times. Well that was super easy.
I mean it was for us. Hope it was for you too.
We just hope that after watching this video that you feel comfortable and confident in trying the Curl Cult perm and excited.
I hope you're just plotting and planning those clients that you know. Oh my Gosh, they would be perfect for this. They would be perfect for this.
And from experience, the second you start talking about perms with your clients, you will be shocked how many of them are interested and want to get one.
It's kind of the dirty little secret where they're like, I mean, I've always wanted to ask, but I was scared to say anything. So it is, you know, I am a hairdresser behind the chair just like you. And it is my dream to create a product that not just like gets you excited about a new service to offer in the salon, but makes you more money. It makes you more successful. So that really is my goal with Curl Cult is that we are, you know, solving hair texture problem but also making you guys more money.
And make sure you're following us both on Instagram, Live, Facebook. We do post a lot of stuff.
On there as well.
So check out our website. Whatever's not on there is going to be on our IGTV urlcult. And like Janine said in the beginning, you guys can DM us with any questions you have. We are here to troubleshoot and get you to a place where you are super pumped and using this on as many clients as you can.
Totally. I want to see what you guys do with this. You know, this magical potion that I created.
You did it. You completed our certification video.
Congratulations.
Now let's help you set yourself up for success. Make sure you complete the quiz at the end of this so that you can get your certificate and unlock a special purchase. Make sure to take us up on.
That special purchase of the hot rod.
Starter kit and get yourself a model as soon as you can because if you don't use it, you lose it. Be sure to check out our custom fit texture class. It's only 60 minutes and we'll get you ready to roll. Then you can complete our crow coat service on a model friend or co worker. Check out selling a new Service, our new 30 minute class that will help bring this service into your salon and onto your clients. Next, complete the salon rollout checklist to promote yourself. We're so excited to have you part of this team and look forward to seeing what you permit.