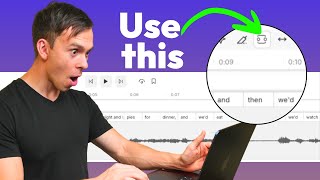
Five Descript shortcuts to edit faster: use Z/X/C keys to cut from the transcript, the Range Tool for selective edits, quick media insertion, copy scene layouts for consistent B-roll, and markers for navigation. Saves time on interviews and multi-clip projects.
Most Descript users are wasting hours because they don't know about these powerful shortcuts. I've taught hundreds of students how to use descript, and in this video I'll reveal five mind blowing tips that will drastically cut your editing time and boost your productivity. You're going to learn the fastest ways to clean up your transcript. Select a specific range of your video for editing, insert media, set scene layout without setting size and position every single time, and the fastest way to navigate your project. Imagine you're writing your video script on a piece of paper and you forgot to capitalize something. You forgot a period, or you misspelled something. Now imagine that to fix that error, you have to completely erase the word and rewrite it correctly. That would be significantly more work and take a lot more time than than if you could simply correct the one letter that needs to be capitalized or just add the period where it needs to be. But most descript users are doing exactly that when they're fixing up their transcript. They go into correct mode every time they need to fix something. But there's a faster way. This way is more like being able to tap the word on your paper and have it fix itself. I'm talking about the Z, X and C keys. Here's how they work. If you hold Z on your keyboard while hovering over a word on your transcript, your cursor turns into a capital a and lowercase a. Now, anytime that you see a word that Descript improperly capitalized or didn't capitalize at all, simply click on it and it will toggle between uppercase and lowercase. Next, if you hold X on your keyboard, your cursor turns into a period and comma. Now, anytime descript improperly puts a period somewhere, you simply click on it and it will remove it. Now notice when I did that, it also uncapitalizes the next word. And if I click again, it adds a comma, and yet again it returns to a period and recapitalizes the next word. Next, when you hold C on your keyboard, your mouse turns into this pencil. Now, if you find a word or multiple words that Descript misspelled, when you click on it, it'll open up the correct box. For example, ironically, descript always misspells itself. It does D, e space, script so I can click on it and it opens up the correct box. But in this case that's not what we want because it split it into two words. So what I'm going to do is highlight both words, click C, and it goes into my Correct box. From here, I can delete the word, spell it how it needs to be spelled, and I can hit correct to correct that one instance, or correct all to correct every single instance of that misspelling in this project. If you thought that was cool, wait till you see this next tool. I want you to imagine you're painting a wall. You don't want to just start throwing paint on it because you're going to get paint all over the carpet, all over the trim, and it's going to be really sloppy and messy. So what do you do? You use tape. You tape up anything around the area that you actually want to get paint on that tape. Those protective rails are like this thing right here. This is called the Range Tool. The Range Tool allows you to select a very specific part of your video so that you can make changes to that part without splashing paint on the surrounding area. For example, I can use the Range Tool to click, drag and select a moment of silence in my video like this, and I know it's silenced because there's no sound waves there and simply hit delete and now it's gone. Or I can find a part where someone is coughing like this, select it with the Range Tool and mute it and just that part is muted without affecting the rest of the soundtrack. Or one more example. Maybe this section is a little boring and slow. I can select it with the Range Tool, then come up to duration and bump the playback speed up to 2x. Here's a power move that will save you even more time if you want to add video or images over your voice, AKA B rol. Don't create a new scene to do that. If you're doing that, you're making a bunch of unnecessary clicks. The better way is to simply select on the transcript the part where you want to add the media, then drag your video or image over your highlighted part and boom. That video is now covering that selection. You can also do this with descript's built in stock media. With your highlight made, simply click this add files in the menu that pops up, then video, then search to find something you like and click on it to add it. If you edit interviews with descript, this next tip is going to first of all make you mad because you're going to be upset at how much time you've wasted doing it the old way. But second, it's going to make you so happy at all the time you're going to save that you'll want to subscribe to this channel so you don't miss any More tips like this. Imagine needing to sign 50 documents. Instead of signing each one by hand, you use a stamp that replicates your exact signature in the exact same way every time. Copying and pasting size and position between scenes is like using that stamp. Instant consistent and saves you from having to do the same thing repeatedly. Here's an interview where I have three views. Speaker A, speaker B and a side by side view. Now, I could go through my project and recreate these three views manually every single time I need them. Or to pull out my rubber stamp. Here is to simply right click on the scene, select Copy Layout, go to the next scene where I want to apply that layout. Right click on the scene thumbnail and click Paste Layout. And this is going to paste all the size and position properties. It's going to paste any captions, any text layers, even transitions to bring everything together. This next tip is going to save you tons of time navigating through your project. Imagine you have a big textbook in front of you. There's tons of great information in there, but you just need to reference a few parts. So what do you do? Well, you make bookmarks of the key parts that you need to navigate to quickly. Instead of flipping through every page to find what you need, you've got these quick access points. Your personal table of contents that lets you jump right to any section you want. In descript, you can create markers. Markers are like your bookmarks. Once you've created them, it's like your own table of contents. You can quickly scroll to a specific moment in your project to create a marker. Type in the hashtag sign on your keyboard and then give your marker a label. Once you've made a marker, you can see all your markers here. You click on this button and there's the entire list of your markers. Simply click on one to navigate to that point in your project. But it gets even better. You can have underlord make markers for you. Come up to Underlord, click on Add Chapters, tell it how many chapters you want it to make, then hit submit. Here's what it came up with and click Add to script to apply them. And now check it out. We have a bunch of pre made markers in our project. You're now able to edit way faster than you could before this video. But there's still way more you can do to boost your efficiency. For example, do you know how to use these things right here? Come on. Do you really? That's what I thought. Check out this video next.