Confused by the Descript Redesign? Here's Your Solution
Learn Descript's redesigned interface through the View menu, layout modes, and timeline controls. Switch between storyboard and timeline views, create markers and split clips with the new Split button, and manage scenes with thumbnails, transitions, and trimming tools.
Questions this video answers
3 minutes and 27 seconds
Shift + 3 (hash/#)
5 seconds
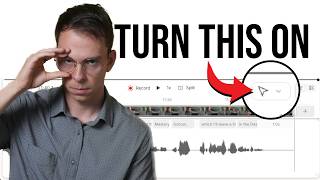
There's a new Descript user interface and I've gotten a lot of emails over the last few days of people confused about how to use it in this video. I'm going to break it down, so join me in descript. So the first thing is up here at the top you see this view button next to your settings menu. If you click on this, you can see that you have several different options here. The first one is script and so you can use this to hide the script, the transcript, of course. On the left side there, if we go back to view script, show script. Now it's back. So when you're hovering over that, you have different options. Like you can show edit boundaries, you can underline filler words, underline word errors. So those are going to be dotted blue lines that go under that particular word in the transcript. Below that you have the scene editor whether to hide that or show that. So I just hit it and now my preview of the video is gone. If I go back to view scene editor, I can bring it back. And also under that, under the scene editor, you can change the views. So this used to be a button in the top right corner. Now it's down here where it says side by side. So that's where your transcript is on one side and your video is on one side. Stacked. Where your transcript is below the video, the video's on top, transcripts below. Timeline is always on the bottom. Let's go back to view. And the next one is full screen video where just like it sounds, your video is going to take up the entire screen and that's going to give you the most detail to view your video when you're editing. Let's go back. I prefer the side by side view, so I'm going to keep it on that. And the last one is the snap. Two guides. This is going to be when you're moving elements around in the video. You have the red lines that'll snap things into the center of your video, either vertically or horizontally. Next is your timeline. If you want to show your timeline. Currently it is not showing, it's just this bar on the bottom. I'm going to click show timeline and now it pops up and we're going to talk about all the changes here in a moment. You also have things like you can change the zoom in and zoom out. You can set it to 100% fit in view, fit current scene. So all those different ways to make the view bigger or smaller. Now you also have something called a storyboard view. And this is my Video that I'm showing you right now has five scenes in it. So in what they're calling the storyboard view, you can see all five of my scenes right here. This is similar to what used to be on the left side over on the left side of the transcript. And then I'm going to go back to the timeline view panels. These are the same thing as the buttons on the right side. So you have a project button. Scene properties. I currently have layer properties open, but I can also switch over to Elements, Stock Media, or Comments from here. So, for example, if I click on Project now, I have the project tab open on the right side back to view. The next thing you can do here is change the theme. So I'm currently in light mode. I have a little check mark next to it, but I can switch it over to dark mode by just clicking on it and it's going to reload the project. And now I'm in dark mode. Back to theme. I like to leave it on light mode since I do tutorials and most people are in light mode. So that's what I prefer to use. But it's purely aesthetic. It's having that black background or the white background. And then the very last thing you can do in here is show volume in decibels. Okay, so that's it for that view tab at the top. Now we're going to go down to the actual timeline. So first of all, if the timeline is already closed, another way to open it is to click on this button right here that says resize timeline. You click on it and it pops open your timeline. And then you can also grab that little. That little button and make it bigger to make the timeline see more detail on your timeline. Or you can make it smaller all the way to. If you drag it all the way down, it'll collapse the timeline until it's flat again. But I'm gonna leave it open. The first thing you have here is a previous scene button. So if you click that, it'll go one scene to the left, one scene closer to the beginning of your video, all the way until it touches the very beginning. Or if I click the right button, that'll jump one scene forward at a time all the way until it hits the very end of your project. Next to that is a jump to marker. So if I click on that, you have a beginning of composition marker where it'll jump you all the way to the beginning of your project, or end of composition, where it'll jump you all the way to the end of your Composition. And let me just go to a different composition here real quick. This one has a marker in it. So if I click on the marker button, there's a sample marker which is timestamped and when I click on it, it jumps me to that spot in the video. Next to that we have the time stamps. So this 25 is the current position of my playhead in the video. So where this blue line is, I'm at 25 seconds out of. This is a 3 minute and 27 second video. Moving on, we have a record button if you want to learn more about that. Check out the Record video. My tutorial about using the recording feature in the top right corner of your screen on YouTube. Next to that is a play button. So if I click on the play button, it's going to start playing from this blue line right here. Again, that's called the play bar. So if I click on that, click on that, click remove and it starts playing my video. Next to that is your playback speed. This is. This doesn't change the speed of your video when you actually save this video or export it to YouTube. This is only how it plays back inside of the editor inside of descript. So 1x is going to be normal speed. Anything below 1x is going to be slower, slow motion. Anything above is going to be faster. And now here's something that is brand new with the timeline, this split button. So again, paying attention to where my playhead is, the blue line right there, if I click the split button, it splits my video at that moment in time. So you can see that there's this new little black shape that's been created and it's taken what was one whole clip and it's split it in half right at the point where I told it to. Next to that you can zoom in and out. So it's currently at 50%. I can click this little minus button to zoom out, although I'm always the way zoomed out as it is. But I can click the plus button to zoom in. Now I'm at 75%. Now I'm at 100% and so on. There's also a fit in view which if you click it, it's going to fit it so that the whole project fits into my current view. And next to that, you won't see this button if you haven't turned it on. So let me show you what I mean. If you come up to the settings, you click settings right here where it says show advanced Timeline Tools. If you don't have this toggled on, you won't see that setting. I turn it on because there's a lot of useful stuff in there. So because mine is toggled on, I can see these settings and you have your Select Tool, the hand tool, the blade tool, the range tool, and the Slip tool. I won't go into all those in this video, but if you want to see my video diving deep into each of those, click on the video in the top right corner of your screen next to that. With this toggled on, we are in the timeline view. That's the current view. But if I click over here, that's the storyboard view that we saw before. A few minutes ago when I clicked on the View Timeline and then I changed it to storyboard view right there. But let's go back to the timeline view and I'm going to point out a couple more things in here. So right there, that little purple thing, that is the marker I created. So you now have a visual, another visual cue of where you've created markers. So that's pretty cool. If I move my playhead right here, for example, and I hit a hashtag on my keyboard, Shift3 on a US keyboard, and I create a blank marker like so there is a new purple marker and if I click on it, it scrolls me to that part in the video. If I scroll all the way to the beginning of the video, notice there is a big plus button that allows me to quickly add a new scene at the very beginning of the project. So I can click on that and it adds a blank 5 second scene at the very beginning of my project where I can drop in an intro, for example, and if I scroll all the way to the end, there is the same thing at the very end there's a big plus button and I can add a blank new scene at the very end. It also pops up layout pack options. So if I want to drop a layout into that newly created scene, I can easily do that. And if I scroll somewhere where I've already got a scene, I can insert a scene between existing scenes. So with that plus button right there that says insert scene, I can click on that and it inserts a by default 5 second blank scene. Now the other thing to point out is every scene has a little thumbnail on the transcript. So what used to be slashes on the transcript is now these little scene thumbnails and they work the same as scene the scene rail did on the left side before. What I mean by that is if you right click on this scene thumbnail on the transcript, you can merge it with the scene before or after it. You can change the layout. You can copy the layout and paste the layout, or you can delete that scene boundary altogether, which is going to effectively merge it with. With the scene before it to create a new scene. It works the same as before. You can click somewhere in your transcript or in your timeline, move your playhead somewhere and hit a forward slash. And that creates a new scene right where your playhead is selected. Also, wherever you have a scene marker, like where my mouse is right now, you can click on this little, this little black circle with the hourglass in it. You click on that and you can add a transition right at that moment, right at that split between scenes. And so right now there's a smart transition on. And if I want to remove it, I can simply click this trash can button at the bottom. And now there's no transition between these two scenes. If you want to trim the scene, you want to change where it begins or ends, you can find that scene split. So right there, and you get that bracket, your cursor turns into a bracket. And if it's open to the right, it's going to be affecting the scene on the right. So I can click and slide to the right to do a trim or same thing on the left, I can slide to the left and that's going to trim that side. Or if I slide to the right, it's going to restore anything that was cut out of that scene. And then from there, things pretty much work the same as before in terms of adding layers, any additional layers. Like if I add, for example, a shape, I just click on it to add it. It adds it as a new layer above my script layer, like so. And I can trim that layer, I can delete it, I can reposition it. All the stuff you could do before works the same way in the new timeline. It just looks a little bit different as well, as you can still grab words down on the timeline and drag them to cut, or you can drag them to the right to add a gap clip. And then same thing up above, you can grab with the bracket up top and drag it to trim or drag to the right to restore. So I know this was a lot of information. And if you want to go deeper on anything, check out my other videos on this channel or check out the Descript Mastery School, which I'll leave a link to in the description.








