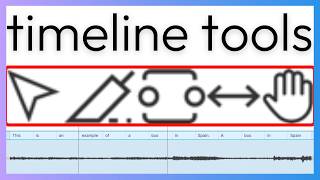
A short Descript tutorial demonstrating the five Timeline tools (Select, Blade, Range, Slip, Hand). The presenter explains each tool’s function, shows live interactions in the timeline (moving clips, trimming, splitting, selecting ranges, changing range volume/speed, slipping source footage) and gives keyboard hotkeys for quick access.
Have you ever wondered what these are? These are called your Timeline tools and they're extremely useful in descript. In this video, I'm going to show you what each one does. All five of these tools are found right here at the top right of your timeline. By default you have the select tool selected. This is the first one that looks like a cursor. And if you've never even played with these before, this is what you've always used up until now. The select tool allows you to select clips anywhere on your timeline. Actually, let me click on this one and I can move it around so I can drag it left and right. I can drag on something here, move it left or right. I can grab the ends of clips and you see my mouse just turned into a bracket and I can drag things to extend it or drag to the right to in this case make it smaller. I can also move things between. For example, I can take this clip and I can move it into the Script layer. If I move it down where it turns purple like that, then it moves it into the script layer and vice versa. I can drag things off of the script and put it up as a supporting layer. The select tool. If you don't want to click on it, you can press A on your keyboard and that will pull up the select tool. The one next to it is called the Blade Tool. Hotkey is B. So you can click on it or click B and that'll move you into the Blade tool. Now when I'm down in my timeline, you can see my cursor turn into this razor blade looking thing and it's red when I'm not hovering over a clip. When I am hovering over a clip, it turns black. And then I have those little V shaped things above and below it and that is the point where it's going to make a cut. So if I click somewhere, it split that into two separate clips. So now everything to the right of that is separate from everything to the left. If I change the properties of everything to the right, it's going to be different than the properties to the left. You can split things on the script. You can split sound layers, you can split any layer you want with the Blade Tool. The next one is the Range Tool. The Range tool is Hotkey R. Or you can click on this and this allows you to select a specific range of a clip. So if I come down to my script, I can select by clicking and dragging and you can see as I drag it, highlights it in blue and a little number appears in the top Left Corner right now 1.432. That's how long in seconds this particular range is. And with it selected I can go into the layer properties on the right side. I could adjust the volume, for example, of just this particular range. I could do like negative 5 or, or I could click mute and notice it muted only that range. It didn't mute anything else. I can also change the speed so I could say 2x and it just made that tiny little selection. So now it's gonna play at 2x. I could also delete just what I have selected there. So let me just click down there again, select and hit delete. And it deleted just that range. So a lot of different things you can do with the Range tool. Next is the Slip tool. This is Hotkey Y and it looks like two arrows facing outboard. So right here, notice this clip that I have selected in blue. This plays from 49 seconds on my timeline to 52 seconds. So it's a four second clip. But notice when I hover my mouse over it with the Slip tool on that, it says 27 on the left side and 30 on the right side. That is telling me that within this four second clip it's going to play that portion of this video. So this video is actually much longer. This video is 40 seconds or something. But I'm only going to play four seconds in this video. So slip allows me to slide through what portion of that video is going to play. So if I click and I drag to the right, you can see those numbers changing. So now it goes from 21 to 24. That means that that clip is gonna play the section of this video from 21 seconds to 24 seconds without changing the length of that clip. So I can click and slide through, I can slide left, I can slide right, and it, it changes what plays without changing the length of that clip. Our last tool in the Timeline Tools arsenal is the hand tool. And you can come into the hand tool with the hotkey H. And the hand tool is purely navigational. It doesn't let you click on or change any of the layers. It only lets you click drag and slide left and right horizontally on your timeline. So it's purely navigational. So again for review, the hotkeys are A for select tool, B for blade, R is range, Y for Slip, and H for the hand tool.