Descript Video Editing Q&A
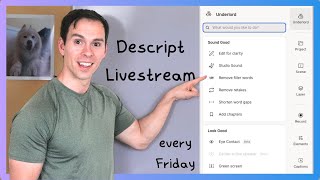
A live-streamed tutorial/Q&A about using Descript for video editing, focusing on creating and applying templates, sequences, scenes, AI features (Underlord), clips/highlight reels, studio sound settings, and publishing workflows. The host announces this will be the final public livestream and explains membership/mastermind plans, shares template examples (zoom effects, intros, social-safe zones, audiograms), and demonstrates template behaviors and limitations.
Okay, we're live. Sorry I'm a couple minutes late. I was having some technical difficulties there. But let me know if at any point you can't hear me or see me. Well, so the first thing I wanted to announce is that I have a new thing I'm going to try, which is a mastermind for people who are creating content and to participate in it. Let me back up a second. This is going to be the last public livestream that I do. So I've been doing these every Friday. This is going to be the last public one from here on out. Starting next Friday, it's going to be for members of the channel, which I see we already have one member in the chat. So thank you for joining, David. Appreciate that. And so you'll have to be a member to have access to this. And at any tier you can join. If you're at the highest tier, which is currently $25 a month, then I'll give you access to the course and you get access to the. This community as well. And. And then I'm gonna do this. This mastermind, I'm calling it. And the idea is we'll just meet up, we'll talk about what people are working on, see who's working on YouTube, who's building courses, who's doing stuff for their business, and then we'll just give each other feedback. And maybe you'll form some connections, like there will be some synergy. Maybe you're in the same town, maybe you're working on the same types of projects. You can meet people. And so we'll do breakouts. Zoom. Breakouts, where you can talk to people. And yeah, it's gonna be the first one, so it's gonna be kind of learning as we go, and then hopefully it develops into a vibrant community. But along that note, I'm gonna start doing a lot more in here, which is the Descript Mastery community on descriptmastery. Com. And so I'll post resources in here. I'm gonna hopefully have a lot more. Oh, hey, Sarah. And it was Sarah in the chat. It was her idea. So thank you. I'm just sharing the. The mastermind and. Yeah, that's the gist of it. And then the. To get access to these live streams, like I said, you can join the. The channel here. There should be a join button right now on the live stream where you can. Oops. My. My YouTube looks like it's frozen. Let me know if it is. There's just a spinning circle on my screen. But anyways, yeah, if you Join at any, any tier. Then you can continue to have access to these live streams and I'll probably, I don't know how I'm gonna do it if it's gonna be every Friday still or if I'll do like a half an hour on Monday, half an hour on Friday. It's just depends on you, the subscribers. I wanna make it useful for you. And I'm also gonna start releasing videos earlier for members so like a day or two or three early for members and then before it gets released to the the public feed. So let me know if any questions or feedback on that. Otherwise we can jump in and talk about descript. So as always, let me know in the chat if you have any questions and we can talk about those as we go or I'll just make up stuff. I usually end up talking about templates because that's what everyone wants to talk about. But if you have specific things, let me know and we can talk about that. Can also talk about YouTube, can talk about Canva, whatever you want. So the easiest way to make templates, I'll just start talking about templates. And the easiest way to make a template is let me just open up a project and I'm on the web version. By the way, I've been using the web version almost exclusively lately. I used to always recommend the desktop app but that's changed as they add more features to the web version where it's in my opinion for at least for my computer, my Internet connection, all that kind of stuff. Everyone's results will vary and so I always recommend try both. But yeah, the web is on par with the desktop version now, so it's great. So inside of my project, let's say that one of these scenes I have, you can see my scenes on the left side. I currently have seen four selected. If I want to turn that into a thumb area template, I can right click on it and I can say okay, I heard in the chat that my, my Internet might be having problems. Yeah, I am seeing that as well. The, the circle just spinning in place. Let's see. And there's quite a bit of a delay too. Let's see here. Let me turn down the quality of the stream, see if that helps. Stream LATENCY low It seems to be working now. Let me know if it's not. I don't know if you're still seeing it choppy. So yeah, with one of any scene that you want to turn into a template you can right click on it and then come down to where it says Save to template, click on that. And then these are like folders of templates that I have. But if you've never made a template before, you can hit Create new template. You can call it templates, whatever, project templates, and then give it a access level. So either private, meaning only you can access it. You share with drive, meaning if you have any editors, then they can share it too. They can use it and share publicly, which will just generate a link that you can share with the Internet and then anyone can download it to their their descript drive. And then once I hit create, it asked me to label it again. So the first one was creating like a folder where I can have as many templates as I want, and then the second one is the actual template. So I'm going to call this just Test, Test template, whatever, and I'll hit add. It says adding layout to template right there and it's taking a second to load. While it's loading, I'm just going to go to my template section to show you the other way to make it. So over here from the drive view, on the left side, there's this one that says templates. And here you have your drive, which I mentioned is when you can share it with other editors or private, which is when just you have it, only you can access that template. And so the one I just saved, I called it test template, I think what did I. Templates, just this one. So if I click on it, there it is. There's my scene that I saved as a template and I could edit it, I could change it from here. So I could, for example, delete one of these layers. And the way that templates work, by the way, is. Okay, question in the chat is what is the template for? Yeah, so that's right. What is about to explain is like this script layer, it saved the scene from my project, but this script layer is. If I applied this template to another scene in another project, that script layer would get replaced with the script layer that I'm applying it to, but these layers would get added. So this one, there's a screenshot behind me and then there's an arrow animation. So the template is a package containing those layers. And it's just a way to like quickly add those layers every time without having to like. And those layers have animations, so those animations would be saved. And so the, the main use case, one of the most common use cases I see is a YouTube intro. You have a standard title that comes up. Maybe it's like your logo, your brand, and the name of the episode or something like that. So you could put all that into a template and then you don't have to make it every single time. You just click on Apply template and it's going to be all in. In your project just like that. And you can do a lot of other stuff with templates. So like this template, because I'm. I have green screen applied in this template and it's like, so it removed my background and then I put a screen behind me. If I applied this to another project, like, let me just find one, then that's exactly what it'll do to that other project. Or if I let me go to the same project but just apply it to another scene. Because there's. Templates are just. They're. They're so hard to teach because they're just. There's so much nuance to them and so many variables. So let me see here. There's scene three. It won't work on that scene because with templates, it has to be the same type of. You have to. For it to work, it has to be the same type of file that you apply it to as the template is itself. So what, what I mean by that is in this case of the template I made, it was a screen recording, I think. Let me check. Let me verify that. Yeah, so the fact that I can do edit sequence, I have a video layer and I have a computer audio layer and screen. So it's my computer screen and then a layer of just me. And so that template is made for a sequence with two layers. So if I try to apply it to a sequence with three layers or a non sequence, then it's going to not work. And sequences are more advanced too. So if you don't know what sequences are yet, don't worry about it. But they're extremely important for podcasts. And you can check out my videos on sequences on this channel. Okay, so that was a very brief and abstract rundown, but. Well, let me talk about more templates because you're asking just what are they for? So I'll show you some that I have. And like, okay, so templates. The one I just made that, that bottom one, the next one that says zoom pack, this is. Let me open it up and I can show you. So these are different types of zoom, and if I click on this drop down here, all these different compositions, these are all the different templates, and they're all applying different types of zooms, different amounts of zooms to different types of videos. So this top one is just called Zoom Landscape. It's a landscape video. And here's what it does if I play it. So just zoomed in a little bit, just 10 to 15%. And so you see it like just cuts his head a little bit off the top and just like that. And so the idea is you could take this template and this is available on my website. You can download. This is one of my many downloadable templates. You can apply it to your script layer and then it would add that zoom and it just saves you a couple seconds of having to apply it yourself, basically. But that's the simplest one. The other one, there's a zoom portrait which is the same thing, just a small zoom. But in portrait mode there is this one is for a webcam. So I'll show you what happens on this one from webcam in the corner to full screen. So it takes me or whoever, whatever scene you apply this to, it takes a webcam in the bottom left corner and then makes it full screen. And then let's see what else I have here. This one go from full size to circle. So that one takes a full size webcam and then animates it down into a circle in the bottom left corner. And some of these interview ones are kind of fun. And actually this brings up a good. Another thing to talk about. Descript just this week added a Ken Burns effect, which is kind of what these are. These are. Ken Burns effect is very slow. It's basically adding an animation to a still image so that it looks like it's moving. So, so what I mean is if you have a picture of like a. A mountain, a scenery of mountains, you could add a slow zoom in and pan. So it just adds a little bit of motion. So it's just. It's not so boring as just looking at a static image. So that's kind of what this template does. Where the use case here obviously would be is if you had two people doing a podcast, they're sitting side by side at the same table or on the same couch. And then this is what happens if I play zooms in on the left speaker. So and these are, these are labeled just very explicitly, interview, zoom in left. And then the next one, interview, zoom out left, is already zoomed in on the left speaker. So when you apply this, it would zoom in on that left speaker. And then when I play zooms out. So it zooms out to the full view where you can see both speakers. And then I have one that is, there's zoom in right, zoom out right. So the inverse of the two I just showed you. And then here's one that's panned left to right. So if you're already zoomed in on speaker A, then when you apply this template, it pans over, it pans across the video to speaker B, and then there's the opposite of that pan right to left. So that is how those work. The next ones I can show you. And again, feel free to interrupt me at any time with questions. And these, these templates, if you want to download them yourself, are on my website, descriptmastery.com/free templates. So you can just go to descriptmastery.com freetemplates and you put in your email address and then all the links get sent to your. Your email. And I just updated the email last night so that it has a lot more information. Because before it was just links to the, the templates, I added a bunch to it where it actually explains with screenshots how to apply those templates. And, and then this is the first time I've ever talked about how to use each specific one. So if you've downloaded them before, this will probably be useful for you. This Other one's a YouTube like and subscribe button. And as soon as it loads here, it's a little slow and I'm running the live stream and everything, so I don't know if you can hear it through the, the live stream, but it's got a little popping noise as the animation occurs. The little subscribe and like button. And then there's the same thing, but on the bottom right corner instead of the left corner. And there's just a bunch of different variations here. So there's a square one instead of landscape, there's portrait. This one is just from a GIF. So it's not even a YouTube or descript custom template as much as it was just a GIF layer applied. And yeah, you could take these and apply it to your projects. So in the chat, someone is asking how the episode was recorded. That last one was just B roll. Just descripts B roll. That wasn't a real or it wasn't an episode I recorded anyways, if that's what you're asking. And do you. Are you asking about the camera or something else about. About it? Because it looks like it's just, it's just one camera and just one video layer. And the idea is it's just a placeholder for you to then apply this to your own project. And it wouldn't work on a sequence because it's just a single video layer. So obviously this wouldn't work with like a squad cast recording or a zoom recording, but if you have two people in the same room, that's when you could use this. And okay, the other one that a lot of people use is the Zoom intros or YouTube intros rather. And if you want to point one other thing out here, this thing that says YouTube intros, this is like when you're editing a project that's like the project name YouTube Intro. And then inside of the projects is all these different compositions. And so I have different like sort of themes here. So there's one that just says waterfall and it's just a B roll of a waterfall and it's got music and it's got the title layer, which is if you applied this to your own videos, you would then type in your own video topic there and change the font, change the color, that kind of stuff. So these are pretty much all the same, just different themes. Yeah, that video. Yeah, yeah, yeah. I'm sure it was a studio, professional studio recording. A lot of that stock footage comes from studios, you know, pro, pro videographers, pro photographers and. Oops, sorry, I just showed that one. YouTube intros. Hang on, let me go back. And what else do we have here? Titles, title, B roll. The idea with this, and all of these scenes work or templates work on a scene by scene basis. So it's important to understand what scenes are and how they work. And so for something like this, the title B roll, the way that this would work is you would need to create a blank scene probably between, probably in a moment where you're, you're changing topics. So you're talking about topic A and now you're introducing topic B. You could create a blank scene, pop this B roll in there and then just type in whatever your topic B is. And then that would be your, your transition slide, for lack of a better word. So if I hit play, it's got that motion where it's like, it looks like you're flying through the stars and it's kind of cool. And then same thing with all these other ones. There's, there's one that's just in a field, a sports stadium. There's different countries, different environments, desert camels, all this kind of stuff. And let's put. If anyone wants to interrupt me, do it. Oh, here's social media safe zone. So if you have something that you're applying to, mostly for shorts and TikToks, then a common mistake that people make is they'll make their captions too wide. And so then the words of the captions will be behind the like and subscribe buttons and all that stuff that's over here on the right side. Or it'll be too low and then it'll be behind that other set of buttons in the description and the all that metadata that goes along the bottom right side. So the idea with the social media safe zone is you overlay this template and it's transparent. So you pop it on whatever you're creating and you'll see if any important elements of your video overlap with, in this case, the purple border. And then you know that you need to make things smaller to be safe. And this is based off of the like pixels of a TikTok and YouTube short. It works for both for portrait mode and then there's, there's one for landscape as well, which isn't quite as useful, but it's the same principle. This is meant for YouTube where, where the bottom would be your play bar controls. So you just want to make sure that your captions and anything important is out of that boundary, that margin there. Okay, that's the social media safe zone. The lower thirds. Let me see what this one was. Some of these might just be adaptations of. Oh yeah, that's nothing. The other thing you can do is with all templates is just use them as starting points. That's what I recommend in fact is like for example, if I go back to this one and just open this, okay, I'm going to make a duplicate of this so I don't mess up this original one here. Hit these three dots, duplicate and super, super slow. Sorry. Okay, so now my copy. And, and now I was mentioning that templates are on a scene by scene basis. So if I select a scene and let's say scene one and then I go to scene on the right side. This is where you find your templates. To apply them, you hit browse templates. And this is. That's interesting. It opened that. I guess that's because I saved it. Normally it defaults to open on the gallery, which is descripts. Built in templates, they're pre made templates. And so what I was gonna point out with this is you can apply one that you like and then change it. So if I go through here and again these are all folders, the first click is to open the folder. So this one's called Audiograms. If I click on it, it takes me into the folder of templates called audiogram and almost all of These if I applied it, notice how that one is vertical mode. When my video is in landscape mode, I would still be able to apply it, but it would change my project to vertical. And then same thing with these next four. Those are all square. So the only one I can apply here without changing my aspect ratio is this bottom one. So if I click on that applying layout and let's see what it'll do here. It kept my video, but it overlaid the layers, which the layers are. We have a progress bar. We have the waveform which is that bouncy paint splotch looking thing that moves in time with the sound. We have a title layer that is the one that just says go ahead and open up. And my music was already in there. So that that scene or that template that I added was these three layers essentially. And if I was adding this to a blank scene. And you can create a blank scene by putting a forward slash, two forward slashes in a row. So for example, open up my transcript here so you can see a little better. So I have this forward slash right at the beginning that marks scene number one, the very beginning of my project. If I put another forward slash right in front of it. And it's super slow. It's never normally this slow. There it is. So that created a blank scene. And blank scenes are five seconds by default. So if I open up my timeline again, I'll see my blank scene and it won't have any layers. It has a black background by default. It's blank. There's nothing there. And so this is a prime candidate for adding one of those title scenes or the audio form. The audiogram won't work because there's no script to go off of the sound waves to move the the shape. But let me go back and find a title. If I scroll all the way down to the bottom, this one here, that says slides. If I click on that opens up the slide one. And I like this one a lot. I've shown it before on the, the weekly calls here. So if I apply this to my blank scene, I just click on it and that's going to apply it and add those layers. You can see it already has a black background. So it's not adding. These other ones are adding colors. They're adding like images in some cases. But this particular one is just opening, putting white text on a black background. Okay, so now that's at oops and I'm seeing the spinning wheel on YouTube again. Hopefully I'm still going here. Let me just close some stuff on my computer to rule that out as slowing things down. Hopefully. Hopefully not that. Okay. And it looks like it's back. So if I click into this template that I just added or I make my timeline a little bigger. So look at all these layers it added. So that One template had 1, 2, 3, 4, 5 layers, all text layers. And they all have just Lorem Ipsum placeholder text in there. But each one of those has a animation associated with the text. So it's, it's. The text is going to pop up and it's got a certain font style associated with it. So where I'm going with all that is you could apply this somewhere. You could change those numbers to your own or change that number, number one rather, and then change the text to your own. And there's just a pop up on my community. I don't know how that happened. Maybe it was a delay from the. From that. Anyways, sorry, the. Yeah, you can apply this, make it your own, change the background color, apply your own logo, whatever you want. And then that's how you can do it. Then you can add your own, like exit transition. Go ahead and open up Descript on your computer and meet me. And you can see that blue thing, that blue blob? That was the audiogram that we previously added. Okay, let me take a look at what else we have here to give you ideas. A lot of these. Like if you see two people in it, that's going to apply to a sequence with two speakers, or in the case of this, three speakers or three speakers plus B roll. So to apply this and have it work, you would have to have four tracks for it to apply to all, all the different layers. And so if I apply it. Let me just do that real quick. Oh, and this brings up another important point. I tried to apply it and I'd already applied a layer there. So I got a failed sign, a failed message. Um, it usually doesn't even give a failed message. It just overrides the previously applied template. So I now moved into scene three, where I don't have a template yet. And I'm going to apply this one just to show you how it won't work because it has. It relies upon three speakers. It's going to do something because I have two tracks in there. So it's going to put two of my two tracks into its layout. There's going to be some blank spaces. So there we go. Oh, and it's actually got placeholder B roll. So that, that did come along, but you can see these Two empty slots where speaker B and C would go empty. And then that top one is. I think that's my screen. It's too small to even see, but let me see. Yeah, that was my screen recording. So that filled in the place of speaker A in this particular template. And then speaker B and speaker C are empty. What I want to show you is on the timeline, there's these layers that just say placeholder. That's because it was looking for those other speakers. They didn't exist. So it adds just blank layers called placeholder. Okay, I know that's a lot. And if, if, if you're completely new to templates, it's, it's probably all nonsense, but at least hopefully you have an idea of how they work. Like what you can do with templates, why they're useful, that type of thing. So the other thing that is really useful, that's kind of like a template within a project is you can click on. What I mean by that is actual templates are between projects. You can reuse them in. I can leave this project, I can go to another one and I can apply the same template and it's going to have the same functionality, but within a single project. I can hit copy layout. So I right clicked on a scene and said copy layout. And then I can go to another scene. Let's go to scene five. I can right click again and I can say, oops, hang on. Paste layout. And it's gonna take all the properties from the scene. I copied all the properties of all the layers and paste it into scene number five in this case. So you see that, and this works best for interviews. Like you have two people and then you can have a layout for speaker, a layout for speaker B, and then a third layout that shows them side by side, something like that. And then. So the point is, you can then chop your project up into scenes or have descripts automatic multicam do that. But then on certain places, if you need to manually override it, like you want to show both speakers reacting, you can do paste layout and it'll put them into that side by side view. And yeah, it's, it's really fast and easy. Okay, templates. Any other questions? I've just been showing my own homemade templates as well as descripts. Yeah, the crazy thing is that I used to always recommend you make templates that do just one thing and then you stack them. But that's no longer an option because as of I don't know how many updates ago, if you apply a template and then you apply another one, and this later applied one overrides the previously applied one. And you just can't stack them anymore. So if you've seen my old videos, my. My recommendation is unfortunately out of date on that. And so now you do have to create templates that do a lot more than one thing. And templates can be broadly two different types of two, two categories. You can have a template that changes the size and position of something. So every single layer, every single element in descript has. If you go to layer, there's this size and position. And so you can see this template. It. It put it in this part of the screen 15. That's the x and y coordinates. 1574. It put it at 209 on the y coordinate and then this particular height and width in pixels. And then it rounded the corners. You can see. Let me click away so you can see a little better. It's got those soft corners. That is that thing right there. They added 80 to it. So all of that information, all of that size and property, size and position properties were included in the template. And so that's something you can do. And. Okay, so I was explaining. That's type one. That's a. That's. The first is a size and position template. The second one is a template that adds layers, which this one also does. So this one added these rectangles, 1, 2, 3, 4 rectangles. It added B roll, it added placeholders, image. So it added like 10 different layers and change the size and property. So it's. This template does a lot. It's a pretty complicated template, but you can have templates that do just one or the other. Like a template that just adds your intro music or just adds your logo as a watermark in the corner. So all sorts of things like that that you can do with templates. Oh, and another cool thing is if you go to underlord and you scroll to create clips, these are templates, these things that says layouts and descript is inconsistent with where they use layout and where they use template. Like you can see, it says layout. And then right here it says browse templates. So I heard the CEO talking recently, and he was saying the big focus for the company is on improving the template experience. So this is all gonna get fixed and streamlined and made a lot easier soon. But for now, you have a mix of them using the word layout and template, but they're the same thing. And so these, these little boxes below it are, as you can see, they have like, different styles of caption if I scroll over, there's ones where it has like two people, it has three people where one person's big and then two are side by side on the bottom. So that is what would get applied to my project when it makes this into a clip. So this is, this particular feature is going to find seven clips of around 40 seconds, some longer, some shorter, but you can give it a benchmark to go for. And then it's going to put it into this template. Now if you've made your own template, you could browse templates, you could find your own template and then put that those clips that it finds into that template. And then so where I was going with all that is that the templates are really useful for making clips as well. Using the AI feature here. And then you can give it a prompt. So my prompt that I gave it was attention grabbing with stories or facts that make sense on their own without context should also peak interest and get people to want to watch the full episode. And I can go ahead and run it just to show you, I just hit submit. Underlord is thinking and underlord, I get this question all the time. Underlord is chat GPT. So it's only going off of the text. It cannot hear your voice, it can't hear your intonation. I just today found out that it can recognize speakers. So what I mean by that, again, not off of the voice, but off of the speaker labeling. So if you say I have a guest named Bob, find all of the times that Bob told a funny story and then it could pull out, it would know when Bob is speaking versus when Ross is speaking and it'll just search through Bob stories. So these are the ones that came up with it gives it a little title. And if you click on it, it took takes me into that clip that it made. This one is 39 seconds. So just shy of that, the 40 seconds that I told it and again that that particular template that I told it to use didn't work because I only had two layers. But you can see it put my screen recording into one box, it put me into the top. And then there's just gonna be a placeholder layer where it's looking for a third one. But if I look on the transcript, you can see this part that's ignored. So when it finds these clips, it, it always grabs like a couple. In this case just one sentence, but sometimes like an entire paragraph before the part that it identified as your clip. And that's just to like give a little more context. So if you Wanted to bring that back. You could like hover over it and then click on this restore button and that puts it back into your clip. If that was like an important sentence that made the whole thing make more sense, then I could do that. But I'm just gonna hit undo command Z and that brings it strikes it out again and then same thing at the bottom where it just like gives you the opportunity to like see the last paragraph. So right now, because it's stricken out, it's not in my video. But as soon as I click that restore button, now it is back in my video. And then. Yeah, so this, that title is AI Generated Understanding Video Slides. Scenes are like PowerPoint slides. And this is interesting to point out the back to the summaries on the right side of each of these clips. This top one, if you see this little thing that says 5.0, that is telling you that the AI has determined that's a five star clip, that is the highest probability according to it of being a good clip. And then. And they go in order. So that's the best one it made. The second best assigned a 3.4 to the one I picked is a 3.3. So let's check out the five star one. Let's see how this looks. With editing. It's all about making change. If you like it, keep it down. Actually yeah, that without reading the whole thing, that, that sounds like it could be a good clip. I might look at that to actually publish that. And then you can change the layout right here. If you click on that, it opens up your template browsing window again. And then from here should look familiar by now you can do descripts built in ones. You can go back, you can do private or drive. Let me use one of descripts again though. This time I'm just gonna do it for one person because it's just me. And let's do this one. So I just click on it and it applies it. And another thing that confuses people when they apply these descript templates is if I go to scene, scroll down. This layers box is all of the layers in my project. And it always adds this descript logo, which is kind of annoying. But you can just delete it. Just select it and delete it back to scene. Under my layers, the thing that throws people off is this layer right here that's gradient. So if you see it's. It's kind of hard to notice, but the bottom part of my video is like black. It's like that gradient. It's like Looks smoky. If I hide that, you'll see the difference. There's with it off. So now you can see my shirt bottom part of my neck. So it automatically adds that gradient as part of the template, which I may or may not want. And the problem, the reason I'm bringing this up is if you're not aware of that and you're trying to, like, move yourself around, look what happens if I. If I assume that my video layer is the top layer, I try to move it around. Well, I'm actually moving the gradient layer around and not myself. So I've seen that confuse people. Let me delete that. Let me just move myself up. I'm going to put myself up and then I'm going to move that gradient back down. That's a little harsh. Maybe I'll do. I select myself again. So the. The way without moving the gradient, I can select this part that says track one and then that'll select just my track behind that gradient so that I can. I can move it independently. So I now have it selected and then I could. I could adjust it on the canvas or I could go to the size and position, which I sometimes like to do, and I could just type in a bigger number there and that'll make my video bigger. So let's try 5,000 and that's pretty good. I'll do that. That gradient looks a lot smoother. Like it fades to black without looking so abrupt. And then actually let me select it again and I'm going to move myself down by changing this Y property so I click and I can slide. Oops. And that's raising me. I gotta go the other way. So I'm just gonna move it so my hair is just touching the edge. I don't want it to get cut off quite so. There we go. Now my face is a lot bigger and it looks a lot better. Like a short. And then I'm gonna go back one more time. I'm gonna move my captions right now. My captions are like on my chin, but I'm gonna move that down. Oops. And see, I just did it. I grabbed the gradient and I slid the gradient down rather than grabbing my. The captions layer that I was trying to adjust. So let me go back to scenes caption and then I'm going to adjust it here just so I don't make that same mistake. And sliding it down and you can see it's. It's getting covered up by that gradient. Like it's kind of hard to see it's behind that. That foggy gradient. So back to this layers section. I can change the layer order. I can put that caption on top of the gradient by clicking it and dragging it up. And now you can see that much clearer because it's on top of the gradient. It's not getting fogged up. Another thing I can do is if I hover over the gradient layer or any layer, there's this little lock symbol. And if I lock the layer, I can now no longer select it here. And so if I select it, I'm actually just selecting my layer, even though it is behind the gradient, the gradient is locked. Um, so yeah, this is looking much better. You might actually see me publish this in some form later. Question in the chat. How do I select my YouTube shorts thumbnail in descript and have YouTube recognize it? So YouTube or descript has a YouTube thumbnail thing, which I think is maybe what you're referring to. Where, if. So let me back up. If you go to publish, you Change this to YouTube, your publish destination right here, you can set a thumbnail. In my experience, it doesn't work, so I don't use it. In theory, what. How this should work is you could scrub through and you could find a particular frame of your video and select that and say use frame and that becomes your thumbnail. In theory, again. So when you publish this to YouTube, that would be what shows up. Or you can upload, you can browse through your computer and find any custom made. Maybe it's something you've downloaded off of Canva and make that your thumbnail. But that doesn't work. As I said, the. Until recently, there was no way to set a thumbnail for shorts. As of a few weeks ago, I saw an announcement that if you have the Android app for YouTube, you can set your thumbnail. If you're in the studio, YouTube studio on your browser, you cannot set your thumbnail. It just says setting short thumbnails isn't an option or something like that. And yeah, so the short answer is you can't. But the other workaround is that. Let me show you in Cap Cut real quick, a really cool thing that Cap Cut does. And sorry, I know this is a Descript live stream, but this will at least give you an idea of something that's available to you with Cap Cut. Let me go back to another. I don't think I have any. Let me just add. I'm just gonna add a photo. Okay, so in capcut, there's this thing and the live stream's way behind. So I Can't tell if you can see it, but hopefully you can. There's this thing that says cover and if you click on takes you to like a Canva like page where you can design your own thumbnail. And it's in this case it's using the one piece of media I gave it, which is this photo. But you can use templates and if you've used Canva, this looks super familiar to you. You have an upload button, text button and then you can add this straight to your video like so and save it and in a second here, super slow. Well, okay, I'm not gonna wait for that to load. The gist of it is it Canva or Cap cut has this built in thing and it puts whatever you assign as the COVID is their word for it. That'll be frame. One of your video and YouTube uses I think the first frame of your short as the thumbnail. So effectively you've created your thumbnail in that way. Okay, so, so what you could do in Descript is the same principle like just put a single frame, cover or thumbnail as your very first frame and. And then that could become your thumbnail and descript in YouTube. Now the other thing, the reason they don't allow you to set your thumbnail is well, they haven't prioritized that feature for some reason. But secondly, if you think about how people are finding it, they're on their phone, they're scrolling, they're, they're not looking at your title and thumbnail like they are with a long video. It's just gonna pop into their feed. So the only metric that matters is the retention on your short. Like how long are people watching it on average? Are they interacting with it? Are they watching it multiple times? Really good shorts people will replay it multiple times to catch everything. And so that's why thumbnails don't exist for, for shorts. Although they're starting to add it. Like I said, with the Android app you can do it. Okay, good question. Let me know if anything else. And what else about my. The stream is way behind. I can see. I was talking about the Cap Cut thumbnails. That was like three or four minutes ago in real time. Anyways, doesn't matter. I'll push on. Let me know if you have questions. So back to underlord. Let me just show a few things here. That was the clip. Create a clip that we did. If I go back again, there's also create highlight reel which is going to create like a compressed version. So this is a 55 minute video. I could create a maximum duration. It lets me specify 5 minute highlight reel where it takes the most interesting moments. Again, just going off of the transcript. No other contacts. It can't see me, it can't hear me. But just going off the transcript and then it's going to turn that into a highlight reel. The best five minutes ideally. And then as before, you can click the template that you want to put that highlight reel into. And then. Yeah, it just makes it very easy. The feature I use the most of all the AI features is this one right here. Add chapters. And I. And I already did it in this video. These things on the left are called markers. And so if you click on just scrolls you to that point in the video and if you publish this to YouTube that becomes your YouTube chapters where viewers can just click and go immediately to those points. And so yeah, I always use AI for that. Well, that's not bad. How to use the recorder. I like that. That's. And I might actually manually just straight into the not verbose and create. That's. That's the ad ch and remove retakes is if you like repeated a line sa like let's say you're. You're filming something unscripted, you say something you didn't mean to say or you said it with the wrong intonation or whatever, then that'll identify times where you did multiple takes and it'll get rid of the first take, assuming that your second take was the correct tape take where you fixed your pronunciation or whatever. Whatever happened. Remove filler words. This is something I've been harping on a lot lately. It's come up a lot is instead of. So by default, this box shows you all the filler words that it's looking for. If you click on all filler words, unselect all. And because up until when everything was selected, it's looking for the word right? The word. Well, the word like et cetera. And that might be too much because some of those are meant to be in there. So I just, I don't. I don't have AI remove those anymore. The only things I have it remove are ums and us. That's it. And then anything else I'll just manually remove myself. And it just is a lot better. And you can see it found 31 instead of 99. And so that's just significantly fewer cuts where before it might be like every few seconds there's going to be like a crazy cut that I don't necessarily want. So a little tip there and Studio sound. The only thing you can do with studio sound is change the intensity. So if I click on these dials, I have 0 to 100%. And also with studio sound, I can't granularly control it. Like, I can't select. I'm in scene 24 right now. I can't turn studio sound down to 50% in scene 24 and 80% in scene 25. It's all or nothing. So the entire video file is going to be whatever I set it at. You can't. It's. It's one of the few properties that. That you can't change scene by scene. Okay. I don't know why, but, yeah, I'm sure someday you'll have the ability to do that. And I find. And with studio sound, it's. It's going to vary based on the factors of your recording environment. The microphone you're using, the room you're using, your distance to the microphone. If right now, I don't know if you can hear this, but there's people mowing the lawn in my apartment complex. Like, this whole time I've been on this live stream. And so if I was recording a video today, my studio sound settings would be different than when it's totally quiet here. And so what I'm saying is every video is gonna be different. You have to just kind of learn how to see. The most important metric is always your eyes and ears. If it sounds good to you, if it looks good to you, then keep it. If it doesn't, make a change until it is. And so if studio sounds too intense, dial it down. If it's too much background noise, dial it up and you get the idea. Or take it off. I've actually been taking it off a lot lately. It's been. I don't know, it sounds better. Depends on the microphone. Again, like, the. The better the microphone, the less you need studio sound. So I've been turning it off lately. Uh, and also you can get apps like this RODE microphone I have. They have their own app called Rode Connect here, which is kind of like the RODE audio interface. That is like a $500 device, but this is like the software version of it. And so you can come in here. And a lot of microphones would have this. If you have, like a Shure microphone or what else is popular? Blue Yeti, like, those kind of things, then you'll probably have something similar where you can, like, set a specific gain for your microphone. You can turn on. This noise gate is kind of like studio sound for. But it's like built into the microphone and built into the software. And so I show this because this is why I've had to use studio sound less because some of the processing is happening before it even gets to Descript. And this gets more advanced but at least you're aware of like things like this. Like to just show. Show stuff. Show my toys. Cool. Any other questions? I. I scheduled some overflow time so if. Because again this is the last public, free public live stream I'm doing From now on future Fridays it's going to be members of the channel and members of the course. So if you're already a member, thank you first of all. And second of all you'll, you'll have access, you'll get the emails and stuff when I schedule those. Um, and if you're not, consider joining. And I'm also doing the thing I announced at the top this creators mastermind where we're going to meet and it's going to be more like a discussion. It's going to be over Zoom instead of this live stream format. And you can join, we'll talk about like get to meet everybody, talk about what you're working on and then break into breakout rooms and have like one on one conversations about what's working, what's not working, get feedback, get ideas and it's free if you're it. It's free if you're in the course or joining the channel here. So yeah, let me know if there's anything else anyone else wants to talk about. I can see my, my live stream is like 5 minutes in the past. Working in 4K and descript, I tried a few episodes. Lags like crazy. Yeah. Yeah. To be honest, I do almost everything at 1080 and it's yeah a long project in 4K. Yeah, it's, it's slow in descript. No, no getting around that. Like even if you have a good computer, even if you have good Internet doing everything right, it's, it's slow. So. But that's not the only reason I don't do it. It's also just that the. Everything else about 4K, like the files are so big you need like huge amounts of storage space and other stuff like that. And 1080 is. And for what I do just making tutorials, I want to be able to just things quickly and so it just takes too long. So to answer your question, no, I guess I don't recommend 4K and descript 1440 is, you know that's, it's the medium ground there and 1440s probably good if you want to get close to the split the difference between 1080 and in 4K. And you can do that. By the way, what I just pulled up there is. Let me close this, this aspect ratio in the top left. And of course like I shot this video at 1080p, so I can't raise it above that. But if for some reason I had shot it at 4k, I could artificially lower it to 720 or I could artificially raise it in this case to 1440. And so this is where you. Where you can set that. And then also you can see that's applying to landscape. But I could switch it to portrait, I could switch it to square, etc. And this. Actually I think they fixed this bug. But there was a thing a few weeks ago where even if you recorded in a higher resolution, it was bumping your project down. And so when you went to publish you would see this thing that says max, which you and go to Advanced. So then just change it to 1080p. And then now you'd be able to export at 1080p. So if you run into that, just be aware where that's what you can do. So yeah, and also this gets back to like what descript is good at. So if you're making something where 4k is important, like a documentary or a travel vlog or something where you want to show like beautiful colors and high res stuff like that, then I guess colors aren't as important. But high res, then you probably don't want to use descript anyways. You probably want to use whatever you're good at. Premiere, DaVinci, Resolve, even Cap Cut is better for that type of thing, where there's less emphasis on the spoken content and more emphasis on the visual component because descript is just so limited on transitions, color grading, like all that kind of stuff.








