Descript Video Editing Q&A
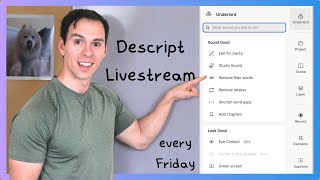
The host of DescriptMastery.com walks through Descript's video editing tools in a live Q&A, covering Zoom imports, the upcoming Rooms feature, timeline controls, layers, transitions, and AI-powered captions with Underlord.
Questions this video answers
Friday, August 30th.
Foreign and we're live. It's Friday, August 30th. Welcome to another live stream. I do these every Friday and we're. And yeah, we see who joins and feel free to ask your questions. Just drop it in the chat and I will respond to you as I have time. Sometimes we only have two or three people, sometimes we have 20. So it just depends on the week. No idea what to expect. But before I get into Descript, I always start by pitching what it is that I do. I have a business called descript mastery. DescriptMastery.com is my website. The primary things I do is first of all, tutoring. I spend most of my day in tutoring calls, showing people how to use descript. Mostly it's brand new Descript users, they come to me and they say, help me get started with this software. And then if you want to talk about YouTube or you want to talk about strategy or camera best practices, anything like that, then those are all areas that I go into. But mostly we talk about descript and the nuts and bolts of how to actually edit a video or podcast, sometimes audio only podcasts though those are becoming less and less frequent. The next thing I do besides the tutoring is I have a course. So all these things can be found under this Learn Descript tab. My course and the tutoring. And then yeah, the course is do it at your own pace. It's over a hundred lessons and I'm always adding to it. I added one this week about. What did I add? It was. I. I recently added one for the zoom integration about how to do that so that when you upload your Zoom calls to the cloud, it'll then you can then put it into a descript sequence and edit it from there. And then yeah, it's, it's always changing based on descript, always changing. Every two weeks there's a new version of descript and so I'm taking. Just putting out a lot of content to stay up with it. So that's the Descript Mastery course. I also have templates, I have free templates which are extremely popular. So you can go to this get templates button. I think I also have it in the link for this video and all I need is your email address and then I'll send you the link with 10 different folders of templates and, and there's over a hundred templates in total and they're just ones that I've made that are like YouTube intros and outros, different types of captions, all sorts of useful stuff. That that might be useful to you. I'm getting a warning from YouTube live streams, so please let me know in the chat if I'm freezing or if anything's not working. But. And also feel free to drop your questions in the chat. I'm just kind of killing time right now by introducing what I do. So. Yeah, that's it. My. I've recently completely restructured my course or my. My website here over the last few days. So there's this article section where I post blog articles. Usually post something every day or two, and mostly they're the videos that get posted to this channel. So if you're watching this channel, it's. It's that plus usually a little bit of stuff that I write in addition to it. Maybe some text walkthroughs, stuff like that. So that's a great resource. And that's pretty much it. That's. Those are the big ones. There's a couple things that I took off of my website that weren't that I still offer. Number one is my VIP days. So VIP days are where I travel to you and. And it could be your place of business. Okay, thank you for letting me know that it's working. And then, yeah, I teach. I can lead a workshop for you and your team. Or maybe it's just you. Just one on one, whatever you want to do. I've done a few of those now where. Yeah, I travel out in the US so far, but I'm open to go anywhere if you're willing to pay for my travel. I'll meet you and I'll teach you description or YouTube or whatever you want to talk about or learn from me. Happy to talk about those topics. Okay. Yeah, let's see. I guess we can just dive in to Descript. Haven't gotten any questions yet, but I can come up with something right off the bat. This import from Zoom button is new as of about three weeks ago. And by the way, I thought two days ago on Wednesday, Descript had this big Season seven event, they called it, which I tuned into and the CEO spoke and different people from the Descript team spoke. I thought that was going to be a release of the new rooms feature, which is going to be the ability to record podcasts directly inside of Descript. But it wasn't. They were just talking about it. They didn't even show it, they just talked about that it exists. So that is still yet to come. And there's a wait list which you can enroll in. I don't have the link handy, but you can get on the wait list to. Okay, I got a question in the chat about squeezing down the video. Can't remember how to expand it out again. Yeah, absolutely, we can talk about that. Just to finish that train of thought, the rooms integration should be coming soon. What? Where? Basically you won't have to go to squadcast to record in a separate browser window anymore. You'll be able to do it right from descript. And it's also supposed to be a lot better. Just it's gonna be more reliable. They say it's gonna be more. Just more of a tighter integration with descript. Cause there was a lot of issues with taking your SquadCast recording and then putting it into descript. Okay. To answer your question, squeezing the video down. What I think you probably did. Let me just add something here is. Let me just add a video and feel free to chime in if. If it's something else. But what I think you're describing is that you shrunk the video on your canvas once this adds. Okay, so like this happened. Is this what you're saying? And then you just don't know how to make it bigger again. So you can grab these edges and. And drag it in one direction or you can grab the corners and drag it proportionally so every. The height and width will change together. And there's one other way. So let's say it's small again. I can hit position and I can hit. Oh in the video timeline. Okay, okay. Okay. The last thing is just you can hit that fill canvas and it'll fill the whole thing there. So in the timeline, if you're talking about the. The layer here, so probably what happened is you grabbed the edge and shrunk it like that so it stops playing at a certain point. What you can do to make it bigger is just grab the end and drag it to the right to make it big again. Let me know if that's what you're looking for. Let me just turn on my mouse annotation so you can see here. But yeah, basically you can grab the boundaries, the beginning and end of any clip, and your mouse will turn into that bracket. And when it's open to the left like this, it's going to affect. Yeah, yeah, it's hard to grab it. In the chat, she says, I had a hard time grabbing the edge to expand. Yeah, I totally get it. Like, that's such a big problem with descript is just putting your mouse in the right place. So. And especially when you're. When you're between two adjacent clips and you can't really see if it's open to the left or open to the right. And you can see my mouse is kind of big. I've actually gone into my computer settings and made it bigger because, for one thing, I'm always demonstrating descript and it helps when you're able to see it. And so, so that might be useful too, is to just go into your settings and expand it. And also I will always preach this. I recommend an external mouse. If you're using a trackpad, it's going to be a lot harder just because your dexterity is so much less when you're trying to just move things around with your finger. So I always preach, get an external mouse. And it's also really nice if you have a scroll wheel and beyond that, a horizontal scroll wheel. So you can scroll left and right in the timeline like that. And if you don't have a scroll wheel on a Mac computer, you can hold command and then use two fingers on a trackpad to scroll up or down to zoom in or out, and then hold shift and scroll up or down to scroll left and right in your timeline. So that's how you can do it from your keyboard and from a trackpad. And it works the same. The scroll wheel, shift, holding shift and then left and right will go left and right on your timeline, holding command and scrolling will zoom in and out. Okay, thank you for the question. Let me know if anything else comes up or you want any more tips about. About. About that. But hopefully that was what you're looking for. Yeah, so there's that. And then I could show you. Let me just create some fake placeholder text in here. I'll just have AI generate something and I can teach that while we're going. So under lord, if you haven't been. If you're new to descript or you haven't seen it in a while, all the AI features are in this top right called underlord. And you can. It's Chat GPT. So it's an AI chatbot built into the editing software. And right now I don't have any text in here, so all of this is grayed out with the exception of generate an image so that I'll use AI to generate AI art. And then at the very bottom here, brainstorm, write a script or write an outline so I can give it a prompt to write the script for me, like what the content of this video will actually be. So if I click on that, I can tell it how long in words. And sorry, my computer is Getting a little slow here. I think I'm over it with the live stream. Different softwares, but length 500 words. You can set it to whatever you want, just type it in there. Starting point, like just give it a topic that you want it to write this script about, give it a tone. I want this to be funny, I want this to be professional, I want this to be academic. Whatever you want to say, that's what you can type there. Audience, whatever you want. Examples. If you have a style that you like of somebody else, or maybe it's your own style, you could type in a sample of your writing to give an idea. This is all training the AI essentially so it can, it has more to work with. The, the quality of the output is always the quality of the input. So the more you can give it here, the better your results going to be. And then any other custom instructions, any context you want to give it or anything else, you can do that there. And hit submit under Lord is thinking. I've drafted a 500 word script and you can see within three seconds of me hitting submit it's already got an answer. So extremely fast. And I could read through it. If I didn't like it, I could hit follow up and that'll give me another chance to prompt it. So I could say include less detail or make it more detailed or whatever I want, but I won't do that right now I'm just gonna hit add to script and there it is. So there is my. Oops, where did it go? Hang on. What just happened there? Let me undo. Okay, there it is. I somehow accidentally deleted it. So there it is in my script and you can see it's light blue because I haven't turned it into an AI voice yet. And to make it an AI voice I just need to add a speaker. But first I'm going to check the chat question. Can you explain what the icons are on the timeline? Why and how to use those? One looks like it and another looks like a knife. Another looks like a square. Another hand. Yeah, so those are the timeline tools and thank you for the question. So by default it's in the select mode and I've worked with students who have used descript for months and aren't even aware that there's anything but the select tool. So you, you can do everything with the select tool and that's why it's the default. And if you get away from the select tool, it's. It's this one that looks like a cursor or you can hit a on your keyboard and that'll bring you back. And so that's all the normal behavior that if you've never switched this that you've used before, where you can click on a clip, you can drag it left and right, you can click on words, all the just normal stuff that you can do. Now, the one next to it is called the Blade Tool. And with the Blade Tool, you can see, as you said, it looks like a knife. And if I put it somewhere, you can see the little red arrow above and below that place on the layer where I'm hovering over. And what that's going to do is split the clip at that point so I can click and you can see it just split everything after that point where I clicked from everything before it. And so the purpose of this is now with that second half selected, I could delete it. For example, I just hit delete on my keyboard and it's gone. I could change the timing of this switch back to my select tool, and I'm just changing the timing of it. I could then, you know, sneak in another clip right there in the gap. So there's all sorts of things you can do with splitting it. The next tool over is the Range Tool. And the Range Tool, as the name implies, allows you to select a specific range. So I can click drag, click hold and drag to another part, and only that part in blue is selected. So with it selected, I could go to layer and I could, for example, well, this doesn't have audio, but if that part had audio, I could mute it. Mute it just in that part. So like, for example, if there was an, I could just go over that, that individual part, mute it, and then it would be gone. And yeah, in the chat, is the knife the same as clicking on S? Yes, it is. So, yeah, it'll split the clip. And that's. That's one of the alternatives. That's why you can use the select tool for all the functionality I'm showing you. Um, so, yeah, so the Range Tool is really easy way to. To select a specific range. The other way I use it is. So let me switch back to Select Tool. I hit a. If I select this, you can see it's highlighted in blue. So I know it's selected. That's 32.2 seconds long. I can see that right there. If I go to the Range Tool and I select just a portion inside of there, it's telling me that that portion I selected is 13.5 seconds, and that's at normal 1x speed. But let's Say that I'm doing a descript demonstration and I'm waiting for underlord to load something. And I don't want there to just be 13 and a half seconds of silence. I want for the sake of the viewer, for things to be moving a little quicker so I can bump up just that selection to, for example, 8x. And now it took that range and made it. So it's going to play at 8x speed and the viewer won't have to sit there and wait for my computer to load. So that's the range tool and the way that I use it most frequently. The next one is the slip tool and this one's a little harder to explain. And let me undo that change. Let me undo even that split. Okay. So the slip tool is this one that has two arrows facing outboard. And what this does is notice when I put my mouse over it over the clip, it says there's a little black box that pops up over it and it says 000. And then horizontal bar or vertical bar, 0059. That's telling me that this clip is. Is going to play. It's from 0 seconds to 59 seconds. It's going to the whole length of it. Now if I. If this clip was a little bit shorter, like let's say it was cut off, like, let me switch back to select. I'm going to make it a little bit shorter. Go back to slip. So now when I made it shorter, it goes from 0 to 28. But what slip allows you to do is to change the part of the video that plays within that selection. So what I mean is if I click and I drag to the left. Notice how those numbers are changing? So now it's from 0016 to 0044. So the length of that selection hasn't changed. It's still 28 seconds. But the part of the clip that is playing inside of that is changed. I shifted it over by 16 seconds. So hopefully that makes sense. If you have. This is especially useful for B roll like this. This is a perfect example. Like if there's a certain part of the mountain of this drone shot that I want to show, then I could slip to that exact point so that there's not a bunch of boring like lead up or something. But I need it to be exactly that length, 28.1 seconds in this case, so hopefully that makes sense. Slip is a little bit more advanced and probably won't use it as much. But it's good to know about the last one is the hand tool and this one I never use, but it's purely navigational. So you see that my cursor turned into this mouse and all of these by the way, only apply from the timeline. And below, if I bring my mouse up into the transcript, it's all the same, it's just a cursor. Thus why these are called timeline tools. They're only for the timeline. So the hand my cursor turns into the mouse and I can click somewhere and drag. And if I drag to the left, it slides my timeline to the right and vice versa. If I click and drag to the right, it slides my timeline to the left closer to the beginning. So it's purely navigational. And this is most useful if you don't. I talked about mouses, external mouses and scroll wheels earlier in this live stream, but if you don't have the luxury of that, then this could be a great alternative for you to be able to just do it through clicking. Just click on the mouse or click on the hand and then drag left and right. Okay, thank you. Good question. The timeline tools are an often overlooked thing, but can be very helpful. And again I 90% of the time I'm just in select mode. And then yeah, you can split the functionality of Blade you can do by clicking S on your keyboard. So here's what that looks like. If I, if I click on my clip and then again notice I'm on Select tool, I hit S. It just split it the same way that it does with the Blade tool. And then range for selecting a specific portion, slip tool for changing the portion that plays within a given clip and then hand tools for sliding left and right in your timeline. Also to the right of that. This isn't a timeline tool, but it's. It's a view. It's a user interface thing. The it's defaults to default makes sense. But there's one below it called large and if you click on that, notice that my layer just got wider. So that just makes your layers appear bigger so that you can see them a bit better. Like you can see that thumbnail and if you had a bunch of layers, this could be really useful. It also could help with someone mentioned earlier having trouble grabbing the the timeline. Just being able to see all this stuff better can really help. So you could try that to just make your, your timeline large and then see if that helps with the viewing. And you can also. If I had a bunch of layers, I'd be able to scroll up and down through them. That's another common thing I see people doing is they don't know. They, they have a bunch of layers in here and they can't find something that they've added. They're like, where is that sound layer that I added? And what they don't realize is you can scroll up and down through your layers and find things that way. Additionally, if you click into the timeline, into the white space and you go to layer here, you can see this thing that says layers in current scene. And here you go, there's a video layer and there's my script layer. And if I had any other additional layers, like let me add a music layer, just hit that plus. But I went to music, hit that plus button. It's importing audio, so it'll be in there in just a moment. And now if I go back to layer, there it is. There's my music layer. It's got that little music icon next to it, so I know it's music. And then my script layer. And the important distinction here is the script layer is what is transcribed. You can think of it as your base layer. It's the most important layer. And it's these words here that I just highlighted. You can see it's highlighted here and it's highlighted down here in blue. So that's the script layer. Everything else is just a. Another layer. It's just a general layer, supporting layer, as I call it. So, yeah, that's the distinction between script layer and other layers. But you can see now that I have two different layers in there. They're stacked and I can scroll up and down a little bit through them. But let me make this smaller now I can scroll through it and you can see that it's. It's stacked. So that's how that works. Question in the chat. Is there a way to completely delete a project and start over? Yes. So this brings up a lot of interesting talking points. Let me go back to my drop drive view here. If you click on. If you find the name of a project that you want to delete and you come over to these three dots, there's a few things here. There's this one that says delete project and that will completely delete it from your computer and from Descripts cloud. Now, I'm on the web browser right now, so these files aren't downloaded to my computer anyways. But if I was on the desktop app, they would automatically be be downloaded to my computer's hard drive. And there would be a thing here that would say remove download. And if you click remove download, That'll take it off of your computer's hard drive, but not off of Descript Cloud, so it's not completely lost. Now, because I'm on the web web.descript.com I have this one that says Clear Local Cache. And so descript has put some files into my browser to make it so that the next time I open this, it's going to open a little bit faster. Now, I could hit Clear Local Cache and it'll get rid of those, or I can hit Delete Project and that project will be gone from my account altogether. So that's deleting it. And then the other thing you could do is you could keep your project like this one called Untitled, and I could just delete the layers if it's. If I'm not too far into it, I only have two layers in here, so I just highlight them, click on it, and press delete. And I could even. I could click right click on the scene thumbnail right here in the top right and hit delete. And now it's gone. I've effectively deleted everything. Now, the advantage of doing that, deleting it inside of a project is if I go to my project files, all of the stuff that I've added, like that reggae song and that view of the mountains, every file that's ever been added gets added to this project file. This project? Yeah, Project Files is the name of it. So that might be a recommended way if you're going to use the same source files and is to just keep your. Your files there in the same project. The other way, I told you this brings up a lot of talking points because there's a lot of different paths you can go here. Right now, we're inside of a composition inside of a project. Every project has at least one composition. So if I click on this dropdown right here, I'm in a composition called Untitled inside of a project called Untitled. So let me just rename these for clarity. So there's a project. And then I'm just going to name this composition and it changes my. Let me add a new one. Rename Project. Okay, so Project. The thing to the left of the forward slash is you can think of it as like a folder. And then the thing to the right of the forward slash that says Untitled is a composition. So if I click on that, I can have. As I said, you have to have at least one composition in a project, but you can have as many as you want. You have unlimited. So right now I have this original one called Composition. And then I Have this new one called Untitled. And I could duplicate these. I can just hit New Composition, as I just did to create a new blank one. And I can title it here. So I can just call this Composition two. And there we go. I now have Composition one and Composition two. It's over here as well, in the right side under Project files. So where I'm going with that is let's say your composition one is all messed up and you just want to completely start over then without, but you want to keep it just as a reference, just to have it there. Then what you can do is just hit that new composition button and you're starting over from a blank slate. But you can have your original work in case you need to reference it. And the other advantage of inside of this project, these two compositions plus any other ones I add, will share the same project files. So anything that I've added to any of these compositions, I. I'll be able to access right here to pull into the other ones. Because Descript doesn't have a central library, for lack of a better word, where I could share files between projects. I can only share files between compositions inside of the same project. So hopefully that kind of makes sense. It's kind of a little complex. And I've done videos where I've like drawn on my whiteboard the breakdown of project composition, scenes, clips. Question in the chat. Do you have an idea? I accidentally created a transition, but my video is starting now and ending at the very starting and ending at the very point of that transition. But I cannot see that transition and cannot delete it. So transitions are found in scene and they're right here. So wherever you're seeing that transition, if you click on the scene before or after the transition, then because scenes are only in or out. So let me, let me just add two. Let me just add two scenes here for clarity. So I'm adding one video and then let me just add that other one. Show timeline. Okay, so here's my first thing. Aerial view of Frasier river valley and mountain landscape in British Columbia. And then I'm going to add a scene with the slash. So I've seen one and scene two. And then in scene two, I'm going to add this, this waterfall or mountain thing that I added before. Hit add new layer. And if I click back into scene one, I go to scene. The scene properties up here, I go to transition. Right now there is no transition applied. So I hit this plus button. And if I say out, that's how this, this is going to go. From scene one into scene two, I can do a fade, I can do a blur, crossroom, etc. So do cross zoom. Let's see how that looks. There we go. I don't know if you can see it over the live stream because it might not be a high. High enough refresh rate, but it was there. And so where I'm going with all this is now that that transition has been added, I'm in scene one right now. I can see that blue line letting me know that I'm inside of scene one, I go to scene. I have. There's. Under my transition is the one that I added. And if I go to scene two. Well, actually, let me just click on this. These dials. So it says transition out. So scene one is going to transition out like that. If I go into scene two, click on those dials, it's a transition in on that side of the transition. And to get rid of it, all I do is just click on this minus sign. And now that transition is gone, and you can see it's gone from both sides of that scene boundary. So the important thing is find where that transition is happening, go to scene, and then delete the transition. Yeah, I think. Let me know if. If that's not quite doing it in the chat. Can the audio on MP4 be rerecorded with a different voice or delete the transcript and add a new transcript to the same video with a different voice or AI voice? So if you're importing a voice or you're importing an MP4 file, then, no, you won't be able to change the voice. Actually, you know what you could do is import it, transcribe it, and then take that transcription, copy it into a new project, and then make that into a AI speaker of your choice. So I could run through that real quickly. And Chris, since, yes, I'll open up the. I'll open up our Bootcamp video again. And so this is actually a perfect example. So let's say that this is the Transcript from the MP4 that you brought in. You won't be able to change it here, but what you could do is cop. Oh, wait a second. Then you'd lose the video. Yeah. So the problem is you lose the timing of everything. Descript is coming out with a regenerate video, where it's going to regenerate the mouth as well as the audio part of it. So let me think about this. I was thinking, when I first said how to do it, I was thinking MP3, whereas audio only, because what you could do in that case is just copy the transcript, go to a new composition, make it a audio only. Right. Paste in the transcript and then change the speaker to like a stock voice, which descript. Added a bunch of new ones that I haven't actually tried yet, but they're supposed to be better. They're supposed to have like intonation and be a lot more natural sounding than the original ones. And it was six new names. I can't. It's probably one of these. But yeah, let me think about that. That's it. I'm sure it could be done. It's just not like super, super, super easy, especially with the timing of the voice because the AI is going to totally do its own pacing. Unless you're. Unless you're not showing a person. If you're doing one of your PDFs and you're just showing the warrior animation or something else, then that would be. That would be a lot easier because then you're just. You don't have to match it up with the voice, with the movement of the mouth. Question in the chat. Can I use loop to loop music just for time instead of it choosing to loop the music for the entire project? So to do that you'll have to set the scene. It depends how you have your project laid out. Like, you can. Let me go back to another example. And also this will be easier to do than try to just explain. So if I add some music. Let me go back to the one I already added. Add new layer. And so it only goes to the end of the scene. So what you could do, if your project isn't split into scenes yet, you could add a scene at the point where you want your video to stop or your music to stop and then loop it. And it'll only fill that scene, I think. Let me verify that because as I say that it might go past the scene. Ah, okay. Audio only. So you won't have scenes. Yeah. Okay, so let me, let me try this. Let me switch to audio only and music. Okay, perfect. You're able to delete the transition. Yeah, it's a little. It's a little hidden if you don't know what to look for. Okay, so what I'm checking here is the loops get a little weird. Like. Yeah, I won't even try to explain it. Let me just see if I can do this. Just gonna make this longer so it plays the whole. Just zooming out and extending this clip. Okay, so if I go to layer and right now it's playing once. Let me hit Loop. There's our loop. It's going to play multiple times now. Okay. So I can't just drag it shorter and I can't just cut it. Hmm. You know what? I don't know that I have a good answer for you. Other than what if I make it shorter here? Sometimes I'm figuring this out in real time. That just shrunk the beginning. Yeah. Without scenes. That's interesting. I haven't run into that, to be honest, in audio only because I. I don't do a lot of audio only. Yeah. It looks like it just loops throughout the rest of the project. Let me look on now. You know what? I'm not going to do that live. Yeah, I. I don't know. I don't have a good answer for you. Sorry. I. I'm gonna need to do some research on that. How to stop the loop in an audio only project. It's easy in video because you got the scene. Actually that brings up a point. What you could do is drop down the composition list. Sorry, my computer's being slow here. Three dots and say set to video. And you won't actually have a video, obviously. But what you could do is add a scene and then shorten it. I just grabbed the end of it and just shortened it to that nearest scene. And then go to publish, export and then just export it as MP3 audio. So yeah, that's the workaround I would do is to. Because you really need that scene to stop the choosing not to loop it. Okay. Yeah, yeah, that's. That's easy too, is to just copy and paste the track and then just. Just duplicate it as many times as you need. Maybe it's just once. And then with. When it's not a loop, it won't have that weird behavior where it cuts off the. The beginning of the track. So. Totally. That works. Yeah, it's just. I guess if you had a really long thing and you needed to copy the music like a bunch of times, this would probably be a more automated way to do it. So. Yeah. Cool. Yeah, that's weird. It's working in audio only. Counter intuitively. Little things like that can actually be challenging if you don't. If you're used to being in video all the time as I am. Okay, cool. Tons of good questions today. Thank you. This is one of the most active ones to date. Yeah, no worries. Yeah, I've recently. It's like almost nobody that I work with does audio only anymore. And so I've recently changed all my website and everything to like it just Video editing. But there are still a lot of people that do audio only podcasts, so it's important. Okay, what else? I could talk about captions real quick. Unless anyone else has more questions, obviously, feel free to keep them coming. Let me go back to underlord. Generate a script again, since I deleted it. Go to write a script and hit submit. There's my script. And hit add to script. There it is. And now that I have that in there, those words in my transcript are what will become my caption. So, okay, yeah, in the chat, transitioning from audio to video. Yeah, exactly. That's what like the very few people that I see still doing audio are looking for ways to get to video. Like they're either gonna. They're doing audiograms so they can publish it to YouTube or they're just getting cameras and stuff. They're figuring out how to do video. So that's. Video is. Is eating the world right now. Um, so, and this is a good example here of one way that you can make something that's audio only into a video. So I'm going to make a little audiogram here. I'm going to delete scene one and all I have. Let me just delete that last little bit of the mountain there. Okay, so now I have my AI script. AI generated script and a blank screen. There's no visual component in here. What I could do to make this more interesting is go to captions. And these are all of descript's built in captions so you can hover over them and you'll see what it looks like. So this one has like the karaoke effect with the green letter and then the rest are white. I really like this one. It's white with yellow karaoke effect. But some of them are like skewed. They're off on an angle. Some of them are like this. And actually this is a. What I was gonna go for was that waveform. If you see behind the captions, this includes that waveform. So if I click on it, it's going to apply not only the caption but that waveform. And I have that music still in the background. So hopefully you can hear that through the live stream. And so you can see that little gray bubble that is moving in time with the music. And. And if I had the voice, it would be moving in time with the voice. But that's how a lot of people are taking their audio only podcasts and then just getting a simple video out of it so that they can post it as an MP4 on YouTube. And then that's it. That's at the simplest form. I guess the simplest form is to just put a picture in the background. You could just put like an image of you or your logo or it could be one of Descripts stock media. You could just take one of the. Something like this. So at the simplest form, that's how you could turn your audio into a video is just adding this stuff, step above that captions and audio forms. And then the step beyond that would be to add B roll, like to add actual video over whatever you're talking about in the chat. Do you use squadcast for podcasts? We want to start remote recordings. Are there common issues that we should be aware of? Yeah, so I, I use squadcast. There's a lot of people who don't recommend it and have had bad experiences with it. In my opinion, they're probably not using it right. I have a checklist of. And I guess, I guess this is the problem with it is like using it right involves setting it up right. So it is a little bit more involved than Riverside, which just works. It's just the most reliable one I've heard. And streamyard. Streamyard is extremely simple. It's just like the user interface is really easy to understand. So those are the three I'm familiar with. Squadcast, Riverside and streamyard. And so yeah, squadcast is good, but it's just you gotta use the right, you gotta know what you're doing with it. And I have a checklist which I can pull up Google, it's on Google Drive. One second here, here it is. And I don't advertise this on my website anymore, but I used to have it available for download, but actually let me just send this link in the chat. So basically you don't want people on like their phones, have them on desktops if possible, have them on Chrome based browsers if possible. And then typical stuff like restart your devices, close other apps, things like that, all that will help. And when I've done all these and my guests have done all these like I haven't had any problems. Um, so yeah, I know it's kind of a lot like. And I guess that's why I probably shouldn't recommend it because it's a lot of extra work here. I'm, I'm dropping this checklist in the chat. Okay. I just dropped the link and so yeah, and. But then I guess I've also seen some issues with the Edit and Descript button where it then sends the recording files into descript, puts it into a sequence for you to edit. And it's funny because I didn't think I'd be talking about SquadCast anymore after Wednesday. I thought they were going to release that Rooms thing, but it's still further down the road. So maybe hold off, I would say hold off on using squadcast until they release Rooms, which is supposed to be a lot better, a lot more reliable and everything else. So yeah, should be coming any week now. So the common issues, like I said is bringing into Descript can sometimes cause issues. When I saw that be a problem was when one of the people on the call had done a screen share and for some reason descript didn't accept the screen share layer. And then another common issue is people not being on their on desktops. I found that out the hard way. Somebody called in on a phone and that file didn't upload properly. Oh, and the other thing is, it's as you're recording, it's uploading into each participant's browser. So if somebody like as soon as the call ends, they just drop off before it's finished uploading, then that causes a problem. You lose, you can lose that, that file. So that's the other thing is make sure everyone stays on for a few seconds after the call. And this is the reason this is highlighted. This is, this is really the only step you need to follow is do a test recording, make sure that everyone's uploading, that everyone can see each other, everyone can hear each other, and if they can, you're good to go. If they can't, this is, you know, do, do a test recording first 60 to 90 seconds or really like 10 to 20 seconds is all you need to just make sure all that's working. And then when it is the do your real recording, do the big full interview. So that's my opinion, is if you're using it right, it's reliable, it works great. If you're not, if you're not following these conditions, you'll have problems. Okay, in the chat, where do I store my own style of captions? In templates. Yeah. Yep, you're exactly right. So like, let's say that I start a great way to use templates and the way that I recommend everyone use my templates, if you, if you haven't downloaded them yet, you can go to descriptmastery.com and then templates at the top and then I have free templates that you can download. The way that I recommend everyone use them is as a starting point. So this was the descript Template that I applied, not my own, but Descript the company. And if I go to layer, I can change these. So I can make it like change the position, size and position. I can change the font, I can add my own font if I want. If you have like a brand font, then you could add that here. With this little upload arrow, you can find either the Google font or if it's something custom, then you can just download that file or upload that file and then it'll be in your Descript drive. So the one I use for my company is outfit. And so now it's going to apply outfit to that, that caption. And then I can change the weight of it, I can change the size, all that stuff. And once I'm done with that, I could go to the scene in the top left and I could say save to template, but I, that's going to save everything. So if all I want is the caption layer, then you need to start from scratch by going to back to your drive view, go to templates. And then I think I have one for captions. You know what? Maybe I don't. That actually brings up a deficiency in my, my, my templates. I have one that's a Netflix. Where is it Netflix style? These are captions, but that's all it is. Basic boring white with a black outline, a little bit of a shadow like you'd get on a Netflix closed caption. So anyways, the point here is you can ins. When you open up a template. Let me go back. You hit new template. And then inside of here you can create your own caption by going to elements. And then you can, you get. These are. I won't go into those. You can hit title and then you can hit layer and then type captions. And now there's no transcript, so there's no words showing. But what it would do is, as you know, read the transcript in sync with the video. And so even though I can't see it and I could just write some stuff in here as a placeholder, this is a placeholder for my caption text like that. And so that's what it's going to look like. Then once again, I can change the font, the size. Let me just make this like 100 and I can move it down here. And maybe I want this only for social media. So I can go up here in the top left, change it to portrait and do something like that. And then once I have it all set how I want, it's got my brand colors, my brand font, all that stuff. Then you can just publish this template with that button in the top, right, and you'll have to name it again here. So we had to name it. Well, I didn't, but you could name it here and then you'll give it a separate name here. So I could call this my captions hit publish. And then that would now be something that I could use across projects. And that also works with music, if you have brand music, if you have any sort of element that you use a lot across projects, captions are how you. Or templates are how you can store that. And by the way, on that note, the CEO in the call the other day, the CEO of descript said that their big push for the next big update with descript relates to captions, captions and layouts, or not. I keep saying captions, templates and layouts, so I don't know exactly what that's going to look like. But he teased that. And I think that's going to be a big improvement because templates are like the number one thing that people come to me for. Like, it's crazy. I talk templates. Every single one of these calls spend probably half the time talking about them. People download my templates, people hire me to make templates for them. So it's a. It's definitely tricky and there's a lot of nuance to them. Okay. As far as I know, I cannot add another template like a layer. Ah, yeah. Well, so I don't fully understand the question, but I think what you're asking is like adding multiple templates because that recently changed. You used to be able to stack templates. And I've made videos on this channel and in my course and everything where my recommended way to make templates was to make templates that did only one thing, because you can make templates that are super complex and they do color adjustments and they do green screen and they do like 5 or unlimited amount of things. But my recommendation was, was to make each template single purpose and then stack them. That no longer is valid after a few upgrades ago. Now, when you try to apply a template on top of another template, it undoes the previous template. So you have to do those complex templates. Let me show you what I mean. If I go back to my demonstration projects, uh, and sometimes it works like with applying a sound layer, for example, or a layer that is just adding something versus a layer that's adjusting a property. So like, if I go to scene, this is where all your templates are. Go to layout, browse, templates and then I don't think I finished saving the one that I just made. But let me, let me do this. This will give me a chance to talk about this. I have these things. These are part of my template pack. It's called Social Media Safe Zone. And they're these borders that you can apply to your project and it shows you where the controls for a given social media platform will be. And I just realized there's a problem with this because it has that white. It needs to be transparent. So the idea with this is you would lay it over your project and then you can see make sure that your Captions aren't, for example, on this purple part, because that's where YouTube's play button and the play bar and all that stuff is going to be. So it's just a safe boundary to make sure that you're not losing any part of your important parts of your video to the controls of the platform. And then I have one for portrait mode. But anyways, that's a tangent. Okay, so caption. So I applied that caption and then if I go to apply another one, like where's the one that I just made? If I don't think I saved it? But if I go to apply just a random. Actually music layers work, so I won't do that. Okay, so when I just applied this new. And this is my outro that I use for YouTube. And so this is a great, a great caption or a great template to have is like a watch next one and then inside of YouTube studio you add your recommended next video or like a playlist, something like that that the viewer can, can click and then binge your channel. But so what I wanted to point out here is when I applied that template, it took away that social Media Safe zone layer. It's now gone. And if I had just added that social media safe zone layer as a, as a layer myself, it would still be there. But because I added it as a template, it takes it away to add the most recently added one. So in short, your templates have to be more complex now. They have to do everything that you want in one place. So that includes any property adjustments, like color adjustments, transitions, green screen, whatever your layer is supposed to do, you need to do it one layer. So unfortunately my recommendation for stacking them is no longer valid. Yeah, exactly. In the chat. So it's probably better to make more complex templates and delete the parts you do not need. Yeah, exactly. So if you had like I won't throw out more examples of Properties you can adjust, but you could have a template that does five things and you only need three of those. So you could delete the two things, apply the template, and then delete the two properties that, that you don't need. That's exactly how I would do it. Or you can have like really granular, like if you're applying one thing that only happens at the beginning, but then to a scene in the middle, it's like almost the same minus a couple differences. You could have like your opening template and then you're like middle of the project template like slightly different ones. It all depends on how much you're going to be using each of these properties. Because obviously I won't go into like how to have an efficient workflow, just that the more you're going to apply something, the more it makes sense to have a template to just do it repetitively for you. So when I'm doing like my course, for example, the first thing I do is make the templates for it. So like I'll come up with like a module template, like each lesson individual template, like the I have an action item template where at the end of every lesson it assigns the student a project to practice. And so that's the very first thing I'll do, is just make those templates and then record the video. And then all you have to do is just plug the templates in and yeah, it's not. Doesn't take too long at all. Okay, so it's almost 2:30. Any last minute questions? If not since we talked about templates a lot again, descriptmastery.com templates I can make ones for you. I can, you can download my free ones and I have a masterclass which is Templates Masterclass, which you can buy as a standalone course or if you buy the Descript Mastery course, it's included with that. So yeah, and yeah, check out for the rest of August, which is like less than 36 hours. I'm running a deal where if you buy four three calls, you get one free. So four for the price of three for the next less than 36 hours. Thank you so much for joining. Have a great weekend and come back on next Friday. Oh, one last question. Is there a correct order to applying one template to an entire project without it auto including scenes unnecessary? I don't fully know your question, but the one thing I'll show you that I think will be helpful for what you're asking is you could apply the template to one scene and then what you can do is take that scene. So I applied this template to scene 1 and I can right click on it and say copy layout. And then I could go to another scene, like let's say scene three and hit paste layout. And that's kind of like a template within a project. So if I'm understanding your question correctly, that could do what you're asking. Just set up a scene how you want, copy layout and then paste layout into the one that you want to replicate. And that won't copy the content? Well, it actually did in this case because it's just a. It was a blank scene. But if you already had content in that scene, it would only copy the properties and the additional layers. It wouldn't. It would just. It would swap out the script layer. It wouldn't swap out the script layer. The existing script layer. Hopefully that makes sense. Okay, I'm gonna end it there. Thank you everyone and talk to you later.








