How I Make a Youtube Video from Start to Finish (in 2026)
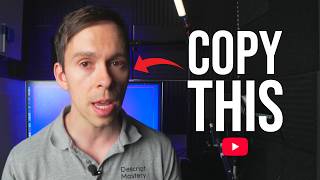
Ross Zeiger shows how to make a 3-minute sales video in Descript, from editing B-roll and adding captions to exporting and publishing on YouTube. He covers metadata, AI chapters, thumbnail optimization, and post-publish checks, then explains the 5× guarantee he offers for his tutoring service.
Chapters
Today's video is unlike any tutorial I've ever done on this channel. I'm going to show you my entire process from setting up my room, setting up my camera, setting up the lights, to actually recording into Descript. And then it's going to go into the entire editing process of that video, including— I'm even going to use my teleprompter, so you're going to see me what app I use for the teleprompter and how I actually run that. And I'm going to explain some techniques as I go. And then when we're actually in the editing software, it's going to be a normal Descript tutorial. I have no idea how long this is going to take. This could be hours long. So I'm going to put right here the timestamp of when the Descript portion of this tutorial begins. But for now, let me just explain a few things. So I'm talking to you with a DJI Mic 2. It's this device right here. The camera I'm using is an Osmo Pocket 4. I'm gonna take a photo of it right now, and then I'm gonna show you exactly how this is set up. And so that photo's gonna appear in the final video, and this is wirelessly connected to the Osmo Pocket 4, and then connected to the Mic 2, this cable right here, this cord that I'm speaking into, this is called a lavalier mic, and this is like a $30 to $40 piece of equipment, and so it just connects into this, and it makes it, it's a lot smaller, and check this out, it allows me to feed the mic through my shirt, and then I can clip this to my pants, and I can clip this mic, to my shirt like that, and it's a lot more subtle. It sounds great. And now I can move around. I don't have to hold it, and most viewers won't even be able to tell that I'm wearing a mic. So the one part of this that I'm not going to actually show you is writing my script, and that's just done on my laptop on a note-taking software. And then I copy my script and I paste it into a software, a teleprompter software from the makers of my teleprompter, which is a brand called Neewer. Neewer right there. So they make the software and they make this actual teleprompter. But there's dozens of options, free options that you can download on Android, iPhone, iPad, even your computer. Even Descript has a built-in teleprompter that you could use. It's not quite a teleprompter like this where there's the mirror, so that you can just stare straight at the camera, but it has a teleprompter for the screen. So anyways, whichever teleprompter software you use, you will then paste the note from your computer into the teleprompter app, which is what I'm pulling up right now. And then it looks like this on the screen of my phone. And this actually comes with— the teleprompter that I use comes with a remote control. So when I turn this on, it's Bluetooth connected to the teleprompter. And so when I press the play button, the teleprompter is actually moving. And that's what I'll read. And you can tell it's upside down and backwards. That's because once it's mirrored onto the teleprompter itself, it looks normal to me. I can read it left to right, top to bottom, and it's scrolling slowly once I press play on here. Okay, so that's step 1. You have your script set up, you've got it set up and loaded into the teleprompter app of your choice. And now let's set up the environment. So I have this big grid light, and these are really good for one-person YouTube videos like I make. This grid here focuses the light on me rather than spilling it out on the background. And generally, the bigger your light the more diffused it's going to be and the better it's going to look. So this light also comes from the brand Neewer. A lot of my gear comes from Neewer, my tripods, things like that, um, and I can leave affiliate links in the description of this video. But what I'm going to do now is go ahead and plug this in. And a light like this has two settings, so it's got a warmth which is like how orange or blue the light is going to appear. And then it's got an intensity setting. And what I use for this one is 5600 Kelvin, which is a pretty like daylight, almost sun-looking setting. And I have it at 50% brightness because in a moment I'm gonna turn off my overhead lights. The settings here are gonna depend on your own setup. That's just what I use. And again, this one is called the FS-230B by Neewer. That's the actual light. And then the softbox, this big dome here, this is a separate piece. But I bought both of these on Amazon. And by the way, my final video is going to be shot with my desk as the background. So I'm going to have my monitor behind me. I have another light. I'll talk about these in a moment. Um, but this is going to be roughly the angle of the final video. So my light that I just set up is over here facing my desk, and I'll explain more about positioning the light and stuff in a second. But for now, I'm going to continue setting up the environment. So as part of this, I'm going to make sure that my environment is quiet. I have an air purifier running over here, so I'm going to shut that off, and then I'm going to shut off my overhead lights. In general, if you can You want to shut off overhead lights because it casts shadows directly down over your face and it doesn't look as good as the light that's coming from in front of you. On top of that, I have some windows back there and I have blackout curtains over them, so there's no natural light coming through. The reason for that— you can use natural light to your advantage, but in general, if there's a cloud passing over the sun or you're recording at sunrise or sunset, it's going to cause the light to change as you're recording. So for being able to control it to the greatest extent possible, I seal off the outdoor lights and I just use my artificial lighting right here. But for now, I'm going to go turn off my air purifier and I'm going to turn off my overhead lights. Those lights are off. The next thing I'm going to do is set up my primary camera. So I'm using for this a Sony camera, and it's currently plugged into the teleprompter. So this device sits onto— it's mounted via hardware to the teleprompter. And if you can see behind the screen, the glass screen of the teleprompter, there's the lens behind it. And this one's called the Sony ZV-E10 II. It's a popular intermediate-level DSLR camera, so it's a, it's a step above recording with the Pocket 4 that I showed you, and it's definitely a step above filming with your cell phone camera. So what I'm going to do here is plug this into my computer. I'm going to record directly into Descript from here. Now I could record onto the internal memory of this camera or onto a memory card and then transfer that card to my computer. Or like I said, what I'm going to do for the sake of simplicity is record directly into Descript off of this camera. So I got my cable here, plugging this into the side. And the other side, this is a special adapter that converts the— it's called HDMI— is the, the output of the Sony camera. And then this converts it into USB-C that I can plug into my computer. And my computer, if you're wondering, is called a Mac Mini, and I bought that in 2024. So it's relatively new. And with that connected, I'm going to turn on the camera and I'm going to position this. It's already at the right height. It's about eye level with the camera. You could go slightly lower and have it looking up at you. That gives a more authoritative look if the camera's kind of looking up at you. Or you could have it slightly above eye level looking down at you, um, is another option. But a safe for YouTube, generally good option is about eye level. So I'm just gonna place that off here to the side. And then behind me, you'll notice I have a bright light. This is my panel LED light that I use for Zoom calls. So I have a webcam right here, and then directly behind that is this panel light. But when I'm filming a YouTube video, what I'll actually do is flip this around like so, and then I'll turn this to blue, and then it looks like my computer has a blue glow. And the reason I choose blue is that's one of my brand colors, so it complements my branding. And then I also have this light right here, and this adds a little bit of texture. First of all, glowing in the background, it just, it looks kind of nice. But also, it acts as what's called a hair light, where it's lighting up the back part of my shoulders and my hair, and it gives a little bit of depth. It makes it so that you can tell that I'm standing in front of my computer and it's not kind of just all blending into the in with the background. I'm not. Okay, and as for the big light, I didn't mention how I set this up. Generally what you want to do is have your brightest light— if you have one of these lights, you want it about 45 degrees offset from you and 45 degrees up, and that's going to cast brightest light over one half of your face and then leave a nice shadow. That's kind of a cinematic effect that's really popular on YouTube and in films. And so that's what I'm going for by placing it 45 degrees off. You could also have it directly behind your camera or your teleprompter. I know it's kind of hard to see, it's kind of dark over here now, but you could place it directly behind your camera and that's— that works just as well. Okay, so now I still have my teleprompter app pulled up here, and what I'm going to do on this teleprompter is I place my phone right there with that app pulled up. I reposition that so that it fits nice and tight. And now you can see on the screen my phone, which is mirrored on the phone itself. Once it gets onto this part of the glass, it reflects back at me the way that we read in English, left to right, top to bottom. And so What I can do is scroll here to get to the very top of my video. And what I'm going to be recording, by the way, is a VSL, video sales letter. It's, uh, very short. It's about 90 seconds, and it's for my course, the landing page of my course. And then we're going to edit it together once I'm done filming it. So with that out of the way, I got my teleprompter set up correctly. I got my remote here. Ready to go. And what I'm going to do, the way I'm actually going to use this, is I'm going to press play, I'm going to read the lines. If I need to, I'm going to pause it. But what I'm basically going to do is just put this remote in my pocket as I'm going, and it's going to be out of sight, out of mind. Now, some technique for the teleprompter. First of all, you want to look directly into the lens of the camera, so you want your eye travel to be as small as possible. So on When you're setting up the teleprompter, you want to make your words close together because the further across you have to read, the more your eyes are going to travel and the more obvious it's going to be that you're reading. You also want to— the camera takes off some of your energy level, so you want to be a little bit more excited than you normally are. I say about 120% energy is about right for most people, so you want to just give it a little bit more energy than you normally would, or then feels natural. And lastly, you're probably going to mess up lines. You're probably going to read something wrong or you're going to say it with the wrong intonation. That's fine. That's part of the game. Again, you got your remote, pause it, scroll back up, read the line again. Don't start in the middle of a line. If you mess up a line, don't just start over in the middle. Read the last full line and start from there, or entire paragraph, even better. And then when we're in the editing phase, you can edit that out. And by the way, using a teleprompter, I recommend it for many reasons. One of them is that it keeps you much more concise. If you're somebody who goes off on tangents and you ramble a lot, this will keep you down to just the essentials of what needs to be said. It'll also make it so that you're not doing any filler words, so that saves some editing time of having to get rid of the ums and uhs and saying likes and you knows. You're fixing all of that stuff in the writing process. When you wrote that script, you're condensing it into the core of what needs to be said. Authors wouldn't put out a book that nobody had edited for them before. You know, they— most books start 5 to 10 times longer than what actually ends up being published. And that's true of YouTube scripts too. If you don't narrow it down to the essence of what needs to be said, You're wasting your viewers' time and your video's gonna flop. Okay, so now I'm actually gonna switch over to setting up my Descript video here and you can see that process. Okay, first I'm gonna come over to the Descript app. I'm gonna open that up and then I'm gonna hit record. I'm gonna hit camera. If I was doing audio only with just a microphone, I would select audio only. But I have a microphone and a camera, so that's what I'm going to select. And here I am inside of a project, and the first thing it tried to do was choose my webcam as the input source. So what I'm going to actually do is change this to this one that says USB video. That's going to be my good camera with the teleprompter over my shoulder. So I'm going to click on that, and we have a problem. So I'm going to need to actually turn on the camera to fix that that input thing that's going on. Okay, so the next thing I would do is do some practice recordings. So I'm going to move this out of the way a little bit. So I'm going to grab my teleprompter and camera here, and what I want to do is position this, and I'm looking at the actual what Descript is picking up to determine my framing. And I'm making sure that my head isn't getting cut off. I want to be on about the top third, which actually you can see right here there is a thing where I can, I can position myself inside of to make sure that I'm centered up how I want to be, which would be about here. And this is a really safe, easy view for YouTube where my body is centered, my eyes are on the top third line and there's about a fist or two above my head so that if I need to crop in or zoom into the video in any way, it's not gonna chop off my forehead. And then I also wanna make sure to set my input audio source. So right now it's going off the same input source as my camera, but what I wanna do is switch this to my desktop mic here, which is called Shure MV7 Plus. And now I'm getting audio out of my good mic and I'm getting video from my good camera. And then I'm going to kind of position— I have this mic arm here that it's on, so I can kind of position this over my shoulder and pick up my audio as I'm talking. Okay, and then always, always, always, I recommend do a test. So hit record, get 5 seconds of you speaking, check the audio, check the positioning of the video and all that kind of stuff. And I'm actually going to just bring this back a little tiny bit I think that's gonna be a little bit better. And then do your practice recording before you actually do your full thing. So that's what I'm gonna do right now. I'm gonna click record. Test, test, test. 1, 2, 3. How does it sound? I'm gonna hit stop and then I'm gonna see what's going on in Descript, how it looks. Test, test, test. 1, 2, 3. How does it sound? Okay, so one thing that's going on is I'm having a delay, an out of sync issue between my mic and my video. But that's okay, we're gonna fix that in the editing process. But other than that, I'm checking that I look how I want on the video. I'm checking that it sounds clear, there's not any echo. Maybe I forgot to turn off my air conditioning, maybe my dog is walking around. I'm just making sure that it sounds good and it looks good. And if it does, it's time to do the real thing. So what I'm gonna do is highlight my test clip on the timeline and press delete. And now it's gone. I have a blank project again. And you can see it automatically named this video project. The only thing I said was echo test, and so that's what it put in there. But I'm just gonna rename this Descript tutorial like that. And then I'm gonna come down, I'm gonna say record camera, and there's my feed again. I already know I haven't changed anything, so my audio's good, my video's good, we're good to go. I'm gonna hit record. I'm gonna turn on my, my remote here. And it's okay that the recording is running and I can even say stuff. I can, I can leave notes to myself more or less because I'm just going to cut this out in the editing process anyways. So the first 20 seconds of this video I'm just going to eliminate and I'm going to just take a second, take some deep breaths, do whatever you have to do. If you want to jump around, some people jump around. I know people that jump on a trampoline, they have like a little trampoline in their office. Whatever it takes to get yourself energized or in the right headspace for the recording. Go ahead and do that. But here we go. So I'm going to return my teleprompter to the very top of my script. I'm going to hit play and I'll see you on the other side. I'm going to stick this in my pocket. Making videos feels overwhelming in 2026, especially if you're over 40. The last thing you want is endless rabbit holes, tech jargon, or wasting weeks on tutorials that don't answer your nuanced questions. I'm Ross Zeiger, and I've spent years helping beginners just like you cut through all that noise with one-on-one Descript tutoring. Chances are you found me from my Descript Master YouTube channel where I've— okay, there we go. I messed up a line. I didn't say it quite how I wanted, so what I'm going to do is I'm going to— recording is still going, I'm going to cut all this out in post. I'm going to pause, I'm going to scroll up back to before that line, I'm going to hit play again. This is going to go back in my pocket and we're going to take off from where we left off. I'm Ross Zeiger and I've spent years It's personalized, hands-on, live group coaching. I just messed up again. So I'm gonna do fast forward up. And by the way, some mistakes you can leave in because you could throw something over it. Maybe you're listing stuff out like I just was. I could get rid of my video and put text over it, or I could, if I'm talking about doing something in the Descript software, I could throw a screen recording of the Descript software doing that particular feature. But what I'm gonna do is hit play and we're gonna continue on. Looking sharp and professional. And notice, by the way, the way that I set up my script is there's spaces between paragraphs. So when I'm pausing, it's just running through those spaces and I'm kind of gathering my thoughts, preparing for the next paragraph. But again, I'm not worried about it because I'm going to cut all that out in post. Within a session, or maybe a few sessions depending on where you're starting from, you will learn all the skills you need to record, edit, and publish your videos. So here's how it works. Choose a package. By the way, I want to explain something I just did there. It's a little bit of teleprompter/presentation skills. When I was listing those things off, I said you will learn all the skills you need to record, edit, and publish your videos. I'm using my hand motion in a different way. I'm saying, "To record, edit, and publish your videos." I'm actually physically kind of like bonking the words as I go. And so you can kind of do things like that to make your presentation more interesting. And another thing with teleprompter, by the way, is rather than just staring at the camera the whole time, to actually look off occasionally. So it's like you're thinking about your words and it just kind of gets awkward if you're just staring straight at the camera lens. The entire time. Okay, let's continue on. Scroll down below, pick your package, complete the checkout, and you'll get onboarding instructions instantly to set up your account, book your first call, and we'll get you making videos without the headaches. And then at the end, I pause a little bit and stare at the screen for just a couple seconds because if I start reaching immediately for my remote you're gonna be able to see that. But what I'll do is I'll pause it just a few seconds, and then that way I can add a fade out at the end, and the video fades to black, and the video is over. Okay, so now I have my video done, uh, that was 7 minutes and 50 seconds, and it's still going into Descript. When I get this all cut down, it's probably going to be 90 seconds or less. But what I'm going to do is hit the stop button And as soon as I do that, it says initializing, processing recording. And this will take, for an 8-minute video, it'll take probably 30 seconds to finish processing and transcribe it. And I can, even before it's done processing, I can see my video. I can preview it, make sure everything is looking good. I can even hit play. More or less, because I'm just going to cut this out. And just make sure that it looks good, which it does. So now I'm just gonna shut everything down. I'm gonna pack up my light, I'm gonna turn back on my overhead lights, get everything back to how it was, uh, before I started filming, and then I'll meet you in Descript and we'll actually edit this thing. Okay, everything's taken down. Let's edit. Here is my desktop with Descript pulled up, of course. And before we get into this, I wanna just show you a couple things. First of all, you might be wondering what this is. This is a screen cursor app that puts this blue circle around my mouse. So if you've ever wondered how to do that, you can get a screen cursor app on the Apple Play Store if you're using Apple or Windows Play Store if you're using Windows. And I do happen to know that this functionality is coming to Descript soon, but for now I use a third-party app. And so that's what's creating that blue circle around my mouse. Every time I click, you can see a little animation. And if I right-click, it's a purple animation. It, it does it in purple. And that is just, uh, a customization that I've done and set. The next thing is everything I'm gonna show you, or a lot of things I'm gonna show you will require an updated version of Descript. So I am on the Creator plan on what I'm showing you, which costs about $24 a month. Um, so there's certain things like layouts and AI tools that require a paid plan. So if you're gonna be using this tool a lot, I recommend you might need to upgrade. And I have videos talking through the buy decision, which plan is right for you. And then as far as getting the most out of this tutorial and all the tutorials on my YouTube channel and with software in general, if you have it, it's really useful to have two screens up so you can watch this YouTube video on one screen, play a little bit, watch how I do something, and then pause it, go into your Descript and practice the thing that you just saw. And if you get stuck, look, software is complex. There's a lot to pay attention to, a lot of little fine nitty-gritty details. So. Watch things multiple times if you have to. Make it bigger on your screen, make it as big as possible so you can really see the details of what I'm doing. And then watch it multiple times, play back a couple seconds, watch it again if you have to, and actually practice it. And that is how you learn. That is how this becomes muscle memory. So if you got a project of your own, that is highly, highly recommended way to go through this. Okay, so here is my video. You can see it ended up being 8 minutes. And again, this is gonna be even more fluff to cut out because I was explaining things as I was going. I was teaching you teleprompter technique and stuff like that. But what we're gonna do is you're just gonna be riding along. I'm gonna edit this like I was gonna edit this for my website. So let's get into it. Let me just do a little bit of familiarization in case you've not used Descript before. This is your transcript up here, and this corresponds with the timeline down below. You have to use both together to edit your videos in Descript. So when I'm starting a cut, I always do what I call the rough cut first. And you could use AI tools. So I could go to AI tools over here on the right, and I could do the filler word removal. And it found 12 filler words. Again, because I use the teleprompter, there's gonna be a lot fewer filler words than if I was just speaking off the cuff, but it still found 12 filler words. And what I always do with the filler words is I select this one that says all filler words and I unselect all because the likes and the so's and all that kind of stuff, it can be too much. This is what it's finding. So it only found one like, it only found one so, and so those are probably there intentionally. Like I just used the word so, so I'm going to leave that in. But the words ums and uh, those pretty much always need to go. So I'm going to select those. It found 2 each of those. Repeated words, I'm going to leave those in as well. I'm not going to select it. So I'm going to click out, and that immediately cut my list down to just 4. So I'm going to click Find All Filler Words, and over here on the right, it put the 4 that it found. And I can click on it and it takes me to that part of the video. I'm gonna do But what I'm gonna do is click on avoid harsh cuts, and that narrowed my list down to 3. I'm gonna go ahead and say remove all, and now all of those ums and uhs are gone. The next thing I'm gonna do is go back to AI Tools, and I'm gonna click on Studio Sound. And now Studio Sound is applied, and Studio Sound just takes out some of the background noise, so, you know, dogs barking, traffic going by, ambulances, things like that, and just makes your audio sound a little bit better. And then what I'm gonna do is go back. You can see my playhead, this gray line right here, which is where I'm currently looking at, the moment of my video I'm currently looking at, is at 3 minutes into my video. I can tell that from the number right there. I'm gonna return to the beginning of my video by pressing the Home button on my keyboard. If your keyboard doesn't have a home button, you can also use this button right here or click on this little jump to marker and say beginning of composition. You can click on that and that takes you right to the 0:00 second mark of your video. But what I'm gonna do now is play through my video and listen to the quality of the audio and see if I like it. If I do, then I'm gonna keep it and I'm gonna use it. And it's okay that the recording is running and I can even say stuff. I can leave. It's a little bit harsh, the Studio Sound. So what I'm gonna do is click on my video, find the Studio Sound, click on the dials and dial the intensity down. With Studio Sound, there's only one thing you can do, which is adjust the intensity. So I'm gonna dial this down to about 80 and let's listen to it again. I'm gonna back up. And it's okay that the recording is running. And I can even say stuff. I can, I can leave notes. And that sounds better. And one quick note on editing is all of editing is a cycle of make a change and then back up a couple seconds in your timeline and play that change back. And you're listening to it, you're watching it, you're paying careful attention to the details. If you like the change that you just made, keep it. If you don't like the change, keep changing it. Make it more intense, make it less intense, do a different change until it looks and sounds exactly how you want. Because a lot of times, even after years of doing this, I don't know the exact setting with the Studio Sound, for example, that I need. I mean, I kind of have an idea because I, I'm always recording in the same place with the same microphone, but a lot of times you won't know, especially when you're starting out as a beginner. So you have to just make a change. See how it is in the video, and then keep adjusting until you like it. That's it. That's the editing process. Now continuing on, what I'm gonna do is use the timeline to do some editing. So right here you can see it says that 5.0s, that is time where you can see there's no sound waves, there's no speaking right there. And so right off the bat, I know I haven't started my, my actual video yet, so I'm just gonna trim that out. I put my mouse at the beginning, I get that bracket and I just trim it out like so. Now what I'm gonna do is I, I could have alternatively just read through my transcript and seen where I actually start speaking, which is right here where I say making videos feels overwhelming in 2026. So everything before that was me just explaining to you what I'm about to talk about. So I don't need any of that. I'm just gonna highlight it all, and I'm gonna hit delete. And now it's gone. Making videos. And now it's a nice and tight intro where I just get straight into my talk where I'm actually speaking. So now what I'm gonna do is just play through this entire thing and cut out all the stuff that I definitely don't want in my video. Making videos feels overwhelming in 2026, especially if you're over 40. The last thing you— okay, so another thing that's happening is I'm noticing my video is out of sync with my voice. This happens sometimes because of— it could be a hardware issue, like your microphone or the cables connecting your microphone or your camera are causing— there's a little bit of latency And so the audio signal is a little bit outta sync with the video signal. No problem. We can fix that easily in Descript. So what I'm gonna do is go to project and everything in, in project is all of my media files. This is literally everything that's been put into this project. So all of my videos, all of my audio, all of my stock media, if I've added it, will live in here. So what I need to do is find this particular media file, and I can do that. I could, you know, scrub through here and I could find which one it is by just looking at the audio. Like there it is. It's the Descript Mastery -1, or I could right-click on the video down here and I could say view media in case there's a lot of video and you don't wanna look through them all. And so there it is. Uh, Descript Mastery -1 is the name of this one. Now, for fixing the audio and video offset, there's this little thing right here in the bottom right of this view. So I click on that, and right now it says 0ms. That's 0 millisecond offset. Now again, in perfect conditions, this would already be perfectly synced, and maybe to you it does look synced, but to me, I can tell that it's, it's a little bit off. Now I need to determine exactly how it is off, is the video ahead of the audio, or is the audio ahead of the video? And I can do that by just clicking somewhere in the timeline, anywhere at all, and I can click forward with the arrows on my keyboard one frame at a time. So if you pay attention to my video, I'm clicking with my left arrow on my keyboard and it's moving one frame of video forward at a time, or backwards in this case. And now I'm gonna go forward So I can see my mouth is opening in the video, but if I look at the timeline, the playhead, the blue line, is on a silent part. The sound doesn't actually start until a little bit later. So that tells me my video is behind my audio. In other words, my audio is ahead of my video. So I'm gonna go back to my source recording here. I'm gonna hover over the 0 millisecond there. And you can see that little black box that pops up. It says, fix audio-video sync issues by adjusting the video offset in milliseconds relative to the audio. Positive values delay the video, negative values advance the video. And so I already determined that my video is behind the audio, so I'm gonna need to put a negative number in here. Back to the editing cycle I talked about, you're just bracketing in. So you'll start with your best guess. Like, I just will put in 100 milliseconds. And then I'm gonna hit enter. And you can see in the background my video changed a bit. And so you're just putting in your best guess and then we're gonna play it again, or rather use the, the arrow method that I showed you, tapping one frame forward or backwards and seeing if we're back in sync. And ultimately playing it will be the best determination. But if my change was too small, I'm gonna make a bigger change. If it was too, big, I'm gonna make a smaller change, but let's go ahead and play it. I'm Ross Zeiger, and I've spent years helping beginners just like— so it's pretty close. I'm moving in the right direction, but I think I need a slightly bigger correction. So I'm going to click on their video once again, Descript Mastery -1. I'm going to come to the audio sync, and I'm going to try a -125 milliseconds. I'm gonna play it again. I'm Ross Zeiger, and I've spent years helping beginners just like you. Okay, that looks fine. So that is how I would fix the sync, and now let's continue on. Making videos feels overwhelming in 2026, especially if you're over 40. The last thing you want is endless rabbit holes, tech jargon, or wasting weeks on tutorials that don't answer your nuanced questions. So later, that part where I'm listing stuff, rabbit holes, tech jargon, or wasting weeks, I'll probably do something with that, like put text on the screen or zoom into myself. But one mistake I made when I first started editing was trying to do everything at once. So I'd be doing my, my first playthrough that I'm doing right now, and I would go ahead and make those changes. And that's fine, it's just inefficient. The order, the sequencing of how you edit matters. Because right now I need to have the discipline to just do my rough cut. Because maybe I repeated those lines and I forgot about that. And then I would end up making a change here. And then I just say those lines again in my script. And now I gotta, I'm doing double work or I'm deleting the work that I already did. So I encourage you have the discipline to only do your rough cut. Rough cut in the rough cut phase, which we're in right now. And in fact, I can see I did repeat that line. I say, 'I'm Ross Zeiger' again down below. So what I'm going to do is play this take, I'm going to see how it sounds, and then I'm going to go play this take and see how that sounds, and I'm going to choose the better of the two. Probably most times the second take is better, which is why you, you repeated yourself, because the bad one, the first one was bad. But we'll see, sometimes you can take the best of both takes. I'm Ross Zeiger, and I've spent years helping beginners just like you cut through all that noise with one-on-one Descript tutoring. Chances are you found me from my Descript Master YouTube channel where I've— okay, there we go. I messed up a line. I didn't say it quite how I wanted. So what I'm going to do is Okay, so that was just me explaining to the camera, um, obviously. So I'm just gonna find where I'm saying this is gonna go back in my pocket, take from where we left off. So that I— the line I, I repeated was that I am Ross Zeiger. So I'm just gonna select everything from the start of my next take all the way to the start of my previous bad take. And this is exactly how it works, exactly what I was explaining in that part is if I tried to just cut to the line I messed up, where I, in the middle of my sentence, I messed up my line or hesitated, it would be a lot messier cut than if I just cut for the beginning of my first good clean sentence. So what I'm gonna do is just delete all that and let's just back up a couple seconds before that cut and see how it sounds. And again, I'm just selecting in the timeline to a couple words before for where I start my good sentence over. Your nuanced questions. I'm Ross Zeiger, and I've spent years helping beginners just like you cut through all that noise with one-on-one Descript tutoring. Chances are you found me from my Descript Mastery YouTube channel, where I've created over 400 videos now teaching clear, no-fluff Descript tutorials. Now, if you've ever thought, I would like to sit down with him screen share, get him to answer my questions in real time and get me unstuck fast. That's exactly what my one-on-one tutoring delivers. This isn't— so there's a little bit of a— it was a little bit of a— it was a very rough cut, actually, where I made that cut. But again, I'm having the discipline right now in the rough cut phase to just I'm gonna take mental note of that. And in my next playthrough, I'm gonna clean it up. I might use a zoom or I might use some B-roll to cover it up, but for now, I'm just doing the rough cut. And so there's another 3-second pause. What I'm gonna do is click on the word, this word, this isn't group calls. And I'm gonna drag that in the timeline until it's tighter with the previous sentence. And there's not really a rule of thumb here. Again, it all just comes down to how it actually sounds, the pacing that you're going for. And to do that, you'll just— now that I've made that change, I'm gonna play it. Delivers. This isn't group call. And that sounds good. That sounds natural to me. And that's what you're going for is natural. You want your edits to be frictionless for the viewer. They shouldn't be jarred by the cutting you're making, the cuts you're making. And basically, yeah, you just want to reduce the friction of the viewing experience. It should be easy to see, easy to hear, easy to understand. Okay. This isn't group calls or prerecorded lessons. It's personalized, hands-on, live group coaching. I just messed up again. So I'm going to do fast forward up and something happened with my video there, but that's okay. We're going to cut all this out anyways. So I'm talking about— get through screen recording. Okay, so there's the start of my next good take where I say, now if you've ever thought. So I'm going to highlight all of that bad take to the previous now if you've ever thought. I'm going to hit delete, and notice it put in a blank line there. I'm going to hit delete one more time just to keep everything tight. I'm going to back up a couple seconds— a couple words rather. I'm gonna— and let's hit play. Fluff Descript tutorials. Now, if you've ever thought, I would like to sit down with him, screen share, get him to answer my questions in real time, and get me unstuck fast, that's exactly what my one-on-one tutoring delivers. This isn't group calls or pre-recorded lessons. It's personalized, hands-on coaching live over Zoom tailored to where you are right now and where you want to go. You don't need fancy gear or to become a professional editor to succeed on YouTube. What you need is someone who teaches at your pace, skips what you won't use, and focuses on what gets your videos out there looking sharp and professional. And notice, by the way— so there I'm talking to the camera again. And I'm just gonna fast forward. And you can scrub through here like I'm doing. So I'm left-clicking and then just dragging through and I'm scrubbing forward to see where I actually start speaking again. So now I'm facing the camera and I can see I'm saying within a session or maybe a few sessions. So that's where I'm starting again. And let me just scroll over. By the way, if you don't know how to scroll through the timeline, navigate through the timeline, I highly recommend spending some time learning that, how to zoom in and out. Zooming in is seeing more detail, zooming out is seeing less detail. And you can do that with your mouse by holding Command on a Mac or Control on a Windows and then scrolling with your scroll wheel, and that goes in and out. But what I'm gonna do is click on the word within and drag it to the left And remember this whole section here, that's all my bad take. So I'm gonna drag this word all the way to here, which was the last part of my good take that I'm gonna keep in. And there we go. And notice my 8-minute video is already under 5 minutes. I'm a third of the way through this and I've cut a significant amount. With a lot more still to cut. And I'm just doing a quick look through my timeline because sometimes you can just read things and save yourself the time of playing through. Like, you know, you did a bad take and you can just go off of the transcript to find those bad takes and just go ahead and delete them even before you listen to it. And another thing for going even faster is clicking on this 1x right here. And this is gonna be the playback speed. So when I click on X, or maybe a few, 1x is, is normal regular speed, but I can click on that and I can play through faster, like 1.5x or 2x. And I don't necessarily recommend this, especially for a beginner, but since I'm showing you exactly how I would actually do this, this is something that I would do just to, to play through a little bit faster. Um, okay. Edit, and publish your videos. So here's how it works. Choose a package. By the way, I want to explain something I just did there. It's a little bit of teleprompter slash— when I was listing those things off, I said, you will learn all the skills you need to record, edit, and publish your videos to make your presentation more interesting. And another thing with teleprompter, by the way— okay, so that was all just me explaining stuff. So I'm going to go all the way to the where— so here's how it works line down here on the timeline, and I'm going to bring that all the way over, and I'm going to zoom in a little bit. What I'm going to do is find that next part where— so there's my bad take of where I say, so here's how it works, and then there's my good, here's how it works. So I'm going to drag this all the way over like so, and now I'm left with my, my good take. And by the way, I'm gonna get out of the 1.5x. I just did that for demonstration purposes, but for the sake of this tutorial, we're gonna go back to 1x. But that is a tool in your tool belt that you could play through your video faster. And maybe in the later stages of your edit, once you, you finalize everything, you could just do this as a quick review, put it in 2x or 3x. Um, but I'm gonna return to 1x and let's just see how this cut looks. So here's how it works. Okay, that was a little bit of a jump cut. So I'm going to do— let's put my playhead right here. I'm going to tap forward one frame at a time, and right there it goes from my hands down to my hands being up near my chest. So what I'm going to do is zoom in on this a little bit. I'm going to get my mouse right there with my bracket open to the right, so I'm manipulating the clip to the right side of my mouse. I'm going to click and I'm going to slide to the left, and that brings back my video to a frame where my hands are down, so it matches how my body looked before that cut. And now that's going to look a little bit smoother. So here's how it works. Choose a package and let's continue. Most beginners start with 3 calls, and each call is 60 minutes long, and that can get beginners from from zero to publishing your very first video. In each call, we meet one-on-one over Zoom. We'll use screen share so I can walk you through every click live in your actual projects. I can annotate things. I can even control your screen and do things for you if that's helpful. And every session is recorded so you can watch it back later on your own time. Between calls, time between calls. You get unlimited email support. So if you're stuck on a gear decision, there's a weird Descript update, or you just want feedback on something like, I don't know, how do I make this clip pop? Just email me. I respond fast. But why would you choose me? I teach at your level. No nerding out on technical specs. I'm unless you ask. And I know you're not aiming for Hollywood-level film. You just want to be able to make clear, engaging videos that connect with people and build your brand. I've helped 500+ beginners in these calls avoid months of frustration, students who have gone on to publish consistently, grow their audiences, and even land clients from their videos. So here's my risk videos. So here's my risk-free 5x guarantee: if each hour of tutoring doesn't save you at least 5 hours of struggling on your own, full refund. So there is only one outcome here: you learn Descript or it's free. So you ready to stop thinking about it and start creating? Scroll down below, pick your package, complete the checkout, and you'll get onboarding instructions instantly to set up your account, book your first call, and we'll get you making videos without the headaches. So there we go. That's the whole thing. And then right after my last word, I can just split this clip. So I'll click right there, like give a little bit of a pause after the last part of my last word, and I'll hit S, and then I'm gonna select the part after it, the clip that I just created, and I'm gonna hit delete. And I'm gonna hit all the rest of this. I'm just gonna check the transcript. Yeah, that was all just me explaining. So I'm gonna highlight that all and press delete. And now it's gone. And there it is, more or less my final video. And it's down to 3 minutes and 15 seconds. I'm gonna hit the home button to return to the very beginning. And that is it for my rough cut. I've taken out all the stuff that definitely won't make it in. I might cut out a couple more lines as I'm going, but that was the stuff that's definitely not gonna be in the final video. And then what I'm gonna do now is what I call my detailed cut. So I'm gonna start adding text. I'm gonna add zooms and transitions and all the fancy details that will make this video come together. So this phase of the edit is the detailed cut, and this is going to be 20% of the results but 80% of the effort in time. Your rough cut was the 20% of the effort. It's fast, but it's 80% of what matters is actually choosing the content that goes in it and getting rid of everything that's not going to go in it. So let's get into it. So again, I'm returned to the very beginning of my project with my playhead, and I'm just going to do a complete playthrough again. And this time, as I get ideas, I'm going to start adding stuff. And maybe I had ideas in my script that I actually wrote into my script, like add this effect here, put in this music, put in this effect. So maybe I already have that stuff planned out, but if I don't, which I usually don't for me personally, then I'm just going to be adding that stuff as I'm playing through and thinking like, oh, that would look good here. So let's go ahead and do that. Making videos feels overwhelming in 2026. And one quick thing, my studio sound still feels too intense. So I'm going into properties, studio sound, the dials, and I'm gonna drop this to like 50. Let's see how that sounds. Especially if you're over 40, the last thing you want is endless rabbit holes. Okay. Making videos feels overwhelming in 2026, especially if you're over 40. The last thing you want is endless rabbit— Okay, so the part where I say making videos feels overwhelming in 2026, I'm going to put my playhead right there after the word 2026. I'm going to put a forward slash and that creates a scene. So now I have a scene 1 and a scene 2. And in scene 1, I'm going to right-click on this part and I'm going to say change layout. And that opens up a layout menu over on the right side. I'm going to say change layout pack, Drive. And then I'm going to choose a different layout. And by the way, I have a layout course that's completely free for the first 100 students. So check the link in the description for that. There's still about 55 spots remaining at the time of this recording, but I'm going to click on this one that says Descript Mastery. That's the name of the layout pack. I'm going to say see layouts. And then here are my different layouts. And I'm going to apply this one where it's going to put a quote on the right, on the left side, and then I'm going to be on the right side. So I'm going to click on that. And there's the layout. So there's my quote, making videos feels overwhelming in 2026. And it ends in a comma, which I don't like. So I'm going to fix that first. I'm going to come over to my transcript. I'm going to hold X on my keyboard and you can see my mouse turned into a period and a comma. I'm going to click on the word 2026. And it got rid of the punctuation. I'm gonna click once more on 2026 and now it's a period and that's what I want. And then over here on the right side, I am not centered. So what I'm gonna do is double-click on myself and this puts me into reposition mode where I can simply drag myself without changing the crop. I'm just repositioning which part of myself inside of that, that frame is showing. And that looks a lot better with my shoulders centered. So I'm going to hit done. I'm going to return to the beginning, and right off the bat I can see that on the very first frame it's black. I don't like that, so I'm going to hit back. I'm going to close out of the layouts there, and right here where it says transition, that is what is causing it, is this smart transition. So I'm going to click on that and I'm going to change this to none, and now I'm showing from the beginning. So now let's hit play. Making videos feels overwhelming in 2026, especially if you're over 40. The last thing you want is endless rabbit holes, tech jargon, or wasting weeks on tutorials that don't answer your nuanced questions. So there, that part where I'm listing stuff, I just created another scene with the forward slash after the word questions, and now this whole section has been isolated as a scene. I'm once again gonna right-click on the scene rail. I'm gonna say change layout, and I'm going to sort through, scroll through my layouts. I don't have any ones on here that are list types. So what I'm gonna do is change layout pack. I'm going to do this YouTube Descript Mastery one. I'm going to say see layouts. And I'm going to scroll through to find a list overlay. And yeah, let's use this one. I'm going to click on it. And there it is. It applied it. And in a second, this text will get replaced. There it is with the things that I'm listing. So there is endless rabbit holes, confusing tech jargon. Wasted weeks on tutorials. Now there's another problem, which is that I'm not centered once again. So I'm gonna just slide myself over. I'm gonna grab the right side and move myself like that. Double-click, slide myself down like that. And then, um, this, I don't like the hierarchy of this. This is one problem with AI is sometimes it makes the header like this is size 39. I can see it in the text that's over. It says 39 and then down here it's 40. That doesn't make any sense from a hierarchy perspective. So what I'm gonna do is click on this one, say 50. I'm gonna make this box a little bit bigger and I'm gonna do, I'm gonna make it a little bit lighter so there's more contrast. It's easier to read. Video overwhelm is real. And then I'm gonna make these ones smaller. I'm gonna click down below. I'm gonna change that to— that's too small. Let's do 35 and just resize it a little bit by grabbing the box and resizing. Okay, so now let's play this whole intro sequence. Making videos feels overwhelming in 2026, especially if you're over 40. The last thing you want is endless rabbit holes, tech jargon, or wasting weeks on tutorials that don't answer your nuanced questions. I'm Ross Zeiger, and I've— so there we go. And now this next part, I'm introducing myself. I'm saying, I'm Ross Zeiger, I've helped hundreds of beginners just like you cut through all the noise. I'm gonna go all the way to after the word Descript Tutoring. I'm gonna type a forward slash and we're gonna repeat what we did. I'm gonna right-click on scene number 3, change layout. And this time I'm going to find one that's called a speaker, speaker that shows. And again, all, all these are little previews of what this layout's going to do. So this one, that's going to be me in the background. And then my name is going to go right there and it's going to probably misspell it because it misspelled it in the transcript, but that's no problem. We're going to fix that. So go ahead and click on it. And there is the layout. It says speaker name until it gets replaced. There it is. One-on-one Descript tutor, it says below it. So what I'm going to do to fix this is just click on the name that it thought it picked up. I'm going to delete the S. I'm going to put in the Z, E-I-G-E-R, like that. And then, um, down below, I'm going to get rid of the one-on-one part and just leave Descript tutor. And like that. Okay, so now let's play the transition from scene 2 to scene 3. Answer your nuanced questions. I'm Ross Zeiger, and I've spent years helping beginners just like you cut through all that noise with one-on-one Descript tutoring. Chances are you found me. Now I could proceed through my whole video like this and just saturate the whole thing with, uh, layouts like I'm doing. I don't actually like that. I like very simplistic edits, but that's just to give you an idea of how you could do that. But what I will say about that is it helps from a retention perspective to front load your edits. So a lot of people will say every 3 seconds or every 5 seconds for your first 30 seconds of the video, your visuals should be changing. So that could be text, that could be zooming in and out, that could be just different techniques at your disposal of keeping things very interesting and fast-paced at the beginning. And then once the viewer has committed to the video, then you can kind of slow down and go to more minimal edits. So that's generally what I'm gonna do with this, but I will show you a few more things that I, I might do to this video. So the other thing I would do in the first 30 seconds is add some music, and I will do that with Descript's stock media, which can be found right here in this media button. And then up here at the top, there is a my media tab where you can add stuff that you frequently use. So like if I have music that I always use for my brand, I add it in there. But for the sake of this video, I'm going to show you using Descript stock media, which by the way, you pay for. So you may as well use it. You don't need to go and get any other subscriptions or download music from any other sources. So the first little tab under stock is for visuals. So you can do stock videos, Giphy GIFs, images, but we're going to click on this music note. And these are going to be our music and sound effects. And one thing that a lot of beginners don't realize, they're like, well, there's only 2 songs in there, or you click show all and you can only scroll. What they're missing is this search button right here. So if I want to find very particular music, like one style of music that I really like is when I type in documentary and then I click show all, and these are really neutral instrumental songs that work well for YouTube. That actually might not be bad for when I'm saying, right? Making videos feels overwhelming. Um, but just to be safe, I'm going to play a few of these. That's too epic and dark. That's too bright. I don't like it. Too slow. That's not bad. I'm going to use that. So, uh, as I was doing, you can hit the play button to preview it. And just play a few seconds of it. And if you like it, then you can hit this button to actually add it. And with all these songs, they have a name, they have how long it is. So this one's a minute and 4 seconds long. I'm not going to need all of that. I'm probably going to cut it off after the first 30 seconds, but I can just hit this play or add button and now it's importing audio. And there it is. It's this green layer. And by the way, up until now, everything has been in our script layer. That's my video. And in Descript, only one layer gets transcribed, which is this one. And so you can see the words above my speaking. Everything above it is supporting layers. So now I have a supporting layer that is music. And what I'm going to do is I want this to start right at the beginning of my video. So I'm going to click on this green layer and drag the whole thing to the left until it won't go any further. And I release. And now that's gonna play from the beginning of my video. And then above it, these layers, you never saw me add those because those were part of the layout. So those were my layers, like my text layer with my name and a gradient layer. You can probably hardly see it, but there is a black gradient at the very bottom of this. And you can see the— every single layer in Descript has a, a border around it when it's selected so that that blue border is showing me what I currently have selected, which is the gradient. And then every single layer in Descript has, when it's selected, if you come to properties, you can see the properties for that currently selected layer and you can adjust things like the color, the opacity, the position of it, all that kind of stuff. But let's go to the very beginning once again and let's play this with the music. Making videos feels overwhelming. Okay, it's way too loud. The music is drowning out my voice. That's not good. So what I can do is click on the music layer. Properties is already open on the right side. I can go to this box that says audio, and 100% is going to be the, the volume before I've adjusted it. That's the default. And to, to make this be background noise, you have to lower it quite a lot. Like I find that like 15 or 20 is usually right. So I clicked in there, I typed in 15 and I hit enter. And so now it's going to be 15% of its original volume. And let's see how that sounds. Making videos feels overwhelming in 2026, especially if you're— so that's good. It's a lot more subtle. It adds a little bit of mood to the video, but might not be, won't distract from the video. Or you found me from my Descript Master YouTube channel where I've, okay, there we go. Oh, and I somehow missed that in my rough cut where I messed up that line. I guess I forgot to cut it. So what I'm gonna do is finish my rough cut by going to where I said chances are. So where do I start that line? And you can see I'm zooming in and out on my timeline to find that word. That's just my personal preference for this particular use case. And there is the word chances. So I'm gonna click, I'm gonna press F. S to split it, or I could click split right here, and it automatically selected everything before that split. And remember, if I scroll over, my previous scene ends right before the word chances. So everything that I want to cut is already selected. In this case, I'm going to hit delete, and there we go. That just cut out a couple minutes from my video, and I'm going to back up a couple seconds. Remember, always, always, always do that. And let's continue on. One-on-one Descript tutoring. Chances are you found me from my— okay, so there's a bit of a jump cut there where my body position suddenly changes. It's a, it's a bit jarring to watch. Chances are— so one way to get around that is in the next scene. Click on my video, and then up here at the top where it says 100%, zoom it in. So I'm going to do 110%. I'm going to hit enter, and I'm going to click into the white space and check the transition. So this has a transition on it already. The way that this scene is going to start is with a smart transition, and I'll show you how that looks. Let's back up and hit play. Descript Tutoring. Chances are— so it did a little bit of a zoom in to that 110% zoom, which I don't want. I want it to punch in. I want it to suddenly jump to 110%. So I'm going to click on that in transition and I'm going to click none. And now when I play it— Descript Tutoring. Chances are you— it jumps in and that distracts from the fact that this is a different cut. So let's keep playing through. Descript Tutoring. Chances are you found me from my Descript Mastery YouTube channel. And there's a little bit of like a clang in the background. I don't know if you can hear that through the screen recording here, but I'm going to zoom in. Chances are, chances are. Okay. Right there. There's a little bit of a, some background noise. So what I'm gonna do is switch into the range tool by pressing R on my keyboard, R as in range. And you can see that little blue thing that appeared below my cursor. And I'm gonna select right there. That's where that little clang is happening. It's probably me hitting my desk, the microphone metal making noise. And so I have this little clip selected that I, with the range tool, I clicked and dragged, and that selects just a range of my video. And then with that selected, I come over to audio and I click this little speaker and that mutes out only that range. So everything before it is gonna be normal. Everything after it is normal. But let's play that. You found me. Perfect. It perfectly canceled out that little clang that was happening. And sometimes this is, this is a risk if you have a little bit of background noise. And then suddenly it cuts to nothing, it sounds, it's a little bit jarring that it goes from whatever ambient noise is in your recording environment to completely silent. However, I have some music playing, so it nicely covers that up and the viewer probably has no idea. Let's press on. Chances are you found me from my Descript Master YouTube channel where I've created over 400 videos now teaching clear, Okay. Right where I say my Descript Master YouTube channel, I'm going to put a scene right before the word my. So I'm clicking into my timeline. I'm going to press a forward slash. That put a scene before my, and then I'm going to come after all the way to after Descript tutorials and put another slash and then I'm going to drop in a screenshot of my channel. So here's my channel. I'm going to press Command+Shift+4 to do a screenshot on Mac. I don't know what the, the hotkey is on Windows, but I know you can press the Print Screen button if you have that on your keyboard. And I'm going to just highlight over the part of my channel that I want to screenshot. And I release. And then I have this thing called— it's a third-party software that does screenshots. And so it puts this down here. It's a little preview of the actual screenshot that I made. And I'm going to hit copy. And then I'm going to come back to Descript. I'm going to click into that scene that I just created. I'm going to hit paste. And there we go. Now. The preview of my YouTube channel is in the video and there's a problem. You can see some black space on either side. So to fix that, I'm gonna grab the bottom corner and I'm gonna drag it to fill that, get rid of that black space. And then on the right side, I'm gonna do the same thing with the bottom right corner. And there we go. Now I can see my B-roll. And if you haven't heard the, the term B-roll before, To define terms here, A-roll is my video with my face and the actual sound that you're hearing. It's me producing the, the primary audio. B-roll is anything other than that. So in this case, I'm throwing up a different image and my voice is there in the background. And just to pull the curtain back a little bit on Descript, if I move this out of the way, my video is still there. In the background. It's just being covered up at this moment in time. And if I go— if I click this back button here and I come down to this bottom section that says layers, these are all the layers that are currently in this video. So the top one that says clean shot, that is my screenshot. And if I click this little eyeball, that hides it. So it's still there It's just not visible in my video, but I can bring it back by clicking that eyeball again and I see it once again. And so that's covering up my script layer, which again is my primary video and audio. And I could mute that layer, for example, by clicking on that, that mute button, or I could hide it, et cetera. And then there's also my audio layer because my audio layer also, my, my music layer also exists at this moment in my video, and I can mute that as well if I wanted. So pressing on, let's continue. You found me from my Descript Mastery YouTube channel where I've created over 400 videos now teaching clear, no-fluff Descript tutorials. Now, if you've ever thought, I would like to sit down with him, screen share, get him to answer— so the music at that point, I'm kind of done with the intro. So what I'm going to do is cut the music there. So I'm going to click right where I want that music to end, and I'm going to press S, as in split. And that just isolated the first part of this layer and the second part. I'm going to click on the second part, and I'm going to press delete. And now my music ends right there. It's going to end a little bit abruptly. Let me play it. Descript tutorials. Now, if you've ever thought, so what I'm going to do instead is fade that out. How do I do that? If I hover over the music layer, you can see this little tiny white dot in the corner. Every single layer in Descript has this. And in the case of music, this is going to fade out where the music gently goes from the volume that it is to nothing. And so it'll be less abrupt of an ending. And so what I'm going to do is click on that white dot. And drag to the left, and you can see this dark triangle forming right there. That is, that white dot indicates where the fade is going to begin. The volume's going to begin dropping off, and then by the time it reaches the end of this layer, that music's going to be non-existent. So let's play it. Teaching clear, no fluff Descript tutorials. Now, if you've ever— much better. And with everything As you're going to hear me say over and over and over, you never know exactly how it's going to sound until you just make the change, play it back. If you like it, keep it. If you don't, keep changing it. If you've ever thought, I would like to sit down with him, screen share, get him to answer my questions in real time and get me unstuck fast, that's exactly what my one-on-one tutoring delivers. Okay, there's a little bit of weirdness with that transition. So you see I'm pressing forward one frame at a time and this starts to show. I'm gonna go one more frame, one more frame, and then all of a sudden my body changes. So what's going on there is that is a smart transition. So my top layer, which was my screenshot of the YouTube channel, is fading out and I'm seeing a bit of the background from my first, from my script, and then it's cutting to me in a different angle. So what I want to do is eliminate that smart transition. So I'm going to come down to where it says In, Smart Transition, and None. Now let's back up and play it again. Descript tutorials. Now, if you've ever thought— Okay, that looked good, but it sounds bad. I don't know if you could hear me taking a breath. I was taking a breath in at the end of the, the previous scene and a breath in at the end of the second scene. And so what I want to do is I'm just going to tighten this up with the bracket. Let's play it again. Descript tutorials. Now, if you've ever thought, I would like to sit down with him, screen share, get him to answer my questions in real time, and— okay, what I'm going to do here is some zoom-ins at each thing that I list. So I say screen share, and then right after that word, I'm going to put in a scene. And then right after the next thing I list— just in real time and get me unstuck fast. And then right after the word fast, I'm going to add a scene. And then right after the word delivers, I'm going to add a scene. And then what I'm going to have happen is each time that I list something, the camera's going to zoom in a little bit. I'm going to come into the scene number 7. In this case, I'm going to click on my camera. I'm going to change this to— actually, I see it's already at 110. So I'm going to do is take this first one and make this one 100. This one's going to remain at 110, and then this third scene is going to be 120. So I'm typing that up above my image with it selected. Hit enter and it zooms in. And let's play it back. As always, screen share, get him to answer my questions in real time and get me unstuck fast. That's exactly what my one-on-one tutoring delivers. This isn't— and then at the end of that, it zooms back out. And I'm actually going to click on this, change this to 100% so it zooms all the way back out to the original size. Delivers. This isn't— and notice the animations, it automatically does the zoom. That's because if I go to properties right here, the transitions, every time I'm adding a slash, AKA creating a scene, it's automatically inserting a smart transition. Why? Well, if you come up to your settings, which are located here in the top left corner, Click settings, and then right here, apply smart transitions to new scenes. I have that turned on. So every time that I create a new scene, it's automatically got a transition in applied to that new scene. Okay, let's continue on. This isn't group calls or prerecorded lessons. It's personalized hands-on coaching live over Zoom. So right where I'm saying it's personalized hands-on coaching. I'm gonna create a scene over those parts like so, and I'm gonna find some B-roll. I'm not gonna walk you through all these steps, but I'll be right back once I have my B-roll ready to add. And with B-roll, I'm gonna introduce you to something called the media library. So if I click the home button at the top left corner of my project and I come back to the main drive view of Descript, over here on the left side towards the bottom. There's a thing called Media Library. Click on that. And in here there's a bunch of different folders. And what this is, is a library of content. It could be videos, images, pictures, sound effects, music, anything at all that has a media file. You can store it here and then access it across all of your projects. So you can see I set up folders, which you can do with this button in the top right corner. That says new folder, and then you can title it based on what it is. So again, images. I have one called live events B-roll, and inside of here, these are images or videos of me actually teaching classes, live classes of Descript. And in this case, for the sake of demonstration, I'm going to upload a photo. So I'm just going to sort through my computer, hit open, and it's importing this image into my media library. and there it is. That's a photo of me helping somebody learn Descript. And then I'm gonna go back to home. There's the video I'm working on right now. So I'm gonna click on that and it opens up right where we left off. So right where I'm saying it's personalized hands-on coaching, that's where I'm gonna go to my project folder in the top right corner. I'm gonna click on the plus button and I could have just dragged that image in, but I wanted to show you the media library because that's how you can start building a library of images that you use over and over. So for example, I do this a lot when I'm talking about me teaching Descript. I show one of those B-rolls that I just demonstrated. So I'll hit media library, live events B-roll. There's the image I just added. I'll hit import. It says importing to project, successfully imported. And then scroll down in here. There it is. Drag it in, and there it is. And then I'm just gonna crop this in a little bit, zoom in on it so it's a little bigger. Maybe that's a little too big. I want to be able to see the computer so it's obvious we're working on Descript. And there we go. So then when I'm talking about personalized coaching, this image is going to show up. So let's back up and play it. Group calls or pre-recorded lessons. It's personalized hands-on coaching live over Zoom. Okay, there's one other thing I can do to make this a little more interesting. Since it's going from video to image, it's a little boring. So what I can do is click on it, click on animation, and then click on this one that called Ken Burns. And what this is gonna do, you see it, it changed my image. Ken Burns is an automatic pan and zoom effect. So I'll just play this as is and then we'll adjust it as needed. Pre-recorded lessons. It's personalized hands-on coaching live over Zoom. So it's panning up and into the middle, and what I want to do is change that. So I'm gonna click on the image again, click on animation. There's the Ken Burns effect. Now that it's been applied, I hit the dials and I'm gonna do a zoom into the middle. So this, this map here is the direction of the panning. So you can go up into the left, up into the middle, et cetera, or just into the middle. And it can be zooming in or zooming out. And then you can choose a speed. So I'm going to do slow. And another little shortcut here, if you click on this play button, it's personalized hands-on coaching live over that little play button previews it so you can see how it'll look. And this is a little bit too, uh, I need to make some adjustments to this image 'cause it's a little more cropped than I would like. I actually wanna return this to how it originally was. So to do that, I can select it, say position, and then fill scene editor. And that makes it so it's the original, it's filling the entire thing at the original size of the photo. And now, now that that's done, I'm gonna do, actually Ken Burns is already applied, so let's see how it looks. Recorded lessons. It's personalized hands-on coaching live over Zoom, tailored. Okay, there we go. That's fine. Um, so let's continue on. You are right now and where you want to go. You don't need fancy gear or to become a professional editor to succeed on. Okay, right there where I say you don't need professional gear, I'm gonna insert a scene before and a scene after editor. And then I'm gonna look through my media library again. So I go to the plus button, media library, and let's see if I have anything that would fit there. Okay, this one is a time-lapse of me filming, so I'm gonna use that. I'm gonna click on it, hit import, close these, scroll to the bottom, and there it is. I'm gonna drag it into my project. Release. And there we go. Now, a couple learning points here. Notice that the— when I dropped it in, it only fits the scene that I dropped it into. However, if I put my mouse over the end of this clip, it's much longer. It keeps going. In fact, I think this clip is several minutes long. However, I only want it to show at this, the designated start and end point that I gave it. For this, there's a very handy tool called the Slip Tool. And if you come up here, and I haven't shown you this yet, but these are all the rest of the timeline tools. So everything we've done right now has been the Select Tool, or I briefly showed you the Range Tool. However, there's also this Slip Tool. So if you click on this, it's going to keep the boundaries of our video the same. And if I hover over it you see in that little black box it says 00, and then there's a vertical line, it says 00.06. That is telling me that I'm seeing a 6-second chunk of this video from the start of it to 6 seconds in. But if— what, what the slip tool allows me to do is if I click and drag, notice those numbers are changing. So now that I've made a little bit of a change, it goes from 05 to 011. It's still 6 seconds long, but it's a different 6 seconds of this video. And the blue line, the playhead right there, is which part of the video I'm currently seeing. So I want to look, preview it at this, the starting point of this video. And I'm gonna slip through here until I actually see myself filming on screen until right about there. And so let's back up a second. Where you want to go. Play this. You don't need fancy gear or to become a professional editor to succeed on YouTube. What you need— okay, I like that. And then let's keep going. Someone who teaches at your pace, skips what you won't use, and focuses on what gets your videos out there looking sharp and professional within a session. Okay, so there's a long pause and a cut, so I'm going to use some B-roll over this to distract from that cut right there. So first of all, I'm going to Trim out that little bit of silence. I'm gonna put a scene over that trim, and you can see there's a trim. First of all, if I put my mouse on either side, it lights up in gray each individual clip. So there's a clip, I move my mouse over here, there's a clip, and there's a vertical gray line, dotted line right there. And if I'm sliding along, the playhead kind of locks into place right where that split is. So that's exactly where I'm going to place my scene. I let it lock in and then I hit the forward slash and now I have a scene there. And then on this first part where I'm saying what you need is someone who teaches at your level, I'm going to put a scene right there before the word and focuses. I'm going to hit a forward slash and then I'm going to go once again into my media library. And you can see the importance of the media library. If you load this thing up with B-roll that you use a lot, like Could be you presenting at a conference or you on a Zoom call or you just working and stuff. Like all that kind of thing can become very useful for your videos like I'm doing right now. Like for example, I have one that's just me typing and then there's me filming and me teaching, me cooking, all this different types of stuff. But here's the one I wanted of me teaching a class. I'm gonna import. There we go. I'm gonna drag it in and let's play it again. It's what you won't use and focuses on what gets your videos out there looking sharp and professional within a session. Okay, and I'm actually going to get rid of the smart transition, so I'm going to go to Properties, Transitions. I'm going to delete this, click Change to None. And professional within a session, or maybe a few sessions depending on where you're starting from, you will learn all the skills you need to record edit, and publish your videos. So here's how it works. Okay, that transition was a little bit bad, so I'm going to tighten it up. And notice there's very little space between the previous sentence and the next sentence, and I already have a scene there. So I'm going to go into my later scene, and I've already got a zoom applied. So what I'm going to do is just delete the transition on this one, and let's see how that looks. Your videos. So here's how it works. Choose a package. Most people— so right where I say choose a package, I'm going to actually go to my website, which is descripttutor.com. I'm going to go to the pricing section and I'm going to screenshot that. And then I'm going to go back to Descript and I'm going to drag this in. And then, um, I'm going to have this come on. Yeah, right there is fine. And I'm just gonna make, click on this. You can see there's some black edges around the image. I don't want that. So I'm gonna say position, fill scene editor. That makes it just a little bit bigger. And now let's play it and publish your videos. So here's how it works. Choose a package. Most beginners start with 3 calls and each call is 6. And right where I say 3 calls, I'm gonna put a scene and then I'm gonna go to elements. I'm gonna add an image around, or a shape rather. So this is a hollow square. I'm gonna click on that and my square is added, but it's currently white, so it's a little hard to see. So I'm gonna click on this white dot and I'm gonna make it blue. And then I'm going to put this around the box like that. And these can be super useful for drawing the viewer's attention to different things in your video. Um, you've seen me do it a few times throughout the tutorial you're watching right now, but as always, let's back up and play it. Start with 3 calls, and each call is 60 minutes long, and that can get beginners from zero to publishing your very first video. And then right there at the end of that line, I'm going to hit a forward slash, and notice my layers. I have my, my square and the screenshot go through that layer. So what I need to do is trim it so it actually, so it ends right where that scene ends. So I'm gonna hit, I'm gonna select the rectangle layer, I'm gonna hit S and that splits it. And I'm gonna hit the screenshot and hit S and then I'm gonna delete the parts I don't need and I'm gonna trim those two layers like so, so they're flush with the scene, and now let's see how it all flows together. In your very first video, in each call we meet one on— and there was a little bit right at the beginning of the scene, I was like, it looks like I was reaching for something. So I'm actually gonna trim that a little bit so it starts a little bit quicker. And then I'm gonna go to properties. I'm gonna get rid of that smart transition and it should flow a little tighter. In each call we meet one-on-one over Zoom. We'll use screen share so I can walk you through every click live in your actual projects. And then right where I'm saying screen share, I'm going to throw in another B-roll. So I, I dropped in my scenes. I'm gonna go find some B-roll for that. And the reason I'm using so much B-roll, if I haven't said this already, is video is obviously a visual platform. You want to show, not tell. And so whenever I am mentioning something, I want to actually show it to make it concrete in the viewer's mind. So I'm gonna have to dig through my archives to find some good B-roll for this. So I'm gonna pause the recording and I'll be back once I have that. And I found some good B-roll. So I'm gonna go once again to the plus button in projects, media library. I'm gonna open up my B-roll folder. And the one that I just brought in was this one, group call screen annotation. I'm gonna hit import. Close this, scroll down, find the video I just brought in, drag it into my scene, and I'm going to play this. We'll use screen share so I can walk you through every clip. And there's sound on that clip, which I don't want, so I'm going to click on it, go to properties, click on this right here, the speaker, to mute that B-roll out, so I'm only left with my narration. And then let's make sure I get the right clip of this larger image or the larger video. So let's play it. One over Zoom. We'll use screen share so I can walk you through every click live. So I can see my screen annotation arrow, which I use when I'm doing these live calls. So I'm gonna just do the slip tool once again, and you can click here Or you can press Y is the hotkey. So I pressed Y and I'm slipping through. We'll use screen share so I can walk you through every click live in your actual projects. So I'm gonna back up to the start of this clip and I'm gonna slip once again and I'm paying attention to the video. Okay, right there I have an arrow pop onto the screen, so I'm gonna go just a second after. So it's somewhere in here. And I know this is— this part is fast. I'm not explaining what I'm doing with the slip here, but, um, I'm sliding through to find the exact moment where the arrow appears, where I'm doing a screen annotation. So here's how that looks. On OverZoom, we'll use screen share so I can walk you through every click live in your actual projects. I can annotate things. I I can even control your screen and do things for you if that's helpful. And every session is recorded so you can watch it back later on your own time. Between calls— okay, that's kind of a long pause, so I'm going to tighten that up and I'm going to use the Zoom technique. So I'm going to find that split right there, hit the forward slash to create a scene, and in this newly created scene, I'm going to select myself. And actually it's already at 110%, so I'm gonna zoom out in this case. And let's back up and play it. Later on your own time, between calls. Okay. And we have the smart transition, which I don't want. I'm gonna go to none. Let's play it. On your own time, between calls, you get unlimited email support. So if you're stuck on a gear decision, there's a weird Descript update, or you just want feedback on something like. I don't know, how do I make this clip pop? Just email me. I respond fast. But why would you choose me? I— okay, so right there where I say why would you choose me, I'm going to make that a scene, and then I'm going to go to my layouts and I'm going to choose a different layout for that part. I think I want to put the text on the screen in some way. So let me search through these. The ones called chapters might work. Let me do 3 more. And I'm going to do this one right here where it puts it in the bottom left corner. So I'm going to click on that. And it got rid of my video, but we're going to fix that in a second. Once this text updates, I just want to see it. Okay. It says, why choose me? Personalized, no fluff, 101 Descript coaching. And then if I scroll down, there's my layers. So there's the rectangle. If you hover over it, you can see it highlighted on the editor. And then at the very bottom, there's my script. So my audio is still gonna be in there, but notice it's grayed out. That has to do with this eyeball that I showed you before. So part of this layout was that it hid that layer, but I want, I actually want it in this case. So there we go. I clicked on the eyeball and now my visual is back. But this text is a little bit hard to read, so I'm gonna make this white. I'm gonna click on this purple dot. I selected the text, clicked on the purple dot. And I make it white. And just to make it stand out a little bit more, I'm going to come down to visual effects and shadow, and that helps it stand out. And I'm going to delete this top one. I don't need that. And I'm going to make this a little bigger, so I'm going to click on it and type in 100 and something like that. Okay, so now let's play it. I respond fast. But why would you choose me? I teach at your level. And it's a little bit quick. I'm gonna make that just a touch longer. And the easiest way to do that is notice how these two layers that make up this particular layer, the layout, um, end right where the scene boundary is. I can simply extend that scene boundary to where I want it to end, and those layers are gonna go with it. So if if I come up to my transcript, each of these little squares on the transcript represent a scene boundary. So there's the one that ends after I say, why would you choose me? So I'm going to select that square and I'm going to go until after the word level. So I'm going to hover my mouse over the word no and release. And now my scene has been extended to there. So the scene is going to go from before the word 'but' to after the word 'level.' And if I look down on my timeline, you can see that those layers got extended with the scene. So let's play the whole thing. I respond fast, but why would you choose me? I teach at your level, no nerding out on technical specs unless you ask. And I know you're not aiming for Hollywood-level film. You just want to be able to make clear engaging videos that connect with people and build your brand. I've helped 500+ beginners in these. So right there, again, every time I, I'm mentioning, you know, the people I've helped or how I help people, that is an opportunity to throw in B-roll. And again, showing, not telling. So showing proof of times that I've actually led conferences, led workshops, been on Zoom calls with big groups of people. And so those are the kind of B-roll I'm looking for. So I'm isolating before the word I've helped and after the word, uh, in these calls. I'm gonna put another slash and I'm gonna sort through my B-roll again. Plus media library, live events. There's one of me teaching a workshop. Import, drag it onto the timeline. And I'm going to mute it because this one has audio with it. So I muted it and let's play it. And build your brand. I've helped 500+ beginners in these calls avoid months of frustration. Students who have gone on to publish consistently, grow their audiences, and even land clients from their videos. So here's my risk-free 5x guarantee. If each hour of tutoring doesn't save you at least 5 hours of struggling on your own, full refund. So, okay, so that whole section, right, from, so here's my risk-free guarantee to the word full refund, I'm going to tighten that up a little bit so there's not such a long pause before I say it. I'm going to put a scene beforehand. And if you're wondering why I use so many scenes, I mean, hopefully by now you see how useful they are for splitting up the visuals. But as a rule of thumb, every time your visual is changing, use a scene and you can see how I've been using it. Like this particular scene contains my B-roll from left to right boundary there. And so in this case, my new scene where my cut just happened, that becomes a new scene all the way to after the word refund. I put another scene and now that's been isolated. And then in this scene, I'm going to go with a text only option because this is a good thing to read. 'cause I'm throwing out some numbers, I'm throwing out a guarantee. And so what I'm gonna do is go into my layouts again, scroll down, and I'm gonna do one of these paragraph ones. So I'm gonna do this one right here where I'm still on the screen, but then my, my text will be over here on the left. So I'm gonna click on that and you can see it already zoomed me in and the text is about to change. There it is. Once again, it's kind of hard to see. It's kind of a dark blue on black. So I'm going to lighten this up. That's easier to see. If 1 hour doesn't save you 5 hours of struggling, you get a full refund. Perfect. I have no changes except for I will just bring myself over a little bit and oops, I'm going to double-click, reposition myself down. And let's play that from their videos. So here's my risk-free. 5x guarantee. If each hour of tutoring doesn't save you at least 5 hours of struggling on your own, full refund. So there is only one hour. And actually, right where I say full refund, I wanted to zoom out at that moment for emphasis. So I'm gonna do the thing I just did a minute ago and change the scene boundary. So there's where the scene ends. I'm gonna drag that to before the word full. And now let's see how that looks. Full refund. So there is only— and let me just play that one more time. Full refund. Okay. That's— there is only one outcome here. You learn Descript or it's free. And right there where I say you learn Descript or it's free, I'm going to make a scene out of that. And then with this scene, I'm going to find a captions. So I'm going to scroll down. There's some captions. I'm going to use that first one there. Click on that. You learn Descript or it's free. Ironically, Descript always misspells itself. So to fix that, and by the way, the text in the caption comes directly out of what's here in the transcript. So to fix that, I need to highlight the word Descript, click correct, and then I'm just going to type in the correct spelling. And I can hit correct to correct just this one instance, or I can correct all to correct every single time it's been misspelled like that, which it may have happened multiple times. Yes, it did. It's in there 7 times incorrectly. So I'm just going to go ahead and hit correct all. And now it's been fixed in every single place in my project. And so let's back up a second and play it. Here. You learn Descript or it's free. So you ready to stop thinking about it and start creating? Scroll down below, pick your package. Okay, so where I say pick your package, I'm gonna do that same B-roll I put in before. So I just, I created a scene before the word pick and after the word package. I'm gonna come into my project. I already have that screenshot from earlier of my website, so I'm gonna drag that in. There it is. I'm going to hit position, fill scene editor, and now let's play it. Down below, pick your package, complete the checkout, and you'll get onboarding instructions instantly to set up your account, book your first call, and we'll get you making videos without the headaches. Okay, it ends a little bit abruptly, so what I'm going to do is extend this just a little bit. And now you can see there's 2 seconds of silence at the end. And if you remember from the recording part of this, when I told you the reason I do that, I, I pause for a few seconds at the end. This is exactly why, so that I'm not immediately, as soon as I finish talking, reaching for the camera to hit the stop button. It just is a little bit too abrupt. So I have this nice little couple second buffer where I'm staring at the camera, maybe smiling at the camera, and I can grab this little white dot here. We already saw that before. For fading, and I'm going to fade out pretty much up to where my last word was. That's about a 2-second fade, and it's going to fade to black, which is great. I could also choose a different color, like maybe blue. I'm going to go like a very dark blue, like almost black, like that. And then let's play it. Videos without the headaches. Like that. And I could put text there that says like you know, join today or something like a call to action. But I think this video is good. I think that's it. Um, and you can see if I scroll all the way out, I've done a lot. There's a lot of scenes. This ended up being 31 scenes for a 3-minute and 15-second video. And so that is it. The next phase that we are now entering is our final playthrough. So I'm going to return for the last time to the very beginning of this video. I'm gonna play through it again, and this time all of my edits should be done. Now, I'm human, I probably missed some things, I probably made some mistakes, forgot things, or I'm gonna see other things that I want to add. But this is gonna be a small part of my video. Ideally, it's not gonna take much longer than 3 minutes and 16 seconds to play through. So let's get started. Making videos feels overwhelming in 2026, especially if you're over 40. The last thing you want is endless rabbit holes, tech jargon, or wasting weeks on tutorials that don't answer your nuanced questions. I'm Ross Zeiger, and I've spent years helping beginners just like you cut through all that noise with one-on-one Descript tutoring. Chances are You found me from my Descript Mastery YouTube channel, where I've created over 400 videos now teaching clear, no-fluff Descript tutorials. Now, if you've ever thought, I would like to sit— that was a little bit abrupt, the music ending and the scene changing. So what I'm actually going to do is open up my timeline, and there's the music. I'm actually going to extend this, and I can extend it past the scene into the next scene, and I'm gonna extend this, the fade out, so it happens over the course of like 10 seconds like that. And let's back up and start over. Down with him, screen share, get him to answer my question. And by the way, one, one giant limitation of Descript is the user interface, like being able to see the video. You want to see it in as big of a setting as you possibly can. So when I was first playing through, I had all this stuff open and this is quite small. This would be like the size it would be on a cell phone. So what I actually should have done, I'm not setting a good example here, is I should have made it as big as possible like that. And you can also go to the view settings in the top and say Scene Editor and then Full Screen Video. That's going to be the biggest view. Possible. And now with that, I'm able to see a lot more detail, and I'm going to hit play. Questions in real time and get me unstuck fast? That's exactly what my one-on-one tutoring delivers. This isn't group calls or pre-recorded lessons. It's personalized, hands-on coaching live over Zoom, tailored to where you are right now and where you want to go. You don't need fancy gear or to become a professional editor to succeed on YouTube. What you need is someone who teaches at your pace, skips what you won't use, and focuses on what gets your videos out there looking sharp and professional. Within a session, or maybe a few sessions depending on where you're starting from, you will learn all the skills you need to record, edit, and publish your videos. So here's how it works. Choose a package. Most beginners start with 3 calls. And each call is 60 minutes long, and that can get beginners from zero to publishing your very first video. In each call, we meet one-on-one over Zoom. We'll use screen share so I can walk you through every click live in your actual projects. I can annotate things. I can even control your screen and do things for you if that's helpful. And every session is recorded so you can watch it back later on your own time. Between calls, you get unlimited email support. So if you're stuck on a gear decision, there's a weird Descript update, or you just want feedback on something like, I don't know, how do I make this clip pop? Just email me. I respond fast. But why would you choose me? I teach at your level. No nerding out on technical specs unless you ask. And I know you're not aiming for Hollywood-level film. You just want to be able to make clear, engaging videos that connect with people and build your brand. I've helped 500+ beginners in these calls avoid months of frustration, students who have gone on to publish consistently, grow their audiences, and even land clients from their videos. So here's my risk-free 5x guarantee: if each hour of tutoring doesn't save you at least 5 hours of struggling on your own, full refund. So there is only one outcome here. You learn Descript or it's free. So you ready to stop thinking about it and start creating? Scroll down below, pick your package, complete the checkout, and you'll get onboarding instructions instantly to set up your account, book your first call, and we'll get you making videos without the headaches. All right, that's it. So now that my video is good to go, what I'm gonna do is come up to the export button in the top right corner, and I'm gonna actually publish this first to a web link because again, remember this is a VSL. The idea is this would be a VSL. Uh, I've actually done a, another take. You can see the real one that's on my website if you want the live one. but I'm gonna say this is Tutor VSL. That's gonna be the name of it. And notice when I change it there, it changed it here in the background, in the composition. And I'm going to leave this on web link. I'm gonna leave it on the max resolution. Actually, you know what? I shot this in 4K, so this is a good teaching point. If I click on this, notice it doesn't allow me to select 4K or even 1440. 1080, which is a lower quality, is currently the max. Why is that? Well, if I click back and I come up to the top left corner to this button and I come down to other, this is the video settings for this project. So currently it says Full HD, which is 1080p, but what I want to do is actually force this to be 4K. And now you can see that's a full 4K resolution. And I can close out of that. And this would only work if your source video is actually 4K. If it's below 4K, then there's no reason to do that. And typically when it's, when Descript is giving you a max there, it's because it thinks that that is the max resolution of the source video files. However, for some reason it didn't in this case, and I needed to manually override it to that 4K. So I'm going to click on that. And I'm going to leave this on anyone with the link and I'm going to hit publish. What that just did is it created a link called share.descript.com/ and then a big code that is a website just for this video. So if I click on this little globe right here, this is showing me the full video on its own page. And I could send this to somebody, like if I'm editing for a client, I could send this to them for them to review and. And approve the video or not. They could leave comments on it, all that kind of stuff. It has the transcript over here, and this is a really cool way to do it. But what I want to show you, if we go back to the project, back to export, and then we click on the copy link thing right there, that's again what you could share out. Or you can click on this embed code and that gives you some, some HTML that is copied to your clipboard and you could drop this into your website. And if you're using like an AI website builder, you could feed this code to it. You paste it in and tell it, add this video to my website. And once you do that, if I scroll to the top of my website here, here is the real VSL that I actually made. It's a, it's a, a different version of the video you just saw me edit. Um, but this making video, this right here is a Descript embed. And if I click on this little link right here in the top corner, It takes me to this page where the, the actual source video is. And you can see I just released this yesterday. It has 9 views already. Um, so you can get a little bit of information on how many times it's been seen. And if we go back here, the viewer has all sorts of, um, just like with YouTube, they can play and pause it. They can change the volume. They can change the playback speed from half speed to 1x all the way up to 2x. Make it full screen, all this stuff you can do with normal online video players. When I first made my course, the first version of my course, it was nothing but embeds, Descript embeds. But anyways, you can do a lot with these and it's, it's kind of a Loom replacement if you've ever heard of Loom. Okay, so back to our Descript project. And then the next thing I'm going to show you besides the Descript web link, which was the default. You can do local export. And if you click export here, this is going to download this video file as a.mp4— that's the type of video file— to your computer. And then from there, you could post it to YouTube or a course platform or wherever it's going to end up. But what I'm going to do, because I promised you this would be a YouTube video, I'm going to click YouTube. And I could set a title here. This title can be different than this title, because this will be the YouTube title. And I can set the description. This is exactly what's going to be in the description of the video. I can set a category, tags, access level, private, public, or unlisted. I recommend leave it on private. That way you have a chance to see it in YouTube, preview it before you send it out to the public algorithm. And then once again, you can set the resolution. I recommend go as high as the video that it— the camera that it was shot with. Now personally, I don't touch any of this stuff here because I like to review it in Descript and make my changes there. Um, but you're welcome to get everything set up here if you'd like. And actually, I just remembered one thing I haven't shown you yet. This is a timestamp, but it's the only timestamp for these become chapters in YouTube. Where you can skip around in the video, which I have on this video. If you want to see how that works, you can scroll down below and see how my YouTube video is cut up into chapters. But I wanna show you one cool feature that I forgot to show you before. So I'm gonna click back, I'm gonna go to AI tools, and then this one right here called Add Chapters. And I can set a number of chapters or I can leave it on the default, which is auto. And the AI is going to decide for me. So I hit submit. And here are the, the dark text is the chapter names. So meet Ross, and I misspelled my name, but I'll fix that. And so those are the, the chapter names. And then below it in the lighter gray text is a preview of the transcript from that section. And you can see it made about 8 of them. And I'm going to click add to script. And if I come back to my view, scene editor, side by side, that's the original view I had, the default view where my transcript is over here. And you can see now that I've added those chapters, they become chapters in YouTube. They're called markers here in Descript. But now that I've added those, you can see the bold where they are in Descript. And these don't show up in my video. They're purely navigational. And so there's the second one, and I can change these if I, if I hover over the left side of it, my cursor turns into a mouse and I could drag it over some words and change where that marker appears. But I'm going to go back to before the word I'm, and there we go. And I'm going to fix the spelling. So I just click in there and start typing. And that changes the spelling. And one little tip for you is make these chapters interesting. And these aren't bad. Video overwhelm in 2026. That's not, that's not terrible. But what the AI will sometimes do is just write something like introduction, and that's super boring. Nobody will ever click on a chapter that's just called introduction. So what I always encourage my students is to think of every single one of these, every single touchpoint in your video. As a hook. And so if you, you want them to actually click on one of these chapters because it sounds interesting. Um, skills you will learn, how the calls work. That's all fine. I'll leave that for now. But also now that we've added the chapters, if I click this button right here, this is a list of all my chapters with the timestamps, the corresponding timestamps on the right, and I can quickly navigate to one of those markers in my video. And again, we already saw how you can go to the beginning of your composition or the very end or any of the chapters in between. But now let's go back to the export button and now look at what's in the description. Now there's the timestamps for my original, my first marker that starts at 0:00:00 and it's now called Video Overwhelm in 2026. And by the way, you have to have a chapter that starts at 0:00:00 for YouTube to pick these up and for it to work. So that has to be in there and AI will automatically do that for you. But just make sure you don't delete that or not have a 0:00 in there. Otherwise, all the rest of the chapters won't work. Um, but then from there you can see all the rest of them. And the other thing I would fix about this is some of these chapters are only 16 seconds long. Like that goes from a minute 24. To a minute 40. So I'm actually gonna start honing these down. For a 3-minute video, there should probably only be like 3 or 4 chapters. Um, you don't want too many chapters. And if you have like a 2-hour long video, then each chapter might be 5 to 10 minutes long or, or more. So you don't wanna overwhelm the viewer with a bunch of really tight-knit chapters. So I'm gonna, I'm just deleting a lot of these. Okay, there, we're down to 4. That's fine. And everything else is set. I'm gonna click sign into YouTube. This pops up asking me if I want to allow my browser to do this. I'm gonna say allow. It's gonna reload the page. So I'm gonna have to go through that process one more time. Hit export. Go to my dropdown. YouTube. Oh, and unfortunately I lost my, my changes because I only changed the chapters here in the description rather than in the video itself. But that's okay. It only takes a second to delete these. I'm just going to delete a few of these. There we go. We're down to 4 again, and I'm going to leave everything else the same because we're going to change it in YouTube anyways. I'm going to hit sign in. And now this time it opens up a sign in with your YouTube account option. So I'm gonna click on my name and I have dozens of YouTube channels from all the different clients that I have. So I'm gonna select my Descript Mastery one. And now it still hasn't published yet. So there's one more step, which is to actually hit export one more time. And by the way, those steps that I just went through, you have to do that for every single video. Descript doesn't save your YouTube login. So every single time you go through this process, you'll have to do that authentication with Google, which isn't that big of a deal, but just, just so you're aware. And then there's a little toast telling me your video is being published to YouTube and will be on your channel in a few minutes. And because I already published this to a web link, this is probably only going to take a few seconds and then it's going to be on YouTube. So I'll check back when that's done. And if I go to back to the, uh, Descript web link, you can actually see where it's at in the rendering process. So it says rendering 30%. When you do the publish to YouTube, it has to publish to the web link first anyways. So this is, uh, something that you might consider doing anyways is publishing to the web link first, letting it finish rendering. And then once you do the publish to YouTube, it'll happen almost immediately. But anyways, it's at 30% and we'll check back in probably 90 seconds or so when it's done. It's worth mentioning too that besides YouTube, you can also publish directly with very similar steps in the sense that you have to log in, connect your account with the other tool to other, uh, podcasting hosts. So Blueberry, Buzzsprout, Captivate. Castos, uh, Google Drive, all these other choices here. If you're using any of those, then they all have direct connections with Descript. And it is officially published. So this little toast appears below my editor that says, "Published to YouTube completed successfully." And there's a view button right there. So when I click on that, it opens up a window— making videos— directly to my my published video. And again, I left it on private, which I can see right below the title of the video. So what I would do now is click on— well, first of all, I would view it. I would watch the entire thing, which I'm not going to put you through that again. Um, but you could watch the entire thing and pay attention. Sometimes it doesn't happen much anymore, but in the early days of Descript, there would be some weird things like the text, it would, would appear correct here. It would be, if I click on this, this is a font called Outfit. But then in Descript, when it renders here, it's in Arial or something else. So sometimes like weird things like that would happen or some animation that you added wouldn't work somewhere in the process of converting into a YouTube video. Um, so that's the kind of things I'm looking out for. Again, hasn't happened in a very long time. But that's what I'm looking for in this phase. And then maybe too, just in this view, I realize something doesn't look right or I can't see it well. And I would also recommend go look at it on your phone because right now I'm on my, my desktop, but only 50% of my viewers are on desktop. The rest are watching this on mobile. And so watch it. How does it look on a tiny screen? Maybe this text looks great here. But it's super, super tiny on a cell phone. And then I realize, oh, actually I need to go back and fix that. So that's the kind of stuff you're looking for in this phase. And then after that, we're going to click on edit video and that opens up this view. And you can see here if the video has been rendered in all pro— completely processed on YouTube's side into all the appropriate video qualities. So SD is the lowest quality. And that happens really fast, like within a couple seconds it'll be in SD, and then it'll take a little bit longer to do high def, which is 1080p, and then it could take, depending on the length of the video, it could take quite a long time to finish processing into 4K. But anyways, it's a good idea to make sure those are all completely filled in and completed. And when I say filled in, I mean dark around it, 'cause they'll be gray if they're still processing. And just to let that process finish, before you actually make this public. This link here is the link to this video. So you could hit this little button right here that copies that link, and then you could share that with your friends and family or post it to a site or wherever you want this to end up. Um, however, remember this video is private, meaning only you, only your account can see it. If you click on that, and there is an exception to that, which is you could actually click share privately. Drop somebody's email in here and then they would be able to access this video. But anyways, uh, probably what you're going to want to do if you have a team that needs to review this or something is click Unlisted, and that means they can open up the link that you send them, this link, but it's not going to be on YouTube's algorithm yet. It's not going to be a public video. Members Only is if you have people paying to see your channel, and then Public means it's going to hit YouTube's public algorithm and everyone can see it. So, uh, only do that when you're completely done with everything else we're about to talk about. So I'm going to leave this on private and I'm going to close out of there. So I would then choose my titles. And by the way, you can do A/B testing. So you can do, um, test up to 3 different titles and YouTube is going to cycle through these titles. And see which one gets the most clicks, or you can do 3 different thumbnails and you can upload 3 different images, or you can do 3 title and thumbnail combinations and run a test on those. And YouTube's going to test these for 2 weeks to see which one gets the most views. Now, as for the title, if I don't have a good title in mind, what I can do— again, I'm just giving you ideas here— is come back to my video. Come to Underlord in the bottom right corner, and I can say, based on this video, give me some ideas for interesting titles for YouTube. And then I told it who the ideal audience is, because that's critical. That kind of context is critical in getting a good response from the AI. And you can choose different AI models. You can do like GPT, you can do Claude, all the major frontier models. Um, you can choose your favorite one and hit send. And I never use AI's first suggestion, but what I'll do is I'll take pieces I like, like for example, stop wasting hours on video tutorials and this piece, learn Descript in one session, and then I'll combine those two. So I'll say, stop wasting hours on video tutorials, copy that. Paste it into the title and some of the formatting's off. I'll fix that. And then I'm going to grab Learn Descript in One Session, come back here and I'm going to do period space and then paste in. For some reason it's pasting in a different thing that I didn't copy. So I'm just going to write in Learn Descript in One Session like that. And there's some extra spaces in there. I'm going to delete and I'm going to delete that. Pin. And there we go. It's a super long title. I wouldn't actually use this, but I'm just showing you very quickly how I get ideas. And then in the description, same thing. We can come back to Underlord and we can say, help me write a description that is 3 paragraphs long and loaded with keywords. I'm gonna hit enter and I'm gonna scroll to the top. I'm gonna grab all this. And the quality of the outputs are always the quality of your input. So I'm, I'm giving it a very quick one-shot prompt here, which I don't recommend. But there we go. I pasted that in and it put down here some, some keywords. I'm going to copy those. And by the way, you don't, you don't need those. I don't typically recommend those, but just showing you how you could use these. And so I would then edit all this into my own voice. Right now it's going to sound super AI. But I'm gonna just fix the spelling of my name, for example. And so you could just polish this up into your own voice, change the timestamps, and then to add your thumbnail, I'm gonna show you that with Descript as well. If I come back to our video and I could find a specific frame of this video, let's just take this right here and I can go to properties. Scroll down and in the layers section, there's a little camera right here, which is gonna save the current frame as an image. So I can click on that and it says uploading. If I go to my project files, there's now a folder called Saved Frames. I can open that and there is the image that I just took and I could click on these three dots. I can say download. I can give this a name, so I could call it thumbnail since that's how I'm going to use it. I can come back to Descript, back to YouTube, hit upload file, grab my thumbnail, hit open, and now that's the thumbnail of my video. And then I can add an end screen, which would link this video to another video. So I could, for example, click on this one. And that's gonna drop in. YouTube's gonna suggest a next video for the viewer, and it's gonna drop a subscribe button right there. And I could change where these appear. So I got a lot more black over here. It's a lot darker. So I'm just gonna put some of these elements there. I'm gonna put that up in the corner and I'm gonna click save. And now that's gonna appear in the last 20 seconds of my YouTube video. And I could choose— a lot of this stuff is set in the defaults of my channel. For example, whether it's for kids or not, always say no if it's not specifically made for kids, because there's certain limitations about where and who this can be shown to and how it appears. Um, so always say no if you want this to reach the widest possible audience. And then if there's any age restrictions, and I won't go into all this, this is beyond the scope of Descript, but this is where you can set all the metadata. For your YouTube video. Okay. So the final step would be to do public. I'm going to do unlisted just for the fun of it. And I'll actually share this with you. I'll put this in the description of the video that you're watching right now. I'll hit done. And I'll hit save. And now our video is live.








