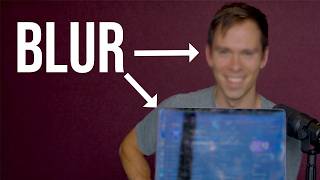
Short tutorial showing how to blur parts of a screen recording in Descript. The speaker demonstrates adding shape elements (rectangle, circle), enabling the Glass Blur visual effect on the shape’s layer, adjusting the Amount slider to control blur intensity, and using the Invert option to instead blur everything outside the shape; closes with a pointer to a related recorder video.
Hey, welcome back. If you ever find yourself making a screen recording and you're showing parts of your screen, but you want to blur out certain things that are either private, personal, or they just don't need to be in your video, well, I'm going to show you how you can do that, how you can blur out just certain parts of your screen while leaving the rest visible. Join me in Descript and let's get into it. By the end of this video, you're going to be able to blur out a face like this while leaving the rest of the video intact. Here I am inside of a Descript project, and let's say that I want to obscure or hide the information that's here. I'm showing my Descript projects and I accidentally showed something I didn't want to. You can come over to Element. You can do what I'm about to show you with many different types of elements. So you can do with text elements or you can do it with shapes. I'm going to do it with a square in this case. So I'm going to add this square again. It doesn't matter which one you select, but I'm going to use this one. Now, with that added, we're going to. You can see it added the rectangle layer to my timeline. And with that selected, I'm going to come over to layer and then I'm going to find visual effects. The visual effects box down here, and there's this one called Glass Blur. Come over to the right and toggle that on. And look at that. Our rectangle just turned into a blurry shape. And I can move it around the screen, I can grab the corners to resize it, and I can make it look how I want it to look. Let's do that. So it blurs out all of the names of my projects. And then what I can do is come back down to the Glass Blur section and click on these effects settings. And when you click on that, you can change the amount. So right now it's at 20. I can grab this little dot and I can slide it. And you can see that blur is getting more and more intense to the point where you can't see hardly anything at all behind it. Let's go to. I want it to be obvious that there's something behind it, but not readable. So let's go to 30. That looks good. And then there's one last thing I want to show you, which is that maybe I actually want to focus on this information and I want to blur everything else. Well, there's this thing called invert under the glass blur settings. And if I toggle that on now, it's clear inside of my rectangle, but everything else on the screen is blurred out. And when I'm done with my settings, I can just click this little X and I close the glass blur box. Now, if I wanted to blur out a face, I would do the same thing. I could go to Elements. I could add a circle. With that circle added, and with it selected, and you can select it by just clicking on it, you come to layer visual effects, toggle on glass blur. And now it's all blurry. And I'm just gonna resize this so that it blurs out my face like that. And then I'm gonna hit this little effect setting here and I'm gonna dial it up. And look at that. I'm completely blurred out. Now that you know how to blur out parts of your screen, be sure to check out this video next, where I go into everything you need to know about the recorder so that you don't mess up your next recording.