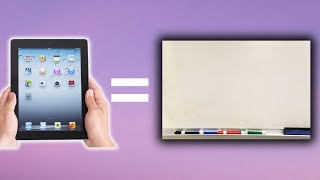
Use your iPad as a wireless whiteboard for your Mac by mirroring the display through System Settings, then draw with Apple Pencil in Preview and record with Descript's screen-recording tool.
Questions this video answers
macOS 10.5 or higher.
An iPad, a Mac computer, and Descript.
Both devices must be logged into the same Apple account.
Swipe down from the bottom-right corner of the iPad to open Control Center and tap the record button.
In Descript: click Record → Record into script → drag to select the iPad screen → Start recording.
Today's lesson is about how to use your iPad as a whiteboard for your computer. To do this, you'll need an iPad, a Mac computer, and descript. Let's get started. So the very first step to use your iPad as a whiteboard is to make sure that you have the latest version of macOS and descript. So go to the Apple in the top left corner of your screen, go to about this Mac, and make sure that where it says macOS, you have at least version 10.5 or higher. If you're not, you're going to need to upgrade and get a version that has this capability. After that, we're going to check on descript, so go back to the top left, click on descript, click Check for Updates, and here at the bottom right, you get this little toast that says you are using the latest version of descript, or it'll say there's an upgrade available and then a button to upgrade. So go ahead and click that just to make sure that you have the latest version of everything and everything is working as smoothly as possible. After you have that taken care of, the next thing you're going to do is have your iPad located close to your Mac computer and make sure that the iPad and the Mac computer are both logged in to the same Apple account. Once you've got that set up, go back to the Apple at the top left, hit System Settings. It's going to open up your settings menu, go down to Displays, and you can see here I have an external display, I have my MacBook, and then I have my iPad. This is what it's going to look like when you've successfully connected everything. But I'm going to go ahead just to walk you through the entire process, I'm going to disconnect my iPad. I clicked on the iPad screen, I'm going to click disconnect, and now my iPad is no longer connected. So with my iPad still on, the screen is on. I'm going to hit this plus button, and there's this little thing that says mirror or extend to Ross's iPad. I'm going to click on that. And it took a little moment to load there, but now you can see that my iPad screen is back up there. And basically what's happening is this is now extended. This is now a third monitor. So it's part of my macOS. I can see it. Let's jump over there. And you can see what my view is on the iPad. So here we are on the iPad, and you can see it looks exactly like My Mac os, I have the normal Apple menu bar at the top. I have preview open. I can change the window. I can close the window with these buttons right here. To get my dock on the left side, I'll have to. My mouse only goes up to that black bar on the outer perimeter. So I'll have to click the buttons with my finger to open the dock. And then you have like a command button, you have option, shift, etc. You can do undo with that button right there. There's a keyboard that you can pop up. You can hit this bottom one to disconnect. This will disconnect the iPad from your Mac OS and just return it to iPad mode. At the bottom you have different options for. This is just the preview app that I have open Apple's built in preview app. And you can add a text box with that little text button. You can scribble with the scribble button there. And I have my Apple pen. So I'm just going to do that type of thing and you can scribble just like that. And I'm going to go ahead and hit undo. And so basically it's exactly just an extension of your Mac os. And I'm recording this with the built in iPad recorder. So if I just swipe down from the bottom right corner of my iPad, I get my normal iPad options and I can just hit this record button to start and stop. So that's how to start and stop the recording on the iPad itself. But we're here to talk about how to do it with descript. So going back over to our Mac computer, we're going to start a screen recording and just like this we hit our record button and record into script with our screen setting. And I'm going to hit record into script and I get this prompt to drag to select the part of the screen I want. And since I'm on my iPad, I can select that as one of my screens. So I'm going to bring my mouse into there. I'm going to select the part of the screen I want to record and I'm going to hit start recording. I don't know if you're going to be able to see this very well, but start recording. Okay, and now we're switched over to Descript. So I'm back over onto my Descript mic and good mic and everything and pull up the app that you want to use as your whiteboard. For me I am just using once again the built in app called Preview. It's Apple's PDF app and it works really well for these purposes. So I'm going to hit the scribble button. I'm going to change my settings here, and there we go. I'm just using my stylus, my Apple pen, to just mark up that document. I'm gonna hit undo to get rid of those. And I could use this, for example, if I'm teaching algebra, I could draw graphs. I could draw whatever I want. I could say, go to my course@ descriptmastery.com course and I could highlight that. You get the idea. It's just off to the races. Now, you just use this as a whiteboard, and then to stop, just as always, we go into our descript app, and we hit the stop recording button, and we're done. So that is how to use your iPad as a whiteboard using descript and an Apple computer. Thanks for watching.