Record Your Face and Screen The Easy Way (New Descript Recorder)
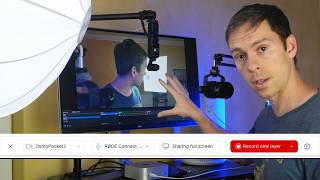
Descript's recorder lets you capture your face and screen at the same time. Pick your camera, microphone, and whether to record your screen or a specific window, then hit record. The footage comes in as separate layers you can edit independently in Descript.
Questions this video answers
At least three seconds.
A 3, 2, 1 countdown (toggleable).
4K (set to highest resolution supported by the camera).
To record your face and computer screen like the video you're watching right now. Here's how to do it in descript. First of all, from the home view of descript, when you first log in up here in the top right corner, there's a record button. Click on that. And here you can choose to record just your camera, just your screen and camera, just audio only, or you can go into a remote recording with other people. For the sake of this demonstration, I'm going to show you this screen recording. This thing pops up in the middle where you can choose to share a specific tab. You can share a window, so an entire app, or you can share your entire screen. I'm using a browser called Arc, but depending on your browser, this dialog box will look a little bit different, but the principles are the same. Choose the specific tab, the window, or your entire screen to share. I'm going to go ahead and do my entire screen, so I'm going to click on that. If you have multiple screens, like you have multiple monitors, you'll be able to choose those here. So make sure you choose the right one. And you can see at the bottom it says to share audio. Share a tab instead. So if I, if I go back to Tab 1, it says also share tab audio. It's currently clicked on. That means that if I'm showing a tab like let's say that there's YouTube on that tab. When I hit play, the audio from that YouTube button is going to come into my recording. So toggle that on if that's what you want. But again, I'm going to go back and just share my entire screen. I'm going to hit share. And now you can see inside of my descript that here is a preview of what is going to get recorded. This is my entire screen. Below that, on the bottom bar, there's three options here. There is my camera input, so there's that little camera icon. If I click on it, then I can choose my camera input. So this would be my webcam, or it could be my iPhone, anything like that that I'm going to use as my video input. Or if I don't want a camera, I can click on the thing that says no camera, and now it's gone. Now, keep in mind, with this little preview, this circle of myself that is changeable in the editing process. And in fact, you can see my camera's upside down. My camera, my webcam, is mounted upside down because that's how it fits with my screen. So in the editing process, I have to Flip that. I can also turn it into a square. I can make my background go away. I can make myself full screen. All sorts of things that you can do in the editing process. But this is just a preview here. Next to that is your microphone input. So choose the microphone that you want to use in the recording process. And if you don't want to have a microphone, you simply click on this bottom one that says no microphone. And then your last one is your screen share. We already selected that on the the first step. But if you want to disable that, you click on that and your screen share will go away. And then the next thing we need to do step three is adjust the settings for our recording. So if we come back down to the bottom here and you click on this gear icon, these are all of your settings from top to bottom. You have a countdown option. So this means when you hit record, it's going to give you a 3, 2, 1, and then start recording countdown. Personally, I don't use it, but if you want to, you can toggle that on and have that countdown. Next is microphone audio settings. So the first one is whether or not this video will get transcribed as soon as you stop recording. If you wanted to, then toggle that on. The reason you might not want it to is if you're constrained, you're hitting your limits with transcription time, then you might consider turning that off. Default speaker. This is mostly for using the AI speaker. So if you've trained your voice on the AI speaker, then you can select that here and you'll be able to use that seamlessly in your project. Below that is studio sound. I keep it on. And if you click on these effect dials, you can choose the default intensity. So maybe a hundred percent doesn't sound good for your microphone and your recording environment. You can set that to an intensity that you found works well. So you could say 50%. And then as soon as you record, it's going to automatically apply studio sound at that intensity level. I'm going to leave this at a hundred percent and auto gain control. I also leave that on. This is going to automatically adjust the sensitivity of your microphone. Personally, I leave it on. It does a pretty good job. Below that is your computer audio. So that was the microphone audio. Computer audio is going to be like what I mentioned with. If you have a tab showing YouTube and you're playing that YouTube video, the sound that actually comes out of your computer is your computer audio. And you can choose to transcribe that or not. You can choose to set a Default speaker. Again, this is going to be an AI speaker and you can choose to apply studio sound to this. Personally, I'd turn studio sound off because a lot of times if I'm playing something through YouTube, I want the original audio. Maybe it's music, maybe it's somebody speaking, but studio sound can kind of cause that to get distorted. So I leave it off. And lastly, is your default camera resolution? I leave it at 4k because I have a 4k camera. If your camera is only at 1080p, it wouldn't make sense to go above that. So set your camera, your default resolution at the highest resolution that your camera supports or that you want to record in. And when you're done, close those settings. Now this next step, step number four on my checklist here, is to do a test recording. This isn't required, but I highly, highly recommend that you do it. I'd say 50% of the time that I go to record into descript, I have something isn't quite set up properly, like my mic interface isn't on or something's wrong with my recording environment. And so I always do a test recording of at least three seconds. I just run the recorder, talk, say a couple words, hit stop. And then I play it back to make sure it sounds good, make sure everything's getting picked up correctly. So here's how that looks. I'll come down to the record button at the bottom here, I'll click on that and I'll do my test recording. I'll say test, test, test, I'll hit stop. And it's going to immediately start processing it. It's only a four second recording, so this should only take a second. And before it's even done processing, I can actually just listen to it back and it sounds good, it sounds clear. I can hear myself, everything looks good. So I'm going to go ahead and do my, my real recording. So on the timeline you can just select your test recording so it's highlighted in blue, hit delete so it's gone and then go back to the record button right here. Or you can click it down here and choose the same thing you set before screen. You get this pop up here. So you can choose which window you want to record. I'm going to do entire screen, select entire screen, hit share. And now we're all set up. All your settings from before should be saved. If they're not, or if you found something in your test recording that was wrong, fix that here. And then when you're ready, hit record. And now I'm going to do my real recording. I'm going to go through whatever I'm showing, whatever I'm teaching. And as I'm going, if I want to pause next to the stop button, there's a little pause button here. You can click on that. And that's going to be the same video file, but it's just not currently recording. So I can pause as long as I want. Reset, maybe I'm letting something load. And then as soon as I'm ready, I hit the record button again and I'm back in action. And as soon as I'm done with my recording, I hit stop. And now, as we saw before, it's going to process, it's going to transcribe. And once that's done, from here, I can edit this project just like any other video project. Now, one thing that's important to point out about how this recorded is this is a sequence. So both of my video files are in here. I have my webcam layer right here. And you see, I can drag it around independently of the screen. And then I have my screen layer, which is independent of my webcam. And so I could do things like zoom in on a particular part of my screen recording, or I could take my webcam, I could flip it like that, I can make it bigger, I could turn it into a circle. But to go deeper into how to work with sequences, check out this video next.








