Recording Slides and Tutorials like a Pro
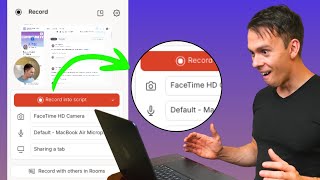
Learn how to record slides and screen tutorials in Descript using Quick Recorder, the desktop app, or web app. The workshop covers microphone and camera setup, cursor highlighting, transcription settings, and post-production workflows to polish your recordings.
Okay, and we're live. Okay. And we're live. So today is workshop on recording slides using descript or making a tutorial where you're showing your screen and then just recording that all inside of descript. So you don't have to go to any other method of recording. You don't have to use the built in Windows or Mac Recorder and then bring that video file into descript. You can just do it straight into descript or in another way I see people doing it is over Zoom. You don't have to do that as well. So I made this document here to kind of guide the discussion and feel free to. I shared the link to this document in the chat, so feel free to use that. And you can make a copy of this into your own Google Drive. So if you go up to file and then make a copy, you can save this to your own Google Drive and then you can review it later and use it however you want. Some housekeeping there that I have is just drop your questions in the chat as we go. This is a real live stream. This isn't something that I recorded beforehand. I know a lot of YouTubers do that. So yeah, feel free to drop your questions there and keep your questions on the topic. But as time allows, if I get through this fast, there may be time for other related stuff at the end. So basics of what I'm going to cover is the types of recordings in descript. There's multiple ways to do it and there's different places where you can record. Like you can record in the web app versus the desktop app versus the quick recorder. So we're going to talk about those and when and where to use each one. There is the whole selecting of your microphone, your camera and your screen. That's something you have to do each time. Well, once you do it, those become default settings. But if you're changing it up, then that's something you have to set each time. And then the settings. So this is setting, you know, the resolution for your camera, setting whether it automatically gets transcribed, whether you apply studio sound to it. All that kind of stuff is things that you can do in the settings. And then I'm gonna talk about other useful recording tools that I use. Oh, and let me turn one on. In fact, this screen cursor here, I'm not sure if you're gonna be able to see it. I think I've had problems with it before. Yeah, there it is. Okay, it's working. So this little circle thing that I have on my mouse, that is a useful tool that you can use when you're making your screen recordings. And it just makes it really obvious to the viewer where your mouse is, so they can follow along with whatever you're showing. Okay. And I see we got people joining, so feel free. As I said, drop your question in the chat as we go, and we can talk about those. So the first thing to talk about with the recorder is the types of recordings you can make. So you have the desktop app, which, which is what you download to your Mac or your Windows, and you can just get that from descript.com downloads, I think it is. And that's the app that lives on your computer. And once you have the desktop app, you can use make what's called a quick recording. And with the quick recording on a Windows computer, you'll have something in your top menu bar where you. Which isn't in the live stream right now. You can't see it, but there's a descript logo at the top of your computer and it's on my other screen. So I apologize, I can't actually show this. Oh, there it is. Okay, so this dropdown that just came down, I clicked on the descript logo on the top of my computer, and then I get this, this view here. And I can do. I can select camera only. And you can see I have a little preview. And I can move this around like so. And I can also select screen, and that's going to record my screen. And I can also move this around. I can grab these dots on the corners and the edge to make it bigger or smaller. I can change it from a circle to a square like this. Or I can close out and not record my camera at all by hitting that X. That's what I just did there. So you have your computer audio. We're going to talk about these in depth later. But these are the basic inputs that you can have. You can have your computer audio. So that's. Let's say you're playing a YouTube video. If you want that sound to be in your recording, then make sure to have computer audio on. Otherwise, if you don't care about that, you can disable it by clicking on that little speaker icon right there. And the next one is your camera, which we saw. I already turned that off by clicking the X in the little preview. And there's a drop down there where you could select different cameras as well. But again, we're going to talk about that in depth in a moment. The next one is displaying your screen, and I'll show you how that works once we actually start this recorder. But then the last one is your microphone and you can select any microphone there. Okay. So. And then down below that there's a big record and share bar. So this is one of the distinctions with the Quick Recorder is it's. If you've ever used Loom before, it's kind of like a loom functionality in that it's meant for it to as soon as you're done recording this, for you to immediately share it. And somebody could watch it using a link. So It'll generate a share.descript.com link and then you could send that by email by Slack, whatever it is, to a colleague and they could see the recording that you just made. So let me open that again. The other option is if you click on this arrow right here, there's the record and share with the checkbox next to it. That's why we see it down there in the black bar. But if I hit Record and edit, instead of immediately generating a link that I can share, it's going to open it up inside of a Descript project and then you can edit it. So it'll be just like a normal editable video that you normally make in descript. And the last thing to show you, it's hard to see because of the angle or the crop of this particular live stream. But this gear icon up here, these are all the different options you get with your Quick Recorder. So you can save where or where this is going to save. That is what Descript drive is going to be in. Probably you only have one drive, unless you're editing for clients and you have a bunch of drives like I do. Default publish privacy. This is going to be public, is going to be searchable on Google like that. If I hover over it, you can see it says searchable on Google. So completely public and indexable. Anyone with the link is what I currently have it set on. And that means that I need to explicitly share the link to that video with somebody in order for them to see it. And the third one is Project access required. That means I need to invite them to this project using their email. So that of course is going to be the most restrictive. Below that it says start stop recording. So. So this is actually a keyboard shortcut. So if you hit Shift command and two, that's the default, I haven't changed that. Then that'll open up this Quick Recorder. With that keystroke you can also, if you hit that little X, you can make it anything you want. I'm just Going to return back to what it was. If you click that X and then click in where it says shortcut, you could type in whatever you want. Like I could type in R. No, that won't work. Command R and then that would become my recording shortcut. So pretty cool. If you're going to be using that feature a lot, let me return it back to Shift Command 2 and then the countdown. This is going to be. If you want it to do a countdown before you start, it's going to be like 3, 2, 1, and then it'll start the recording. If you have it off, which I do, I like it just start right away. As soon as I click record. Open web page after publish, that is going to be the page that that video lives on. It'll just open up immediately after you, you finished recording and then display author on publish page. That is a privacy setting, more or less whether you want it to be. Say this was created by, for example, Descript Mastery or whatever your drive name is. Otherwise you can just toggle that off and it'll be more. More anonymous. Enable comments on Publish page. So that's if when you're sharing it with somebody, they go to that page and they can just leave comments on it, like a YouTube video. They can just go into the comment box, ask you questions, that type of thing. Audio section. So you can see there's like this is the general section and then audio section. Audio section. Transcription, which is currently toggled on. This is if you want your video to be transcribed. Um, I always leave it on. The reason you might not want to is if you're close to your limits on transcription. Like if you're on a small plan, you only have 10 hours per month of transcription. You might want to conserve that time and you can toggle that off. Studio sound, same thing, depending on the quality of your mic. It's like if you have a good mic, you might not need studio sound, but this is all going to come down to. It's going to be the same pseudo sound that gets applied in a normal project. So if you like how it sounds there, then you'll like how it sounds here. And that'll just automatically start processing that as soon as you hit stop recording. Applying the studio sound. That is the screen. This is going to be the first one is the recording resolution of the screen. So right now it's at 4k, which is great. You know, go as high as you can, as high as you want. Highlight clicks while recording. That's going to create a little circle around Your mouse whenever you click, just to kind of bring attention to that. So I leave that on Confirm recording area. That's going to be when we're going to talk about this more later. But when you select a manual aspect ratio in your screen that you want to record, there's going to be a little dialog box that says are you sure you want to start recording? I leave that on because you can, you can fine tune the, the box that you've selected so you can grab the corners, grab the edges and crop it in or out as needed. And then the minimize recording doc as soon as you hit. Or this is going to be the recording dock that's on the side of the screen. So there's a little thing that pops out on the side. It's got a pause button and a stop button and, and that's going to be whether or not that is just always there on the side or if it slides away, it kind of slides off to the side out of view. So I leave that on just so that's, that's not getting in my video. The system, system settings here, this is whether to run this in the background. So here's what's interesting about the Quick Recorder is it's kind of like a separate app. So even if descript desktop app is closed, the Quick Recorder can be open up there on your top menu bar. And it's just a different process in your system. And so if you have that set to run in the background, then you'll have that capability launch at login. That's whether it opens as soon as you open your computer or not. And then you can quit descript right there at the bottom. Okay, so that's a quick run through of the Quick Recorder. And again, the Quick Recorder only applies to the desktop app. So if you're, if you're only using the web version, which I pretty much do now, I'm going to talk more about the differences in a second, but then you won't have this, this Quick Recorder. Okay, let me know if any questions about that. The next thing is the built in Recorder. And so this is built in again, still talking about the Desk desktop app, which I'm going to bring over here. So let's go into our drive and I'm going to open up actually. Okay, so there's, there's multiple ways that you can start a recording from the desktop app aside from the Quick Recorder, we just saw that. But the first one is if you go to new project, there's the Quick Recorder. So that's that's another way to reach it is within the app. But if I go to a new blank video project, then you should all be familiar with this view. There's this button that says record right here. So I can just immediately go into filling my project with a recording as well as there's a record button right here. So those will both get me to the same place. So I click that, it toggles this open on the side or let me close that. If I click it there, it toggles it open right there as well. Same view, same end result. Okay. And from here we have the same sort of basic functionality as we had with the Quick Recorder with a little bit more function, a little bit more stuff going on. So you can see there's these, these boxes here. This one says audio only, meaning it's going to turn my camera off. It's not going to record my screen exactly like it sounds like. It's audio only. Um, so my choices here are to select my computer audio, which again, if you've been here since the start, computer audio is what it sounds like. It's gonna be the audio that plays from your computer. So if you're playing a YouTube video, it could capture that audio and then put it into your project or any other sound coming from your computer. And then below that is the microphone. And so you could click on this dropdown and you can select an external microphone. This is going to be my computer's built in MacBook Air microphone. And it looks just like that. You can also set the speaker for the computer audio if you're going to use it. And you can set the speaker for the microphone. Now we can talk more about this later, whether or not that's worth doing. But just be aware that those are your options there. Next we have the camera. So if I click on this box here, this is the for recording audio and video, not screen yet. That's gonna be our next one. But as before, we have this little preview as before with the Quick Recorder, that is I can move this around. Notice a difference here? I do not have that. Those buttons where I could turn it into a circle or a rectangle. With this recording. Oh, this brings up a point I didn't mention. With the Quick Recorder, it's all one layer. It's one video layer. So your webcam view is burnt into the video. You can't change it in post. With this, with the built in recorder, it's going to be a separate layer. So this video that I'm moving around right now is going to Be its own layer. And then if I have a screen recording, that's gonna be a separate layer. If I have computer audio, that's gonna be a separate layer. And so that's the way you wanna do it for the most control. And yeah, we can talk more about the post process later, but that's a big distinction there. And then let's go to the last one here. Well, there's. There's one more. The record with others, but kind of beyond the scope of this. But there's the screen one. And as this little preview. This is a little preview, of course, of what you can do with it. So this one's going to be your computer audio, if you want. You can also turn it off by clicking on that speaker, your webcam, your screen, and your microphone. So it's gonna be four separate layers put into one thing. And you cannot look. If I put my mouse over it, it kind of grays out my. Oh, it's in the bottom corner. So it might be hard to see, but it grays out my preview. So there's nothing I can do with that. I can't change it around here, but in post I'll be able to because it'll be a separate layer. So that is a breakdown of all of this. That stuff. Let me see. I can't. Oh, because I have this open. Hang on. I'm trying to go back to my. My outline here. Oh, I'm in the. Here we go. Okay, so. Yeah. Okay. So that's the gist of all of that. The next thing I wanted to show you is if I already have stuff in there. And let me just do a little quick recording just to have a placeholder. So I'm going to say record into script just by clicking on it. And that's going to put the video into my script. And I'm just going to hit stop and I'll give it a second to process. You can see it's automatically transcribing because I had my settings set to do that as well as this little notification here. It's applying studio sound again because I told it to. And so there it is. And if I had set my speaker label, then that would be replaced with the speaker label that I gave it. So if I said this was Ross, then it would just label it as Ross. Okay, but what I wanted to show you is the third way to start a recording, which is if I have a new line here, whether or not it's in its own scene, There is this record button here. And if I click on that I get the same menu on the right side. And everything is the same as what I told you before. You can do audio only, camera screen, or just to briefly expose you to this last one, record with others. And it's actually opening up a new window in my browser. And there it is. This is for those of you seeing this for the first time, this is called Descript Rooms. This is the replacement to squadcast. And this is what you could do to record remote interviews. So, and I've actually been using it for webinars. So very similar to this live stream I'm doing right now. I do my group coaching calls on Descript Rooms and it works great. But hopefully by now you're pretty familiar with how this whole situation works. Selecting your camera, selecting your microphone, and, and selecting your speakers. So, and then there's just one question here. It says, are you wearing headphones? I am not. So I say no. And what this does is it'll use some AI to detect the echo so it's not echoing your own voice back to you or to your, your guests. And so the recommendation is to wear headphones, but if you're not, make sure that you select no and and then hit join. And then this link is unchanging. So it's going to be the same for all of your Descript Rooms projects. And so that link is what you could copy send to your guest or co host or webinar participants. However, you're going to use this and then they can join using that link. Okay, again, that's kind of beyond the scope of this live stream, but I just wanted to show you that for completeness. And again, that was the record with others option. Okay, so back to my outline here. And by the way, speaking of the group coaching, as I mentioned, I did one this morning. So my Descript Mastery School I do you get access to the course and then two group coaching calls with me per week. And there's a Black Friday deal going on right now. 30% off the whole thing. So go check that out if that's of interest. Basically, these workshops and live events I do twice a week with the members over there. Okay, so what makes the the desktop version different from the web version? So the big one is when you go to record your screen. If I go to record, I have my screen selected. I hit record into script. I get this view here, the drag to record part of the screen or press space that space bar to record full screen. So what this is telling me, this is really confusing for a lot of people. Is I can click somewhere. And wherever I click is going to be the top corner of my screen of what Descript is going to capture. So let's say I want Descript to capture just my transcript box here. So I'm gonna select click and drag. And you see this white spot opening up? That's gonna be what gets captured by the recording. And then if I. You can see in the bottom right, that there's that black number 384 by 570. That is the dimensions of what I'm recording. And I can grab these white dots, make it narrower. If I grab the top corner, it does height and width together. And top will be just the height. And so, yeah, I don't think I need to beat a dead horse there. And then when you're ready, you hit start recording. And it's going to record my webcam. And then that little window, the bright window, is what it's capturing. So needless to say, you'd want to select just the part that you want to focus the viewer's attention on into that window. Okay, so. And then it automatically transcribed it. It put it into my project like that. And I also. So you can see there's my screen recording in the middle, and then here is my webcam. And I can move this around. I can turn it into a circle. And I just have a lot of control in post to do whatever I want with that. Okay, so that custom size workflow I just showed you is unique to the desktop app. The web version has a different way to do it, which I'll show you next. But the other thing about the web version is it has better audio quality. And so I wrote it down here where the web version has an issue where the recording starts super loud and then evens out. It ends up being okay. But it's just the first few words when you start recording does this weird thing where it. It's like it blown out, it's way too loud. And I also wrote in parentheses, they're not sure if this is still a problem because I don't use. But I just don't use the web version for that reason, because it was something that was happening last time I checked, which was like a few weeks ago. And so I just find that using the desktop version is better for recording the audio, and it just tends to be more stable. A lot of times the recorder will crash out of the blue, and it still saves your recording. Everything's always, always getting saved as you go. But I just find that the web app crashes a Little bit more often on recording than the desktop app. Okay, so now let's talk about the. The web app. So with the web app, when you go to record, and I have it open in another window here, so I'm now in the web app. And I know it looks exactly the same. That's one of the confusing things. They're identical in looks. But if I click record. Notice I don't have those boxes anymore. The, the audio only camera screen. I don't have those four boxes. It's just this, this preview. And I can turn on or off my camera. And you can see when I do that, I get these sound waves. It's telling me it's audio only. So essentially it's. It's the same functionality. It just looks a little different. And I know that this throws people off. So there's a couple of things here that you can do that you cannot do on the desktop. Like this button right here, it pops out this window. And now I have a floating window preview. And so that could be useful for you. And if you click on this little arrow that puts it back in the sidebar. And then there's this thing here. So if I click on center me, it puts that outline around me and I can just. That's just a visual way that I know. Okay, I'm in the middle and my eyes are, you know, typically following the rule of thirds, you want it to be about in the top third of your video. Alternatively, there is also a grid where you can get the rule of thirds using this. So again, we don't have that in the desktop app, but everything's the same down here as far as the camera selecting your camera, selecting your microphone selecting your screen or not. And actually, when you do select your screen. Let me go back. So right now it's off. It has that strikethrough through it. If I click on it, I get this view, which is different. If you remember, in the desktop app, it had that drag and select a specific portion. I cannot do that with the web version. I can do my tab here. Arc is my browser. If you, if you're on Chrome, it'll say Chrome Tab, Firefox Tab, et cetera. And so you can select a specific tab that you have open. That's a very convenient way to do it. You can select a window. So this is gonna be like an entire app. Like, I could select my entire ARC browser and display that, or zoom, obs, et cetera. I can do an entire screen. And notice I have two screens. So I have screen One, that's my laptop that I'm talking to you on right now. And then on my other side, I have a second screen, so I could select that entire screen and show that. And then also there's this thing on the bottom that says also Share tab Audio. And you can toggle that on or off. And similar to sharing your computer audio, this is going to be whether or not it records your audio that your computer's playing into your descript project. Okay, let me know if any questions about anything so far. And then finally, there's a Record with Rooms button. Before it was that icon thing, and then it took us into descript rooms. Now we have a button and that will once again take us into Descript rooms. And everything looks the same from there. But let me go back to my outline here. Okay. We talked about the grid and the center. Me talked about the share needing to share sound, toggling that thing on different layouts. Floating window, we talked about that's the being able to pop out the window. So your preview window. And then an issue. So I talked about this before, where what this is is when you hit record, for some reason, the web version has this bug where it just like the gain is super high for like the first second of the recording and then it kind of tapers off. And so for that reason, I personally don't use the web app for recording, but try it out for yourself and see where you get better results. And another important thing is in general, a big advantage of the web app is all your projects get stored to descripts Cloud if you're on, and they do on desktop as well, but only descripts Cloud as opposed to on the desktop app. It gets stored locally to your computer, taking up hard drive space. And so personally, I use the web app whenever I can for just having keeping my hard drive local hard drive as clean as possible, as empty as possible. And then I use the desktop app for recording. So find your own workflow, try them both out, see where you get better results. But that's my general rule of thumb. Okay, so let's talk about selecting the input sources. Generally, you have four input sources, and we've already talked about that, but we'll go deeper on each one. You have your microphone, you have your camera, you have your screen, and you have your computer audio. And you can have any combination thereof. You can record your screen without recording your microphone and camera, or you can record computer audio without recording any of these. You get the idea you can have any combination of these four. And Build your project accordingly based on what you're making. If you're recording slides and tutorials, probably most likely you're gonna have all three or all four. But the core three would be these three. So you're sharing your screen. Yeah. Whether or not you have the audio is up to whatever you're making. Okay, so if I go back, let's do, let's go open up our recording tab again. And the difference is here. So on a Mac you're gonna have the FaceTime HD camera. That's the built in camera that Mac computers have and that's the default. And on a Mac computer, on a Windows it'll depend on. There's so many more brands, there's a lot more different options. But the advantage of using the built in camera is it's going to be extremely stable and it's going to, it's going to work well. The problem is, the biggest problem is probably the quality. A lot of computers still have 720p and some have, some have 1080p now, but very, very few have 4K still very rare. So anyways, your resolution is going to be a limiting factor with the built in camera. Um, below that you can see this one says virtual camera. And if I switch to it, I think it'll actually. Nope, it's just off. That's a third party software that I have that you can create layouts where it's a little hard to explain but you can have like for example, your webcam preview could be a circle, you could put it in a certain part of your screen, you could have multiple windows open and you can put that into what's called a virtual camera. It's like that, that layout which I'm using right now for this live stream where my webcam is in the bottom left, my screen is filling the whole thing. This is a virtual camera from obs. And so when you make one of those, you can select that as an option here. Same thing with Camo. Camo is actually an app that you can download on your phone and on your computer and it allows you to use your phone's camera as your webcam. So that's what that is. And if I had a third party or an external camera like a DSLR camera or a Pocket three is another one I have, then you can use that, select it as your webcam by turning it on and then selecting it from this dropdown and then with microphone, same basic principle. There's my built in one and it'll look the same on your computer and Then if you plug in a microphone using like USB or if you have some other interface, then that'll appear as an option. And so you'll just find. So this microphone that I'm talking into right now is called the RODE PODMIC usb. And because it's plugged in, my computer recognizes that and I can switch to it like that. I just simply select it. And now that will be my input source. And finally, with the screen. We already talked about that at length. Just select the right window or your entire screen or whatever it is you want to select, and I'll talk a little bit more about best practices in terms of selecting the minimum possible or based on what you're recording, how much of your screen you want to actually capture. But that is the basic gist of those. Okay, let me go back to my outline here. And again, this outline, I shared the link in the chat. So if you want to download it for yourself and follow along with me or take notes, then feel free to do that. The last one I can talk about is the computer audio. So let's go back once again. And then the. So as mentioned, this is the web app. With the web app, our audio settings are going to be inside of the screen Share functionality. So when I click on the screen, share, the computer audio setting, whether to have it or not is going to be down here where it says also share tab audio. So you can toggle that on or off. And that is what's going to determine whether that audio gets captured. Let me close out of that and let's go back to the outline. Okay. And as always, let me know if there's any questions and we can focus in on something else. Okay, settings. Let's talk about settings. So if I go back to my recording window, there's this gear icon up here. And this is. That's going to be there. Whether you're on the Quick Recorder, the web app, or the desktop version, you're going to have that gear icon. Click on it. You'll have this same basic set of controls. The countdown I mentioned briefly is once you hit start recording, it'll say when you have this toggle on, it'll say, three, two, one, and then go. It's. It starts recording. That's if you have it toggled on. If you have toggled off, as soon as you hit start recording, boom, it's going. It's gonna start capturing your screen, your webcam, whatever you told it to. Let's leave that on for now. Microphone, audio transcription. This is whether it's going to as soon as you hit stop recording, transcribe your video or even be transcribing it in the background as you're going. And so I leave it on again. The only reason you might consider turning it off is, is if you're coming up on your transcription limit for the month and you just don't need to burn that that time. Otherwise Descript shines as a transcript based editor, so leave it on default speaker. If you remember my desktop recording, where did that go? Right here. So where it says MacBook Air microphone and FaceTime webcam. Had I selected my own name right here, like let's say I did Ross NT USB Home Office. If I had done that, then it would automatically go into my video project with that speaker label applied. So super handy for that purpose. And then lastly is Studio Sound. I currently have it off, but if you like Studio sound, if it works well for your microphone and your recording environment, turn that on and that will automatically apply Studio Sound. As soon as you hit stop recording, I'm gonna turn that off for now and actually I'm gonna undo this label there. Oh, and with Studio Sound you can also change the intensity. So by default it's gonna apply it at 100%. But if you always record in the same environment like I found that 80% works well for this microphone, this room and so I could just type in 80% there and when it applies to the sound, it's going to apply it at that intensity. But again let me just turn that off. And then there's computer audio. So same basic stuff here. Actually exactly the same stuff here. There's transcription, whether you want it to transcribe the computer audio or not, set the default speaker or not, and Studio sound or not. And one, one possible thought here for you is if you're recording a zoom call, first of all I'd recommend use Zoom's built in recorder. That's gonna be just a little more hassle free. But what you could do is like let's say you have a zoom window open. You could record using descript, select the zoom window and then in order to be able to hear the the people you're speaking to, you'll want to turn on computer audio. And and then this is where you could select the speaker and notice it only lets you select one speaker. So if you're talking to several people in a call, that could be an issue, but otherwise just leave it blank and then you can label the speaker in post. Okay, the last one is your camera and all you can do here is set the default resolution. So I leave it as high as your camera is capable of, but no higher. For example, it's at 4K, but the webcam I'm talking to you on right now is only 1080. So it wouldn't work. It wouldn't, it won't like break anything and it won't not start. But it just won't actually be at 4k unless I have a camera that's capable of 4k. So put that as high as your camera can physically handle, but no higher. Okay, so I think we covered everything important with the settings. I want to talk about other useful tools. So this blue circle that I have on my mouse right now is a third party tool that is called Screen Cursor. Let me just pull up the app app right here. And I got this on the Apple App Store. It was like 99 cents. It was very inexpensive and it's very simple. This is all it does. You can change the color of the ring around it. Oh, there's more features I guess. And so that's for a left click. It does like a blue ring or you can change the color of a right click. You can change the size of it, make it like huge or like that, change the width of it. But I find like about there works pretty well. And then you can also have a, the ability to draw. So if I hit option D, is it going to do it? Maybe I would be out of there. It's not, not liking it for some reason, but it brings up this like bar where I can basically just like draw circles, draw lines, like all that kind of stuff on my screen. And again there's dozens of apps like this. It's not important. The one you pick, I guess it says I need to upgrade. I don't know. Thought I already paid for it. But yeah, the point is they're, they're inexpensive, they're simple and it can really, really make it a lot easier to follow along while you're making a screen recording. And it doesn't hurt anything, it won't ruin your descript recording or anything. So that's a powerful tool if you're gonna be doing this a lot. The next thing is changing the cursor size and color. So even when I don't have this cursor thing turned on. Let me close out of it just to show you this Close out. You see how my cursor is blue? I did that. I use my brand's shade of blue. I use the exact hex code to make my cursor blue. And it's just kind of a little touch that makes it a little easier to see and also is my branding. So I like it. And you can do that in your, whether you're on Mac or Windows, you can go into your computer settings and then change it so that it's like that. And it's also bigger so you can change the size so that you can have a bigger cursor and it's a little bit easier to follow. But again that's done just natively inside of Windows or Mac. And then the last thing you can consider is like a magnifying glass. Some people have these like circles where inside of that circle everything is at 2x size or 3x. And it just makes it super easy and clear when where your mouse is and what you're doing inside of that space. Next, just general best practices and post production process. So I highly recommend. I've tried extensively doing this both ways. Recording like my slides or my screen and then trying to do the voiceover after. And you can do that, but it adds a lot more work. You have to do a lot of clipping things up, changing the speed of things so that it all is timed up with your voice. So I recommend if you're showing something on your screen, do the voiceover and the screen recording together. And that way as you're talking through something like you're saying, okay, now click on this thing or whatever it is that you're showing, do it together. It's just so much simpler. And it's also. Tutorials are also the type of thing where you don't need to have it be super scripted and super polished, depending on what it is, of course. But if you're showing Descript like I am, then I know it so well that I can just show it and talk through it while I'm doing it. And if you make a mistake, just simply do it again. You know, you can hit undo a couple times. Leave the recorder running, don't start it and stop it. Leave the recorder running, go back as if you're doing it for the first time, talk through it again while you're doing it and showing it. And then in post in the editing process, just cut out the bad take and then leave in the good one. So that's huge. That's something I've dabbled with. I was trying to record the screen and then later do a voiceover and it's just, it adds a lot of complexity. Okay. If you're manually selecting the screen, I.e. the desktop version way of selecting your screen, grab more of the screen than you think you need. And the reason being is you can always crop out, but you can never add something back. So in this, this live stream, for example, I wanted to show you the Descript Quick Recorder thing on the top of my, my computer. But what I have showing is too small. And so that just creates an issue where I can't show you everything that I wanted to. So I highly recommend grab a little bit more of the screen than you think you need, and you can always crop it in post. And same thing with zooming. As this next bullet point says, cropping and zooming can happen in post. So don't worry too much about trying to, you know, use command and plus to zoom in on the screen if you're showing a webpage, for example, because you can do all that stuff in post. And in fact, I recommend that you do it in post, which leads into the next point. Add lots of annotations, sound effects, et cetera, to add clarity. So if you're saying click on this button right here, this little add comment button, for example, one thing you've probably seen me, if you've seen my other videos, my tutorials, you know, I use that, that curved white arrow animation. So that's really good for drawing the user's attention to something. They're like, if they're looking around my screen, they're like, where's that button he's talking about? But then they see that animated arrow pointing right at it. It's hard to miss. And so use those gratuitously. If you're citing an article, citing some facts, you could put that on your screen and, and you could do an underline effect. And you could also, with that underline, add the sound of a pencil scratching a piece of paper. All that stuff goes a long ways. The other one with sound effects, what I have in mind for that is every time you make a mouse click, if probably your mic's not going to pick up your actual mouse, so you can add in a B roll sound effect from Descript stock media. And that goes a long way in cueing the viewer, like, okay, he just clicked right there. So you just want to make it as simple as possible, give them as many ways to understand that something just changed or you get the idea. Same with typing. That's another one I use a lot. If I say, okay, type into this box, then I'll add a typing sound effect. Yeah. Not only does it make your video more interesting, it makes it more clear, which is super important with all of this. Okay, so I got zero questions as we went through, but feel free. We got a. I got 10 more minutes if anyone wants to ask a question about this or anything else. Again, the link to this Google Doc is in the in the chat and you can go to file, make a copy and you can save this doc and leave questions or not leave questions. It'll put it into your own drive so that you can annotate it or review it, et cetera, and do whatever you want with it. Let's see. I think I got to all my bullet points. I was expecting a lot of questions along the way, but didn't get any. The as for slides, since that's a big part of this, I mostly just talked about the mechanics of recording it. If you use anything you could go over. Okay, I got your question Rod. Thank you. Yeah, we can, we can go over sequences. Yep. Just to finish that thought, you can use anything for slides. You can use Google Slides, you can use Keynote, the built in one on Apple, you can use PowerPoint of course. And the way you would do that is just go into presentation mode or Canva as well. I always like to mention that because most people use canva. Now go into presentation mode and then select the presentation using the methods we talked about. Either selecting the full screen, selecting the full tab, or manually selecting the part where you're showing your slides and then starting the recording going through your presentation. Again, best practice, as I mentioned with the tutorial, best practice of just if you mess up a line or something like that, don't stop the recording, just keep it running and then edit out the bad take in post. And that's a really efficient way to do it. Okay, so regarding question in the chat is go over sequences and how to adjust the audio to match the video if they get out of sync. If they get out of sync. So if you're recording using descript recorder, it should all be in sync. If it's not for some reason like let me go to back here, I click on show timeline and there is my timeline. And remember this, it looks like one layer, it's my script layer, but inside of there is a sequence. It's got my webcam, it's got my microphone and it's got my screen recording. So there's actually three things going on in there, possibly four if I have my my computer audio being recorded as well. So the way that I edit those tracks separately is by double clicking on it. So I click twice on it, it opens up this view Here. So this is inside of my sequence. And actually, I misspoke. There's two. There's two tracks. There's the computer, audio and screen. That's one track. And then there's the MacBook Air microphone and FaceTime camera. And that's the second track. So if these are out of sync, what I can do is right click on it. I can say, detach audio. And now I have a track that is just my webcam. And then below that I have a track that is just my microphone. And if they're out of sync, then either my camera is ahead of my audio or my audio is ahead of my camera. And the way that I fix that is simply by changing the position of these tracks relative to each other. So I can grab my audio track, for example, and slide it, click and drag just a little bit. And that's going to change the position of that entire audio track relative to the camera. And so then once I make a change, I can play it. It's gonna record my webcam. And now it's out of sync. Cause it was in sync already. But that's the gist of it, is you would just play with this, slide it left and right, playing it back, my webcam, until those are synced up. And it's probably gonna be a very small change. Like if I zoom in on this, like I'm only seeing a 1 1/2 second view right here. If you see these numbers at the top, this is a 1 1/2 second view. And so if I change these just like a tenth of a second left and right just to try to get it back in sync with my camera, then that is how I would do that. And again, with this, the webcam and the microphone as an input should be synced by default. But for the sake of Rod's question here, this is. This is how you would do that. Okay. And he's saying the detach audio button isn't always available. If it's not available, then there's no audio with it. So, for example, if I click on my camera only and there's no detached audio here, it's because I already detached it. So in that case, you probably already recorded your camera and your microphone as separate tracks. And the process will be the same. You'll just need to find your audio track and then adjust it relative to the camera track. I'm assuming is what you did. So, yeah, detach audio will always be there if there's audio to detach. For example, down here, this again was my computer audio. And my computer screen. So if I right click, there's detach audio and then it made my audio only and my screen only or vice versa, I'm not sure which is which, but yeah. Any other questions about screen recording stuff we covered or you have me for three more minutes. If there's any other general descript stuff. So yeah, sequences are separate. So like if they shouldn't be affecting each other, if you're making changes inside of the sequence view here, it will not affect other sequences. But if you have back to back sequences. So I think yeah, that's a sequence. So I have a sequence in scene one and, and I have a sequence in scene two. If I make a change, like I cut off a little bit of scene one, sequence one rather well, scene one as well, then that'll. That still didn't affect scene two in this case. But okay, let's do this. If I do a crossfade like I do, let me just add an actual transition here out crossfade in that case, because these, these sequences are adjacent to each other, it'll fade out of the first one and into the next one. But generally these are distinct things. So any changes I make inside of the sequence view won't affect any other sequence. And if I go to project sequences, there's my, there's one sequence, there's my second sequence and I can also go to edit sequence from here. And if I make any edits, it'll only affect this sequence, not the other ones. So yeah, hopefully that makes sense. And I do need to run in one minute, but if there's any other questions. Recap. Yeah, so again I gotta jump in one minute here, but I made it. I followed an outline for this whole thing which is available here. And I'll share this link in the chat one more time. And you're welcome to download this file. You just go to file, make a copy and then you can save it to your computer. And this has all the points I covered. And this recording from the whole thing will be available on the Descript Mastery Channel. So you can watch it forever after this. After I hit stop today. But yeah, no time for a full recap, sorry. Oh, and one last thing before I go is it's Black Friday, it's November. So if you want to join the discrete Mastery school, there's a 30% off sale. So it's going to be the steepest discount of the entire year. And I do similar to this workshop, I do group coaching twice a week where members jump in and then you can ask. Whatever you're stuck on descript, technical support workflows, just whatever you want. It's your time. And sometimes even just talking about YouTube or whatever, social media growth, all that stuff is fair game. And you also get access to the course. So my entire Descript mastery course. And yeah, it's as cheap as it'll ever be for the next two weeks. So thank you, everyone that joined, Appreciate you. And again, the. The. For those that just joined at the end, the live stream will be available as a video that you can watch on your own time. All right, have a good rest of your day. Bye. Bye.








