Screen Recording Deep Dive - Live Event Replay
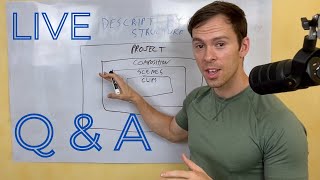
Ross from Descript Mastery walks through screen recording, editing, and audio tools in Descript. He covers recording modes and inputs, layer management, timeline hotkeys like blade (B) and slip (Y), and audio fixes including auto-leveling and external noise removal with Auphonic.
Questions this video answers
Free plan: 1 hour/month; Creator tier: 10 hours/month; Pro tier: $288 per year for 30 hours/month (counts file duration).
$25 per template.
Foreign and we're live this time. I'm a lot more prepared than the one I did on Friday. And I've got some ideas for you today. But if anyone joins, feel free to ask your questions. My name is Ross. I am the owner of this business called Descript Mastery. And all I do is help people learn Descript here. And I do that through a course. I do that through tutoring. This is my website right here. So if you go to products, course tutoring and then I also make custom templates for people. So for $25 per template, I can make a YouTube intro, a YouTube outro, I can make whatever you want. If you have a certain brand, style, captions, I can make those. The, those are common templates that I do. And yeah, this is my business in a nutshell. DescriptMastery.com so check that out. And this week I'm doing an experiment. I'm going to do a live stream every single day, 1:30pm right here on the channel. And you can find me. I'll be here for free. You can ask your questions and I'll help as much as I can. And I'm going to come each day with a different topic. So today I'm going to talk about recording, screen recording. And we're going to do that. One second. Let me just check the health of the recording here. We're going to do that. One second. Okay, looks good. So I always get nervous when I can't, like I don't have feedback if the stream is going through clearly, if my audio is got an echo or something weird's going on. But I'm going to have a theme every day. And today, in absence of questions, until I get questions, I'm going to talk about using Descripts built in recorder. And the simple way to do that is you come up here with this record button and you can set your. You can do a variety of things with this. You can record audio only, which is great for like a podcast. And let's start there. That's the simplest option. So you can turn on your microphone or. Sorry, the first option here is computer audio. And so if you turn that on, that's going to take the audio that is playing from your computer. Maybe you're playing a YouTube video, maybe you're playing a recording of something you've previously made and you're playing it through your computer. That audio is going to get picked up in the recording. When you turn that on, when it's off, you're not going to hear it. And there's no. There's no other options there. You can't pick a different. You can't choose, like, which window you're hearing the sound from or anything like that. It's just going to take all the audio that's coming from your computer and it's going to put it into an audio track. You can assign a speaker to it. So if you're playing one of my YouTube videos, you could choose me as a speaker and say that, you know, this is Ross from Descript Mastery. That's coming through my speaker. The other thing you can do is you can have it automatically apply studio sound to the recordings and that'll cancel out the background noise. That'll cancel out even music. It'll cancel out even sometimes laughs and things like that that it shouldn't. But studio sound generally does a really good job of reducing noise, reducing echoes and that type of thing from your recording. So that's a really useful thing to have on. But maybe you don't want it on for computer audio, as I don't. The next one is to transcribe it. This would be, as you're recording, for that sound, to automatically be transcribed by the software. I have that on. That's something I like to use. And then below that is your microphone. So if you turn that on, you can see, first of all, a little feedback. You got those green lines. And by the way, this doesn't always work. I've found recently a number of errors where you don't get that green input, but it's worth glancing at if you have it. That's good. Like, I can see every time I say a word, my green lines are bouncing up. That tells me that the computer is picking up my audio. If it's not, then you might want to restart your app and try it again. Because what I see happen is if you've already done a recording and completed that recording, and then you try to do another one in descript, you won't get that audio feedback. I don't know why. It's kind of a bug that's happening right now. But you won't always have that next to that. You choose where you want to record from. So this would be your microphone. This thing right here is called a Rode podmic usb. And if I want to record with that, that is what I would pick. However, I have a software called rodeconnect, which looks like this. And you can see my. I got system sound and I got podmic USB sound. And this is kind of like a production. What do they Call those things like a road, the Rode procaster. This is like the software version of that where you can have a lot of different inputs here. So I could have multiple mics plugged into my computer. I could have multiple different sound effects coming into my computer. And then that's what this is saying is I'm picking this input software as my microphone input for my recording. And so that's what I have it set at. Channel 1. Road Connect software. Once again, I could assign a speaker, I'll assign myself. And the purpose of assigning a speaker is for AI voices. So if you want to correct a section or add a text to speech section, like, let's say I meant to include some more details. I left out a sentence when I was delivering my speech, my podcast, whatever it might be, and I can add that either by rerecording it or by typing in the words that I wanted to say. And. And then the AI voice that I've trained it, my voice will read those words and it'll sound like I'm actually saying it. It's hit or miss. I don't. I don't use it because I don't love it. I would rather just rerecord it. If I really mess something up, if I mess up just one word, then I use what's called the regenerate function or possibly the overdub function and replace just one word. Like let's say I said 600 and I meant to say 700, then I could just correct that one word. And it usually does a pretty good job about that. Once again, I got these little input settings here, and there's only two options there. Studio sound and transcribe. I already talked about what those do for me as a human. I leave those on for computer audio. I don't. But studio sound I apply to myself. And transcribe, I applied to myself. Now, one other consideration with that is if you're on the free plan of descript, you can only transcribe one hour per month. With your free plan, and that's one way they try to get you to upgrade, is once you're in the trend, the creator tier, then you can do 10 hours per month. And when you're at the pro tier, which is the highest Tier and is $288 US dollars per year, that one, you get 30 hours of transcription time per month. And to be clear, that's the time of the audio files that you give it to Transcribe. So that's 30 hours of audio or video. I should say not just audio, audio or video that you are transcribing into text. So even if out of that 30 hours, there's only 15 hours of speaking, it's still going to be counted as the 30 hours. It's the amount of the file, the length of the files. Very good. And then the next thing is you could add multiple inputs. So if you're doing a podcast with multiple speakers, this is where you do it. You have channel one, channel two, and then the next thing is the record into script button. Now, a very important distinction is that the script layer versus the other layers. And I'll just call them other layers because that's what they are. The script layer is your base layer. It's the layer that gets transcribed. So the words that it recognizes that the AI system recognizes out of your audio, it turns it into text on your screen. And there's a couple other things that make the script layer unique. But at a high level, that's the most important thing. And then if you click this little drop down here, there's a record New layer. And if you already had a script layer and you selected record new layer, this would record it as a layer above your script layer without interfering with your script layer. And the last option is to replace selection. And this is if you have a portion of your. Your audio, in this case selected, like a couple sentences that you. You said wrong or you just want to do it again, you could select those sentences and then click this big red replace selection button, and it would record over just that selection. So those are the audio settings. Moving on, we have the camera setting. And now you can see it puts a little preview of myself in the bottom left. And as before, this should look pretty familiar. We have our computer audio setting. I've already talked about that. But we have one new thing here, and that is the camera. And you can toggle it off like that. And now it's just effectively a. Well, it actually reverted to the screen setting. But I'm just going to. So you see audio, camera and screen. But when I turned off the FaceTime camera, it reverted to the screen one here on the right. But if that's what we want to do, we want to record ourselves. You can move it around the little preview window here, and it's kind of a little slow to load there. There might be some issues. I'm not going to actually start the recording since I'm also doing the live stream. I don't want to have it mess things up. So I'll just talk you through it and I see we have viewers in different channels, so feel free to leave questions if they come up and doesn't have to be about this. It can be about anything. I'm just sort of killing time by talking about screen recording. So by default I'm on a Mac, so it defaults to facetime HD camera. I could go to none and then it once again reverts me back to the screen. It's the same as disabling the camera. I could go to Camera Camo camera or OBS virtual camera. Those are third party softwares that I use. I'm on OBS right now for this streaming. That's beyond the scope of descript though, so I won't, I won't go into that unless you want me to. And then let me revert. It keeps reverting back to the screen option there and then below that you have your microphone options as before. I'm just going to turn off channel two there. So nothing different with computer audio or the microphone. The only difference is choosing your camera. And if you have an external camera and it's plugged into your device and the drivers are installed, everything's set up. In general, you've used your camera as a webcam before. You should see it here as an option. And that includes if you have like a. I have an Osmo Pocket 3 and when I plug it in it can be used as a webcam, a 4K webcam. So you know things like that. You could, if you had a GoPro, if you have a. A DSLR camera, that's how you would select it. And then as before, we have the same options here as well with record into script, replace selection or Record new layer. So I won't go into those again. And then our third and final option across the top is to do a screen recording and you can see the preview there. It tells you what it is that it does. The first one is just a camera, rather the first one is just audio. So it's a microphone, no camera. The one that's camera shows a guy with a camera taking up the whole screen. And then the screen one, there's a little guy in the bottom left and then a screen behind him. So this computer audio should look familiar. Webcam should look familiar. What's new here is the display screen and there's nothing you can do with this here. But in the next step is where you will choose which part of your screen you want it to record. If that's your entire screen or if it's just a portion of your screen that you manually select. That'll be in the next step. Um, so the only thing you can do here is just toggle off the screen share at all. And then when you do that, it reverts back to the camera mode. So then we got the microphone that looks familiar. Already talked about that. And our replace selection record into script record new layer. Nothing new there. The last thing to show you with the record options is this gear icon. And here you can set a countdown, which I believe is on by default, but I have it turned off so I don't use it. I like it that as soon as I hit record, it's going. It's. It's recording. If you have that on, It'll do a 3, 2, 1, and then it'll give a beep and then it starts recording. So that might be useful if you need to catch your breath and then you start speaking or, you know, whatever. If that's useful to you, you can do that. Below that you have your transcription language. Make sure you get that correct. If your defaults to English, I think it defaults to English, but if you are in a different language, be sure to select the proper language. I've had many clients who, you know, they do their whole thing and it's on the wrong language and then it's. It's a lot harder to retranscribe it and you're going to eat into your time when you retranscribe a file. So check that. And then the default recording resolution, set this appropriately. Make sure if you want to record at 4k, you do that. It does say it's in beta, so it might be a little buggy. I'm not sure. I've never had issues with it, but it does say beta and I usually do 10 ADP. If I'm showing my. If I'm showing my screen, 1080p is adequate for. For this. You know, I'm not showing like extreme amounts of detail or anything. It's just I'm showing descript most of the time. Highlight clicks when recording. This is to have it do a little bubble around your. Your click every time. Which reminds me, I need to turn on my. I have this tool that puts a circle around my. Around my cursor like that. And that's kind of what it does with that record clicks when recording. It puts a little circle every time you click. And I just got a comment in the chat. Thank you, Johan. I appreciate the comment and the support. And yeah, feel free to watch the replay. Absolutely. If you have Any questions you want me to cover? If you got a jump, I totally get it. But if you have questions you want me to cover, you can catch it in the flip. Okay, so, yeah, so recording resolution. If depends what you're showing. Maybe you're showing photography or you're showing video editing or something. Then it might make sense to go as high resolution as you possibly can. Highlight clicks when recording. Yeah, I talked about that. Confirm recording area. So this is going to make more sense when I show it in a moment. But after you click the red button to start the recording, it's going to manually ask you to choose a portion of your screen that you want to record. And if you turn that off, to be honest, I'm not sure. I think if you have it off, it's just going to record your entire screen by default. I'm not really sure about that. I just have it on minimize recording dock. So this is if you want it to automatically recording doc. Oh, okay. The recording dock is a little black rectangle that'll come out of the side of your computer. By default. It comes out of the right side of your computer, and it's got a stop button and a pause button. So while you're recording, you can pause it to, you know, catch your thoughts or let something load or whatever it is that you're showing. And then there's a stop button to stop the recording and just go ahead and save what you've created so far. So that is asking you if you want it to automatically minimize, which I do, because I don't want that to be on the screen while I'm showing something. And then as soon as you hover your mouse over the right side of your computer, it'll slide out, and then you have those two buttons. And then the last thing here is hide descript when starting screen recording. For 99% of you, you'll want this on. I have it off because I show descript. So it's for me, my unique use case. Descript is what I'm showing, and I have it off. So again, that is it'll minimize the entire Descript app out of your view so that you can focus on whatever it is you're showing, probably your browser, whatever it is on your computer. Okay. So with all that out of the way, I'm gonna show you this screen recording. Once we click on, I'm gonna do record into script. And I think I'm gonna cancel out of this before starting it, because I don't want to ruin, you know, what I'm Gonna try it. If I get cut off here, we'll rejoin. I'll be back in a few minutes, so let's see what happens. And I can already see my camera is not loading, which is weird cause it was loading earlier. But so you see that as soon as I start this, I get this message that says drag to record part of the screen or press space to record full screen. So if I click on my space bar, it's going to record my entire screen, including the top menu bar of my Apple computer, the dock, everything, the whole screen. If I don't want to do that, like, I only want to record this, the canvas of my descript project here. What I can do is click and drag. And you can see the number in the bottom right of where I'm dragging. That's. That's the size in pixels of this, the screen that I'm going to capture. And so when I'm recording, the only thing that's going to show up is what I have selected. And then I have the option to say, start recording, and that'll start the recording. I can hit escape to cancel the recording. If I decide, like, I'm not ready yet, or I wasn't quite able to get the right dimensions, then that's my out. And you can't see it because I'm on obs, my streaming software here. But on the right side of my screen, there is that thing I told you about where there's a stop button and a pause button. So, yeah, I'm just gonna. I'm gonna try this. I'm gonna hit start recording, and it's kind of just spinning in place. I think this isn't gonna work. It's probably gonna give me an error here, which is fine. Yeah, There we go. Unable to launch recorder. Okay, so that demo is not gonna work. But after recording, I would get a layer for the screen and a layer for the webcam. And let me see if I have one that I could show you, since this is all I do. I'm sure I do have publishing to YouTube. Maybe let's take a look. No, well, it's okay. I won't waste time looking for that. Oh, well, I got my preview back, so let's try this again. Let's just try it. Whatever. I'm just gonna select a portion. And one thing I didn't show you is once you have this box where you can. You can grab the white corners to keep, you know, resize both dimensions at once. Or you can grab just a side and just do one side at a time. Or you can click in the middle and you see I have that cross. My cursor turns into a cross. I can drag it around the screen or I can hit escape and cancel out of it. But let's, let's go back into that record into script, start recording. Okay, now we're recording. This time it's working. This is good. So I'm just gonna let this go for a few seconds. And. Oh, you can see a stop button, like the bottom half of a stop button up here. Or it'll be the bottom half in the recording. Because the light part of this box is all that's gonna show up in my view window. And then off to the right of my screen. You can't see it in the stream, but I have my stop button and my pause button. I'm gonna pause it and everything I say right now is not gonna make it in. But there's also a play button. So I'm gonna hit play and then I can start talking again and I'll stop it. Okay. And you can see it immediately goes into transcribing. It says 0% transcribing. If I hover my mouse over that. And it's got the name of the, in this case, FaceTime HD camera. But if you use a third party camera or anything else, it just be whatever camera you selected. And then. Okay, here's, here's what's important. On the left side or the right side, where under layers, there's our camera layer and there's the screen layer. And so I can treat these, these are separate layers. So I could drag it around, I could resize it, I could do portions, I could have it switch back and forth. So it could go from me being full screen to me being just in the corner. I could apply green screen to this. This is what I typically do for all of my videos on this channel. You've probably seen I have green screen applied. So you don't see my background. It's just my floating head in the bottom left corner of whatever I'm showing on the screen. And then I could, I can move this around as well. The screen. I could zoom in. If I want to emphasize something like I'm talking about the actions button right here. I could zoom in on that. Let me undo that. So this is the best way. And you can see green screen's already done being applied. Look at that. I'm just floating in the ether now. The problem with that is my microphone is right here on my shoulder. So there's kind of Like a. It detected that as the background and took out my microphone. But in that case, I would just raise the microphone up a little bit so it doesn't. That doesn't happen. Okay. And then, yeah, I can position. I can. If I click on my layer, I can do this right here and make myself a circle and let me change the background here because it's. You can't really see it. Now you see how the bottom of it is round. So again, if you just click on the layer, you can also crop it, zoom way in. I just want my eyes. For some reason, I had done. It's this thing right here. When you have the layer selected, it says shapes. I can make myself a square portrait landscape, which was what it originally was. That's the default. But I like circle. Circle looks cool for this purpose. And then what I could do is. Thank you, commenter. A taste of the Kawartha's culinary tours. What is Kawartha's culinary tours? I appreciate the compliment. Um, and then I could send this layer behind. I could. Sorry, I. I wasn't explaining what I just did there. I added a shape. In this case a circle. And I could shrink this down and I could position it behind myself. And then right here where it says fill, I can make it like a different color and I could bump that around till it fits nicely. Let me find the layer, show timeline, expand it, and then I can go to layout and change the X and Y properties to slide this around there. Now it looks like the bottom of my portion of a circle is lined up with the circle that I have behind myself. So that's kind of a cool effect. You can see you get very creative with all that. And then if I click on my layer again, I can apply Studio sound. I could apply compressor. Those are about 80 to 90% of the audio stuff I do is just those two settings. Studio sound and compressor. That gets you 80 to 90% of the way there with fixing up audio. And then beyond that would just be changing audio, the volume. Sometimes there's like parts of podcasts that'll be really quiet, parts that'll be louder. And then just correcting to kind of even things out, which you can also auto level, you have to go into the sequence and then getting ahead of myself a little bit here. But if you right click on the audio track inside of a sequence, there's this auto level, click clip option and it happened immediately. It'd probably already been done. Descript notice under the audio level it says positive 6.8 decibels. Descript automatically sets an audio level. So if you're really quiet or you're kind of far away from your microphone, it will apply a certain amount of volume control to. To equalize the whole thing out as best as it can. But doing that auto level also prompts it to auto level just like it sounds like the audio levels. And then there's a hotkey with everything in descript that has a hotkey like split. You can type in S right there inside of my cursor, and that will do a split of the clip at whatever point your playhead is at. Yeah. And the. The hotkey for this auto level is kind of complicated. It's option, command, shift, and L. So that's. That's one of the biggest hotkeys in descript. I don't. I don't typically use that as a hotkey. The most common hotkeys are. Well, first of all, spacebar to start and stop play. So rather than clicking. Good. So I'm just gonna. Every time you can use SpaceBar, let this go and stop it. With SpaceBar, you can. I don't often use this, the next marker, the fast forward marker, which is option, command, and period. That'll skip ahead. I usually just click on the button because again, it's kind of a big hotkey. And then same thing for reverse option, command, comma, will go to the start of your project or the previous scene if it's a longer project. So those are different options for you. Okay. Yeah. Back to hotkeys. So the command or spacebar is what I often use. The other ones that whenever I tell clients about this, it's. It's not obvious. And so people are stoked when I tell them about this is left and right and up and down keys. So right now I'm clicking the right key, and you see how the playhead is sliding forward. And if you notice my image in the canvas, I'm moving slightly. So every time I click the right key, I'm moving one frame forward. And if I click the left key, I move one frame backwards. And so if you have a weird transition where it's like choppy or like a little, you see like a cut of something weird, you can use these frames, move forward just one frame at a time to see what's going on in a very granular way. The other way that you can use the up, down, left, and right keys is when you have a layer selected. So watch. If I click left, I have the. My screen layer selected. I'm clicking left and moving that to the left or I can hold it and it slides smoothly or up or down. So this is great. If something's just a little bit off. You're trying to position a title. I did this earlier with the. The circle. I was just trying to make little fine adjustments to get it positioned just right like you see this. So I can do this to just tap it into place with my arrow keys. Super easy. The other thing moving on from hotkeys and feel free to leave comments in the chat again, I'll just keep talking otherwise unless I get anything. But crop mode is to resize something so it doesn't. It doesn't change what's visible or how do I explain this. It does change what's visible if you cut out. Cut off what's visible. But it. It changes the dimensions of the object of the object that you have selected without shrinking what's inside of that object. So the. The other way would be when you have these white dots here and then you grab the corners. That does shrink the entire object, but isn't changing the aspect ratio. So it's still this same height and width. Those. That ratio is staying the same, but what's inside of it is shrinking. And you can change your view. So I could click right here and make the my canvas smaller or bigger by dragging like that. I can make the scene thumbnails smaller or bigger by dragging like that. And right now I only have one scene. Thus there's only one image here and the number one. But if I had a bunch of scenes, they would all be stacked right there and I could navigate through them by clicking on them. You can hide the timeline, which it's kind of weird to me that it's. The timeline is hidden by default because if you're opening up descript for the first time, you might not even know what is the timeline. Where do I find it? So open up the timeline and these are where your layers go. I talked earlier about the script layer. The script layer is what gets transcribed, which is why we have work words over these sound waves. These sound waves correspond. So this particular chunk of sound wave right there is me saying so. And I can simply click on the word. This might blow your mind if you haven't seen it before. You can click on the word and drag to the left and I just closed up the silent space that was before it. And if I wanted to get rid of the words before it, I could just keep dragging and those words are gone and I could start. Actually so is a filler word. So let me get rid of that. I'm going to go from the next word and just drag over. So. And it's gone. And it might not sound great. It might. You got to be careful that you're not clipping words, meaning that you're cutting a word in the middle of that sound that it's creating. Um, and this one looks like it should be okay. You can. Another hotkey, by the way I'm doing it right now is holding command and using scroll on your mouse. So scroll up and down to zoom in and out on your timeline. So, yeah, so I'm zooming in and I'm looking at the sound waves and I'm. I see that after the word working, the sound wave tapers off. That's good. If it was like this, where the. It gets chopped right in the middle of that sound wave, that's probably not going to sound good. It's going to sound like it's work, like get abruptly cut. So that's one way I use visual cues of the sound wave, the. The size and shape of the sound wave. And that comes with experience, having done this for thousands and thousands of hours. But worth pointing out that it's not too complicated and you can start implementing that as well. And right here at the end, you can see that word and gets chopped. And that's where I finished speaking. Let's see how that. Dan? Yeah, I just chopped myself in the middle of the sentence. So what I can do is I can grab the end right here and my mouse turns into a bracket and. And the direction of the bracket. So right now it's open to the left. So this is telling me that when I click and drag, I'm affecting everything to the left of that clip. So if I click and drag to the left, I'm getting rid of some of that layer, I'm getting rid of some of that clip. And now it's going to end on the word again instead of the word and that was floating out there to the right. And I can do the opposite. If I click on there again, I get the bracket, I click and drag to the right. I just restored that word. So nothing's ever truly deleted in Descript. You can always restore it in that way. You can hit undo on your computer just like you could with a Word document. You can also use version history and go back to a specific point in time to what your project looked like yesterday, a week ago, a year ago. It's all saved. And let's see here. So, yeah, and then to get back to the Start of your project. You can just hit this left arrow here and let me just make this bigger resize this. I'm not used to seeing the canvas on top. I'm used to seeing this view. And if you have a big screen you probably are as well, where it's got the transcript on the left side and then the image on the right side. So this is kind of unusual to me to have the transcript below it, but it is what it is. Let me get things back to how it was. And so if I had computer audio, I talked about in the recording portion of this live stream, I talked about having your computer audio on. So since I did, as part of this layer that has my screen, there's also an associated sound layer with it. So if I didn't want that, I could mute it right here. Or if I wanted to make it louder, I could change the volume right here. But one very important thing I want to get into in lieu of questions. Haven't had any questions yet. Feel free to drop them in the chat if you got any IS sequences. So if I right click on my script layer, I get this thing that says edit sequence and this won't be there if you only have one layer, if you only have one media file, I have three media files. I have my microphone, I have my webcam view that's selected right now with the purple box around it on, on the canvas and then behind that I have the screen. So I have three media files in my project right now. So I hit edit sequence. And you see here, There are my 3, oh 4. So I got the computer audio as well. So along with that screen recording, there's a separate audio file for what I played on my screen, which is this bottom one here. You can see they're labeled on the left side. Computer audio Ross Wav. That's myself screen, MP4, that's the video, the visual of just the screen and then FaceTime HD camera, that's the visual of me from my webcam. So there's no audio associated with these ones on this layer itself. Otherwise you would see sound waves there. You see on these, on this bottom one you got my sound waves there. The computer audio does not have sound waves because I didn't actually play anything, but had I played a YouTube video or something, we would see sound waves there. But the sequence here, the sequence view is very, very, very important to understand if you're going to make multi person podcasts or even for this purpose for screen recording. Because what sequence does is, is it takes all these Separate layers, and it keeps them in sync. So right now, these four layers are synced up. They're. They start at the same time and they end at the same time. I could get them out of sync by clicking one and dragging it. So I just moved the FaceTime HD camera out of sync with the three layers below it. So that's not good. That's not something I would do, but. But maybe you didn't record in descript. And so things aren't already synced up automatically if you have to manually sync things. Like in Hollywood, they have those clapboards, and that's to indicate a moment in time when all of the. They need to sync all the microphones up. They need to sync all the cameras up. Cause one shot might have 10 different things going on, 10 different inputs. So the editors can go in to find all those different layers. They can sync it at the moment in time where that clapboard happens. And they use the sound waves. So, like, you can. You can see here the peaks in these sound waves. If I'd had a. If I'd snapped or clapped or had a clapboard, I would see that peak and I could line up all the layers at that point and then. And then create a sequence or whatever the equivalent is in other softwares and more professional software. So the con, the sequence is a container of these layers. And I can also do things like mute a particular layer. So I could take this computer audio layer and mute it again. There's not even sound waves to start with, so there's nothing to mute. But I think you get the idea. And once I've tweaked things in here the way that I want to, I can hit done. And you see back here, I have. I have this layer which is my ellipse, the circle, that red circle that I added. But that's the only other layer I have down here. There's just one layer showing, but it's actually a sequence. And inside of there are the four layers that I just showed you. So what happens is even if I make cuts here from my timeline, from my project view, it won't affect the sequence. So if I chop this, I make this cut right here, it's going to cut all four layers proportionately so that everything after, it doesn't get out of sync. Because if I cut. If I had four layers here on my timeline, and I cut only the part where I'm speaking, then the other three layers would be out of sync because the same cut wasn't made to them. So hopefully that makes Sense how to make sense of sequences in the comments. I have to go over this a few times as I use Pro Tools for audio and Final Cut for production to put it all together. Yeah, Pro Tools is a whole. I. I've never used it. I'm familiar with it, and I know it's like a super sophisticated tool. Um, so I'm sure Pro Tools has the equivalent of this where you create sequences. Final Cut. I don't know. I know that Premiere uses the word sequence, and it's the same principle. I don't know with Final Cut what their equivalent terminology is. But yeah, sequences are more complex. But again, it's the only way to do it right. With multiple layers. It's like. It's super, super fundamental. And it helps when you're coming from other editors. It makes it so it's not all brand new. You understand the concepts. You just kind of gotta apply it to this particular tool. So. And I can, to an extent, I can control the layers individually here in Descript. So if I click on myself, this is the layer that has the audio. And I can mute myself like so with the speaker button here. Oh, are you able to see that in the live stream? Hang on. It might be out of view. Okay, I tweaked the screen a little bit. So here on the right side, the speaker, you can toggle that off to mute a layer, toggle it back on to mute a layer. And if you apply studio sound to a sequence, it'll apply to everything inside of it. And then you need to go back into your sequence and individually un. Studio sound a layer, if you wanted to do that. But the other thing about studio sound, this is important to point out, is it implies it applies to the entire file. And I've seen this cause problems where studio sound picks up like something like a laugh or a cough as a background sound or something that it wants to get rid of. And it'll make it sound weird. It'll be like a muted cough or muted laugh. And you can't select just that cough and unstudio sound it because studio sound is file wide. So if you apply applies everywhere. And you can't just like pick and choose certain places to. To have it applied. So that's kind of a frustrating thing about studio sound. And then if you click on these dials, you only get one setting with studio sound, and that's the intensity. So the alternative way to work around that situation, like the cough or the laugh that I mentioned, is to play with the intensity. And I've Found that with this microphone and compressor settings that I use, I'm usually somewhere around like 80%, and I find that that sounds pretty good. And so once you figure out for your recording environment, your microphone, your level of speaking, all that kind of stuff, you can dial in an intensity setting that you always use. And maybe a hundred is fine, maybe you're happy with a hundred. It can just make your voice sound a little bit robotic and flat. So consider turning it down. There's also, I'll mention I've been using another tool called Alphonic, which is like, you can think of it as like a dedicated studio sound tool. That's all it does is the functionality of studio sound, but a little bit more accurate and a little bit more options with it. So you can do things like remove noise while keeping background music and remove breaths, which is something that descript doesn't offer. You can't remove breathing. So if you have a guest who, after, at the end of every sentence, takes a big breath in and it's really distracting, you could edit that out. You could just chop it. Or you could use the Range tool, select that specific point, mute it. But it would be nice if descript had a functionality to just remove that using AI, which again, Alphonic does. And Alphonic is free, so check it out. I've never paid for it. The Range tool I just mentioned. So let's say that right here, this. There's this filler word, which. There's many ways I could cover it up. I grab or slide it over. But one of my favorite ways is the Range tool, which is this thing right here. In your Timeline tools, you can also click R on your keyboard. And when you go into the Range tool, just like it sounds, you select a range. So you click and drag over a specific portion. So I started my click between the word and or, and I dragged all the way to the end of the previous word here. So it's that gap plus the word. And I could delete it. I could click delete on my keyboard and now just that specific range is gone. But I'm gonna undo that. Or I could come here to my audio settings. I could turn it down so that maybe. Maybe I took a big breath right there and I just wanted to get. I turn it down without totally removing it. I could do that. And as well as it would quiet the there, you could see the sound waves shrunk when I did that. I could make it louder as well if I. There was something I said or a guest said, and it was kind of they kind of muttered it under their breath, but I want to emphasize it. I could do positive 15. Oops, let me. So click in there, positive 15. And now look at how big those sound waves are. That's going to be blown out, but that's something you could do. Or this is the thing I was going to show you all along is just click on the speaker and it just muted it. So now that you don't see sound waves at all, and it's just going to be completely silent right there without removing the video. So, yeah, if you have a video element to your podcast, you could remove something and especially an. You don't really see it on the camera as much as. Like with other words, if you wouldn't want to mute a whole sentence when you can see the video moving and you see their mouth moving, but like one word here and there, you can mute it. And it's. It's barely discernible to the. To the viewer. And. And so the advantage of that too would be you'd prevent a jump clip. If you. If I recut this section, I click on it, I press delete, and now it's gone. I run the risk of a jump cut where. In this scene before that, that cut, my head's over here, and then at the end of that cut, my head's over here. That would be a jump cut and it'd be really distracting, which I don't want. So for all those reasons, Range Tool is awesome. The other thing you can do with it is I still have it selected here and you can see the. The length of it. It's 0.932 seconds. I can also come here to this heading that says duration, and it's currently at 1x, which means it's playing at normal 1x speed. I can change that to anything from 0.1. So it just got way longer because it's playing at 10% of the original speed, all the way up to 30x, which now is just a tiny little sliver. It's going to play it 30 times faster than the original rate. It's a point 0.03 seconds long. So you can also type in a duration there or you can change the speed in. In a number. I'm going to undo that now we're back. Let's see if I can. I'm just clicking undo, so command Z on my keyboard until we're. Okay, there's the sound waves and we're back to how we started. So Range Tool is awesome. And it took me a while to Start using it now. The other thing you could do is right next to it, the blade tool. I very rarely use the blade tool anymore, but the way it works is it turns into this razor blade and wherever you click it's going to split that clip. So if I click right here, you can see that it, it split it into two pieces and then everything to the right of it is selected by default. So I could hit delete and it would delete that entire back portion of that, that selection there. Or I could, I could go back to my select tool, which is this one here, the cursor, and I could select everything before it and delete it. But what I'm going to show you is isolating a portion. So if I go back to my blade tool, it's B on your keyboard. B as in blade. And then I got this range tool. I click before the word and I'm looking at the word there as well as the sound waves right here so that I know I have it selected. And once again it defaults selected everything after the cut. But this time, since there's another cut here, it only selected up to that next cut. So in this case it isolated the word and I have it selected. So I could just click delete and it's gone. But I'm gonna undo that. And now we're back to where we started. So, yeah, select tool is the default tool. This is where you can just move the playhead. The playhead being this blue vertical line. And wherever the play head is is where it's going to start playing. So if I play, it'll be the bottom half just like that. And then the Blade tool we just covered Range tool is awesome. Slip Tool is Y on your keyboard or this double arrow thing here. Slip tool is more complicated to explain, but let me see if there's a good use case for it. Basically, if you see where, if you see my mouse, it says 4 and the black box above my mouse, there's a 4 and a 28 on the right side. That's telling me that this selection that I currently have, the blue portion, starts at 4 seconds in my video and ends at 28 seconds. So it's a roughly 24 second clip within that. And that that goes from the previous clip, the previous split, which happened at four seconds. And I can move the clip inside of that portion without changing the length of it using the Slip tool. So I can click and drag and you can see the words moving. But it's still now the portion that if you see my mouse, it goes from 0 to 24. So it's still a 24 second chunk. But what's going to actually play and be displayed in that chunk is different because I just slid it in place and now it starts at 3 and goes to 27. So slip tool, it's not used often, but it comes in handy when you need it. And yeah, next to that is the hand tool. Hand tool is purely navigational. You click and you drag. And you can see I'm sliding. If you see the numbers up here, I'm sliding through. Oops, I grabbed a corner there. I'm sliding through the timeline. So you click, drag. It's kind of like swiping on your smartphone. The same mechanism where you're just the point where you click, you hold that and then it moves with your thumb. In this case with the hand. And the reason I don't use that often is, first of all, my mouse has a horizontal. I don't know if you're gonna be able to see this in the camera, but it has a horizontal wheel, which is super handy for editing if you got the budget for it. I definitely recommend a mouse like this. But if you hold command on your keyboard, you can scroll or you can zoom in and out while holding command with the scroll wheel up and down. And if you hold shift, you can use the scroll wheel to go left and right. So that's why I don't often use the hand wheel because I prefer to just use the scroll wheel as well. In the bottom here, I don't know if you can see this in the streaming software. Let me reposition my window. It's super hard to see. And this is kind of another not so good thing about Descript UI is this light gray bar in the bottom that is like your, you know, like on a web browser, you can slide left and right and up and down. This is how you slide left and right. And then on the corners of it, on the left and right corners, there's a white, there's a dot, and your arrow turns into this double arrow. And you can, if you slide it to the left. Zooming in. Zooming in here, meaning I'm seeing more detail on my timeline. Like I'm only seeing the word view and window and then the sound waves for those. And I got this little tiny scroll bar at the bottom and I can do the opposite. I can zoom out, seeing less detail, but more words in one view by doing the opposite scrolling out. And that's kind of cool. I haven't seen that on any other software. Those dots on the ends. So it's not common. But I also don't use it, so your. Your mileage may vary. Cool. We're coming up on the last five minutes. Any last minute questions, feel free to drop them in the chat. Otherwise I'll keep making stuff up here. Green screen. You can toggle it off, there's my background, it's back. Or I can toggle it on, it's gone again, or remove it altogether once it's been applied, once the AI has processed, then it applies instantly. As you can see, I can just toggle it on and off immediately. Good question. Question, in the chat, is there a list of Mac keys that you use for different actions? Yes, there is. And let me pull up a resource that I have. I have a free resource that'll drop in the chat and let me open it up here. So I have this PDF and I will drop this in the chat so that anyone who wants it can take this. And this is all, this is all hotkeys. So these are, this is totally my essentials. This is what I call the essentials. These are the 15 that I say are most worth memorizing. And they're the tools. Select tool, range, tool, Blade, tool, A, R and B respectively. And you can see there's Mac OS as well as Windows. And then zoom in, zoom out, scroll left, scroll right, split, bring to front, send it back. So those have to do with layers. And those are bracket keys. Correct transcript. These are some of my favorite hotkeys, C, X and Z. I highly recommend getting those into your workflow if you haven't used those. These basically if you hold C and you click on a word, it'll go into correct mode. If you hold X and click on a word, it'll toggle punctuation. So if there's no no punctuation on it, it'll put a period on it and you click again, it'll put a comma on it, click again, it'll put take away punctuation and then it'll capitalize or uncapitalize the word after it as well. Capitalization. Exactly what it sounds like. It'll capitalize the word you click on or lowercase the word you click on undo command z. Super important. Shift +Command +Z is to redo and then there's then beyond that again, those are my essentials, quote unquote essentials that I use all the time. And then below that you have everything else. So playback and navigation. I talked about the space button, timeline, the timeline tools, and then yeah, these are super nice CZNX that I talked about. Insert these come in handy. The speaker label, you use the @ sign and then the hashtag sign to do a marker and yeah, that's it. Super handy. I also have another resource that I'll share just for the fun of it. Oops, sorry, I just closed my Google Drive. Let me pull that back up. My other downloadable resource that I often share is squadcast Best Practices. So I have this little checklist and I will share this in the chat as well. Squadcast Best Practices. And yeah, this is super. Squadcast is finicky and if you don't do everything right, your chances of a catastrophic loss of the interview increase. Big one being having everyone on Chrome browsers turning off unnecessary things in the background, doing a restart prior to recording. So not required, but if possible and recommended on all the. The big one too is everyone on desktops, not phones or tablets. And then the biggest key of all of it is conduct a test recording of 60 to 90 seconds. That way you know that it's gonna work. Just record, make sure the upload happens properly and then, you know, give it a review, see how everyone sounds and then jump into the core of the interview. Because yeah, it's, it's one of the most stressful things ever. If you have like a big name, you got somebody that you admire on your podcast and then you lose the interview or yeah, at a minimum, just don't impress them with how unprepared you are. So this, this can really go a long ways in mitigating that. And then after the session, making sure that everyone is synced is super important. So. So yeah, that's it for today. Unless anyone has last minute questions they want to drop in, feel free to do so. Finish with one last call to action, which is my website, descriptmastery.com I'll go ahead and pull it up. In addition to free downloadable resources like I just showed you, I also have free templates that you can download here. You go to Products Templates and then this big free templates button. You can download all the templates that I use on this channel. You can download different transitions and zooms and different things like that and all sorts of stuff. You can order templates. I make templates for clients for $25 per template and you can do one on one tutoring with me as well as the course which is on discount right now. And that's it. Thanks so much for joining. As I mentioned at the top, I'm going to do this every day this week. This is an experiment, so feel free. Same time, same place tomorrow.








