Simple Guide to Descript's New Layouts
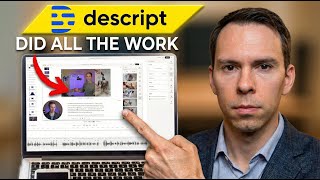
Ross Zeiger shows how to build and use Descript layouts, reusable scene templates that auto-populate text. Learn to customize colors and fonts, organize layouts by aspect ratio and media type, toggle smart-fill per layer, and publish changes to sync to the cloud.
Chapters
One of the most powerful things you can do for fast and consistent edits in Descript is to create a set of layouts. But how do you do that? Join me in Descript and I'll show you how. In case you don't know what layouts are, let's start there. Layouts are presets that apply one scene at a time, and if you don't know what a scene is, check out the video in the top right corner where I give you an introduction to Descript. But assuming you have a basic understanding of scenes and layers, then layouts will make sense. So right here is scene number 1, and let's say that I want to make this an introduction. Well, I could make an intro slide that I use in all of my videos, and then I can just apply it with the click of a button once I have that layout made. And to do that, you would click into the scene that you want to apply the layout to. and then you would go to properties, toggle open properties on the right side. And then right here, there's a layout section. And then you click on that and you would find your layout pack, which we'll talk about. That's what we're going to make in this tutorial. But once you find the layout that you want to use, so for example, here's an intro, I click on it and it immediately turns that scene into this intro. And notice it even changes the text. Based on what this video is about. So these are smart filling layers. It knows that this video I applied it to is about an introduction to Descript. And so it automatically populates those words into this text layer as well as into the subtitle layer there. So that's a very common use of layouts is creating an intro, creating a page where it shows your title and your name, creating things where your, your logo slides on to the screen and creating outros. So now that you know what layouts are, let's talk about how to actually make them. From your Descript Drive, click on this button on the left side that says layout packs, and then come up to the button in the top right corner that says new layout pack. Click on that. And you have a choice of starting from scratch or Remix Gallery layout pack, which is what I recommend for you. This is gonna create 122 layouts in your branding already ready to go. So click on that and you get this popup right here. We're gonna go through this form in order. So right at the top, this is one of Descript's default layouts. So if you click on this dropdown, you get different ones. There's the black background with white text, white background with black text, and then various color schemes thereafter. So if one of these stands out to you as a starting point, then feel free to click on that. I'm just gonna use this white on black for the sake of today's tutorial. So you click on that, and then below that you have this color box. And in here you can set your text colors and your background color. So you'll have a primary text color, an accent text color, and a background color. Currently they're white, gray, and black, but you can customize these to whatever you want. So you can do that by clicking on the little white dot here next to the primary text row. And then you get this swatch and you can scroll through here, find any color you like. Or if you have a specific hex code for your brand, hex codes are these numbers right here that correspond to a specific shade, then you can paste in that hex code and use that as your colors here. For the sake of demonstration, I'm just going to go with white. And then for the accent text, I'm going to go with a light gray, like an off-white almost. And you can even change the transparency. With this row here. And then for the background, let's go with a purple. And then below the color section, once you get that set, are your fonts. And here you can set a title, a subtitle, and a text. So title is going to be your biggest, your headers in other words. What font do you want? And that's what you set right here. When you click on it, Calice is Descript's default font, but you can scroll through here. And you can even add your own fonts from Google's library. Or if you have maybe a custom font, you can add that to Descript and you can use that in your layouts. So I'm going to use this one that I've added before called Urbanist. And then next to setting the font, there's these little dials right here, and you click on that and you can change the font here again, or you can change the weight. So everything from thin, which is very thin, all the way up to black, which is going to be your most bold. So, and I'm actually going to do that for these titles here. And then you can choose capitalization. So camel case, meaning proper capitalized words at the beginning of sentences, or all caps if you want it to really stand out. I'm going to do camel case and I'm going to close that. And then you do the same thing for subtitle. So this time I'm going to choose Cabin, semi-bold, camel case. And then you choose your text. So I'm gonna leave it on Inter and I'm gonna choose medium. And there we go. And then below all that, you can set a name. So I'll call this Layout Tutorial Demo, and you can choose a sharing level. So private means only you can see it. Share with Drive means you can see it plus any editors who might be sharing your Descript Drive with you. If you're working with a team. And then share publicly means it'll generate a link. And I'm going to go ahead and do that and share the link to the layouts I'm making right now in the description of this video. So if you scroll down, you'll be able to see how that looks and you can download the very layout I'm making right now to your own Drive. So then I'll hit create layout pack and we get a little popup that says creating layout pack, and it's going to take about a minute. And then once it's done, I'll be able to click save layout pack. And there we go. I can click save layout pack, or if I decide that I want to start over, I can click this little button and start from scratch, but I'm going to click save layout pack. And now if I look through my list, there it is, layout tutorial demo, and I can click on it and it puts me into the layout pack editor. Now what's confusing about this is the layout pack editor looks exactly like a project. So let me break down how this works. This first page that you're on here, is a composition within the layout pack. And if you don't understand compositions, check out the video in the top right corner where I break down the Descript project structure, cuz that's, that's important to understand here. But basically this is a composition in which there are 3 different layouts. So there's each of these little squares right here indicates a scene, and each scene is a standalone layout, and this entire composition including these 3 layouts, is going to affect the camera in landscape format. So if I come up to the top right here on the left side where it says Layout Tutorial Demo, that is the name of this layout pack. Everything on the right of this slash are my compositions, and these are the different categories of layouts within my pack. So in addition to camera landscape, I have camera portrait, where these are going to affect the camera in a portrait aspect ratio or vertical aspect ratio. If I come back, there's camera square, there's ones related to the screen media, which is going to be putting a placeholder that you could drop in your own images, your own video over this white square. And then there's a placeholder camera where a recording of yourself could go. And then as you can see, there is probably 10 or 15 different layouts inside of here. And if I go to the last one, you can see some of my colors in here. There's my purple background and there are the fonts that I specified, Urbanist. The weight is black and the size is 50. And then notice I can click on these text layers and I can customize them. So maybe I don't like it, or maybe it's kind of hard to read. What I could do is change this. So I could, instead of 50, I could bump it up to 60. I could make this a little bit wider, like so, and then just resize everything like that. So that's what I'd recommend doing is going through all of these layouts, every single one that Descript made, which is 156 of them, and check that they're all readable and tweak them. So maybe right here where it says brand name, you could just change that. To your brand name, like Descript Mastery. And instead of this, I could drop in my logo. So I'm going to do add media, I'm going to sort through my computer, and I add in my logo just like that. And now every time I apply this layout, it's going to look just like this. And then when I, when I actually do apply it in a project, I could click in here and put any additional info there, such as watch the Next video, just for, just as an example, but I'm going to undo that. And so that's how you can start making these your own. And then if we go back in here, you can see we have all sorts of different styles and types of layouts, overlays, presentations. These list ones are extremely powerful. As you can see, it'll automatically create bullet points, like first item, second item, third item. And again, these are smart filling layers. So when you apply it, it's gonna automatically populate these bullet points with what you're talking about in your video. Now, don't feel like you have to make all of your changes to your video and get it perfect right now, because probably you're gonna need to apply these and see how they work in order to understand what needs to be tweaked. So don't worry too much about getting everything perfect in your first pass through all of these templates, but do know that these can be made your own. And then another very important thing to mention here is in all of Descript, everything is getting saved automatically. Everything is backing up to the cloud without you having to press anything. There is one exception to that, and it's layouts. Here in the layouts, if you don't come up to the top right corner and click publish changes, then you won't have access to the latest version of your Descript layout pack. So very important to get in the habit of when you make changes here in the layout pack, come up to the top right, click on publish changes, and then click publish changes. And also just to point out here in this published section, notice that every single standalone layout has a title here. So there's one called default intro, medium intro, medium intro overlay, and you can see a little preview of what's included in that particular layout. And next to the name, which you can just click in here and rename it if you so desire. Next to that is this little categorization feature. And this is purely for your own ability to categorize. I'll show you when we go to apply these, how these come into play, but just know that you're able to categorize these. And again, these are coming from Descript's built-in layouts. So these are all automatically categorized for me. My intros are appropriately labeled, my camera angles are appropriately labeled and so on. But if you want, you can come in here and change these up to how you want. Now you're unable to set custom categories. You're limited to the ones that are already here, but you can see how once you start getting into the dozens or hundreds of layouts that it's extremely useful to have these sorted accordingly. And then also a note on labeling, label these very explicitly so that they'll make sense to you. So for example, this one's called screen recording, but so is this one. So one thing you might do is call this screen recording bottom left webcam. Like that, and then that sets it apart from the other screen recordings and makes it much easier to find. And then one other best practice is if there's ones that you know you'll definitely not use. So for example, I never make square videos. I just don't post to LinkedIn or anywhere that takes square videos. So what you could do is find all the compositions that are square aspect ratio and simply delete them. Hit these three dots and say delete. Now it's gone and you have just a little bit more streamlined layout pack. So assuming I'm done with all my changes, I will now hit publish changes. And once I get this little notification right there with the check mark that says all changes synced, I will now be able to use this entire layout pack in my project. So let's go do that. So here I am back inside of my demo project. And remember I told you that layouts occur scene by scene. So I've already applied the intro layout that I showed you at the very beginning of this tutorial. But let's say I want to reset that. Well, what I can do is right-click on the scene. So here's my scene number 1, and I can come down to where it says reset layout. I click on that. And now this scene is going to look how it originally did. It's going to get rid of those text layers. And it's gonna bring back my video. Now, still inside of scene 1, and when I say inside of, I mean just clicking anywhere in the timeline between the start of scene 1 and the end of scene 1. And so when I'm inside of there, I come up to layout, I go to change layout pack, and then I find the one that I just made, which is called, it's all the way at the bottom, It's called Layout Tutorial Demo, and you can click on it. And then here is where those categories come into play. So I pointed out the camera, the screen categories. When I hover over one, like the screen one, it shows me a preview of the top one, but there's also 6 more inside of there. So I can click on that, and there's my 6 different screens. But for the sake of our demo, I'm going to use one of these intros. So I go to the intro category, I click 4 more, and here's 4 different options of intros. Now, if I use one like this, what's going to happen, what I expect to happen, is my background to turn purple. I'm going to get this text in the font that I specified, and then my camera is going to crop me so I'm over on the right side like this. Let's see if it behaves how I expect. Let's click on it. And there we go. And you can see the text takes a second to update, but once it does, it automatically populates with what this video is about. And then the subtitle populates with a little bit more information. And remember, these are the colors and the fonts that I specified when I made this pack. Now, let's say I mentioned that once you start applying these, you're probably going to realize there's things you don't like about it. Well, I would like this to be just a little bit higher. I think it looks a little bit strange when it's as low as it is. So I'm just going to bump this up a little bit so it's more eye level. And now, now that I've made that change, what I can do is come down to my scene number 1. I can right-click on the scene layer— scene rail— and I can say save scene as new layout if I want it to be a completely new scene. So I can click on it, and then right here, this is the flow for saving a new layout. So it gives you the preview and then you can title this. So I'll call this intro title with right third camera. So very explicit like that to say exactly what this is when I need to find it later. And then where it says add to, this is going to be the layout pack that it gets put into. So I already had the layout tutorial demo open, the one that we created together. And so that's where it's saving by default. But if I wanted to choose a different layout pack, or make a new layout pack. I could click on that, choose a different layout pack, or at the bottom click Create New Layout Pack, and that's how you would do that. But let's go back. We're going to keep it on Layout Tutorial Demo. The scene type, I'll click on this dropdown and we're going to find Intro. Smart Fill. Now this is critical. This is the ability of what you saw just now where those text layers automatically change to say, in this case, introduction to Descript, or whatever the video is about. So to do that, you need to toggle this on. That is called smart filling. And then once you do that, you get this dropdown and it's going to ask you for every single text layer in that layout, which ones you want smart fill applied to. So this one has two text layers. There's the title and there's the subtitle. And let's say I want the title to be smart filling, then I leave that toggled on. But let's say the subtitle is always going to be the same. It's always going to say innovative transcript-based editing. In that case, I would toggle this off. And now that smart fill is not going to be in effect. It's only going to be fixed to saying innovative transcript-based editing every single time I apply this layout. So close that. And then save layout without script. This one is asking if I want to save the script, which is my underlying video as part of this layout. And I'm gonna toggle it on to not do that. Either way, this layout will work whether or not you save it without script. It's not super important whether you toggle it on or off in terms of the functionality of this layout, but I'm gonna go ahead and toggle it on and I'll click add. And now that layout has been saved and in future videos, all I would need to do is find that layout that I just made. And apply it to my introductory scene. Now, the exact same thing I just showed you can be done with any scene, any scene at all that you find yourself making over and over in Descript. You can create a layout for that. So for example, let's say that I am always going to be creating screen recordings like I do, and I want myself to be in the bottom right corner in a circle. And I want myself to be facing inward. So what I can do is drag my webcam there. I can get it looking just how I want. I can flip it like that. And that's it. This is gonna be the look that I use across my entire YouTube channel. Well, all I need to do is come down here once I've got it set, right-click on the scene rail and click save scene as new layout. And I go through the exact same process I just showed you. I'd give it a title, save it to the appropriate pack. I could call this one screen because I'm showing my screen and I would hit add and it would now be available for me to use forever with the click of a button. If you enjoyed this, if you enjoyed learning with me, then I recommend you check out Descript Made Easy. That's my program where we do live group calls 3 times a week. We talk about whatever you're stuck on in Descript. We help you get better as a creator. And we also talk about how to grow on YouTube. So if that's of interest, check out the link in the description of this video, and I hope to see you in the Descript Made Easy program very, very soon.








