The 7 Steps for Creating an Online Course (with Descript)
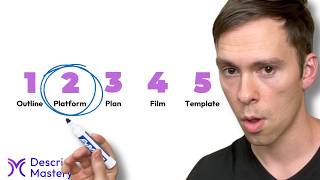
Seven steps to build an online course with Descript: outline your modules, pick a hosting platform like Kajabi, plan your setup and scripts, batch film lessons, create editing templates, edit in Descript, then bulk upload and publish. Batching and templates are key to speed.
Online courses are a great way to turn your expertise into income, but developing a course is a daunting task. There is so much that goes into it that it can get overwhelming fast. So these are the seven steps that I'd use to create a course using descript. Descript with Underlord, its AI assistant, can help you with every single step here except number two. Diving right into these. The first thing that I would do when starting to create a course is draw the outline for it. Break up your course into modules, and then from there break it into sub modules, and then from there into the individual lessons that you're going to create. And then along with that, come up with activities for the student to do along the way. Come up with assignments. Come up with a task that they can complete, something tangible that they can finish based on what they learned in the course. Of course, it depends on what your topic is. If it's something like my Descript course, then have a project that they can work on throughout the course and by the end have something to show for having taken that course. So draft up your outline in as much detail as possible and come up with the broad idea, the broad vision for the course on what you want the student to get out of it. Also in this phase, start thinking about what the what you want the course to look like and feel like. And when I say feel like, I mean what makes your course unique. Don't just do something boring. Film it in unique locations, film it in unique scenarios. Give the student unique tasks. Make your make your course something worth talking about. But I also want you to think of this phase one as draft mode. Like anything that you write here, we're going to refine in phase three before we actually go to film this course. So just get everything out on paper, lay it all out, and then we're going to go into phase two. In phase two, we're going to do some research on what platform to actually host this thing on. The very first version of my Descript Mastery course was hosted for free on a notion document. I just embedded Descript links on a notion document and had over 50 students that just signed up and accessed the course through the Notion document for free. But think about the features that you need. Do you want to have a community with it? Do you want to have the email services built into it? Do you want to have landing pages built into it? Or is all you need is just a paywall so that people need to pay to access your course? So really think about where you want this course to go and look at other courses that you've taken in the past and then see what they're using, see what, what features they had, decide what you need and then go from there. I use one. I just switched my course over to one called Kajabi. And Kajabi is very expensive, but I'm so glad I switched over to it. It's. It's made a huge difference in my business and I've seen a ton more signups ever since switching to Kajabi. And it's an all in one tool. It's got email built in, it's got landing pages, it's got a website, it's got the course, it's got community. And I'm really, really liking it. So consider Kajabi. But it is probably the most expensive option out there. And once you decide on a course platform, it's time to move on to phase three. Which is, which is the planning phase. The planning phase is more like revising what you came up with in your outline. This is figuring out, refining the structure of the course, what are the modules, sub modules, lessons inside of your course, what are the activities that the student's going to complete along the way. And then depending on your style, this could include writing scripts for your individual lessons. If you're somebody who needs to have everything written out word for word, then do that. If you're good with some bullet points, do that. Or maybe you can just wing it, do that. Whatever it is, this is where you prepare and get everything set up so that you can film everything in one go. And this even includes setting up your studio. If this is you sitting down at your desk with a camera in front of you, then get all that set up, get your lighting set up, get your microphone set up. If it's you going out to a park, you're going to film it while you're walking around, then get all that set up, get your videographer in place, get your camera equipment, your microphones. This is where you do all of that before we move on to the filming phase. Now that you've laid the groundwork for everything, possibly to the detail of writing your scripts for all of your lessons, it's time to go film. When you've got everything set up like that, you can batch this as much as possible. You have everything laid out how you want, possibly even to the detail of scripting everything. If, depending on how DIY you're doing this, or if you're hiring a videographer, I recommend batch it all, sit down over one full day or maybe several days a week and knock out all the filming in as quickly as you can get the filming done and move on to stage five. Stage five is where you're going to create templates for your entire course. And of course, this is all assuming that you're editing it yourself. In this phase, create a boilerplate set of templates that you're going to use throughout the entire course so that you can edit much faster and much more consistently throughout all of the video lessons in your entire course. When I made my D Script Mastery course, it's almost a hundred lessons and I did it with three templates. There's one that I use at the start of every module that had the the name of the module and big letters. And then there's one that I use throughout all of the tutorial sections where I'm showing something in the software and it's just me with green screen background and minimize in the bottom left corner. And then the third and final template was an action item, which is at the end of every lesson, where the student has something to work on based on the skill that they just learned in the lesson. So come up with some templates. Maybe it's as simple as mine, maybe you need 20 different templates. Whatever it is, build that in descript. Spend as long as you need to get those right, because it's going to make the next phase so much faster and so much easier. In the sixth phase, this is going to be our editing phase. So we've got all the filming done, we've created templates that we're going to use throughout our course, and it's time to start editing the videos we shot. So import everything into descript, open up new projects, organize it however you want. Maybe you do each module inside of a single project, or maybe you create folders for each module and each lesson is its own project. However you want to do that is up to you. Personally, I created a project for each module, and then inside of each project was a separate composition for each video lesson. And then I went through the painstaking process of going through each video, applying my templates, doing the edits, cutting out any retakes, cutting out filler words, cleaning everything up so that it was just right. And then once you're done with all that, it's time to move on to the seventh and final phase. The seventh phase will be the process of actually uploading everything to your course platform, getting all the descriptions of each lesson in there, any action items, any other filler and detail that the course needs. This is where you're going to put all that in there, and to the extent possible, you're going to want to bulk do bulk actions on everything. I'm talking about bulk download all your compositions, bulk upload everything into the platform, and then use AI. Lean on Underlord to summarize your lesson so you can create the descriptions in each lesson so that it can pull out any action items, it can describe any projects that you have associated with the lesson, and then put all of that onto the course. And once everything's ready, everything's ready to go, it's time to publish that course and launch it. This was a very, very brief overview of all the steps involved in making a course. But if you found this valuable and you want me to go much deeper, let me know in the comments. And I'd love to make a mini course out of this or a much longer video. Thanks for watching.








