The Ultimate Guide to Descript’s New Recorder (Screen and Camera)
Descript has two recorders: Screen Recorder in the desktop app and Editor Recorder in the web app. This walkthrough covers their settings, from camera resolution and noise reduction to teleprompter access and auto-transcription, plus best practices like testing your mic levels before you hit record.
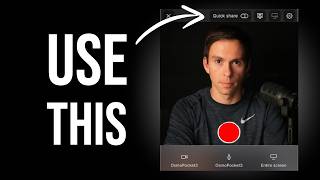
In this video, I'm going to show you how to use descript's built in recorder. So join me in the software and let's get started. First, I want to point out to you that there are two types of recorders. There's the Editor Recorder and the Screen Recorder. And this is the article I have on my screen right now is from descript's Help Center. So I'll leave the link to this in the description, but here's the breakdown. So you have the Editor Recorder and it's available on the web version of descript. So this means you're editing on descript through the website web. Descript. Com. The alternative is the Screen Recorder, which is only available on the desktop application. That means the piece of software that you have downloaded to your computer, whether it's Windows or Mac os. If you're on Mac OS as I am right now, then the Screen Recorder is accessible in the top right corner of your computer. It's up here, it's a little descript Recorder. And you can click Open Screen Recorder. If you're on Windows, it's going to be in the bottom right corner on the menu bar. I'll break each of those down a little bit further as we go and I'll tell you about the pros and cons of each one. But for now, just be aware that there are two different options and they have small but important differences in how they work. To start a recorder, we're going to go up to the D logo in the top right corner. And again, this is on Mac. If you're on Windows, your D button is going to be in the bottom right corner of your screen. But for me, I'm going to click on Open Screen Recorder and that pops open this box and you can see I get a preview of myself. Here's a breakdown of what we're looking at. So first of all, from the top we have this Quick Share button it's currently toggled on. What that is going to do is as soon as I stop my recording, then it's going to automatically create a web link out of my recording. What does that mean? Web links are like Loom videos. If you've ever used Loom before, it's a software that allows you to make a recording and then it generates a link that you could send to somebody. Descript is going to do the same thing. It's going to make you a Descript link that you could send around by email, by text message, whatever. Somebody could click on it and they could watch Your screen recording super easy. If you toggle that off, it's not going to automatically publish that link. The reason you would leave that toggle on is if you don't care about editing. Maybe your video is just a quick communication thing for between you and a client or you and a teammate. Then you don't need it to be super polished and you just. The important thing is to just get it out just to communicate. So leave it on in those cases. In a case where you're making something more polished, maybe it's going to get published to YouTube or LinkedIn. Then you would want to toggle that off and go ahead and edit that video before you publish it. Next to that is the teleprompter, and if you click on that button, it's going to open up the teleprompter. That's a little bit beyond the scope of this video, but I've done an entire tutorial about it, so click on the link in the top right corner of your YouTube window if you want to see my tutorial on everything you need to know about the teleprompter. Next to that is Computer audio settings. What that means is let's say you're recording your screen playing a YouTube video. If you want the video from that YouTube video to come into your recording, then you're going to want to set that. You're going to want to turn that on so that the audio from your computer is getting picked up in your recording. Next to that is your settings. This is just a catch. All of all the rest of the settings related to your recording, you can turn on a countdown. So it's on by default, it's toggled on and that's going to do a 3, 2, 1 and then start the actual recording. If you toggle it off, it it's just going to immediately start recording as soon as you hit that red record button. Camera resolution I recommend go as high as your webcam supports. If you have a 4K webcam, that's the highest resolution that that descript supports. Then make sure it's set to 4K. If your camera only supports 1080p, then set 1080p below that is transcribe microphone. This means the audio that's coming through your microphone presumably is you speaking. Do you want that transcribed? Do you want that turned into text automatically by descript? Leave it on if you want it. I recommend you leave it on because descript is a transcript based editor, so it's extremely useful to have that. Next is Studio Sound this is descript's feature that takes out background noise. So if you have an air conditioner hum, if you have traffic, it's going to help get rid of that stuff from your background. Toggle that on if you want that to be automatically applied. Next to that is the intensity of that studio sound. I often find that 100% studio sound is too much and I dial this down to something like 80. And so if you have this as your default intensity, it's going to not only apply studio sound, it's going to drop it down to 80% automatically for you. Below that is a keyboard shortcut for opening the screen recorder. So this whole window that I'm showing you right now, you can open this by hitting Shift command and the number two on your keyboard. On Mac, again on Windows, it's going to be shift control 2. And if you click on that, you can actually customize it and make that keyboard shortcut something different. So if you're using this feature a lot, you might have a different keyboard shortcut you prefer and you can get into it really, really quick by just pressing those keyboards. Next we have quick share options. So once you record, where is this video going to end up? If you have multiple drives, you can select the drive that that goes to. If you don't know what I mean when I say drive, check the link to a video I have breaking down drives, project scenes, all that kind of stuff in descript below that is default Publish privacy. This is going to be who can see this video? Public means it's searchable. On Google, it's public. Anyone can see it. Anyone with the link can. Means only people who you explicitly send the link to can see it. And then below that is project access required. That means you have to specifically add their email address in order for them to be able to see your recording. And then what do you want to happen after you finish recording? The default is for it to open the editor. So as soon as you hit stop, it's going to open up the descript recording in a descript editing window so that you can just go through it like any other descript project display author on Publish page. So I mentioned you have your own link with the recording on that publish page. Do you want your name to be shown there as the author of that page? Yes or no? Toggle it on and off. Next, enable comments on Publish page. You want people to be able to comment on your video, yes or no. And then camera shape, you can go all the way from circle all the way to the left. Is a square shape. So choose what you want right there. And then lastly are some system settings. Do you want the recorder to run in the background and you want it to launch at login? This is. Is the app gonna be open in the background running so that for example, if you hit those keyboard shortcuts I mentioned, it's just gonna pop right up. If you want that, leave that on. If you don't, and you only want it to be there when you're. When you have Descript open, then toggle that off. Okay, let's go back. We're back to our preview here. And before we get to the actual record button, I'm just going to go through these bottom three. So on the bottom left corner, that is your webcam, your. Your camera input setting. When you click on that, you can choose which camera is going to get recorded by by descript. So right now I have the Osmo Pocket 3 selected and that is the feed that you see right now. Next to that is your mic input. So once again, choose which microphone do you want descript to pick up and draw the audio from. And by the way, at the bottom, with both the microphone and the camera, you can turn this off completely. You can just say, turn camera off. And now I'm doing an audio only recording. Let me turn on a mic again. There's my mic and there's my camera again. And one important thing, you see this little line right here? That is a preview of how strong my mic input is. So right now every, with every word I can see it bouncing. That's good. I want it to go up into the yellow a little bit, but I never want it to be red. Red is going to be too loud. And if it's not hitting the yellow at all, that's probably too quiet. But you should see something happening here. If you don't, you might have the wrong mic selected. Next to that is the screen recording settings. So this is really important. You can either record the entire screen as I am right now, I'm going to zoom out. Check this out. You can see my whole screen. It's a really big screen and I have a lot of windows open. Below that is screen region. What this does is you see this box that just opened up. This is a little floating window that I can drag around. And everything that is dark, everything that's outside of that bright rectangle is not going to get captured. Only what's in this window is going to get captured. And you can see these little white dots on the corners. I can drag Those in. If I drag the corners, it keeps it proportional. It keeps the height and width proportional like that. And then I can resize it while keeping it proportional. And then if I come down here, I could type in a specific size, height, and width in pixels that I want. So, for example, I could click that number in there, and I could type in 1080, and then a different number for the height, I could type in 900. And it's keeping it proportional as I go. And the reason it's doing that is this setting right here. So you can leave it as 9 by 16 or 16 by 9. 16 by 9 is the standard YouTube format, so very, very useful for making YouTube recordings. But you can also go to any of these other aspect ratios, as well as freeform, which will allow you to change the height and width independently. Okay, so once you have everything all set in your settings, it's now time to hit that red button. You click on it. Quick interjection. Descript doesn't record itself, so you can't actually see my screen that I'm recording. But what happens is descript does a countdown. It does three, two, one, and then the recording is live. While it's recording, you can see a preview of yourself if you have your camera on. And the only thing you can do is there's a pause button, so you can pause the recording. It's going to be the same video file, but you can pause it, catch your breath, change your PowerPoint, slide, whatever you need to do, and then hit the it'll turn into a play button. As soon as you hit play, the recording continues. When you're done with your recording, you simply hit the red stop button, and that'll stop your recording and you're done. And then we go on to what you're about to see next. If I want to stop the recording altogether, I hit the big red stop button, and now my recording is done. And then you see this. This, it pops up. A Descript editing project. So this is the recording that I just made. There is that little portion of my screen that I was grabbing. And it's going to go ahead and transcribe that recording and apply studio sound and all the other stuff I had in my settings. And there we go. There's my recording. It was 18 seconds long. And from here, I can edit it just like any other Descript project. By the way, every month, I do what I call a your first video challenge. The idea with this is I teach you everything you need to know to make and publish your very first video Using descript in just one day. If you want to learn more about that, check the link in the description below. And I hope to see you in class again. Everything that you just saw up to this point in the video was the screen recorder, which is only in the desktop app. Now we're going to turn to and look at the Editor Recorder, which is the one in the web app of descript. So here I am inside of my descript drive and in the top right corner there is a record button. Go ahead and click on that and you can choose to record your camera, your screen, audio only, or record with others. That's going to be a rooms recording where you can do a remote interview. If you want to see my video tutorial on rooms, click the video in the top right corner. But for the sake of this, we're going to talk about these three options and each of these are just starting points. So you can start with the camera one and then choose to record your screen or start with audio only and then choose to record your camera. And whatever, any combination of these, you're not locked into a decision once you check one. So I'm going to go ahead and click on camera. And there we go. It pops up my camera view. And this is coming from obs. That's why it's this big logo thing here. But I can change that to my OSMO pocket. And now I'm getting a preview of my camera feed. And again, as with our recording settings before, you have your camera settings here, you have your microphone settings and you have what part of your screen here. Now one key difference with recording from the browser like this is you can't choose the screen region. That thing we did where you could drag the white dots and have a different size of screen, you cannot do that when you're recording from the web browser. Your choices from the web browser are you can record another tab in your browser, you can record your entire screen, or you could record a specific window of another app. But again, there is no regional screen recording. Next is this bar over here that is on our. Our previous recording we had the bar at the bottom that I mentioned was bouncing into the yellow. You want it to bounce into the yellow a little bit that is now on the right side here. So make sure you're getting a sound wave there. And one very important thing that I always recommend to my students when I'm teaching, the screen recorder is always do a test recording. Even if your mic is set up and you are getting those that feedback that your mic is receiving, Input, Just do a test recording. Just hit, hit record for 10 seconds, stop it, play it back, make sure it's working, and then you can delete that recording and then go again. Just knowing that your camera and mic is is working. Because if it's not and you do a long recording, then for some reason your mic isn't getting picked up, then that whole thing is lost. Okay, back to the settings. In the top right corner here is an extremely useful feature. It's this little outline of a man. You click on that and look at this. This is what I think is a very ideal place to position your head in the recording. So using the rule of thirds, it puts a line on the top third of your video screen and you can center yourself and put your eyes on that top third line. And that's a really good look for most camera setups. So highly recommend you use that center yourself. Get your shoulders inside of this white outline and you're going to be looking good. If you click on this little dropdown arrow, you can also put in a grid. Again, I mentioned the rule of thirds. You can do something where you're in the top left third, your microphone's in the bottom right third, things like that. If you want to get a little bit more creative. And this is strictly a preview, so you can record with it on. But these lines are not going to go into your video, only you are going to see it while you're recording. Next to the record button there is our teleprompter. Once again, I have a whole video tutorial about that. The ultimate guide to using the Teleprompter. So check out that it's linked in the top right corner of your your screen and then all your settings. I'm not going to beat a dead horse here. I already went over all these settings in depth when I was showing you the recorder below. So back up a few minutes in this video and watch that again. If you have any questions about these settings. And when you're ready, go ahead and hit record. And boom, we're going. I didn't get to show you this on the other recorder, but here's what I was talking about with the pause button. If you click on that, you see that the numbers stopped counting up. It just gets stopped at 8. So I can catch my breath, I can change my PowerPoint slides, I can do whatever I want here. And it's not going to be getting captured, but it's still going to be the same video file. So as soon as I hit resume, those numbers start going up again. And now our recording is continued. And when I'm completely done, then I can hit the stop button, and it's going to process it, it's going to transcribe it, and I can start editing it just like any other video in descript. Okay, now you know how to use the screen recorder, but what do you actually do with that recorded material? How do you edit it? Well, check out this video next, where I go over everything you need to know to turn your screen recording into something beautiful.








