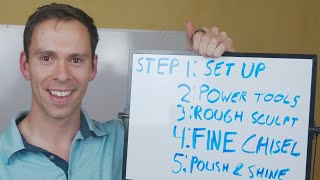
A creator who's made over 500 videos in Descript walks through a five-step editing workflow: setup and transcription, using AI tools to remove filler words and tighten audio, rough cutting via the transcript, adding visuals, then final polish.
Questions this video answers
Over 500 videos.
Five steps.
Do you ever feel like your video editing process is inefficient? Many creators approach their editing process without a plan, which is like assembling IKEA furniture without the instructions. You might get it together, but it's going to take longer than it should and you might end up with the wrong pieces in the wrong places. I've created over 500 videos with Descript and and this that I'm about to show you is the process that I've developed to produce high quality videos quickly and efficiently. So in this video you'll learn the five steps I use in editing a video from start to finish in descript. I've also created a free downloadable PDF so that you can follow along and reference the steps later. Step number one is the setup phase. For this, we need to start a new project. Now, if you've been using descript for a while, this step is going to be very basic and you can use the chapter markers in the description to skip ahead to the next step. From this view, go to New Project and select Video Project. Next, we're going to import our media. So this is going to be all of your raw footage and images if you have it. So to do that, find the file on your computer and drag it into the Descript window. You'll see this blue bar appear and drop the file to place it into descript. Then we're going to transcribe our video. This is an essential step for editing in descript. After the last step, this box pops up asking if you want to transcribe. Choose the number of speakers in your project. If it's just you, you can leave it as one or unsure, choose your language or leave it on English. Then hit Done and this will start the transcription process. Depending on the length of your video, give this a couple minutes to finish transcribing and when it's done, it'll look like this. Step two is what I call the Power Tools phase. One of the things that makes descript so fast and easy is all the AI tools that it has built into it. These AI tools do things that used to take hours, but can now be done with the click of a few buttons. Start by coming up to underlord. Underlord is all of Descript AI features. Why underlord? Well, instead of being our AI Overlord, the underlord is here to serve you, not the other way around. So click on that and everything on this list under underlord is an AI tool that will speed up your edits, but for the sake of time, I'm going to show you just three three that I use most often. You can see that these are broken down by sections. So this first one is Sound Good. Below that you have look good repurpose. But the ones that I use most often are in the Sound Good category, starting with this one right here, called Studio Sound. And that will remove background noises and enhance voices so it sounds just like the name implies, like you're recording in a professional studio, even when you have pretty poor audio quality. The next one I use is Remove filler words. This one will search through your transcript and it'll identify words like ums and uhs and likes you knows words like that. It'll identify them and then you can remove all of them with the click of a button. And then below that there's a shortened word gaps. This will look for silences, maybe parts where you were thinking or for some reason you just weren't talking. It'll help you identify those and remove them really fast and easy. If you want to see me go into how to actually use these features, click on the link up here in the top corner. Leonardo da Vinci said every raw video has a story inside it, and it is the task of the editor to discover it. Oh, wait, sorry, wrong LEO and wrong quote. Here's the right one. Every block of stone has a statue inside it, and it is the task of the sculptor to discover it. With that in mind, this next step is what I call the rough sculpt, AKA the rough cut. In this phase, I play through the entire video. I'm listening carefully to make sure that the volume and the quality is consistent. And if it's not, I'm going to make adjustments. In this phase. For example, as I'm playing through, I found that this part is a little bit loud. So to quiet it, I select it. Come to layer. Then right here under audio, I can lower the volume by typing in a different number. I can even type in negative numbers. Also, I noticed that Studio sound is a bit strong. It makes my voice sound robotic and flat. No problem. To fix that, I'll come to layer Studio sound. Select these dials and turn the intensity down and I'm just going to play it back. Do you ever feel that sounds much better? Now that I've cleaned up the audio a bit, I'm continuing to play through the video. And I'm only doing one thing. In this phase, I'm editing for content to edit for content. As I'm playing through the video, if there's a part that I don't want to include in the video, I'll simply highlight it in the transcript, highlight the words that correspond to that part of the video, and in the box that pops up over my highlight, I'll select this button that'll keep it on my transcript with the strikethrough, but it has now been removed from my video. However, if I want to bring it back later, I can simply hover my mouse over the stricken out part, the crossed out part, and click this back arrow and boom. That part of the video has been restored. So that's all I'm doing for the rough sculpt phase is playing through the entire video and cutting out everything that I don't want to be in the final version. I'm not worried about any details in this phase. As you work through this stage, you might feel tempted to add images, text, music, things like that. But trust me, hold off for now. To return to our statue analogy, you wouldn't start painting the statue or bedazzling it until the shape is fully formed. The same goes for your video. If you get caught up in adding images and text and music at this stage, you'll likely end up undoing a lot of it later. So for now, focus on carving out the core content. Refining the details comes next. Phase four the Fine Chisel so now that we've established the basic shape of the statue, AKA our video in the fine chisel phase, it's time to refine the details to smooth out the edges. Subscribe to this channel and start bringing the beauty out in your video. For this phase, we're going to start at the beginning of our video again, so click on the left arrow here to return to the start. This time as you play through the video, add images, add text, add B roll video, whatever it is that'll make your video better. Add that and amazing. Your video is almost done. But before we publish this, we need to make sure it's perfect. You wouldn't unveil your statue to the public without first checking out every detail to make sure you didn't miss anything. And that's what the next stage is for. Our fifth and final stage is the Polish and Shine phase. In this phase, we are going to return to the start of the video yet again, play through it one more time, and this time we're just making sure that we didn't miss anything and that our edits from the previous step didn't screw anything up. Ideally, we aren't adding anything or making any more significant changes to the video. At this point, we're just fixing small errors and giving the final look over before we hit publish. Remember, you can download a PDF version of this entire video using the link in the description, but with the polish and shine phase complete. Your video is looking sharp. But we're not done yet. In the next video, I'll show you the final step, which is to actually publish your video and share it with the world. Click here to watch now.