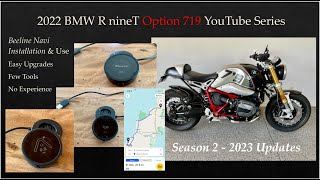
In this hands‑on tutorial Dr. Chris Stout walks viewers through the complete setup of the Beeline Moto navigation puck on his 2022 BMW R nineT Option 719. He begins by describing why he chose a dedicated navigation device over a phone‑based solution, then demonstrates the mechanical installation: threading the two elastic bands, securing the plastic puck to the bike’s top, and confirming a solid click‑fit. Next, he shows how to align the charging contacts, plug the puck into a USB charger, and verify the battery icon. Dr. Stout then launches the Beeline iPhone app, creates a new ride by selecting a destination on Google Maps, chooses the faster route, and starts navigation. He explains the on‑bike UI – the yellow‑ringed button, the arrow that always points toward the next turn, and the distance‑to‑next‑turn readout (e.g., 0.9 mi, then 9 mi). Throughout, he comments on the device’s sleek design, ease of use, and the intuitive cue‑by‑cue guidance it provides during the ride. The video ends with a brief ride segment showing the live navigation cues in action.
Hi, everyone.
Chris Stell back again in this episode. I'm going to go over a. Probably the. Maybe one of the simplest installations. It's hardly even an installation installation, but it's of my Beeline little navigation tool. Because I've recently moved up here, a lot of the places I need to go to. I'm not quite sure how to go to yet and really need to rely on navigation. I didn't want to go with a iPhone connection for a variety of reasons. I'd just be terrified my phone would fly off
the.
Those things are just all kind of clunky and ugly. I just really loved the elegance of this design. It's very clever, cleverly engineered.
Just.
This is so silly to even, you know, to show you, but basically that you. It comes standard with this little piece. You can upgrade to some metal ones, but I really didn't need to. I threaded the. These elastic bands. It comes with two elastic bands. They just simply thread through here and underneath. And that holds this piece on. This is just a nice little piece of plastic with Beeline arrow logo on it. And you simply take this as the
top, fit it
in here. So it's in now and I twist it and maybe you could hear that click. So now it's attached very, very firmly. Doesn't jiggle. I'm holding the top button on and I don't know if it'll show up. Yeah, there it shows up.
Pardon me.
Here's the time and if we jiggle it a little bit, we'll see the little motorcycle there likes to slide around. Because I don't have a route on this, this is pretty much all it's going to show. If once I do have a route on it, then I will show you kind of what that looks like and periodically I'll stop the bike and show you how that changes. As far as charging goes, there is a lineup here for these two points to line up with these two points. And you simply plug this into any USB charger. Take line up these two nibs here. Hopefully you can see that a little
bit better with
in here.
I can't really do this since it'll just slide around, but basically just line those up, turn it about maybe an eighth of a turn and it clicks in and it'll start to power up. It'll show briefly a little battery symbol in here and then, you know you're ready to go.
Okay, here is the app in my iPhone and open it up and you can plan a ride or you can choose prior rides just to show you how this works. I am going to hit plan a ride and it opens up just straight Google Maps. If I go back and all this is really pretty intuitive. I'm guessing they probably have tutorials on their website too, but you kind of. I haven't found that I really needed them. So I'm just going to arbitrarily pick up prior site. It's going to show me just as the crow flies how to get there from point to point. And then it gives me options. The blue one is probably the faster one, so that's the one I'm going to pick. And then I can hit. It's going to tell me 31 minutes, 20.8 miles on a motorcycle and then I can hit go. And then it's going to take me from where I start now, this. Hopefully the light will play nicely. This is the beeline itself and I hold this button down. It's got a little yellow around it and I think maybe if I hold it this way it's going to look a little funny because it's quite in the opposite direction. But the arrow is pointing in the direction that I'm going to need to be going. And it's telling me, see if I can, that the shadow helps any or how I turn it and orient it, but it's going to just keep pointing almost in a sense, no matter which way. If you want to consider this, that'll be the top on my bike. It's always going to be pointing me in the direction that I need to be going. And that's basically how you do the setup with your phone.
So a quick note on the bike.
I'm just getting ready to start on
my ride and you can see that I've got 0.9 miles to my next turn and I've got a little total countdown in terms of till I get to my final destination. And this will be the way that I will be turning. So it gives me a nice little cue kind of point by point rather than the whole thing more to come. So here I am a little further along. You can see I'm now running my nine miles until my next turn. And I'm just about to leave.
So I'm home now in the garage. Motor's off, so it's zeroed out. Since I have made it to my destination and I can press the top button. It's going to ask me if I want to end my ride. If I press the top button, it'll be an X and it'll continue with another route. Or I can hold down the end ride check mark, and it will give me a summary, or I guess like a. An end. A total mileage of it. So here's that total end of the ride mileage and checkered flag because I'm done. And then I can just hold that top button down and it will turn off and save my battery. Big fan, Beeline Moto.