2022 BMW R nineT Option 719 | 2023 Updates – Wunderlich Daytona Fairing & Windscreen Installation
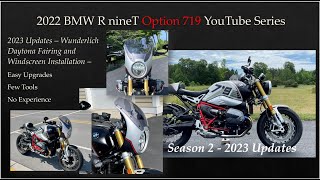
Chris Stout installs a Wunderlich Daytona fairing and windscreen on his 2022 BMW R nineT, contrasting it with four failed universal fairings. He walks through the full build: bracket mounting, bolt sizing, greasing Torx bolts, and windscreen installation with a pro-tip about flattening the washers. The result fits perfectly with no gauge interference.
Chapters
Foreign. Hi everyone, welcome back. This is Chris Stout. I'm going to be talking about a fairing installation on my 2022 BMW R90et option 719. It is from Wonderlic. I can tell you that I have tried and sent back four other fairings that were supposed to be universal or whatever and they did not work out at all. Obviously stumbled upon Wonderlic just by random frustration and searching. Found got onto their website and saw that they had some terrific instructions. If I can get my hands straight here to cut. Oops, sorry for my finger. To be able to see what the installation was going to be like and it looks very, very helpful. The package came pretty quickly and I just have to do a tip of the hat. I stopped doing unboxings because they were sort of anti climactic. But this is the amount. I feel a little guilty. This will all go into recycling but just really wonderfully packed. I was a little worried about that bubble wrap, etc. This is the box and it came in very nicely with their markings and stuff. Just really professional. Very, very professional, which is what you would expect from them. They're high and high quality. This is the smaller windscreen that I got. They have another one that comes up relatively large and then they have five options for the fairing itself. The fairing physically is all the same size but you can get them in different types of levels of paint or what have you. I was always. Since I had all these problems with it getting to fit properly, the other ones having having to go back. I found this one that was specifically done with the option R19 color scheme that I have on my bike. So I have some better confidence that this indeed will work well on the other fairings. This was sort of the problem. This was a solid piece on them so it just would not fit over the front forks. And again, back tip of the hat to them of the quality of this. This is hand painted which is very impressive. And even again, back to the shipping and packing. Check this out. Just everything. I haven't taken these off yet. Everything is just really remarkably professional. And for the price point it's. It's what you, you know, you would expect. It also came with this kit of bits. I'll probably have this laid out more so when we go into the garage and start to do the installation. But again, very nicely done, very nicely laid out. I haven't even gotten all into it. I got a little preview of it with looking at the PDF from online. But all the bits and parts and whatnot. I'll have them all spread out for us and I'll enjoy reading some of this material, see if there's any tips or tricks. They also even sent paste or grease. I figured I'd be using Loctite and then bits and pieces with their logo. Again, all very, very nice. Instills a good sense of confidence and optimism with a lot of the parts that you see me do. Some of the other more minor non serious things as not being super impressive and coming with zero instructions or maybe a little contradictory instructions. So this is what it's looking like at the start. And next up we will be in the garage getting it, getting it on. Okay, we are now down in the garage. I've sort of laid things out and sorted things through with what was in all that kit that I showed you in the first video. And I just did a very gross fitting of the fairing to the bike. And it's probably going to take a little finagling, but this Bazelle around here seems to be maybe a little bit in competition with a snug fit to the fairing. I did find that there is a bolt here. So I'm going to probably off camera experiment a little bit with fitment with this on and off before I do a final fitting of the fairing just to see if I want to do that. In addition, none of them the the instructions that I've seen note changing this. But as I was unpacking the kit I noticed this rather large instructions about this part. So these pieces came inside of this. These are little slugs that will go in there eventually. But basically the way. And they're saying in the instructions, as best as my German is, which is not good at all, that this piece may need to be a spacer to give further forward fitment of the headlamp. So again I'm going to be kind of messing with that separately maybe. Well certainly off camera because I can't do it with one hand. But we'll see how all this works. So I've been just kind of thinking about it. I'm going to do a little bit of experimentation with it to show you. Again, what we have here are the primary pieces of it which will grossly go like this down here with different spacers. And then I think actually no, I should have done this before. But on this side actually I think it's going to be something along these lines here. And then I believe, yeah, because this is a single hole, we'll go up here grossly like that. If you can get my angles Here do my little extra yoga this morning. So also just with the windscreen, this is what came. What came with? Well, I had to purchase it separately, but it is specifically for this fairing and then this little bit of protection. There's no notes about it, but pretty sure just putting two and two together and using some common sense that once everything's done that will go on there. So as for the whole kit, it's Wunderlich us, It's obviously made in Germany. I also got this little booklet. Every single word in it is German and there's no illustrations so I'm guessing maybe that's warranty. I'm not super sure about that. It is done with the Option 719 paint scheme which I think should look very nice and complementary to the bike. It's the Blackstorm metallic with hand painted red pinstripe again to mimic the tank and the tail as to that color scheme. And then the fairing itself is the Daytona and the windscreen is the sport style and smoked gray. They also have a larger one and like for touring and they also have it available in clear. But I thought I would go with the smoked gray. So I'm going to do test out some experiments and pre fitting and then be back with the show on the road. Okay, I have now messed around with this Bazelle. I've took the bolt out. It didn't want to come off real easily and I really didn't want to mess too much with it. It seems like the fairing will be snug around it. So that's kind of the key aspect of it. So we're at least at this point we're going to try it. The jury's still out as to whether or not I'm going to put that spacer in there. What I have gone ahead and done is taken out these two bolts which are these. They are a 40 socket. The bolts that original were to over these and then the kit comes with these two. And what I've done is well they're four, one for two for each side. So I've gone ahead and used these two bolts which are now the sisters are here eight and used this shim and these washers. So it's the bolt, the shim and then the washer because that will take up this space here and it's really scary to see this gap open up. So next part will be to fit this in and then I'll wrench that and then be able to show you what that looks like. Oh, just as a little update A couple things when I put this piece in, I actually used a 45 Torx socket for that can be a little confusing. I hope I've done it the right way. I'll let you know if it's Bass Ackard's, but this is on the left side of the bike of what it looks like in a. Just periodically stopped and put the fairing up against it and checked and made sure everything looked proper with it. For the other two pieces, the little tubing that I showed you that I thought went to the top of that fairing actually I cut in half and figured out when they note in the instructions to have protective. What do they call it? Edge protection, that that was indeed what that was because these edges are right up against your lines from the hand controls. So hopefully you can kind of see that. But I've just arbitrarily cut it in half and placed it on both of them. So this piece, I believe I will take out this stock bolt on the triple and then use the spacer. Sorry, it's hard to see. Not sure what you're seeing. And put this on generally something that looks like that, if that makes sense. If you have the kit, you'll see and you can see why you would need this protection up against these lines. So next up I will be taking this out and I believe I will be replacing it with one of these and spacer and a washer. Okay, here's where we are at this point. So I have the two lower brackets, right side and left side installed. I have the two upper brackets installed as well. I've left these not totally tightened so I can have some play. We've got some space here to be able to do fitment adjustments. And that's going to be the part I'm sure I'm really going to enjoy. So this generally structurally is all now in place. I'll do a little bit of a walk around for you so you can kind of see what we're dealing with. So spacers, washers, either 40 or 45 Torx sockets to get things on and off. All pretty straightforward. Fairly few tools. It does recommend in the manual torque wrench. I don't have one. I priced one. They're crazy expensive. I've checked with some of my tool head friends. They don't have one either. So I will probably at some point get that done just because it'll kind of drive me crazy, but I probably won't shoot that. So just FYI, look in the instructions. They're in newton meters. It's a pretty straightforward conversion to pounds per square inch. But properly doing this so that you have safety with your front fork, you don't want anything getting loose or wobbly or off offset with that. So next up, I'm going to be playing with fitment of this. And again, at this point I have not chosen. I may have to take everything apart, but I have not chosen to use this spacer to move forward the headlamp. I think it would actually be working against me. So we will see soon. Coming up next, actually, just before I put up the fairing, I thought this might be helpful too. Here's the Wunderlich logo. Make sure you've got the proper part from no knockoffs. So I have eight of these little bolts. They are a Torx 25 and they will all go into these spots. And in the instructions they note here to it's for the fairing but to grease them. So they give you this little packet of white grease. So what I'm going to do is pre grease all of these with this white material. If you can see that in there. And then maybe get a little bit on here too, just to start them and make sure I don't have that trouble and then get it placed up there and then start fine tuning coming up next. Okay, well, just a lot of finessing, a lot of tightening and loosening, tightening and loosening. But we've got the fairing on and I'm pretty close to properly hand torqued for all of these bolts. So two here, two down there on the left side. And step on my wrenches. Two here and two down there. The grease really is greasy. It's slicker. I tried to not use a whole lot on it, but to be proper with it and just. I haven't put on these windscreen yet, but at this point, very happy with it. Just the whole paint scheme just really works. The fact that I could get one that does properly fit it, I'm happy with the alignment of the headlamp. That was one thing that was worrying me. I hope it shows up well here. That really worked without having to use the spacer. So nice of them to provide it just in case. But I think it just. I don't know if this will show, but there's a scooch, a bit of space. And if this headlamp had been further out, it just wouldn't have fit. I don't think so. Anyway, I'm happy with this look and get the grease off my hands and install the windscreen. Okay. In terms of the Windscreen attachment. I have put in five so far of these little references. Rubber screws that are acceptance. And then I will take a washer and one of these small bolts that came with it and thread it through so you can see they just place in here. And so I will take this one and it just pumps right in like that. So I've got the six in Now I got a glove to kind of mitigate fingerprints. And they actually got a screw in that one. Testing it or bolt rather. So let's see if I can shake it out so it'll go up against that. And then I will take those bolts and tighten it up all the way around. I think it takes a. Let's see, what is this? A looks like a 2525 Torx. So I'll install those. And I think that might be it. And here we are with the finished product. Very happy with it. I'm getting ready to take it for its maiden voyage. But plenty of room, no tightness. I was a little concerned, like, would it be too tight around the gauges? It wasn't. Little pro tip with the windscreen is that when I initially put it in with the washers, I couldn't get enough bite or purchase on the backs. The way that these work is that there, you saw earlier that they're like a long little tube and there's where the bolt connects with the threads of that. As you tighten it, it fattens and flattens out. And it just wasn't doing that. They were just kind of sitting there freewheeling. So I took the washer out of one, tried it, got it to flatten. So hopefully I won't have any issues with that with the screen itself. We'll see over time because it'll be under a lot of wind pressure and vibration and whatnot. But very happy with its looks. It's an amazingly hot day, so I probably could have used some extra breeze today in my face. But gonna take it for a test spin. And I think we're getting toward the end of the 2023 season. I just have one other tank bag and some installation. It hasn't arrived yet. And that should be again, probably zero tools as well as zero experience. So happy with how it looked, happy with getting things aligned. I probably could just to be honest, probably could have put that spacer in. But honestly, I was more worried about alignment in here than I was forward facing. And it's not going to reflect back. There's plenty of beam space, so to speak. So I don't feel reflect back inside the fairing either. So thanks for watching. Hope you enjoyed this. Hope it was helpful and highly recommend this. Just beautiful craftsmanship, great parts. I didn't have to worry about any of that stuff. Still had to figure out a few things, but that's probably more so me. So hope you enjoyed this video. Please subscribe. We've got a lot of other other things as well as motorcycle stuff and of course as always, ride safe. Thanks for watching.
More from Dr.

2025 Mercedes-Benz CLE 450 4Matic Cabrio – Owner’s Views After a Year-and-a-Half as a Daily Driver

The Complete Guide to a Successful Everest Base Camp Trek – Post-Trek Debrief

The Complete Guide to a Successful EBC Trek – Post-Trek Debrief: What I Needed (and What I Didn’t)
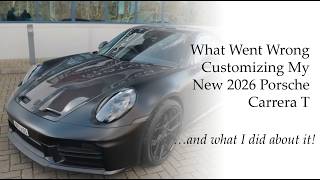
What Went Wrong Customizing My New 2026 Porsche Carrera T …and what I did about it!

Coming May 1 At the Intersection of High Performance and Fulfillment: A Conversation with Alisa Cohn

From High Performance to Fulfillment: Lessons in Inner Mastery with Jim Murphy

Coming March 19: From High Performance to Fulfillment: Lessons in Inner Mastery with Jim Murphy

The New Humanitarians Volumes I - III:- Inspiration, Innovation, and Blueprints for Visionaries

The New Humanitarians Volumes I - III:- Inspiration, Innovation, and Blueprints for Visionaries
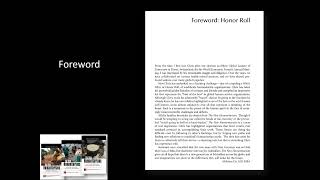
The New Humanitarians Vol I - III: Inspiration, Innovation, and Blueprints for Visionaries - Forward