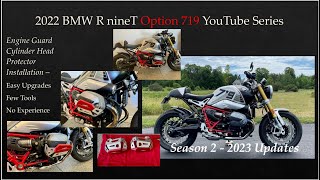
Chris Stout installs red aluminum cylinder-head protectors on his 2022 BMW R nineT. He sources them from Amazon and walks through the bolt swap, washer selection, and spacer adjustments needed to get a tight fit, then adds self-adhesive rubber pads for the final install.
Chapters
Foreign. Hi everyone. Chris Stout back again with my 2022 BMW R90 as option 719. And in this episode of minor upgrades, few tools and no experience, I'm going to be putting on protectors for the cylinder heads. This is what they look like. I got them from Amazon. I'll put this in the notes below and basically it will add a little bit of color going with the red but a little extra protection for these. So it didn't come with instructions but at least they put them online. So here's the computer and what we'll be taking a look at. What I have already done is these came separate. When you order them you can get this where it says 99T in a variety of different colors. I chose the red to go with the option 719 frame. And you can get this either in kind of just the raw aluminum or black. So again I want to have a little bit more color. I've talked about this before. Trying to have less of a black engine on this bike and bringing in some color and bits and a little bit more. Less flat, more shine too. So that's the goal with this as well as a little bit of extra protection. What they. I also installed. I'll just show you the other kinds of parts that came with it. This is my socket wrench with a, let's see a T30 to take out the. There's three bolts we'll take out here, here sorry for the finger there and here the. The piece itself will be spaced a little away from the cylinder head. And they've given us these, they've given us five for each side. I am a little concerned with the instructions that they won't necessarily all fit properly. So I may just put them on the red and these ends here. But we'll see. I'm going to kind of fiddle with it first before I install them. I'm going to place it and kind of see what's what the I also this. These pieces did not come pre installed. So there are six little bolts that came with it. I think they made a mistake because they sent me another set of bolts those didn't fit. So that was a little disconcerting. And then I saw that there are others that did fit that. That was good. So you can just kind of do that. I skipped ahead and added those but they don't come on this way. Just real simple thing to do. And that's what the computer is showing us here of doing those and then adding the rubber, little rubber pads that are self adhesive. On the back, which I'm gonna. Like I said, I'm gonna do in a little bit later. So I've marked out the parts here. These are the beveled washers. I. This is my own hex wrench. That's every. All these pieces will use that same size hex wrench and some washers. So I'm going to set the camera down and then start taking off these bolts. Be right back. Okay. And we are back. So this was easy enough. These bolts have now been taken out here and here. Just three. This is what they look like. And then I'll be kind of just monkeying around and messing around with fitting this and figuring out where the rubber mounts go. I will show you in the instructions in just a second too, how we use these different washers and these different lengths of bolts to do that fitting. But it's going to just take me a little fit test and then I will be back. Okay. Kind of midway through here, just with a little update. This back bolt. I don't know if you can. The camera can get down in here, but this had the wider washer. So it's there. It's not tightened up all the way. Still got some slack here to go, so that's fine. This is the gap. Use my finger as a bearing. Little finger. This is the gap that I have right now. I've not put in any of the little pads yet because like I said, I wanted to kind of see how the fit would be without them. I didn't want to be working against myself. This is interesting. So we'll see if it's the same way on the other side. If it's just unique to the 20, 22 or whatever. I know there can be variations, I suppose, but I'm using the shorter bolt. It's not all in all the way, but I actually. Sorry. Can't probably get you dizzy. Maybe you can tell I'm pushing against this here. And I do not have a washer there. When I had a washer there, it was supposed to be this. Sorry, this washer, which is about this thick. And I was just fighting against myself. I could with. With that washer here at the lower part, I could not get this screw started or bolt. And this bolt. The instructions was noting to use this washer for spacer rather, and it's just simply too thick. So I wound up using the smaller spacer which looks like this, which is supposed to go here. And I've used it here. If you can see down in there. And again, nothing's tightened up yet. So I'm going to start to tighten these things up. And before I do, I'm going to probably put in some of these cushions and I will probably place them here, but I'll figure that out and then show you when I come back. But kind of interesting having to always tweak something. Okay, update on this. When I tried to tighten. This is for reference. Here's the front. When I tried to tighten this piece, the bolt was probably 2 millimeters too long, so I couldn't cinch it all the way down. It actually then, you know, hits gets to a point of where it hits inside the cylinder head. This bolt was defined in the instructions to be a shorter piece, but it actually goes all the way through. It's just open back here on the back side. You can't really see it, but I could see daylight through it. So it's just straight through. So I'm going to swap this shorter bolt with this longer bolt because it doesn't matter how far back this goes, but it does matter in terms of cinching down there. And I should certainly should have enough bite on that. So I'll test that out. Okay. And we are back with I believe, one side done. So here's a couple little helpful hints. Use the shorter screw and the shorter washer here. And out of fairness to them, I might have misread the instructions that kind of don't appear, but online where I bought it on Amazon. So again, that's down in the notes. I did not have to use a washer here and I'd recommend not doing doing that. I think the spacing would be too much, at least on this 2022. And then in the back here, everything went fine with that. As to what I saw in the instructions, maybe, I don't know, I hate to call it pro tip, since I'm not a pro, but it was, I think I would suggest not putting in the little bumpers until you've got everything kind of properly placed first of all to see where you need them. If I would have done it according to the instructions, there would two right here and they wouldn't be big enough or thick enough to actually touch and provide any kind of constant contact and protection, which is kind of what I was wanting. I didn't want space in there. So the three points where there are contact are here, here and here. And before I tightened up everything, it was easy enough to slide those down in there. They're just adhesive on the back. You peel that off, peel that little Piece of paper off and then they fit. So we'll see if it's similar or different on the opposite side. And I'll be back. So now we're on the left side of the bike. Pretty much similar in terms of the bolts. Standard stock bolts to remove. This one's a little different back here. It doesn't have that extension that we saw that was on the other side. So we'll see what that makes a difference. Visa be washers. And just since it leans on this side. Don't have a chalk or a stand, be a little trickier. But just using that same wrench to. Let's see. I think it was a 30. Yeah, T30. We'll take those bolts off. Okay. And we are back again. This left side of the bike sort of has a history, if you've seen some of the other videos, of needing a lot of finesse. It started to just come together very nicely and quickly. And then trying to get everything put together finally just was finagling. I think part of it certainly is my lack of skill, but maybe another part of it is this isn't really NASA grade manufactured pieces either. So for this side I wound up using the shorter bolt again here. I started off with the long one and I did use the fat washer here, as you can see. And I used the longer bolt here as I did in the other side since it goes all the way through. And even though it was a different bolt to take off the back. So as a reminder, this was what it looked like on the right side. And basically this is what it looked like on the left side. So it's really. Or pardon me, this one just really kind of different for some reason. These, these two pieces here. Nevertheless, I used that longer skinny spacer here. That worked out just fine. You can see it down in there. And again, big, big tip. Use your padding once you've got it kind of in place. So I wound up using two here, that was a good spot for the space and then one back here. Everything else, the space was so much that nothing would be buffering or touching. So let's see if I can do a walk around of it a little bit. So here's what it looks like. Bug's eye view on the left side. And here's what it looks like on the right side. So again, I think it does a nice job of adding not just some protection, but a little bit more bright spots to it. And I do really much, very much like this part, I think is actually very highly good quality manufactured aluminum. And the color is really nice. It's got a little bit of a. A flat sheen to it, if that's not too much of a contradiction. And I think it just plays very nicely with everything else that's going on, where there's red on the bike and brings a little bit more to it. So thanks. I hope you enjoyed this video. Please do. Check out the other ones. I've got a couple more projects coming up here for 2023, and as always, ride safe.