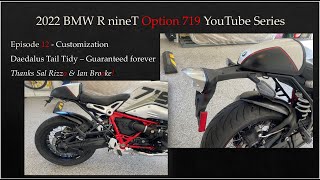
Dr. Chris Stout installs the Daedalus Minima Tail Tidy, a combined tail-light and license-plate unit, on a 2022 BMW R nineT. The step-by-step walkthrough covers removing the stock rear assembly, routing wires, and testing all light functions before final reassembly.
Chapters
Foreign.
Hi there and welcome back.
This is Chris Stout. I'm going to be going over the Daedalus tail tidy. I just recently received it. It's got great boxing. So the top looks like the top, the bottom looks like the bottom. It's really pretty cool and I really appreciate that attention to detail because I think it also speaks to the guys there. They're a Southern California company that does a lot of specialty parts for the BMW N9T. So shout out to them. Dmoto is their website co and it's also kind of cool. This matters too, that this is all totally recyclable and they tell you that. So in the kit, this is the beautiful piece of engineering that's going to be substituting. This is going to be a kind of a do it all piece. It'll be tail light as a running light, brake light and turn signal and emergency signals. So I'll be going through putting that on. Also a cool swag sticker, the
packing
slip, which then makes note that. I got the tidy and got the Minima, the smaller one and got the under tail light or undertail license plate kit. And that's. Whoops. What is in here? Well, take a look at it together for the first time. So. And this is lit. I've had a lot of bikes that did not have lit tail lights or, pardon me, turn license plates, but in some European countries that's the law. So it is here. I heard this is a resumo light as part of this. And I'll also be putting this on to this piece before we do the full installation just because it makes life a little bit easier. This is the kit most people recommend and it looks like they don't even put the kit in with it anymore to just reuse the bolts that come with it because they're tapered and obviously do fit. And then these are spacers. I have the R9T with the cowling. The looks pretty much like this bike and I guess my bike will look pretty much like that bike if you use the rear seat. Then they have these spacers for it. So most of the time I'm going to have the cowling on. And then this is their thank you card, which also looks very cool. I think that's a keeper. And then they tell you here again thank you and tell you about their products and then give you a link to their website, which I've gone to and watched. It's a PDF that you can download and step through it. There's also some other YouTubers out there. That have this kit, a slight variation that are a little older, but this is 2022. Going on a 2022 bike. So stay tuned. The next thing I'll be doing is putting this tail light, or I keep saying tail light, sorry, putting this license plate holder on.
All right, and we are back. So what I did was go ahead and install. Just a little pro tip to go ahead and install this. If you're going to be using this, install it before you install this piece.
It makes life a lot easier.
There's a few little tricks with that. My Torx wrenches aren't quite long enough so I had to take these pieces off. Then this piece comes off. Then you can take a little 2
millimeter, I don't know if it's that big little hex wrench.
And take these off so that these freewheel and then put some loctite on these two, cinch them up and then
put it all back together so it makes again a very nice and tidy potential tail.
So here's what we will be taking off. All of this will be coming off and. And I think It's a Torx 20.
What is this?
25 and 27. So there's four bolts Torx bolts up underneath here that I'll be taking off. And then the one that holds the
cowling back here, that's a little bit larger size.
So we'll be back once I've taken that off.
Hi, everyone. This is probably going to be a bit of a collage of not just working on my BMW but also on video techniques. So sorry for the verticals. Now I'm doing a voiceover for the
horizontals and you'll see that I've taken
off the rear tailpiece, which was a terrifying exam or challenge. And I was looking down in here and if it's a 2017 or newer, the ECU is not there. So there's a just kind of a terrifying set of wires in there. And it was just so difficult to get that clip out. But this piece will go back in. It just pops back in. No tools for that. And give some protection there. The I've bolted in. This piece was just so difficult to get out, but I was so thrilled to get it back in. Of course, when I started, it was upside down, so I had no lights whatsoever, which was terrifying.
But then I got it the right
way, clipped it in and all was well. I also, when I talked to the folks at Daedalus, they said you could take out this top bar piece that we're looking at. The black above the red frame. And I chose not to do that right there. Instead I took a look underneath and there's this opening right here. I didn't really want to thread it through there either. So I loosened the bolts, the torxes right there and right there on the other side. Enough to be able to fit through the module there and then clip it in. So it's a much tidier, better fit. I didn't have to worry about the seat not fitting back in or the cowling or anything like that. I'll probably put a piece of duct tape or electrical tape to help patch up that hole. So I didn't have to undo any of that. But that's another way that you can do it. So this piece here is in the process of being tightened. I had the license plate light there. So that gets just simply clipped into that.
And.
And then you can just leave these two pieces undone. Unless you do the external two turn signals, which I chose not to do. I want just even more elegant and
just
less is more in terms of the back. So when I tested things out before I put everything together, I was tickled to see that I had a tail light. It looks just really great like this. You'll see it again in the next one. Here's the turn signal for the right hand side. And then I'm looking up here to show you the brake.
So there the whole thing is lighting
up as I activate the brake lever. So, boy, what a process. Here's the lights here for the license plate. And I'm just really tickled. So getting ready to put everything else back together now. And we'll go back to live action.
Hi everyone. Welcome back. Got everything put back into place and I really couldn't be happier with it. The be sure to check the notes below. If you're interested in this installation. I highly recommend the craftsmanship of this. Their engineering is just fantastic. Again, if you've got a 2020. Well, certainly for a 2022. Be sure to check out this video and see some of the little tips and tricks that I have in it. I hope they'll be helpful with you. But again, I'm just really happy with this. I'm happy with the. The look of it with the fender, the new fender that I put on. Watch that. The tricks and tips with. With how the trauma with that was. If you're interested in that, be sure to be to watch it and to be aware how to install that. But this installation went quite well. Most difficult part was just really uncoupling some of the the wires and stuff for fear that I would mess something up. But very happy with it. Again, just love the the geometry of it and how everything plays out. The craftsmanship and the engineering is very befitting to BMW and to this bike. So going to put the plate back on and take it for a spin.
See you in the next episode. Thanks so much for watching and ride safe.