Beginner’s Guide in Racing - C8 Corvette NoviStretch Cover Installation
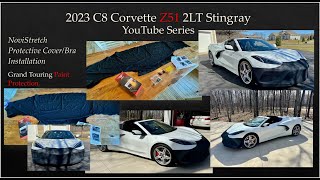
Kris Stout installs a NovaStretch protective cover on a 2023 Corvette C8 Stingray Z51. The synthetic mesh bra uses nine snap fasteners and a front-trunk hook, requires no wheel removal, and is washable with a 12-month warranty. It blocks the front-camera sensors but works with the tow hook.
Foreign.
Hi everyone, welcome back. Kris Stout here. I'm going to be talking about putting on the novastretch protective front cover, front bumper mask. Also sometimes referred to as a bra for my 2023 Corvette C8 Stingray Z51. A few little bits of background with is a synthetic stretch mesh fabric with a heavy duty elastic trim that keeps it on and show you the snaps for that in a minute. It's got what they call black hidden hardware that fits into the wheel well and under the front trunk they have a. I guess it's a patented or trademark snap and strap installation which is actually kind of cool. Once it's the hardware is installed it should be pretty easy to put it on. I haven't done it yet. We'll see. It's got a 12 month warranty. It's washable which is nice. The other things that were kind of key for me is that it kind of just doesn't look like the old fashioned traditional vinyl bras or whatever. But there's no cutting, no drilling and really no permanent alteration to the car. And Made in the USA
I'll be
stepping through in just a second what all the different parts are after we do the unboxing and then the installation of it and tools and parts. So be right back and welcome back. So now it's been unboxed just even just to show you the box.
It's got a little hole in it
so you can feel it when it's in the package. This information I'll put into the notes below and what the kit includes. And Made in the usa. This is it just kind of stretched across this table. This is the back side of it.
What will go up against the car.
These will be the hooks that will hook it in the front trunk area which you'll see. And these are the snaps which will go into the wheel wells of the driver's side and passenger side. So I don't know if I can show you here very well. It's black. It looks kind of gray in this light but it is porous so air can get through it. I don't plan on driving this, driving around with it on all the time. I'm basically going to do some road trips to get to some of the races at the Arkansas Mile and Road America and Blackhawk Farms. So I plan on putting it on then. And also obviously I'm also going to do a tow hook. So the tow hook I don't think would play nicely with this. So that's what I plan on using. I don't plan on leaving it on all the time. Also other aspects of the kit, you have these seven snap or, pardon me, nine snap fasteners. Four on the driver's side, four on the passenger, the passenger side, and one in the center that we'll be showing. And then just the instructions which I'll be actually showing you here, but you have a hard copy too, which is nice to have to be able to refer to cleaning and care instructions. So very nice, complete but elegant kit. Also a nice little card from them and they would like you to send pictures of it and stuff like that. They'll probably put those on your on their website and then just other surface prep and having it be clean, etc. So this is kind of what the before will be like. And then next up will be at the car and starting that first installation process.
Everyone, now we're down in the garage. I have the wheel turned all the way to the right to allow space to get in here. I don't need to take the wheels off to do this, which is very nice. Just a little simple hack to be able to do that. There are four of these snap screws that they have for each side of the wheel well. One for the driver side, one corresponding to the passenger side I have, and then one in the middle, which I'll show you in just a second, which is a little tricky. I have taken out one of the original OEM fasteners, let's what it looks like, and replaced it with the snap one. It uses this bit. I used it in a socket and it just. It's nice that both the ones that we replace with and the originals are the same. So just this little bit and a little elbow grease and you are good to go with that. So I'm not going to do a whole video of me taking these off and putting them on, but basically you get the idea. This is the new one. I'll take off the other three here, the other four on the other side. And then more interesting is how we actually put the bra on itself. The other one that you see, because we have nine of these snap screws is the four on one side, four on the other. And the ninth one, I don't know that this is going to show up terribly well, but if I get in tight here, you can see right there in this mirror reflection. Right underneath here is where the other one goes. So again, there we go, tight. So I'll take that one off and replace it with the same screw that came with the kit. And then I will do that when I come back, then I will be ready to do the bra installation itself. Okay, and we are back. So all of the little snap screws have been put in. Four on driver side, one in the center, four on the passenger side. Got the front trunk open here. Is the bra kind of laid out here for us. And then what we do is I start with snapping on the driver's side first. I just start with two. I'll do that and be right back. So I should have said you start with the upper two, not all four. So driver's side, upper two. Then we take the bra. This is going to be a little tricky one handed. My apologies. I should be looking for an assistant. And then I will stretch it across. It holds very nicely on that side. I will stretch it across. And then I will snap all four on the passenger side. So that's done. All four snap there. I'll adjust that in a minute so you can see it's just stretched across with the frunk open and back around to this side. And then I will snap the remaining four over here. Okay. And what I meant to say was the remaining two of the total of four over here. So now we're on like that. And it's looking like that. Maybe like it's got a mustache or something. And now the final one for the snaps will be to take this one and stretch it over and fit it around here. Then snap it to that one that we had the mirror for that's back underneath here. Okay. So that was actually fairly straightforward to do. And now it's all pretty much fitted around. You can tell you get a lot of nice coverage all the way down and under. Just really clever design. Very interesting material. I was sort of surprised. I have a front tow hook kind of right here. You can kind of peekaboo and see. I thought I would have to take it off to put this on, but I didn't. So that's pretty cool. One thing to keep in mind is that if you have front cameras, which this LT2 does, or pardon me, two LT does, they won't work because now they're. They're hidden behind this. So just keep that in mind. So the last step is to take that hook and put it there. Take this hook and put it. Oops. They probably won't be videoing when you're doing this. And put it there. So that's what that looks like. This is clear. This covers again, very, very, very nice fit. And then we will see what that looks like. Like. And voila. The finished Product very nice, very happy with that. So it's going to give good protection on the road trips that I've got to the upcoming races this year. Very excited about doing that and I didn't want to since I'm only going to have this car for a year. I didn't want to get the invisible bra. I have that on my A7. So anyway, this seemed like a great alternative to it to give good protection. I've read very good reviews about it. I'll be talking about it more in upcoming videos when it's actually out on the road and being tested out. So again, if you like the this series or the ones on BMW, please do hit like and subscribe. Share it with others. If you have ideas or comments or anything, please share them in the comments. And please do take a look at the show notes below. I've got a lot of links to the other videos, both things that I have done and will be doing on this C8 as well as a 2022 BMW motorcycle R9T. So drive safe, race safe and thanks again for watching. Okay, and we are back. So all of the little snap screws have been put in. Four on driver's side, one in the center, four on the passenger side. Got the front trunk open here is the bra kind of laid out here for us. And then what we do is I start with snapping on the driver's side first. I just start with two. I'll do that and be right back. So I should have said you start with the upper two, not all four. So driver's side upper two. Then we take the bra. This is going to be a little tricky one handed. My apologies, I should be looking for an assistant. And then I will stretch it across. It holds very nicely on that side. I will stretch it across and then I will snap all four on the passenger side. So that's done. All four snap there. I'll adjust that in a minute so you can see it's just stretched across with the frunk open back around to this side. And then I will snap the remaining four over here. Okay. And what I meant to say was the remaining two of the total of four over here. So now we're on like that. And it's looking like that maybe like it's got a mustache or something. And now the final one for the snaps will be to take this one and and stretch it over and fit it around here and then snap it to that one that we had the mirror for that's back underneath here. Okay. So that was actually fairly Straightforward to do and now it's all pretty much fitted around, you can tell you get a lot of nice coverage all the way down and under. Just really clever design. Very interesting material. I was sort of surprised. I have a front tow hook kind of right here. You can kind of peek a boo and see. I thought I would have to take it off to put this on, but I didn't. So that's pretty cool. One thing to keep in mind is that if you have front cameras, which this LT2 does, or pardon me, two LT does, they won't work because now they're hidden behind this. So just keep that in mind. So the last step is to take that hook and put it there. Take this hook and put it. Oops. You probably won't be videoing when you're doing this. And put it there. So that's what that looks like. This is clear. This covers again, very, very, very nice fit. And then we will see what that looks like. Like that. And voila, the finished product. Very nice. Very happy with that. So it's going to give good protection on the road trips that I've got to the upcoming races this year. Very excited about doing that and I didn't want to, since I'm only going to have this car for a year. I didn't want to get the invisible bra. I have that on my A7. So anyway, this seemed like a great alternative to it to give good protection. I've read very good reviews about it. I'll be talking about it more in upcoming videos when it's actually out on the road and being tested out. So again, if you like this series or the ones on BMW, please do hit like and subscribe. Share it with others. If you have ideas or comments or anything, please share them in the comments. And please do take a look at the show notes below. I've got a lot of links to the other videos, both things that I have done and will be doing on this C8 as well as a 2022 BMW motorcycle R9T. So drive safe, race safe and thanks again for watching. So I should have said you start with the upper two, not all four. So driver's side, upper two, then we take the bra. This is going to be a little tricky one handed. My apologies, I should be looking for an assistant. And then I will stretch it across. It holds very nicely on that side. I will stretch it across and then I will snap all four on the passenger side. So that's done. All four snap there. I'll adjust that in a minute. So you can see it's just stretched across with the frunk open and back around to this side. And then I will snap the remaining four over here. Okay. And what I meant to say was the remaining two of the total of four over here. So now we're on like that. And it's looking like that. Maybe like it's got a mustache or something. And now the final one for the snaps will be to take this one and stretch it over and fit it around here and then snap it to that one that we had the mirror for. That's back underneath here. Okay. So that was actually fairly straightforward to do. And now it's all pretty much fitted around. You can tell you get a lot of nice coverage all the way down and under. Just really clever design. Very interesting material. I was sort of surprised. I have a front tow hook kind of right here. You can kind of peek a boo and see. I thought I would have to take it off to put this on, but I didn't. So that's pretty cool. One thing to keep in mind is that if you have front cameras, which this LT2 does, or pardon me, two LT does, they won't work because now they're hidden behind this. So just keep that in mind. So the last step is to take that hook and put it there. Take this hook and put it. Oops. They probably won't be videoing when you're doing this. And put it there. So that's what that looks like. This is clear. This covers again, very, very, very nice fit. And then we will see what that looks like. Like that. And voila. The finished product. Very nice. Very happy with that. So it's going to give good protection on the road trips that I've got to the upcoming races this year. Very excited about doing that and I didn't want to since I'm only going to have this car for a year. I didn't want to get the invisible bra. I have that on my A7. So anyway, this seemed like a great alternative to it to give good protection. I've read very good reviews about it. I'll be talking about it more in upcoming videos when it's actually out on the road and being tested out. So again, if you like this series or the ones on BMW, please do hit like and subscribe. Share it with others. If you have ideas or comments or anything, please share them in the comments. And please do take a look at the show notes below. I've got a lot of links to the other videos. Both things that I have done and will be doing on this C8 as well as a 2022 BMW motorcycle R9T. So drive safe, race safe, and thanks again for watching. Okay, and what I meant to say was the remaining two of the total of four over here. So now we're on like that. And it's looking like that. Maybe like it's got a mustache or something. And now the final one for the snaps will be to take this one and stretch it over and fit it around here and then snap it to that one that we had the mirror for. That's back underneath here. Okay. So that was actually fairly straightforward to do and now it's all pretty much fitted around. You can tell you get a lot of nice coverage all the way down and under. Just really clever design. Very interesting material. I was sort of surprised. I have a front tow hook kind of right here. You can kind of peek a boo and see. I thought I would have to take it off to put this on, but I didn't. So that's pretty cool. One thing to keep in mind is that if you have front cameras, which this LT2 does, or pardon me, two LT does, they won't work because now they're hidden behind this. So just keep that in mind. So the last step is to take that hook and put it there. Take this hook and put it. Oops. You probably won't be videoing when you're doing this. And put it there. So that's what that looks like. This is clear. This covers again, very, very, very nice fit. And then we will see what that looks like. Like that. And voila. The finished product. Very nice. Very happy with that. So it's going to give good protection on the road trips that I've got to the upcoming races this year. Very excited about doing that and I didn't want to since I'm only going to have this car for a year. I didn't want to get the invisible bra. I have that on my A7. So anyway, this seemed like a great alternative to it to give good protection. I've read very good reviews about it. I'll be talking about it more in upcoming videos when it's actually out on the road and being tested out. So again, if you like this series or the ones on BMW, please do hit like and subscribe. Share it with others. If you have ideas or comments or anything, please share them in the comments. And please do take a look at the show notes below. I've got a lot of links to the other videos, both things that I have done and will be doing on this C8 well, as a 2022 BMW motorcycle R9T. So drive safe, race safe, and thanks again for watching, Sam.
More from Dr.
2025 Mercedes-Benz CLE 450 4Matic Cabrio – Owner’s Views After a Year-and-a-Half as a Daily Driver

The Complete Guide to a Successful Everest Base Camp Trek – Post-Trek Debrief

The Complete Guide to a Successful EBC Trek – Post-Trek Debrief: What I Needed (and What I Didn’t)
What Went Wrong Customizing My New 2026 Porsche Carrera T …and what I did about it!

Coming May 1 At the Intersection of High Performance and Fulfillment: A Conversation with Alisa Cohn

From High Performance to Fulfillment: Lessons in Inner Mastery with Jim Murphy
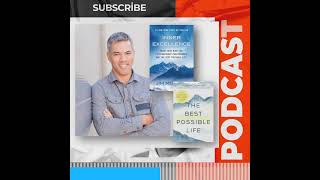
Coming March 19: From High Performance to Fulfillment: Lessons in Inner Mastery with Jim Murphy

The New Humanitarians Volumes I - III:- Inspiration, Innovation, and Blueprints for Visionaries

The New Humanitarians Volumes I - III:- Inspiration, Innovation, and Blueprints for Visionaries
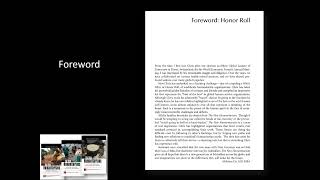
The New Humanitarians Vol I - III: Inspiration, Innovation, and Blueprints for Visionaries - Forward