Scientist Stories: Iben Lundgaard, Studying the Glymphatic System using Light Sheet Microscopy
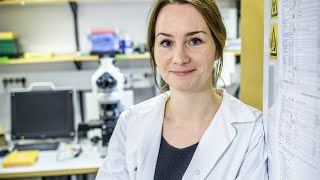
Iben Lundgaard uses light sheet microscopy to watch how the brain clears waste through the glymphatic system, a process tied to Alzheimer's disease. She showed how tissue-clearing techniques make mouse and pig brains transparent enough to map cerebrospinal fluid flow in 3D and track how anesthesia affects the system.
Questions this video answers
Brain tissue clears well, but muscle tissue (including heart) is hardest due to hemoglobin and myoglobin autofluorescence; however, protocols exist to clear even heart tissue.
Use nanobody labeling (small antibody fragments directly conjugated to fluorophore) to amplify EGFP signal and test alternative clearing protocols that better preserve GFP fluorescence.
The microscope has 7 excitation/emission filter sets, but the lab typically uses two fluorophores (green and far‑red) to ensure optimal signal; other labs have achieved more channels.
The authors recommend performing decolorization first because it is water‑soluble; later dehydration removes water, preventing re‑introduction of water before solvent steps.
They have not tried qubicLR yet but may consider it to address GFP signal loss.
Chapters
Hello everyone and welcome to today's webinar, Studying the Lymphatic System Using Light Sheet Microscopy. I am Megan Pascale of LabRoots. And I'll be your moderator for today's event. Today's educational web seminar is presented by Labroots and brought to you by Meltani Biotech. To learn more, visit meltanibiotech.com. We encourage you to participate today by submitting any questions you may have during the presentation. To do so, simply type them into the Ask a Question box and click Send. We'll answer as many questions as we have time for at the end of the presentation. You may also submit any technical issues here as well if you have trouble seeing or hearing the presentation. I'd like to now welcome our speaker, Eben Lundgaard, PhD, Associate Professor, Lund University, Sweden. We will now have a brief introduction from Dr. Liza Nent.
Hello and welcome everybody to our webinar today. My name is Elisa Nent. I'm the product manager for neuroscience working at Miltenyi Biotec, and I'm very happy to introduce you the webinar about studying the glymphatic system using light sheet microscopy by Iben Lundgaard. And before we go on and Iben starts, I will give a short introduction and also tell you a little bit about Mittani Biotech. So just some fast facts. The company was founded in '89, expanded, so right now we have over 4,000 employees worldwide from over 50 nationalities. A quarter of our employees are working in R&D, so we are still developing a lot and trying always to be innovative and on top of research. You can see here some examples about our technologies from Miltoni Biotech. So I will not go into detail, but I hope you can appreciate that we try to cover many different technologies and many areas to give really a lot of benefits to the researchers in the lab. So coming to the solutions that we have especially for neuroscience, which I think are most interesting for you today. As you can see here in this image, we created this to kind of show that we have several approaches. So on one hand, we have kind of a dissociating brain because we have a workflow that you can use to dissociate the brain tissue and isolate cells. But we also have on the other hand a workflow for the imaging of the brain, which I think are both quite important approaches to study the brain. And just very shortly so that you get an overview, our workflow for this dissociation for the analysis starts with sample preparation where we have dissociation kits and the GentleMaxx, like an automated dissociator. For cell separation, we have different microbeads that are labeled magnetic beads to isolate cells. For cell culture, where we have media and supplements. And for the analysis, we have a flow analyzer and sorter. But then more important for today is our imaging workflow where we have a set of antibodies, clearing kit, and a nice microscope that I will also explain you further in the next slides, which is really working hand in hand and makes this approach to study the brain in 3D more easy. So our antibodies for especially for 3D immunofluorescence have a low cost. They are all fluorochrome conjugated, which gives you faster results. So it's easier than working with a first primary and secondary antibody, and they're recombinant and give you reproducible data. And then for the next step, the tissue clearing, maybe most of you or some of you have heard of this. Basically what you do is you render the tissue transparent. By this, we add ethanol for the dehydration and the solvent for the matching of the refractory index, which then, as you can see here, turns the brain tissue within several hours almost transparent. Making it possible to then analyze really every layer of the brain. We have different tissue clearing reagents like solution and a kit. They are organic solvent and non-toxic, which means they are quite safe but still work fast and efficient. We have several protocols that are directly optimized, for example, for the brain, and are quite easy to use. Coming then to the ultra-microscope place. So this is also what will be later mentioned in Iben's talk. This is a light sheet microscope, and you can see here some examples about when it was used in several publications for the analysis of the brain, for example, but also for other tissue. Light sheet microscopy actually covers this gap, which you can see here in the microscopes that you maybe heard of before: confocal microscopy, two-photon microscopy, that cover more the smaller sizes in the cell, let's say, or the MRE that covers directly the whole brain. And then kind of in the middle is this ultra microscope which is kind of showing cell structures but also kind of includes the whole brain anatomy. So you can even track connections of neurons or see their location within the whole organ. And some features of the Blaze is that basically you are able to image large or even multiple samples. Which means that you have directly a high output and but still reduced hands-on time. What is also very nice is that it works fully automated, so that's quite easy. It can be operated by every lab member and you don't have to sit so much yourself on the microscope. You can let it work for you., and we have a set of different optimized optics which give you a high data quality but also high sensitivity. So as a summary, and I don't want to take too much time of you today, just to highlight that this UltraMicroscope Blaze is a fully automated light sheet microscope which can image multiple samples with a high resolution It has cutting-edge optics that provide a high image quality and sensitivity and is enabling to image large-scale 3D organs at a high resolution. And with this, I'm at the end of my part, and I just wanted to show you here this nice video of a brain that was imaged with the UM Blaze. But now, actually, I want to continue and in the end now introduce to you our speaker of today, which is Iben Lundgaard. So, Iben is an associate professor at Lund University and is the principal investigator of a research group of around 12 people that are studying the glymphatic system in the context of neurological diseases. The lab was founded 5 years ago and has since then published many papers in high-impact journals. So the glymphatic system is actually quite new and it's an exciting topic that becomes more and more relevant in neuroscience. So maybe you've heard of this also before, and that's why you are tuning in, or maybe you were just interested to hear more about the glymphatic system. But in any case, I'm very much looking forward now to her talk. I think it's a very exciting topic, and I think with this I'm at the end. So, Iben, thanks for agreeing to give this talk, and the, the virtual stage is now yours.
Hello everyone, welcome to this Labyrinth webinar on the glymphatic system and light sheet imaging. My name is Iben Lundblad, and I'm an associate professor at Lund University. All right, so today I will be talking about what the glymphatic system is, a little bit about why we think the glymphatic system is important in relation to neurodegeneration, Then about our appropriation of light sheet microscopy and some data using light sheet microscopy that we use to study the lymphatic system in pigs. And then I'm going to go through some more considerations that you might want to take into account when you decide on whether or not to use light sheet microscopy. But first, I will actually start talking about the cerebrospinal fluid. So it's produced in the choroid plexus here in the ventricles. This is the ventricular system you see here. Most people know the CSF as a way to measure biomarkers. But how do the biomarkers actually get to the brain? So what you see here is the progression of Alzheimer's disease. But you also see that the first detectable event is the presence of amyloid beta in the CSF. So then that begs the question, How do these biomarkers produced inside the brain actually get to the CSF? This is something that the glymphatic system can explain. So, it was discovered in 2012 in the lab of Malcolm Whitaker, and it is a system of a perivascular influx of CSF. So, the CSF is circulating in the subarachnoid space. And when these peel surface IgGs turn into penetrating IgGs, the fluid, the CSF, will actually follow. And you also see here that these IgGs are bounded by the astrocytes surrounding them. And we know now that the aquaporin-4 channels expressed in the astrocytes are vital for the distribution of CSF from the CSF spaces to the brain parenchyma. So in essence, the glymphatic system is this fluid transport system. First, we have the influx of the clean CSF, and this in turn mediates clearance of solutes from the parenchyma. So it's a brain clearance system. And interestingly, it's only active in the sleep state, and luckily for us, also when anesthetized with certain anesthetics that have a high proportion of delta waves resembling normal sleep. So there are some very interesting links between sleep and neurodegeneration that the glymphatic system might actually be able to explain. So it was known from previous studies that sleep deprivation in Alzheimer's mice caused exacerbation of the plaque load in these mice. Also, in humans, it was later shown that the more hours the less amyloid we have in the brain. The glymphatic system sparked a new interest in sleep as a way to prevent Alzheimer's disease. We think that the glymphatic system is also important to study in relation to Alzheimer's disease, for example. Then some links between aquaporin-4 channels which in the brain are only expressed by astrocytes and Alzheimer's disease. Here you see Alzheimer's disease mice of the type APP-PS1. And what you see here is that when the mice were crossed with ApoE4 deletion mice, knockout mice, there was an exacerbation of the amyloid pathology. And also, the mice showed worse cognitive performance when the glymphatic system was inhibited in ACO4 knockout mice. So we know now that ACO4 knockout exacerbates the AD pathology in mice. Also, in postmortem studies, Acupuncture 4 localization to the vasculature, so the correct localization of Acupuncture 4, was found to be disrupted in Alzheimer's disease patients. So this is why, some of the reasons why, we think the glymphatic system is very important to study in order to prevent neurodegenerative diseases. So now to some of the light sheet studies that we did. We have some cleared mice and our ultra-microscope Blaze light sheet microscope. So how do we make tissues transparent? Or we can also ask Why are tissues not transparent? So you probably noticed something that when a light, when light travels through different kinds of materials, it will change direction. So here you see, for example, when a light beam is first traveling through air, then changes direction when, when it enters and exits a gel. So this is the same thing that is happening in our tissues. So this is because of the differences in the refractive indices. So light is both absorbed and it is also refracted. So particularly when light moves through an aqueous solution, which would be inside or outside the cells, and then when they move through a cell membrane that has a high lipid content. So the most kind of basic premise for, for, for optical clearing is a homogenization of refractive indices. So this will make the tissues appear more transparent. And the basic steps that we use is dehydration, delipidation, optical clearing, so substitution of affected indices using another solution, and then we can use it for light sheet microscopy. Interestingly, the first version of optical clearing was actually performed more than 100 years ago, um, by Spalzigaus. And he used optical clearing in this little bit more primitive form so that he could draw human organs to use in atlases. Today there are a number of different protocols available. We use the, the disco series and specifically we use iDISCO+. And we have substituted one chemical that I will mention later. So, so yeah, this is the general steps which consist in just changing solutions. So it's very easy. Method, and we have substituted diphenyl ether for ethyl cinnamate, as ethyl cinnamate has the same refractive index but it is non-toxic. Actually, it's used as a food additive. Then if you want to clear not organs but, for example, whole mice, You can also do this with a few additional steps. So here we have used the VDISCO method and we've performed decolorization and decalcification and then our regular steps. And here we have also injected a dye in the CSF and We can now see this in the whole body of the mouse. And we also see here how the green channel, 488 channel, can be used to obtain structural information. So it has higher background than the other channels. It can be a pain if the fluorophore of interest is in the green spectrum, but if not, it's very good to, to get the whole structure. Okay, so light sheet microscopy, the principle is very simple, and the illumination comes not in the same direction as the lens but comes perpendicular to the imaging lens. And often you will see illumination from both sides. And then the light sheet is stable, but the sample moves up and down so that you can capture the whole the whole sample. So when you use the technology, as for example the OptimalScope Blaze, we use 6 sheets of light, 3 from each side. And you see how compared to only left or right side illumination, you gain a little bit more detail by using illumination from both sides. And some, some light sheet microscopes also have the software, so they actually adjust the light sheet and the imaging. So one image, one field of view is made up by by many different images so that the light sheet is as focused as possible on that field of view. So this is one of the very new microscopes under Micron Ultramicroscope Place that we're very happy with, and I will go through some of the specifications. So here you see our beautifully cleared mice, and this is in air, and when immersed in fluid, they become even more transparent. So this is what we used for our light sheet imaging. But I should say here, when we first set up the technique, we were using the previous version, the Ultramicroscope 2. And so using the light sheet microscopy to image the glymphatic system for the first time, we felt that it was necessary to run some tests. So here we compared ossetron and aesthetics, where we know that the glymphatic system is suboptimally active, and we compared this to ketamine-siazing anesthetized mice, where we know that the glymphatic system should be equally active as in the sleep state. So here we see the results from 3D reconstructions. So we found that we were able to reproduce the differences between the isoflurane and ketamine-xylazine anesthesia regimens when we used light sheet microscopy. And we also found that, of course, we could, by sampling the entire brain with light sheet imaging into 1,000 images of the mouse brain, we were able to perform additional segmentations. And we also saw that the lymphatic system was more impaired in the dorsal and the anterior parts when using isofluorane anesthetics. So then going forward, we are interested in using machine machine learning algorithms to investigate the lymphatic system in the entire mouse brain. But so far we have used a machine learning algorithm to segment out the vasculature. So not the perivascular tree, but the vascular tree. So we have seen that in the experimental autoimmune encephalomyelitis model, which is a model of MS, we had observed that these mice were hypoxic, which could be partially avoided by inhalation of 100% oxygen. So we wanted to to analyse the perfused vasculature. So we used an intravascular dye that would only label the vasculature of the perfused blood vessels. And we saw that in terms of the perfused vasculature, we're able to, to hear for the spinal cord determine the total perfused length and the perfused radius of the vasculature and the bifurcation points by combining light sheet imaging and machine learning algorithms in collaboration with the Ali Atürk Lab in Munich. Then we also used light sheet microscopy to study the glymphatic system in higher mammals. So besides this obvious difference in size, the pig brain here is also gyrencephalic, so it has gyri and sulci in between, whereas the mouse brain is lissencephalic, smooth. Also, the pig brain has larger arterioles, whereas mouse brain mainly consists of capillaries. And other advantages for using larger mammals such as pigs is that they have a more similar physiology to humans. So what we saw here in the pig brain was that the glymphatic system— and here we are tracking fluorescent CSF, and we're looking at how it distributes to the pig brain. Here we have a coronal slice, and we saw that the CSF dye was very concentrated in fissures on the sole side of the pig brain. And what was very important was that the tracer, here seen in purple, was also localized in the perivascular space between endothelial cells and astrocytes on the outside. So this tells us that the kind of microarchitecture of the glymphatic system is the same. So in larger mammals, when we see these cells distributed to the brain, it also does that in a perivascular manner. Then we did some light sheet microscopy. Now we have here the surface of the brain, then we're looking at the inside of the brain, and this is just the very lowest magnification. That we can actually use. So what you see here is this very robust and highly regular pattern of CSF influx here in white, just moving into the brain. Into the brain is up in this direction. So that's the cortex, and then in the hippocampus, we see here some larger vessels where the CSF tracer was able to move much further than along the smaller caliber blood vessels. And when doing a comparison here, we saw that the, the entry points for CSF efflux was about 4 times higher in pigs than in the mouse cortex. And we also saw that the CSF travelled further along the larger calibre arterioles. So, we believe that the glymphatic system is not only conserved, but is also perhaps even evolutionarily enhanced in larger mammals. So to summarize here for the parts on the glymphatic system, the glymphatic system is a clearance system that uses perivascular pathways. So it's kind of piggybacking on the vasculature, but it is moving only in the perivascular pathways. Light sheet imaging is feasible for glymphatic studies. We saw that the sulci and fissures in a large, gyrified brain act as highways for recessive movement. So we found that the glymphatic system is evolutionarily conserved, if not enhanced, by the gyrfication of large brains. And as I mentioned before, the glymphatic system may provide links as to why sleep and good sleep quality is reducing the risk for neurodegenerative diseases such as Alzheimer's and Parkinson's disease. So We're interested in studying the glymphatic system and would hope to, to find out how it works, with the goal to be able to enhance or just sustain this function in aging. And now to some considerations if you, if you want to get into light sheet microscopy. So we'll go through some specifications here and some considerations. First, the size of the sample. So I would say if you're only planning to use a few hundred microns, say up to maybe 100 microns of thickness, then you may even use a confocal microscope. But if you have whole organs of mice and so on, then you can benefit from using light sheet microscopy. So here, so you want to, in terms of the sample size, you want to be able to, of course, physically fit it into your chamber, and you also want to check the, the travel range of the microscope. In addition to this, we also have to consider the working distance, because this means here for our 1x lens, the working distance is 1.7 cm, which is some of the highest working distance for the microscopes at the moment, actually. And that would mean that if your sample is 1.7 centimeters thick, then it means to image the bottom, the lens is actually on the top of the sample. So you see how this varies with different magnifications of lenses. Then your resolution— can you get the resolution that you want? So for this, you want to of course look at the lens magnification, the total magnification including the zoom, and your numerical aperture, which gives you this maximum resolution. The image quality, the image quality Here you want to look at how many light sheets can you get. So 6, this would be 3 from each side. Then your thickness, this is your light sheet thickness. We usually use 5 microns. And then is your clearing protocol compatible? Here you want to look at compatibility with refractive indices, and often you will find that you can use both the water-based protocol or a, a DBE or ethanocyanamide-based protocol. Then how much throughput can you get? This of course depends on how much you can fit into the microscope,. But also in terms of the software, if you can set up the microscope for acquiring several samples in one session. So it's more automated. Yeah, so the previous Ultramicroscope 2 we had was from Le Vision Biotech that was later bought by Maintainer Biotech. Here we had to split the mouse head in two to fit it in the chamber size. Now with the new microscope, we can image the whole head. Now we've injected dye in the CSF and we're moving through the head to the periphery here, from the brain to the periphery, and we're gonna loop back. So we see the brain in this entirety, and we also see some cervical lymph nodes. So, uh, this new microscope has been a big, um, improvement in terms of technology for us. Okay, so some more considerations, um, here. So, so you can use organ only, for example, with the iDISCO protocol, or you can use the whole body. Here you have to continuously diffuse the different chemical solutions into the body. Then Then what kind of fluorophore will you be using? Do you have an endogenous or injected fluorophore? So we are so lucky to use our CSF-injected fluorophores. You may have, for example, a reporter mouse with fluorescence protein. And if not, you are of course reliant on antibody staining. But having said that, you might want to be aware that if you use fluorescent reporters, and this includes GFP reporters, you might need amplification of the signal by antibody labeling because some of these fluorescence proteins are not as bright after the whole clearing protocol. So if you want to use antibody labelling, there's a number of protocols out there. It is good to check in published papers if someone has used antibodies against the epitope that you are interested in, as antibody labelling requires optimization for each antibody. And some antibodies may not actually work. So here, for example, you can do a methanol test to see whether the antibody still works. And if not, you can try another antibody. This is if you use methanol in your clearing protocol, of course, as we do. So some summary here on the light sheet microscopy part. So you want to consider your sample size. If you have a sample size less than 100 microns, you may be able to use confocal. If you use larger sample sizes, you do have to check the, the sample size and the specifications of your light sheet microscope. Several microscopes, they can only image one cubic centimeter. Then in terms of the clearing protocol, if you use a If your sample is one organ, you can get away with a simpler protocol, but you can even clear whole bodies of mice using other clearance protocols. Then you can also consider substituting some of the toxic chemicals, for example the diphenyl ether This is, which is the last step of the EdiscoPlus protocols, and because this means that this will be the liquid that you use in the microscope also. So only few institutions will have their light sheet microscope placed with ample point suction. So here you can replace, for example, the DBE to ethyl cinnamate so that you're not exposed to toxic chemicals while imaging. Yeah, consider your fluorophores. If you can use a far-red fluorophores. This is recommended as they penetrate the tissues better. Remember that the most autofluorescence you will get on the green channel, so in the GFP spectrum, and antibodies will not always work with the clearing protocols. So each antibody has to be tested. So it can also be an idea to test several antibodies in parallel. So with that, I would like to thank my amazing team and Tekla and Marius, Na, and Nick have been working a lot with the light sheet imaging in the lab. I would like to thank a collaborator who, who's helped with the machine learning algorithms for segmenting out the vascular compartments, Ali Atuk in Munich. I would like to thank my funding And I would like to thank Elaborate for hosting this webinar. And with that, I would be happy to take questions.
Thank you, Iben, for your informative presentation. If you have a question you'd like to ask, please do so now. Just click on the Ask a Question box and click Send. We'll answer as many questions as we have time for. Let's get started. Our first question is, which tissues are the hardest to clear?
Yep, so I can start by saying that I'm fortunate to work with brain tissue and brain tissue clears amazingly. But for example, it's known that hemoglobin gives a lot of autofluorescence, so this is why you start with the perfusion step. But also myoglobin, so that would be in muscle tissue including the heart. So I would say the muscle tissue is probably the tissue that, that is the hardest clear. However, there is at least one paper that describes, that tests different kinds of clearing protocols for clearing of the heart. So I would say that any tissue can be cleared.
Great, thank you. Our next question asks: What can be done if the GFP reporter is not working?
Yes, this is actually something that we are dealing with at the moment. So we have a reporter mouse expressing EGFP, and unfortunately the GFP signal is not visible after the clearing. So what we're trying now is that we're using nanobody labeling. So this means it's a truncated version, so it's a smaller molecular weight version of an antibody which is directly conjugated to fluorophore. So we're basically amplifying the EGFP signal in that way. And we're also testing other clearance protocols than the disco family of protocols that we normally use in order to retain the eGFP signal in our reporter mice.
Great. Our next question asks, how many channels can be imaged with light sheet microscopy?
Yes, so on our light sheet microscope we have 7 emission/excitation filters, excitation/emission filters installed, but at the moment we would like to stick to 2. Fluorophores. And but so we know, for example, that the fire red fluorophore is very good. We also know that in the lowest nanometer range, so for the blue light, it carries the most energy, but therefore is absorbed more and thus penetrates the tissue less. So right now we're actually only doing 2 fluorophores, green and far red, but I've seen other labs that managed to get the solution of more fluorophores than that.
Great, thank you. Our next question asks, how relevant is the order of clearing steps for the results? For example, decolorization and dechlorification prior or after dehydration, or permeabilization?
Okay, that is a good question. We haven't tried to, to switch the order, so of course that could be tried, but I believe it makes perhaps more sense to do the decolorization step first, because I think this is more water soluble, and then if you are using the disco protocols as we are, you are later dehydrating the tissue. So after that, you don't want to reintroduce water molecules because then you have, yeah, then you have solvents, but not actually water.
Great. Our next question is, Was the qubicLR method successful in your hands?
We haven't tried it yet, but due to this issue with the loss of fluorescence in our GFP reporter mouse, we may actually try that. But we haven't tried it yet.
Thank you. Our next question is, what is the main advantage of light screen microscopy?
Yeah, the main advantage. Yeah, that's a nice question. So I would say this is for the mesoscale or perhaps even macroscopic imaging. So if you, if you have a tiny sample, like I said, less than 100 microns, then the confocal microscopy, um, I would probably find would be superior. So, so it's really, really useful when, when you have larger samples, um, such as mouse organs or even if you want to image the whole mouse body, because there you get a much, much improved resolution to, for example, a CT or MRI imaging. So this is really the advantage, is the improved resolution for light your samples.
Great. And it looks like we have one more question here today. And that is, are you open to collaborations?
Yes, yes, we are often open to collaborations. And we, we really love this technique. And we found it pretty easy to to get started. So we'll be happy to help others to get started or do test imaging of their samples if they don't have a light sheet microscope in their institution. So yeah, I find this technique very fascinating and And yeah, has really helped us to answer more of our research questions. So we would be happy to help other groups get started with this.
Great, thank you, Ivan. And it looks like we have one more question that actually came in here, and it asks, how do you use titrate antibodies for 3D microscopy?
Yes, good question. So a little bit primitive, but perhaps a standard way. What we do is that we would try, we would try 3 concentrations of antibody. One would be the same antibody as we would use for a normal say slice staining, and then we would go a little bit under, and then we'll go perhaps several times higher than that. So this would be, yeah, a test that we would run in parallel or simultaneously because, yeah, the antibody penetration takes for the brain, say a week, and for larger samples we would use 3 weeks. So we would always run these different concentrations in parallel.
Great, thank you. We have another question that came in here, and it says the disadvantage of light screen microscopy Is it difficult to perfectly align both light sheets in 3-dimensional space? So what do you have to say about that?
Yeah, I believe that this question could be maybe relevant based on the exact type of light sheet microscope that you use. So we, I believe we're quite fortunate with the model that we have now, and I don't get paid to advertise for this microscope, but I really find it fantastic. So, and what this new and particular model of the light sheet microscope does is that for one field of view, it will actually adjust the light sheet so that it would take multiple images, I think maybe a standard of 32 images, just to put into one image for one field of view. So we haven't had any issues with the alignment. I believe it's done maybe in the service check once a year, and it works beautifully the rest of the time. So at least for the model that we use, it's not an issue. And the software additions, like I said, that it is capturing many images to get one field of view. This is a really good improvement for the image quality and to get it really crisp, everything in focus and illuminated. So for us, alignment of the light sheet has not been an issue. Great.
Thank you so much, Iben. It looks like that brings us to the end of our Q&A session for today. Do you have any final comments for our audience?
Well, I just like to say thank you for attending this webinar, and thank you for the questions. They're all great questions, and I hope that this has spurred you on to perhaps use LightSheet for your own research.
Great. Thank you again, Iben, for your time today and your important research. We would also like to thank Labroots and our sponsor, Miltani Biotech, for underwriting today's educational webcast. Before we go, I'd like to thank the audience for joining us today and for their interesting questions. Questions we did not have time for today and those submitted during the on-demand period will be addressed by the speaker via the contact information you provided at the time of registration. This webcast can be viewed on demand. LabRoots will alert you via email when it's available for replay. We encourage you to share that email with your colleagues who may have missed today's live event. Until next time, goodbye.
More from Joshua





Scientist Stories: Hans Waterham, The value of phenotypic assays in peroxisomal disorders



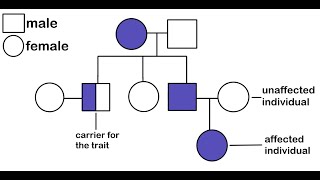
Scientist Stories: Joel Zlotogora, Genetic carrier screening programs for reproductive purposes