Scientist Stories: Ricardo Henriques, Super Resolution & Machine Learning in Imaging
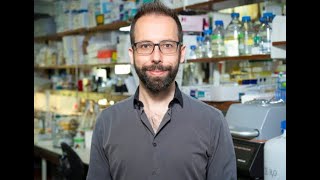
In this lecture Ricardo Henriques recounts his personal path from a childhood fascination with diffraction to becoming a leading physicist‑microscopist. He explains the fundamentals of diffraction and how single‑molecule localization microscopy (PALM, STORM, DNA‑PAINT) overcomes the diffraction limit by exploiting photo‑switchable fluorophores. He describes his early contribution of the open‑source QuickPALM algorithm and its inspiration from astrophysics, and shows how the same principle can be applied to macroscopic blinking lights (Eiffel Tower). He then moves to virus imaging, detailing how super‑resolution reveals sub‑diffraction viral structures, the development of VirusMapper for single‑particle averaging, and examples with HIV and poxvirus. Next, he introduces DNA‑hairpin probes that photo‑switch mechanically, independent of illumination, and discusses their tunability, biotin attachment, and challenges of cellular delivery. He highlights the phototoxicity barrier of conventional super‑resolution and presents SURF (Super‑Resolution in Radial Fluctuations), a mathematical framework that extracts super‑resolution from very few, low‑intensity frames, enabling live‑cell imaging with minimal damage. He then describes a live‑to‑fixed workflow using a Lego‑based, robotized syringe‑pump system (Pumpy McPumpface) that automates fixation and sequential labeling, allowing dynamic imaging followed by high‑resolution fixed‑cell analysis. Finally, he outlines the recent boom of deep‑learning in microscopy, the need for high‑performance hardware, and his solution: a cloud‑based, zero‑cost platform that lets any researcher train and apply neural networks (denoising, segmentation, super‑resolution, phenotype classification) without coding. He concludes with a call to embrace computational data mining as the future of microscopy.
Chapters
Thank you so much, Pete, and thank you everyone for coming. It's really great to be able to do these presentations, and thank you for the Royal Microscopy Society also for this kind invitation to give this lecture. So I want to tell you a little bit about research that we've done for the last years, and one of the things that we very much focused on is on developing technology for microscopy particularly with a focus on super-resolution machine learning, but in the context of making that technology immediately available and transferable to everyone. So everything that you're going to see during my talk is immediately available to you. It's inexpensive and easy to get access to. So hopefully I'll get you a little bit excited about it. So as Pete said a little bit, I recently moved to the IGC, which is a life sciences research institute in Portugal. It's actually the place where I first did my first experiments in a wet lab, so it's good to some degree to come back to the source, like the salmon. And a lot of the research that you're going to see today has been done actually that's UCL and the CRIC where we had two labs, or we still keep labs there, but still they'll eventually move completely to IGC. All right, so Pete kind of introduced you— introduced me as a physicist, and I actually can tell you the first moment I got excited about physics, and eventually it transformed into microscopy. And it's fun because it boils down to an exact moment of time that I can pinpoint to when I was about 15 years old or so. And at the time, I went to visit the laser lab, and we were asked a simple question, which is, here's a laser beam, here's a slit, can you guess what happens afterwards? And as a kid, I still didn't know much, but I knew a few things. I knew that light was composed by, by photons. I thought of them as roundish particles behaving like ping-pong balls. So I thought, okay, so there's these ping-pong balls with a certain velocity, some of them are going to smash against the barrier, some of them are going to go through that hole. And I think pretty much what's going to happen is that I'm going to get a shorter beam that is just composed by those ping-pong balls that are going to cross that hole. And we filmed the experiments, and what I saw was amazing to me. It's hard to transmit how magical this is if you're not a kid seeing it, but it's freaking amazing because look at this, right? So you have that beam, here's the slit. The slit is just two blades that are going to approximate to each other. And here's what you see. What you see is exactly the opposite to what I was expecting. And here I was expecting really for that beam to decrease in size. And, and look at it, is you certainly see exactly the opposite. The beam elongates, uh, on an axis that is perpendicular to the slit that we have, and you have all these side lobes appearing. And First, I couldn't believe it, but secondly, I really wanted to understand what was the basis for this, right? And effectively, this was so disruptive to me that I decided to spend my entire career studying this process. And what you're seeing is diffraction. And, and the— although you're seeing diffraction here in the 1D slits, whenever you try to look at the molecule like a fluorescent molecule, let's say GFP, and you use a microscope, effectively that molecule is going to be a point source of light that is going to emit that beam of light. That beam of light, the first thing that it's going to find on the microscope is a slit. The difference here is that instead of being a linear slit like that 1D slit that you saw before, it's actually a circular slit. And because you have a circular slit, the pattern that you get out of it, instead of being just elongated in one axis, is radially symmetric. It's elongated in every possible direction, exactly the same side lobes. So the experiments that you— I saw as a kid, that you saw before, is what— it's the kind of experiment we do every day when we use a microscope. And this diffraction effect is directly linked to the resolutions we can get on an optical microscope. And it has been fantastic because the, the— when I finished my degree as a physicist, I, I wanted to go to a lab, and that was more or less at the same time that the, the first, uh, experiments with single molecule visualization microscopy came about. And it was right on the spot of that thing that interested me since I was a kid. Because what happens on these techniques, on stochastic single molecule localization, what you do is you actually decorate your sample with photo-switchable fluorophores. And, and if you just look at the sample on a normal microscope where all those fluorophores are emitting, you actually don't get that much resolution. You get the best possible resolution you get on any canonical and classical optical microscope, about 300 nanometer resolution. But because these are photoswitchable fluorophores, in a light-mediated manner I can turn them off and turn on a very small subset. So every point of light that I activate now still emits light, still gets broadened up by diffraction, but the information here is much more simple, which allows me to detect and localize each individual fluorophore that you see there. And because of this, if I cycle on the microscope with lasers in a way that I can turn off this flow force, turn on another subset, and if I keep on detecting, localizing each individual molecule that appears on a sequence of frames, what I get is this, right? I get those molecules turning on and off, and I can use an algorithm that detects, localizes, and renders the molecules that have been detected. And the rendering that I get at the end, which is the accumulation of all these point detections, is actually an accurate description of the image that we're trying to observe on the microscope, but with a much higher resolution than what was possible before. It is a prediction nonetheless. There's going to be some errors to it coming from false positives, false negatives, and so forth, but it's still a pretty accurate description of the underlying structure that you have there. And this is pretty much the basis for extremely used super-resolution approaches that we use frequently in microscopy, particularly PALM, F-PALM, STORM, dSTORM, DNA-Paint, and so forth. And I actually got renowned by developing one of the first single-molecule acquisition algorithms out there, at least one. I believe it might be the first open-source one. Which is called QuickPALM, and it's really an algorithm that is able to detect those molecules that are turning off and on. And I also got known by making this video that you see here, which is the Eiffel Tower blinking its light at night. If you're in Paris, you'll see that every hour at night for 5 minutes, the Eiffel Tower will randomly blink its lights. And I filmed this when I was a PhD student, and I pretty much realized that what I was trying to observe on the microscope with those molecules blinking, uh, is exactly the same thing that I'm seeing here in this phone image, um, of the Eiffel Tower. And, and the beauty of it is that it's exactly the same because the physics that you have on my phone where I'm using a circular lens to, to observe, so therefore I have a circular aperture, is exactly the same physics that you have on a microscope. And isn't that beautiful that the same mathematical rules on a phone applies to a microscope and it applies to a telescope? Because in reality, QuickPALM, the algorithm that I developed, is just me repurposing an algorithm that already existed in astrophysics to detect the stars and actually applying it to a super-resolution microscope. So this is, for example, what we could actually do, right? The same algorithm that we used to detect molecules blinking from for blinking cells, we could actually apply it to the Eiffel Tower, detecting those blinking lights and therefore getting a super-resolution reconstruction. So why is this interesting? Well, one of the reasons why it's interesting is that we've used fluorescence for many years to try to understand what territories proteins occupy in cells, and particularly if you are using dual-waving or triple-waving to try to understand if proteins are forming a complex. But most molecules that we try to observe in the microscope, particularly proteins, they exist in scales of about 2 to 5 nanometers in diameter. And the resolution that we get without using super-resolution, using a conventional microscope, it's about 200 to 300 nanometers. So trying to infer if two molecules are making a complex, and those molecules are about 2 to 5 nanometers, and if you have an error, which is your resolution limits, of 300 nanometers, that's the same thing as trying to understand if two people are sitting together in the room with an error as big as the room itself, right? So it's been really difficult to try to understand microstructure using classical fluorescence microscopy. And this is one of the nice things about super-resolution imaging, that it really allows you to have a boost on the resolution that you are able to achieve. And now we're down to about 20 to 50 nanometers. It's not the resolution You can't— on a daily basis you don't get a resolution that is equivalent to the size of the molecules that you're trying to see, but you are getting very close. And in this case, for example, on this T cell, you're seeing that those molecules that I'm waving, they're signaling molecules that are at the surface of the cell before they seem to coalesce all throughout the membrane. And if I have these resolution boosts given by super-resolution, you actually see that they make these clusters at the surface of the cell, and these clusters are almost purely mutually mutually exclusive. A very different message from what you saw before because they almost don't coalesce except in very specific territories. And that's what improving resolution actually allows you to do. So it was equipped with these interests that I went on and actually wanted to apply technology that just became available and technology we were developing in Super Resolution to study really small complexes in cells, particularly looking at pathogens like viruses. And it happens that all mammalian infecting viruses, mammalian cells infecting viruses that we know, all of them are subdiffractional. All of them have a size that is smaller than what a microscope, a classical, for instance, light microscope, will be able to describe. So pretty much they're dots, right? You won't be able to really resolve substructure of a virus that infects mammalian cells using a fluorescence microscope, at least without using super-resolution. And to give you a sense of this, for example, these are some of the bugs that we studied a little bit. For example, for the case of HIV, which does this beautiful cone shape on its capsids once it's infecting cells, we were— this is actually work back from when I was in Christoph Zimmer's lab. We were able, for example, to resolve the uncoating of the capsids as the virus enters cells and releases the capsid to the cytoplasm, and see that, for example, that most of the capsid is fully disassembled once it enters the nucleus of the cell. And you have this beautiful image here, for example, where we're labeling integrase, which is dominantly sequestered within the capsid of the virus. And once integrase, which is these components of the HIV that is responsible for bringing its genome into the nucleus of the cell, if you actually image it on super-resolution microscope, you'll actually see integrase accumulating on the inner envelope of the nucleus of a cell with these beautiful sudden explosions that we believe some of them might actually be integrase crossing the nuclear pore to go inside the nucleus of a cell. And to give you another example, one of the things that we also try to see is how HIV reorganizes receptors as it tries to enter the clustering of CD4 and CCR5, the main receptor and co-receptor they need to do endoendomyofusion and get released into the cytoplasm of the cell. And we've described this recently in the paper. But viruses are also cool because many viruses are metastable in their structure. For example, the virus that I'm showing you here is is of the family of the deadliest virus that we've ever faced as humankind. And one of the reasons why Europeans actually were able to invade America, it's pox, right? And the pox unfortunately decimates the Native American population once the Europeans started invading. And It's not that we had— that Europeans had much smaller numbers coming out of the boat, but they brought diseases that decimated that population. Pox is really interesting because it's perhaps the, the, the biggest virus that we know that kills the infection. It's pretty much a spot if you just look at it by a normal microscope. If you use a super-resolution method like SIM, you can already get substructure. And one of the interesting things that we've done, and we were one of the first labs actually doing it, is we stole some ideas that were really used and developed in electron microscopy, which is this idea of doing single particle averaging. Because these viruses have a metastable structure, if I actually have the viruses on the coverslip, They all have the same structures, or they apparently have the same structure, except they'll be in different rotations. And because they're in different rotations, what that allows us to do is actually create algorithms that will pick up each individual virus, align all of them together, and make a 3D model out of it. And so we developed the software that is freely available called VirusMapper that actually does this. It's applied to pox, but it can be applied to many other viruses, and we're currently using it for HIV, for example.. And the interesting thing here is that it works on super-resolution fluorescence imaging. And for our case, what we commonly do is we always image the same protein against another protein. And for the case of pox, it has about 200 different proteins constituting the virus. Most of times what we do is we label the lateral body that you see here, and then label another protein against that lateral body. So that allows us to use the lateral bodies always as a reference and map out, for example, where the inner core, the outer core, the membrane of the virus is against that protein. So we get a multi-protein map by always matching the position of an unknown protein against a reference protein that we have. And because this is actually borrowed by EM, the nice thing is we can actually correlate this with EM data. And for example, here you have a cryo-EM model that we can then extend by giving molecular identity to many of the components of the virus. And what we're doing now is actually trying to understand, given that you have that metastable structure that often occurs when you have an extracellular virus, we're trying to see how the virus encodes or undergoes morphogenesis using exactly the same technique. So allowing the structure to vary a little bit and start doing averaging, assuming that variability. And one of the things that we've been able to do with these ideas, for example, is map the fact that for the case of pox, the fusion machinery of the virus is polarized at the tips of the virus, as you see here and see here, for example. This is interesting because the same thing happens for HIV. It's also known that for HIV, the fusion machinery polarizes to a side that has also been described, discovered by super-resolution microscopy. And it might be that this is actually to have its fusion machinery in order to interact with the surface of a cell. Okay, so I told you a little bit about single molecule localization microscopy, our work for viruses, and how we're doing single particle averaging. So going back a little bit to single molecule localization microscopy, you kind of are dependent on this throughput that you're able to turn off and non, so that you can detect those individual molecules on a dataset. And that effect is normally driven by light, and that has an issue because that means that the, the photo switching behavior that you have on through force depends on the microscope that you're using, because the, the light intensity and the type of laser setup will modulate those photo switching kinetics. So we wanted to get a little bit away from this, and we asked ourselves, can we have a fluorophore that is able to photo-switch, but does it mechanically in a way that is almost fully independent from any illumination that you can put on it? And this is what we came out with, right? And the nice thing is that these are open-source probes. They're based on DNA, and the sequence is known. They're easy to order by any And what you're seeing here is that what we've done is using a DNA hairpin configuration, we've put a quencher next to a FRU4, because the quencher is on the 5' and the FRU4 is on the 3' end. And what happens is that this hairpin structure that they have here, the sequence attached to it actually makes the hairpin structure unstable. And because it's unstable, it means that from time to time, by just thermal collisions with the, the environment where the molecule is, this probe will open up. And when it opens up, the quencher gets away from the fluorophore, allowing the fluorophore to fluoresce. So that means that we actually have a probe designed where at whatever temperature we want and whatever chemical environment we want, that we can design the probe in a way that we know that it will have a certain photo switching rate that is highly controllable. And the interesting thing here is that we can even tune that photo switching rate by slightly changing the aqueous conditions in which the probe is, or the temperature where it is. The interesting thing is that that photo switching is almost fully independent from the illumination that you put. So we've characterized this, we've put them on coverslips, we attach the probes to, to to glass by using a structure within biotin chemistry. This biotin, for example, is in the middle of the probe, which allows us, for example, to see this, right, where we have the probes blinking. And what I'm going to do is add formamide, hot formamide, about now. That hot formamide actually forces the probes to open up, which means that as they open up, you then suddenly just have a burst of light where all the molecules suddenly are visible. And I'm just going to highlight 3. So you have these 3 molecules there. They are just naturally photo-switching. And when I add hot formaldehyde, you see the probes opening up, showing where the fluorophores are actually. So it's really cool because you have this pluggable and playable system where it's easy to change sequences and play with photo-switching kinetics just based on those sequences. And one of the interesting things here that we also discovered is that while the probe— while the fluorophore is being quenched by the quencher, because there is actually an absorption shift on the fluorophore, that fluorophore is actually protected from unwanted bleaching. So therefore, these probes actually are able to blink in environments that do not require typical things that you would with a single molecule, like an oxygen scavenger buffer. The presence of the quencher itself will not only protect the fluorophore, allowing it to blink for longer, it will also induce the blinking process itself. So we've developed this. We're still trying to figure out a little bit better how to use them to label probes, because currently we just have a biotin system. So for example, if we want to use antibodies, we still have to have antibodies with streptavidin in there. We're also trying to get the probes to label native proteins that will be expressed by the cell based on synthetic DNA, right? So one of the problems is that we still have to get the probes inside cells. And if the probes are actually nice for white cell imaging, one of the issues and barriers that we still have to figure out is how to properly get the probes inside cells without eliciting an immunological reaction. Cells hate double-stranded DNA. Every time they find double-stranded DNA on the cytoplasm, they pretty much think they're being infected by a virus, for for example. So these are tunable, and that's one of the cool things about the probes. All right, so I told you a little bit about single-molecule position microscopy, about VirusMapper, how we're interested in viruses, how we've developed some probes for super-resolution single-molecule position microscopy. And I now— actually, when I started the lab in 2013, I pretty much wanted to apply all this to understand a little bit better how viruses form their structure, how viruses assemble and self-assemble. And when I wrote a few grants, and some of these were even in partnerships, this is some of the feedback that I had from reviewers. Human Frontiers: this would be a great project for cryo-EM. MRT: super-resolution in general should be seen at face value as a sophisticated way of analyzing bulbs that can only be complementary to high-resolution EM. So some rough criticism there. And every, you know, anytime you get criticism like this, you get annoyed and angry at the world. But this was actually quite interesting because There's a high degree of truth here. If you ask yourself what structures have we discovered with super-resolution fluorescence microscopy that we had not discovered with EM before, that is going to be a very narrow list. EM is actually great, and it has done for decades many of the things that we are trying to observe with super-resolution microscopy. And there's beautiful things that have been discovered, don't take me wrong. For example, the actin spectrum rings that exist on neurons has been, I believe, discovered through super-resolution microscopy. And for example, Christophe Bouthillier, who is in the audience, he has done beautiful work with this. And actually, even I would argue that some of the most beautiful work that Christophe has done has used super resolution in conjunction with EM, because EM always gives you a beautiful view of those structures, often with a higher resolution than what you can get with, with super resolution. So this made me think, why do I care? Why should I continue using super resolution? And the answer is actually that there are things you cannot do with EM, and one of them is that you cannot look at dynamic processes. You cannot do live cell imaging. Super resolution has a wild potential there, but there is a limitation attached to it also, which is the fact that it's incredibly phototoxic to cells. You can do live cell imaging, but they're under severe stress induced by light. And this, this graph here distills this a little bit, right? As you use super resolution methods, they try to get you the best possible resolution. And I'm missing MINIFOX here, that is a little bit more lifestyle compatible, by the way. But the tendency is, as you try to get higher resolution, you get trapped in requiring kilowatts to megawatts per square centimeter of illumination, which is maybe a million-fold higher than what you use in conventional whitefield imaging. And the acquisitions will take longer than what you need for whitefield. And by the way, SIM does a beautiful job and sits very well here in the midst, and perhaps is arguably one of the best super-resolution/enhanced resolution approaches to do live cell imaging. But I wanted to do something about single molecule position microscopy, and so as a lab, we started thinking about how to solve this problem. How can we bring single molecule to a level where it's a little bit more compatible with live cell imaging? And in this dataset here, you can actually see the problem, right? Where this is a classical single-molecule localization microscopy dataset. It's beautiful. You see individual molecules turning on and off. These are neurons, by the way. But we need to spread that information over a very large number of frames. And at the end, these large number of frames are going to produce a single super-resolution image. So typically we take from 5 minutes to 30 minutes to get a super-resolution image. And from those 5 to 30 minutes, we're pretty much just acquiring a sequence of images where the cell needs to be frozen in time, fixed, and we see that blinking happen. So to try to deal with it, we pretty much try to compress time. And that means that with very few frames, with very little illumination, we need to recover super-resolution information out of the data. So for that, we created a new type of mathematical framework which is the basis for an algorithm that we call SURF, Super Resolution in Radial Fluctuations. And SURF does just that. It tries to extract super-resolution data from datasets like this, and these are just 100 frames acquired in 1 second and illuminated at— sorry, now I have— at 40 milliwatts per square centimeter. So what does SURF do? Well, SURF makes a few assumptions. One of the assumptions that the algorithm does is that fluorophores are not perfect, and because they're not perfect, they won't have a constant flux of fluorophores being emitted over time. So we assume fluorophores will also exit their emission, and you expect that because you have thermal unbalance in their secondary and tertiary structure, which means that the chromophore itself will not be constantly stable in that conformation. You have collisional branching against oxygen, you have thermal threats, there's a lot happening in the sample which will force the fluorophore to fluctuate its photon emission. And if that's true, that means that there will be moments in time where a fluorophore will emit brighter than any other fluorophore in its immediate vicinity. If it emits a little bit brighter than any other fluorophore in its vicinity, you're going to see a PSF shape. Out of it. Now we could potentially constantly be trying to find PSF shapes in the data, but we're going to use a slightly different feature. We're going to use the feature that's, uh, it boils down to when I was a kid. That's because we're using a circular lens, and PSF is radially symmetric. The point that you see for f/0.4 is radially symmetric, is going to have that Gaussian type of shape with those side lobes. And it happens that if you just try to map the original space that has the highest degree of radial symmetry, that will be precisely on the center of that flow of form. So here what you're seeing is a radiality map. It's just telling you in space where you have high degree of radial symmetry, and that actually is a good proxy to flow forms that are actually oscillating on your data and emit a little bit brighter in a certain moment of space. X and time. But there is also a huge amount of noise here, right? There's in this region here where, where you don't have any proof or corresponds to this region here where you even see oscillations coming from the noise. And that happens because noise by itself, by just its stochastic nature, from time to time might apparently have some degree of radial symmetry and the algorithm will pick up it. But there's something also interesting about noise, which is noise is uncorrelated in time, while the oscillations of fruit flies have some degree of correlation. It has some pattern to the way that they oscillate. And given that, uh, that's that feature which has been very well described on another technique called SOFI, by the way, um, we can actually then pick up on that idea, start asking where does information correlate in time. And if I project an autocorrelation in time, what I get is this, which actually dampens down the noise that I have on my data because noise is uncorrelated, and it brings back structure. So here, that means that mathematically, I already have an estimate of the super-resolution equivalent of the data that you see here on the left. Now, there is also something that I want you to keep in mind. There is the intent— well, This image represents structure, the same structure you see on the left. The intensity has a slightly different meaning because the intensity that you see on the left corresponds to more or less to, to the, the number of photons that were detected on the pixel, and that is generally linear to the local stock energy of rho4. What that means is that the higher the number of rho4, the higher number of the, the photons that you're going to detect. The, the brighter that pixel will be in your image that was detected by a camera or some other detector. Here the brightness corresponds actually to the algorithm capacity to visualize an oscillating flow form of the data. So that means that these data might not— this information here might not be fully linear in intensity to what you see in the light. So something to be careful about. And by the way, That's true for almost any super-resolution methods that you might use, it being STORM, PALM, SIM, or any method that uses the deconvolution procedure as an end step on the recovery of the data that exists. Kudos to optical SIM like iSIM, which actually does not do this if you do not deconvolve data after Okay, but— okay, so that's cool, but why do you care? In reality, if you're doing PALM, STORM type of imaging where you have a fixed cell, you don't care about SURF because SURF is really great in live cell imaging, but it won't do a better job than the algorithms that have already been developed for fixed cells. Where it excels is when you have really high density data where you actually have a living cell with emitting light acquired at really high speeds, and there the algorithm is able to recover back resolution from that data. The resolution will be mild in this case. For example, the estimate for resolution is just a threefold improvement over what you see on the left. But the most interesting thing here is actually this clock on top, because we continuously image for 30 minutes and there is no apparent effects of photobleaching or photodamage. The cell is behaving naturally, apparently, because the illumination intensity that we're using is so little compared to what you normally use for most other superposition methods that you get natural behavior out of your cells. So a mild improvement in resolution, but you get live cell compatibility, which is one of the greatest features here. So if you want to see a little bit about where we used the algorithm recently, we recently used it to describe, for example, how X-core complexes help some RPL cells undergo division. And we also use the algorithm, for example, to describe vocal disassembly of the nuclear envelope in Pompeii cells. And we're currently working on a new version of the algorithm. Because it's purely mathematical, we can actually improve the mathematical basis. And sometime in the near future, you're going to see an improvement in the mathematical bases for Surf, which actually gets you higher quality data coming out of it. So for example, this is Whitefield, this is the new version of Surf that you're going to see coming out in the next months or weeks, and this is the original Surf that exists out there. These are actually quality rankings, and you see, for example, that with the new version of Surf, you're going to get much better quality on the data that you're we cover at the end. Also, because we have a better mathematical basis, we can do a few things that are interesting. For example, now we can actually get super-resolution out of the algorithm and type of data that we acquire, and we can match it with optical sectioning, for example, spinning disk or white sheet microscopy also. All right, so I told you a little bit about how we at some point wanted to do live cell imaging, and that was really important in order to really get information on dynamics that were impossible for us to observe before. But the thing is, if you have a fixed cell, you can take as much time as you want to observe it, and that's also really interesting. So can I somehow combine the benefits of live cell imaging and fixed cell imaging? You can't have both simultaneously, but you can have both sequentially. And for that, what we actually started doing was we started doing live-to-fixed imaging itself. That means that we get dynamics, and upon fixation, there's a lot of experiments that we can do, and I'm going to give you some examples.. And that is very easy to do using microfluidics. But because it's us, we wanted to make something that was not only useful for us, but it was accessible to everyone. So for that, we partnered up with Christophe Wittecke and developed Pumpy McPumpface, which is what you're seeing here. So Pumpy is pretty much a Lego based syringe pump array, which is fully robotized. And by fully robotized, what I mean is that the experiments that you would do on the bench, like for example fixation and immunolabeling, this Lego device is able to do all that but at the microscope. And one of the nice things is that it is 250 quids. If, you know, a kid, a teenager, or a 12-year-old will be able to build this. It's really simple to build, and it's robust, robust, as robust as Lego. If you drop it, it might disassemble, but the parts will not break at all. Oh, by the way, so just to show you, because it's Lego and it's pliable, these are 8 strange pumps, right? This is the module. You have a module inside the microscope, and the reason why you have a module inside the microscope is that this one here will actually be the ones carrying a fixative. And by being inside the incubator of the microscope, it's kept at 37 degrees, which actually allows us then to not have a temperature shock once we insert that fixative to label, to fix our cells and, and label them. Okay, so what cool experiments can you do with this? Well, one of the things that I can do is I can actually get the benefit of using SIRV capturing some of the dynamics of that cell, but with a mild resolution improvement. And upon fixation, I can take as much time as I want to really do single-molecule causation microscopy and get the best possible resolution. And that's exactly what I'm going to show you here, right? And by the way, this experiment is fully robotized. There's no human intervention on the experiment itself. The microscope is driving all the liquid experimentation that you see here, driving this experiment. Okay, so if we start with just TIRF imaging on that actin cortex, I'm going to switch it to surf mode, which is what you're seeing here. And the microscope then has fixed, beveled the sample, and acquired a single molecule dataset, allowing us then to have this single super-resolution image at the end. And the beautiful here is that you get those dynamics and then the ultrastructure with about 13 nanometer resolution at the end of the data. So we get ultrastructure combined with dynamics. But we also end up with a fixed sample. So with a fixed sample, what can we do? There's a few more things that we can do chemically which are quite interesting. One of the things we can actually do is we can come in with a label, remove that label, label for some— for a different protein, remove that label, label for a different protein, remove that label, label from protein, and so forth. And that means that we are actually using this super inexpensive WEGO device, we are theoretically unlimited on the number of proteins that we actually observe. So this is actually a dataset acquired in partnership with Christophe, for example, and in this case it just labels actin with fluoridine and then pairs DNA paint labeling for two other proteins. And this is really interesting, right? Because then that means that you get live cell dynamics for a selected single protein or maybe two proteins, and upon fixation you can actually do small-scale proteomics trying to understand territories that these proteins actually occupy. I told you theoretically unlimited, but I also have to give a sense that in practice there's a few things that you have to deal with, because all this is based on sequential labeling, as in sequential watching and introductions of a label into the sample. That means that there is mechanical stress on sample, so after a while that mechanical stress might destroy or alter the natural conformation of those structures that you see. And because most of times we're actually packing the cell with antibodies to label each individual protein, we most of times do not remove the antibodies, although they are chemical ways to do it. That also means that we increase the likelihood of steric hindrance as we label more and more proteins. The typical quality control that we do is we actually scramble the sequence in which we observe these proteins, so that we minimize at the end the likelihood that we are always seeing the last protein as being impacted by these possible limitations that exist on the experiments. And it is easy to use, as I was telling you. There's quite a few apps out there that did their own implementation. And one of the things that I was a little bit surprised with is that it's actually used quite a lot in teaching of students also. All right, so I think this is my last story to tell you today. So I told you about Superolution and some of the things that we've developed in Superolution, how I think they are really exciting. I also wanted to tell you a little bit about what we're doing with machine learning and trying to make it a little bit more accessible to everyone. So as you might have noticed, there is a boom of the application of deep learning in microscopy for the last 2 to 3 years. It's something that is really, really still recent. In terms of its applications to bioimage data coming out of a microscope. And these algorithms are breaking records. We're pretty much figuring out that almost for every possible image analysis task that you've seen in the past, that now there is a deep learning algorithm that will do a better job at that kind of task. And why is this interesting to us? Well, because we're as I showed you a little bit before, really interested in doing live cell imaging, particularly in the context of tracking infection dynamics. And these processes take hours, so photodamage is really a major limitation for us in type of data that we want to observe. And if we wanted to do live cell imaging and if we want to limit photodamage, in most of the cases what we have to do is actually reduce the illumination that we use on microscope, and effectively that will mean that we have to deal with data that is much more noisy. I first became interested in machine learning because actually it was very clearly shown that currently the best possible algorithms that you can use to denoise data are deep learning-based algorithms. A few years back, I was actually lucky to be invited to participate in a study being carried out at MPI. In Dresden. And there they developed CARE, which is one of the still best and first approaches where deep learning is used to really denoise and recover back data from really corrupted information on the microscope, particularly when you're using real-world illumination, and therefore you really have very little information coming out from the, from the photons detected. Okay, but, um, we wanted to make this useful to everyone, and deep learning has a little bit of a problem, which is first it requires, uh, really high-end graphical cards, graphical cards that you won't easily find on a normal workstation. So you need to get bespoke hardware to do this kind of analysis. And also, deep learning being fairly new in its applications to biology and to microscopy, it's still really complex to learn. So it's difficult for someone that does not do coding to get into it. And, and we wanted to do something about it. And to, to, to show you a little bit about how it works and, and how, how its, its application here and what are the limitations, I just wanted to give you a sense of how it actually does its job in microscopy. I'll start by telling you a little bit how classical algorithm works, right? On the classical algorithm, what you have is some kind of input image. You then have a predefined algorithm, something like a plugin in Fiji that someone has developed out. There you optimize as a user some parameters on the algorithm and you get a denoised image out. So with deep learning, what you actually have is that you slightly change a little bit this workflow, and you actually start with examples of the type of input image that you have and the type of output image that you desire. For the case of the noising, it's really easy because I can go to the microscope and acquire a sequence of images with high noise and low noise that can be changed by acquiring an image with high illumination intensity, another one with low illumination intensity, or one with low exposure time and one with high exposure time. And what we do is we present this to a machine learning algorithm, and the machine learning algorithm actually doesn't have a very well-defined mathematical structure yet. And what we actually ask is, in an optimization process, we show this data to the algorithm and ask, can you find a mathematical way in which to convert the images that exist on the left to the images that exist on the right? And the algorithm will self-optimize a series of parameters within a neural network until it finds the best possible way it can learn to convert one type of image into the other. And once it has done so, which we normally call it the algorithm has converged— once the algorithm has converged, we then actually have a trained model, which means that we have all the features of that neural network that are needed in a way that we can present an image that is noisy, and the algorithm will give me a prediction of how the denoised image should look like. Here's the crazy and beautiful part of this, which is this algorithm that I show you here knows nothing about the noising. The only thing that it knows is that it needs to find a mathematical way to transform the image that exists on the left into the image that exists on the right. So I could train it to take out the noise that exists on those images. Or I could present low-resolution, high-resolution images, and therefore the algorithm will try to learn how to make a super-resolution prediction of low-resolution images at the end. Or I could show it an unlabeled and a labeled image, and algorithm will try to learn how to estimate where the labeling should be. And this is all the same kind of mathematical network that will try to learn how to do it at the end. And it's beautiful because it's learning from the data. It's not learning from a prior constrained set of rules that a developer has imposed, which is what you have here on top. So it comes from a completely different angle from what we've done in past work, and there's enormous potential because of that novelty. There. There is an issue here also, obviously, also, which is we need a huge amount of example data to train the algorithm to a point where it actually learns how to do this task decently. And that's one of the things that you have to take into account. If you want to use machine learning, you have to use large amounts of training data that really represents the type of experiments you want to do on the microscope. And that you want exposed to the machine learning algorithm. So I told you that you need really high-performance GPUs, and you need the know-how on how to do this processing. To try to simplify this, we actually created a platform that we call Zero-Cost Deep Learning for Microscopy. And Zero-Cost Deep Learning for Microscopy was developed from scratch to actually gets a researcher that has never used machine learning before and that does not have access to those high-performance resources to immediately be able to learn them and get access to them. And I'm highlighting here Guillaume Jacquet, who is our full partner in developing this. This was actually a joint project from scratch between us with many collaborators across the world. So what does Zero-Cost Deep Learning for Microscopy do, and how do you use it? Well, you pretty much just need a couple things. One of the things that you need is a computer. We don't care about the CPU or GPU on that computer because everything in terms of analysis is going to be done on the cloud. That computer needs to have access to the internet and to some data. In this case, you need, for example, training data, and you need the new data you want to analyze. And Zero-Cost Deep Learning for Microscopy, what it does is it brokers a communication with Google Drive, where the data is moving to. It presents a graphical user interface that exists via Jupyter Notebooks, and through that graphical user interface, it then communicates with Google Colab, which is a free service provided by Google that actually gives you access to a GPU for free that has that high performance to analyze data and train a neural network. So that means that with this, you get the capacity for network training and to make predictions on the data that you have using deep learning. Once you have this, you can then download the data, the results, and the trained network itself. So it pretty much allows you to do everything from A to Z in terms of applying neural networks to your data. And the user interface is really simple. It requires no coding, it requires no prior skills, it really shows all the information that you need to precisely learn how to use these methods and understand the basis for it. And by the way, one of the major things that we did here is we adapted really powerful and advanced quality control algorithms so that you can have a precise notion of the quality of the data that you're generating out of those neural networks at the end of the day. Okay, so what can you do with this? Here are some examples of tasks that you can actually do with zero-cost deep learning for microscopy. They go from image segmentation, which for example we're giving an example of an EM image here being segmented by an algorithm that is called U-Net. In this case, for example, you're seeing the implementation of StarDisk, which allows you to do segmentation of the Weibull nucleus on cells. In the next case, you're doing semantic segmentation. For example, in this case, it's finding cells that are mortal and cells that are not mortal, so allowing you, for example, to detect phenotypes that you have on your data. Denoising using an algorithm called Noise2Void. In this case, you're seeing a slightly different version of denoising, which also does image restoration, not only corrects for noise but also corrects for some corruption that might exist on your data. DeepSTORM, which allows you to generate super-resolution data from single molecule information. This is a funny one. This neural network, for example, is predicting a fluorescence channel from a brightfield image. In that case, just using the brightfields to predict where mitochondria might be. In this case, for example, you're predicting where nucleus is standing might be just from an acting channel. CycleGANs here making a prediction of a resolution improvement on the data. And this is just a short example. For fun, recently, because most of the neural networks that exist out there have been developed for eukaryotic cells, we also recently came out with a preprint demonstrating the application of these same neural networks to do bacterial studies, showcasing some of the tasks also that you can do here that go from bacterial segmentation to tracking to classification of phenotypes. For example, what happens to cells that are undergoing antibiotic treatments and denoising, for example, for for live cell imaging. Okay, so again, fully open. Quite a few people already out there showcasing some examples of what they can do with the platform. So if you're a fan of Twitter, check out a little bit of how others are using it for their own research. So I wanted to finish with a kind of funny story. Because this is our eye and our eye sucks. It has all this vasculature on top of our retina. So unfortunately, during evolution, we are stuck with this kind of organ and there's not a single gene mutation that is going to fix it. But our brain actually corrects for a lot of problems that our eye has, and we're kind of in the same regime with microscopy in the sense that There's been some advances in, for example, in the development of lenses, but we pretty much are reaching the limits of physics of glass. There's very few disruptive advancements that have happened in the last decades. And the interesting thing is that within the boundaries of the limits of the physics of glass, we've learned to use mathematical ways in which we can extract more and more data out of a microscope. And this is me just trying to trigger you to get in more into the idea that the research of the future involves very much mining data through computational processes, and now is the time to get into it. I know I'm running out of— very much out of time. I just do acknowledgments twice. The first technology I really want to do is regarding all the researchers in our lab that have contributed to the work that you've seen here, and also the facilities that they helped us get there, particularly like the imaging facilities at IGC, UCL, and the Crick Institute. And finish off also all the other labs that have cooperated with us to make this possible, and everyone that has sponsored our research. And with that, I'm sorry to have taken a little bit too much time. I am happy to take any questions you might have.
More from Joshua




Scientist Stories: Hans Waterham, The value of phenotypic assays in peroxisomal disorders

Scientist Stories: Joel Zlotogora, Genetic carrier screening programs for reproductive purposes