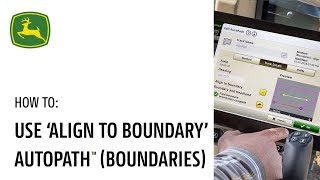
Sam demonstrates John Deere's Align to Boundary feature in AutoPath, which lets farmers set accurate guidance lines for planting by aligning to existing field boundaries instead of manually drawing them.
Autopath Boundaries has a cool new feature that makes starting your field work in the right place a breeze. I'm sitting here in the field right now getting ready to start planting, and I've got my planter sitting right where I want it on the edge of the headland. My guidance line is not in the right spot. I've used the shift buttons over the years to move it back and forth, but no matter what I do, it's never really what I want it to be. And then I get into a different machine and it's wrong all over again. So how can Autopath make this easy for me? I'm going to go into my Autopath setup, and I'm going to choose the Align the Boundary feature. Align to Boundary lets you choose a certain side of the field that you want to align to. In this example, my field actually has two shapes. Shape one is the large, larger portion of the field, and shape two is this small area in the southwest corner. I want to align to the bottom of shape one, so I'll choose that. And then I need to tell Autopath which side of the field to start with. Line one is the longest, and it's along the north edge of the field, or at least part of the north edge. Line two is along the south edge, which is where I actually want to do this. But let's look at some other options. Line three is along the west side of the field, so I can align to that. Line four is curved. However, the dots or the alignment points for this would be at the very edge, so it would create a straight line in that sort of heading angle. We do not support curves yet in Auto path boundaries. Look for that in a future release. And finally, line five is over there on the east side of the field. So I want to use line two, and it gives me an A and B point, the start and the end of that side of the field boundary. It also gives me the initial heading angle 269.7480. That's very precise, aligned to that edge of the field. However, I want to edit my A and B point slightly. And I also have a magnifying glass. Right Now I'm at 950ft away, so I'm going to zoom in and get a little closer. So I've got a little bit better view of what's actually happening here. You'll see there's a curve here. I can use my clockwise and counterclockwise buttons to move this dot along the edge of the field boundary. If I go clockwise, it goes in a clockwise manner and I get kind of off of that curve there. And now I'm on the straight portion of the boundary. Pretty happy with that. So I'll say, ok, I'm going to do the same thing to my B point. In fact, going to zoom in here. I want to make sure it's also on the very flat side of the field and not getting kind of impacted by that curve. So I'm going to go a little bit wrong direction, a little bit counterclockwise, counterclockwise around the field. And now I've got my A and B points where I want. Now I have 269.7551. Let's take a look at how that works. Now I'm going to choose my align to boundary auto path as my guidance line type. And what do you know? That align to boundary has placed the guidance line automatically within 2 inches of where I wanted to be. I could do some small shifting here if I wanted to, but this is so close, we can probably just get started. Auto path's align to boundary feature is going to make getting your field started very, very easy. So try it out and see what you think. Sam.