
CH570 Display Features and Navigation
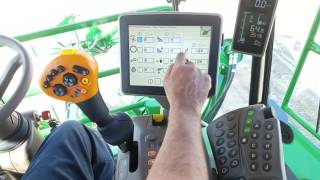
This is a YouTube video titled "CH570 Display Features and Navigation" created on November 21, 2016, providing a detailed tutorial on navigating and configuring the CH570 machine display. The content is a single-speaker instructional guide explaining various settings, gauges, alarms, and features of the machine's interface, including base cutter height, pressure settings, configurable buttons, engine controls, diagnostics, and data management.
Do a short video on the CH570. Just navigating through the display pages. For starters, you have three home pages. This would be one of three, two of three and three of three. Starting off on one of three, this is the main run page. This would be a base cutter height. You can set your base cutter height target and this is your base cutter height actual. To set your base cutter height target, you can just bring your machine down to the target that you want to cut at and then hit the capture button. So once you're in range, you can hit the capture button and it grabs the height you at right now and puts it as your new target. Or you can just adjust it on the fly by adjusting it up and down with the little side harness. This column right here is your base cutter pressure. It pretty much sets up the same way. You can go on the field and cut cane at the normal speed. You'd be cutting that in that field condition. And you can hit the capture button and it'll capture the base cutter pressure you're at right now and puts it as your new target. Or you can just adjust your target by going up and down. If you click on the bar graph themselves, you can adjust the window span of which the gauge is actually reads in. So right now we add say 1000 at 1200 and at 800 there's your window. So if you want to increase that, put it at 400. Now we add 1000 at 1400, so it increases the span. This last column is your chopper pressure. And then you have two gauges on the side. You can set those to whatever you want. You scroll down, put it in anything you select on the bottom banner bar. This bar is the same throughout all three pages. If you have floating crop dividers, these two icon will go green when coating. Crop divider is active. The center one is your base cutter height. If you have contour base cutter height. When you go into return the cut, it will go yellow. And then if you have contour based cutter height, it will turn green whenever the system is active. Next one is primary fan. If you have your primary fan on, this will turn green. It's a fan fans on. Then this one, the elevator. The elevator is on. It'll also turn green. If you reverse it, it'll turn yellow. If you're doing a timed elevator swing which I'll show you later, it'll turn red. This one is engine fuel cruise. If you have engine fuel cruise selected and in and on this one will turn green. Reversing fan will turn will Be green when it's running and it'll turn yellow whenever you come down and you press the reversing fan. But so page two, this is your machine configurations. So the one with the crop dividers, if you have folding crop dividers, you can set your crop divider pressures and stuff. They'll have one additional page, this, this machine does not have floating crop divider, so you notice it's grayed out. But even machines that don't have floating crop dividers and contour based cutter height system, you still have end of the row feature and return to cut feature. This is how you enable it in return to cut and end of the rope. If you want to set your end of the row height, you just simply raise your machine up to whatever height you want to be at at the end of the row and then you just hit your capture button. It'll capture. So now if you go to operated configurables, these are configurable buttons. You have three on the front of your hydro handle, you have two on the side, and you have one configurable potentiometer. If you use the default settings that come from the factory, which will be located on your windshield right here, you don't have to acknowledge the check the check box on every key cycle. If you change from these settings, you have to. When you start the engine, this page is going to pop up. You have to acknowledge it saying I know that these are my new configurable buttons. You can change these configurable buttons to whatever you want. Just select one. And once you select it, you have to acknowledge it and accept it. You can also change these two or the potentiometer from its default. These buttons on the side G right here will be alarms. This is your chopper alarm. This is your base cutter alarm. If you don't want an alarm, if you know the point to where your machine's about to start choking, you can check this box and set your chopper pressure to 25 psi, for instance. And when the machine gets up to 2500 psi, the alarm is going to sound and then you'll know to slow down or something like that. You can do the same thing for the base cutter. The H icon on this page is timer settings. This is the setting for how long your page stays up whenever you make a change. So for instance, if I come right here, I change my primary fan and then I let go of everything. I quit touching it. It's the time that this page stays up before it goes away. There's some default settings but if you don't like them, say this page stays up for way too long and you want to go back to your home pages. You can just go here, time, go primary, set it for six seconds for instance. And then, and then now when I go to my primary page, when I let go of the button the knob, six seconds later the page will go away. That's how you set the timers operator time. And you can do that for your elevator page or engine page or crop the bottom feed rate, any of them. This button right here is I is for if I change this and acknowledge it and then I go back and I want to go back to my factory default settings, it'll change back to your original default sett so you don't have to acknowledge the screen anymore. Next one is your engine. The first one on top is auto fuel cruise. You have that box checked and you put your engine on Auto engine will run at 2000rpms. And then when the machine gets under high low conditions, it'll automatically go up to 2210. And when the load is reduced, it'll go back down to 2,000 of the auto fuel. This one's high idle set point. Let's say at high idle I want to reduce it to 1950 when I'm at high idle when it the engine will start running at 19:50. Same thing with mid throttle. When I'm in mid throttle, if I want to change the 1500-1560, the engine will go to idle once the machine comes neutral and you're not moving for a set amount of time. So we have this set, let's just say five seconds just for this. It it's in high speed. It went to neutral because the auto idle kicked in. And then once you start moving, it'll pick back up speed and you come back to neutral. After a set amount of time it'll go back to neutral. Let me go back to idle. So the next one is track bias. This is your track bias knob on a track machine. The way you set this is you go full speed and then back off a little bit. You don't want to set it at max propulsion, but just a little bit less than max. And you can adjust it to make the machine tracker looks greater. If you're in a field to where you're face cutting and you're using, you really need a different track bias to go from when you're cutting direction. So when you're coming back, you can set up two track biases and whatever which one you happen to be on that's the one it will use. On your configurable buttons you can select track bar as flip and you can use one of your configurable buttons to flip the track bar. So I set one of them up. So when I'm going one way down the field it uses this track bar. When I come back, it uses the other one. That's just a feature that you can use if you're doing face cutting and need two track biases. Max speed limit. You can set your max speed of the vehicle while you're harvesting and you can lower that and restrict an operator from going too far fast while cutting. And then you can go into your access manager and lock him out to where the operator can't change this. If you. If you're a manager you can set up a passcode. This next one right here is a steering aggressiveness. This is the steering aggressiveness while while the machine's in forward. So if I'm in forward gear and I'm moving, this is the aggressiveness when I'm steering. The next one on the bottom is counter rotation aggressiveness. This is when my handle is right here and I'm turning the wheel counter rotation. You change it. You can make it less sensitive or more sensitive. The next one is primary cooling. You can adjust your primary by just turning your just turning a knob on a console if you have it set up as a configurable or you can come to the screen and change it. So if I turn my primary on, you can adjust the speed. 690. 690. If I want to limit an operator from going no more than a certain speed, you can reduce his speed to where he can't max out any more than a certain rpm and you can also lock him out of on access manager to where he's got to run at this speed or less. You can also do the same thing on the low end. The way he's got to run it at a certain in a certain range, you can do the same thing here. Now the next thing is smart power mode. If you have this box checked when you have your your elevator off, the primary fan will go to this rpms. So when you come out the field, you turn the elevator off, the fan will automatically go to 500 or you can set it to whatever you want. This is just a fuel economy mode to save a little fuel. So your fan goes to a lower speed on the headlamp. The next one is elevator sync. When you have this checkbox checked, this one right here, you have it Checked. When you swing the elevator, your primary will turn. With your elevator, you have it unchecked. The elevator turns by itself and the primary does not turn with it. You have to manually go to your switch and turn your primary on. The next one is elevator at the top. Right here you have a timed elevator swing feature. If you have this box checked and you have the alarm checked, when you press the elevator swing switch soft, the elevator will turn. But when you press the switch hard and the red icon is blinking, it will turn 90 degrees. You can do it without the alarm and it'll still flash and do the elevator swing. Timed elevator swing. It rotates 90 degrees per button. Press if you have your fuel cruise on or if you have full throttle. Sometimes the time will need to be adjusted. If your elevator is swinging degrees, you want to reduce this time so that you start off on one side. When it gets to the center, if it overshoots, you reduce it. If it's undershooting, you increase it. That's how you set the time for the elevator to swing to a 90 degree position below it. Right here. If you have the elevator speed option that would be in this, said to have a checkbox to turn it on and and adjustment for it. Information page. This is the Mac page. We'll call it. This one right here would be machine hours. These two columns are not resettable. They just continue to count up. These two are resettable. So this machine's got 3.3 machine hours and 2.8 miles of distance. So if I hit the machine in the morning, I want to reset it. See how I'm doing for that day. I press this button, pull it down for about three seconds, and these two columns will play around. So my machine hours, this is my harvesting hours. This is my maneuvering on the headland hours. This is my transport hours, and this is my hours waiting. And now on the bottom they have the elevator hours. They also have it on this page. So if you're on this page, you can adjust triple starters. You have to have your hours page up. And then if you go here, you can adjust your whatever timer you want. These three on top are fixed timer. These three, you can change them to whatever auto track hours or whatever you want for the bottom three. So those are adjustable. And this is your hours page also. So once you change that and you're on your, let's say your run page. When you, when you press right here, those hours, whatever you select on the bottom, these three can be changed. When your engine is off and your keys on the hours page will come up when you want. When you're running this icon will but you can press it and go back to them. So also on this page you can set three shifts. You can set what time the shifts start and adjust your counters. The next thing I'll go over is the page 3 of 3. These gauges are programmed. You can program to whatever you want to put them at if you want to, however you want these gauges to be set. So when you go to this page, coming default from the factory will flip your three home pages on configurable button number one. So if I press button number one right now, they'll flip home pages one, two and three. Another thing that you have is your diagnostics. So if you press your diagnostics page, this is your diagnostics readings. This page I can go through it and you can you have any problems with anything, you can go in here and check certain things. So for instance, if I select topper and I hit enter and I hit my top array switch is open top arrays output is inactive. So if I hit top arrays I know my controller has power. Now I know my controller sending out power. So you can use it for troubleshooting any issues you think you might have. You can go here and go to diagnostics, you can go to steering elevator controls and stuff like that. This button right here is for calibrations. If you have to calibrate anything, let's say base cutter height needs to be calibrated or primary extractor. You go here, you click perform a base cut a height. Whenever a sensor or component is replaced, you you go through it. It's going to tell you to bring your for this one it's going to tell you bring your base cutter to the lowest position, highest position. It's going to kind of step you through it and then you just accept on each step. If you want to go to your access manager you can go here and you can sel change password and lock lock an operator out of just each individual. If you want to lock him in field crews or anything, you can lock him out of put a password and you do that on this page right here. Access Manager you can also when we were talking about the this data right here, you can also download that information using a USB stick. You just put it in the side and kind of step you through it. You got to hit transfer so you can get this data of how long an operator was waiting and stuff. You know, all that information can be downloaded into a USB stick and that should be about it. Thank you.
More from Francisco




Desh Ke Superhero | Mr. Madhava Rao | Faster Pole Installation with GreenSystem™ Post Hole Digger



En CasaToro John Deere encuentras el respaldo que necesitas para mantener tu maquinaria lista



