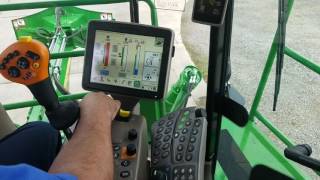
This is a YouTube video titled "CH570 Floating Crop Divider Setup and Adjustment" created on November 18, 2016. The content is a detailed instructional guide explaining how to configure, activate, adjust, and calibrate the floating crop dividers on a CH570 vehicle, focusing on operational steps and settings for optimal performance in agricultural use.
I'm going to do a short video clip explaining the floating crop divadas on a CH570 vehicle. We'll go over configuring, activating and adjusting floating crop to bottom system. The first thing you need to do is make sure your floating crop dividers are enabled on your display. So you want to go to your second home page. Go to D floating crop dividers and enable the left and the right. Or the left or the right. You don't have to can just have one floating crop divider. So in order to activate the floating crop dividers, there's a couple different ways you can activate it. First thing you need to do is make sure the floating crop divider switch is on. If you notice the floated crop divider icons are flashing. So that means they enable ready to be activated. So you can activate your floating crop dividers by simply pressing down on one crop divider, which puts them active. Or you can hit the all on button on the configurable button, which also will activate the crop dividers and the base cutter at the same time. If you notice they flash in green, that means they're active, but they're in a pause mode because the machine, the vehicle is not moving forward. So once you start moving forward a little bit, they're now active. So in order to disengage your floating crop dividers, you can. When they're active, if you double click up on your crop divider, they will come up to the end of the row setting and it will stay there. Or you can go to the two end of the row crop divider which would disable and keep them up. Or you can hit your all up which will bring you crop dividers and your base pedal to end of the rope. If you simply have crap divider is active and you press your just your up button, one click crop divider will come up. But after so many, after three seconds it'll just go right back down. So that's basically to shake a shuck off, go over a rock or whatever in the field is if you hit it up, it'll go off for a little while and automatically go back down. So when you float and crop divider page, you can enable one. So if you see one is on standby ready to go, the other one is off, click both of them. Both of them are going to turn on. When I double click down or hit all down. You can run on one, just one crop divider. If you face cutting in the field and actually want to float the inner crop divider going One way and turn around and float the opposite crop divider coming back the other way. We added a little feature in there that kind of has a toggle. So you can set up any configurable buttons to be that cropta, bottom float or toggle. So you just click on any button you want to use on your footing crop divider toggle. Enable it. So if I hit my button, I set up my configurable button. If you notice it switches back and forth from either your left or your toggle. So if I'm on my run page and I put my craptivatis to float, only one's gonna float. The opposite one's gonna be off. So if I hit all down, one of them's floating and then I come back and my end of the row setting and then I hit my toggle, it flips to the other one and the other one is going to go into float mode. The opposite one goes into float mode now. So the next thing you need to do is set your floating crop divider pressures to make sure they're rotting on the ground but not digging too deep. Having these crop dividers pressures set correctly is really important if you have contour base cutter height control system, because the floating crop dividers will need to follow the ground for the contour system to work correctly. So in order to set the pressures, you want to go back to your second homepage, go to defloating crop dividers. So to set your floating crop dividers, you can simply hit up and down on the arrows to set your crop divider pressures. So if you bring it all the way up to 100, that would make the crop dividers lighter. And if you go down towards zero, that makes them the crop dividers heavier. So a percentage from 0 to 100. There's an also the factory default that you can just hit that basically just center symbol that 50, which comes off of the calibration of the floating cavity bottoms. So a way you can set your fluted crop divatis before you actually enter the field is turn your fluted crop dividers. You activate them if you notice that they're still in pause mode because they blink in green. They're ready, they're activated, but they're still in pause. So you can only do this by creeping the vehicle forward a little bit to get them out of that pause mode. So what I do is I take them, I lighten them up a lot. And then you take your base cutter, you run them and push the crop dividers up. And then when you Lift up on a vehicle, the floating crop dividers will kind of hang up. Then you can start hitting down until you see the crop dividers fall to the ground. And then I then you know your crop dividers are floating correctly. It's a good way to set it before you actually go into the field. The next thing you really want to make sure is your crop dividers are pinned correctly. This is also very important for if you have contour based cut of height control. I think the best way to find make sure your crop dividers are correctly it's just simply come into your gauges. You want to find the crap divider position at the left craptivada position, right. And you cut cane while you're cutting cane. If you notice that one of these is constantly hitting on 0, constantly hitting on 0 or constantly hitting 100, the contour base cutter height control system will not work properly. So if you while you cutting, if your left or your right is going to 0 or going to 100, you need to re pin your crop dividers to where the crop dividers are running in range. Also they have some advanced settings. If you go to the crop Divata 2 page and go to your set point H. So these are some advanced settings for someone that wants to operate a little differently from the factory defoe. They got these neat little buttons on the side information pages. So this one is floating crop divider resume enabled box. You can check the box, you can check to enable the resume after pause feature for floating crop dividers. Basically what that means is if I have this box checked and my crop dividers are in flow, my crop dividers are in flow. And like I showed you earlier, if I lift one of them up three seconds later the crop divata will fall back down. So if I come, if I go back to this page, go to two go to my set point. If I disable this when I lift that right crop divider, if I just want it to stay up and not go back down, I uncheck this box so it won't go back down after a time setting. So it just stays up the next the next part here is your crop divider sensitivity. Quick information adjusts the sensitivity of the floating crop divider. Sliding to the right increases the sensitivity. So it's just the speed at which the crop divider is going to go up and down. And rod, if you happen to change your crop dividers by adding weight to them or anything like that, you also have to do a crop divider calibration. You simply just go to your crop divider page. If you go to your little wrench, hit the down arrow. You can go to your calibrate your left crop divider position. And then what you want to do is basically calibrate your pressures, your left and right crop divider pressures. So if you add weight to the crop dividers or take your outer screw off, or add an auto screw, a vehicle that didn't have it before or just weld on it, add some type of weight, you want to go in here and run this coptivada pressure. It kind of tells you as you go through it how the performing engine needs to be at high idle and stuff like that.