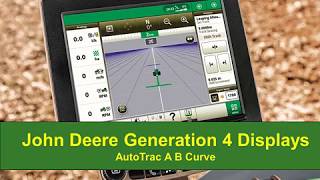
Two John Deere technicians walk through creating an AB curve on a Generation 4 display using AutoTrac. They show how to set up tracks, extend lines, and enable auto-tracking so your equipment follows the same path every pass.
For this video we are going to cover John Deere Generation 4 displays and autotrack AB curves.
So let's go ahead and create a new AB curve. We'll select our set track button and then new track. So we'll select a B curve and then you can see our track name defaulted to track two, which we're going to keep. And let's change our field to field north and select okay and we'll select OK again. So you can see we must select start to begin. And let's go ahead and do that and then increase our vehicle speed and I'll zoom out. So one thing I want to show here initially is that at the beginning of our line, we're going to add a 90 meter or 300 foot line extension to to that beginning point. The reason for that, as you come back around in the field to line up with that line, it's a lot easier to do that with that straight line extension. When we get to our end of the line and press done. We're also going to add a 90 meter or 300 foot line extension to that as well. And you'll notice that as we end our line. So when we're in this curvy mode right here and we can easily toggle between the two, the line we're creating is going to follow the path of the tractor. So as we turn, that line is going to follow our tractor path. When we select this straight button, we're going to snap a straight line from when we've selected that button to wherever the tractor is. So you're going to notice as we drive the tractor, that straight line is changing. To get that straight line to be solid like our curve mode, we toggle back to the curve mode or select Done. In this case, we're going to toggle back to the curve mode. You can see that now the tractor is driving and our line is following that path. So let's go ahead and select Done and then stop our tractor. You're going to Notice that that 90 meter 300 foot line extension got added. And you're also going to see that we're now in 3PI and that we need to press the resume switch to activate auto track. So now that we've pressed done, you saw the calculating curves. We're going to generate five tracks in both directions. So we're going to generate five tracks to the left and five tracks to the right. Let's go ahead and increase our speed and press the resume switch to activate auto track. So you're going to see when we get close to the end of path, we're going to get a end of path warning. One thing I want to show here is that as we get closer to that end of path, you're going to notice that you see a white line extension. This isn't an additional recording, it's simply helping us to line up on that straight section. So once we've added that straight section, once we get past the end of this, you're going to notice that we can keep auto tracking and that there's an additional line extension to help us better line up on this guidance track. So you notice we're past the recorded line and we're still auto tracking. This is just to be able to continue that line for our convenience. So we can press the resume switch to activate Audrey track. When we have the white line extension and you'll notice that we're one, we'll go ahead and stop. We're one track from our original one, and the relative direction of that is west. So let's increase our speed and then let's go ahead and drive towards the end of our AB curve. You're noticing that the track number is changing as we're driving. When we get to this last track here, we're going to see additional tracks generated. So we'll go ahead and stop once we get to the end of the original five generated tracks. And either direction, 10 additional tracks are generated as we approach those five, so now we're going to have 10 additional tracks. Say we started the tractor up a mile away from the last original generated track, the lines are not going to generate to you. You have to be within a quarter mile of the last generated track for the lines to generate to you. So that's just something to be aware of. If you're far away from the field where you created these or you last generated them, they're not going to generate to you if you're within that quarter mile, they will generate, but it may take some time if you're towards the end of that quarter mile range.
To change AB curve line extension settings, go to Autotrac Guidance Settings tab down to AB Curves. Toggle on or off extensions as desired. Changing this setting does not add or remove extensions to previously recorded A B curves. Extensions may need to be turned off to prevent lines from crossing each other. If lines cross, the remaining curves may fail to generate. Thanks for watching.