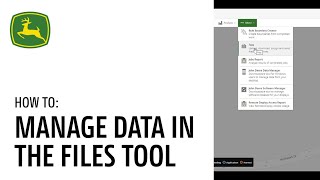
This is a YouTube video titled "How To Manage Data in the Files Tool | John Deere Operations Center™" created on April 27, 2021. The video provides a detailed tutorial on using the FIOS tool within the John Deere Operations Center to organize, manage, and take actions on data files, including filtering, downloading, assigning, reprocessing, transferring to equipment, archiving, deleting, and uploading files. The content is instructional and focused on agricultural data management tools.
Hello. In this video I will show you how the FIOS tool helps users organize, manage and take actions with the data in the organization. This is the storage spot for all data uploaded, including files uploaded through MyTransfer Data Manager, wireless data transfer and Generation 4 display streaming data. To get to the Files tool, login to your operations center organization. Click on More, then select the files in the drop down. Let's review the available section. You have the option to filter your files by date created, client farm, field, or file type under Date created. You can also use a custom date range to filter your files. For this example, let's filter using custom date range. There is no limit on how far you can go back in time. If you no longer want to use a filter, click on Reset Filters located at the bottom of the page. Once you select a file or multiple files, you will have the option to download, assign, reprocess, transfer to equipment and archive. Let's review each download. You can select a single or multiple files to download to your computer so you can have the raw data. Please note invalid files are not downloadable and can only be deleted from the Files tool. Assign in order to assign a file or multiple files to one of your partner's organization, the user needs to have the proper access level. Select the partner and click Assign. By default, assigning a file will keep a copy of the file in your organization. If you no longer need access to the files upon transferring it, you may unselect the checkbox. Reprocess Reprocessing allows to send one or multiple files back through data processing to create new operational maps, totals, legends, and other field specific details. Reprocessing tends to resolve most documentation data related issues. Any valid file visible within the Files tool can be reprocessed. Please note if the user reprocesses a file for a field, it will overwrite any pre existing agronomic data changes that was made for that field. Additionally, if multiple fields were associated to that file, those fields will also be reprocessed. Transfer to equipment. You can select one or more valid setup or prescription files to send to equipment. Only equipment with an active JDLink subscription, an MTG, and a John Deere display can be selected for sending data via wireless data transfer. The machine will also need to be in an area with a good cellular coverage to receive the file Archive. The use of Archive is to easily manage and clean up the actively used files list. This option may be used for files that are currently in an available status. Multiple files may also be archived at one time. Please note available files are automatically archived six months after they have been processed. Let's review more details about the Archived section. When the file is archived, the file is not deleted. It will still be available in the Archived section and you will still be able to view the documentation and set up data in Field Analyzer, Land, operations center, mobile, etc. Here you will also have the option to filter the archived files. You can delete a file or multiple files at once. First you will need to archive it. Then under the Archived section, select the file and click Delete. Please note once you deleted a file from the archives, you will not be able to retrieve it. Deleting a file does not delete the ergonomic machine or setup data in Operations center, web or mobile. You can make archive the files available again by selecting it and click on Make Available in the Files tool. You will also be able to upload files as long as they do not exceed 100 megabytes. Click Upload Files, then drag and drop the files or click on Choose Files to Upload to browse and select your files, then click Upload. For more details and other ways to upload files, please refer to the how to Upload the Data into Operations center video link in the Comments section below. Thanks for watching.