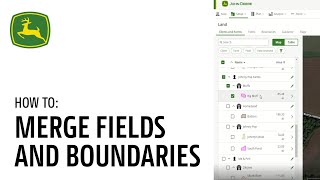
Learn how to merge fields and boundaries in John Deere Operations Center. The tutorial walks through merging multiple fields, field assets, agronomic data, and boundary shapes, plus how to unmerge them if needed.
We are going to detail how to use the Merge feature to merge fields and field assets along with any agronomic data associated with the fields. We will also show you how to merge a boundary shape into another boundary. There are a handful of merge features that can be used such Merging multiple fields at once, Merging fields that do not have active boundaries, previewing your changes on a map before the merge is complete, and unmerging fields in the Field Detail panel. We'll begin by giving an example of how to merge a field. Merging fields allows the user to quickly move all field related information from one field into another. Navigate to Land under the Setup tab in Operations Center. Note that you must be in the Clients and Farms or Fields tabs to access the fields Merge functionality. Check Mark all fields that you would like to merge by check marking the box next to the field name in the Fields list. Once you have selected the fields, select the Merge button in the top right corner of Operations Center. In Before Merge, these are the fields that you selected to include. If you selected an incorrect field, use the X button in the last column in the table. You can also add a field to the field merge by by selecting Add another field at the bottom of the table In After Merge this is the field that all the following field assets will be found in after processing the merge. This data is made up agronomic data, boundaries, guidance lines and flags. Confirm on the maps below the before and after sections that the correct fields have been selected in the above steps. Then select the Merge button at the bottom of the window. The merge process will take some time depending on the amount of data that needs to be merged into the boundary. Also note the field that was selected to be kept in the After Merge section will be the only field visible in your Fields list after the field merge. Next we will detail how to unmerge a field. It can be easy to merge a field by mistake. Fortunately fields and boundaries and their data can be put back into their original place again. Ensure you are in Land and in the Fields tab, select the merged field that contains the field you wish to unmerge, which will open the Field Details panel and scroll down to the Merged Fields section. Click the Dropdown. Within the drop down you will see field details of each merged field. Select the Unmerge Field button to separate the specified field. The Unmerge process will take some time depending on the amount of data that needs to be unmerged into the correct field. Next we will talk about merging boundaries which is a separate process from merging fields. Switch from the field Details tab. To the Boundaries tab, select the field that contains the boundary you intend to merge. Then mark the intended boundary and select the Merge button. The Merge window will appear in the what field will the boundary be associated with? Box, Identify which field you wish to merge the selected boundary into. Then, in the which boundary do you want to merge into? Box, you select which boundary in the selected field does the boundary shape need to be merged into? If there is only one boundary associated to the field the boundary is being merged into, this drop down will be automatically populated. Once the two dropdowns have been populated with a field and a boundary, you can preview the change using the Preview map in the window. Select the Save button and your boundaries will merge. Thank you for watching.