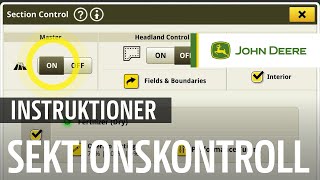
A step-by-step guide to using Section Control for field management. Learn how to set field borders, configure headland offsets, and adjust overlap settings to optimize your equipment's performance.
With Section Control, you can handle up to 255 sections to reduce overlaps and save input costs. In this video, we'll show you how to use and optimize Section Control and how to set a field border as reference for your headland. From your main Run page, go to the Section Control settings either by selecting it in the main menu or if you have configured your Shortcut bar by clicking on the Section Control icon in the Shortcut bar, click the master switch on the left to activate Section Control. Now when you go back to your main run page by clicking the X, you will see that Section Control is on while driving. If you want to change some settings like the Overlap, click again on the Section Control icon and go to the Overlap settings by clicking the Editing button. You can change the Overlap settings by clicking underneath the coverage overlap. You have different options to choose from depending on your field layout. Click on Save and you will get back to the Section Control main page. There is a Performance Tuning button too. Here you can set up the distance and speed you prefer depending on your field conditions. You will find more details about your correct choice in the Help Files that you can reach by the question mark button next to the tab description. Close all these windows Looking at the main page and driving again you will see the result of your setting change. If needed, change the settings again. You can further optimize the usage of Section Control by using outer and inner boundary of your field as reference and set the width of your headland to do so. Again, navigate to the Section Control settings by clicking on the Section Control button on your shortcut bar and turn Section Control on. Then activate the Headland Control and click on Fields and Boundaries. Under the Headland Control main switch. In the window that opens you can see your field boundaries. In this case we have an exterior boundary which we can use as reference. To open the boundary settings, click in the white field. Now click on the Edit button to set your headland. In the Headland menu you can choose between Constant, top and bottom and Driven. In this example we are working with a constant offset. Now enter the offset you want in the small box by clicking on Save in the bottom right hand corner. Your boundary settings are done. Going back to the main run page, you will see an internal boundary mark in yellow with the offset you decided. As soon as you enter the internal boundary mark, Section Control starts automatically.