
John Deere CEE Controls Overview
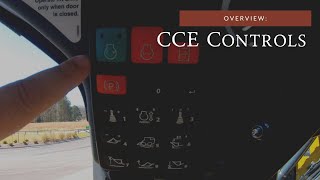
Drew Shirley from SunSouth walks through the controls on a John Deere compact track loader, covering quick tacks, hydraulic settings, ride control, and an in-cab camera system exclusive to the machine.
Hi guys, this is Drew Shirley again with SunSouth. Going to go over some controls with you on our compact track loader here, show you how to make all these great functions that we have work. So first thing we have here is your quick tacks. You got lock and unlock. Pretty self explanatory. You'll hold that until it unlocks and then when you get under your implement, you'll hold this down until it locks out. Until you see your red indicators locked down and you hear the auditory click lights. Pretty self explanatory. This machine here has the LED package. So you can actually go in and turn on and turn off which lights come on at which position. This auxiliary in and out here, this is for a fourth function. So mainly a cold planer. If you're using a cold planer and you need to turn on your fourth function to run, you can do that there. This is a really great thing. Not everybody in the industry has this. This is a reversible fan, okay. So you can turn it on, you can turn it to auto or you can turn it to straight reverse auto. You can set different intervals in the control panel on how long it runs before it actually cuts on. Okay, this is a very important one on this machine here. This here is where you basically turn on your high flow hydraulics. So if you don't require high flow hydraulics, you don't have to run them. But when you have an implement that requires them, you turn that on. And this of course in the south is the very important air conditioner switch. Here we have our air mixer and our fan speed. Now we're going to get to the sealed switch panel here, which basically is really sealed. So it's out of the way of dirt, dust and debris. And it's not a. It doesn't fail near as quick as the other rocker switches do. So this one here, that's going to be your run. You're going to hit this button here once. You're going to type in your code with these numbers here you have one through nine, comes with one owner code and five operator codes. It will actually save operator codes, settings. So if one guy likes it on one setting versus the other guy, whenever he types his code in, it will go right back to where it needs to go. This is your stop switch, of course, engine stop. This is how where you basically can enable the hydraulics on the machine if they've been disabled. For example, you open the door or something like that, then you have your park. Now, probably one of the most important pieces on this Machine here is button number one. Button number one is going to adjust your sensitivity settings. You have high, medium and low. Basically, the low setting will actually decrease the amount of power on the machine to 80%. So if you're out and for some reason you're not getting enough power and you look up and you're on the first setting, you need to move that to two or three. The number two button here is accelerate decelerate. So a lot of your Dozer operator guys are familiar with this. Currently it's set on when you push the foot pedal down, it will accelerate the engine. But Dozer operators are usually used to decelerating. So that allows your operator who's been on a Dozer, to be familiar with what settings he can use. The third setting is basically, if you don't have E hydraulics, electro hydraulics on the machine, you don't have this setting. You can't change it. All of the deers come with electro hydraulics. Our competitors use different settings. So basically what you can do is you can go in and you can adjust it from ISO industry standard, or you can do it from H pattern, which is, you know, basically if your guys used to running case H equipment, then that's what it would do. Number four is going to adjust the boom speed, how fast it comes up, how fast it goes down. Once again, if you're in the first setting, it's going to reduce production by 20%. So again, if you're not digging or picking up as much as you need to, make sure that setting there is on either second or third level. Number five is a button here. That is your ride control. What ride control is, is it allows us to give you that suspension type feel when you're going across the job site without actually putting a spring system under your machine. So you're going to click it one time and that's going to actually enable it in standby mode. Then when you want to activate it, you're going to hit the left trigger on your joystick. The reason you don't want that all the time is if you're not traveling from one side of the job site to the other, you don't want that enabled because it's going to affect your loader operations. The other one here, this one here, is your rollback. Basically it's going to adjust the rollback and tilt lockout. 7, 8 and 9 are going to be. They're really, really awesome attachments. They're basically return to load, return to dig, and return to position. Now what that means is let's say you're, let's take a guy who is loading pallets of sod onto a truck. You're going to take number seven here and you're going to set it at the height that he needs to be to load that truck. And when it is enabled, when he picks up on that load, it's going to go to that height automatically. Same thing with the return to rollback when he positions his forks on the ground. Once that is set, the forks are automatically positioned to allow you to run in that pallet. And number nine is return to dig. It's going to allow you to set that boom to actually return to that position when it's enabled without having to be so precise. And for a guy who is loading and unloading a long time, it really decreases operated fatigue and it increases production. Right next to this, you have your throttle here, this little wheel dial knob that actually increases your throttle. One other industry exclusive that we have that I want to talk about today.
Is our in cab camera system. Now we aren't the only ones that have in cab cameras. We just have the best in cab camera. So we have a designated screen for our in cab camera, which means this camera, if you can see this little wheel spinning up here, this camera, all it does, all the time is show you what is at your rear. Some of our other competitors do not have a designated screen.
So when you actually pull the lever.
Back to go in reverse, it changes over to your reverse camera. And we all know that sometimes we need to see what's behind us. We need to see where our, the back of our machine is, even though we're not going in reverse. Whether you're spinning to the left, spinning to the right, you don't want to spin into a tree, spin into a house, spin into somebody. So we have this as a designated screen to where you can constantly see where you're at. One of the other things is because of our hood design, because of our tri cool system and the way we're able to mount our camera at an angle. As you can see here, you can see further and you can see the back of your machine. So a lot of our competitors, you can't even see the back of our machine.
And therefore you don't really know what.
You'Re close to or what you're not close to. So it's kind of a point of reference that allows you, like I said, to not damage as much stuff the machine or people, and you don't hit as much stuff. So once again, industry exclusive, designated camera, screen. All that's on it is the camera all the time. And when I say a dedicated screen, you have your other controller up here with your gauges, basically your most important temperature and fuel. Then you have a digital def gauge you can actually scroll through here. You got your hours, your batteries, your job, hour code, hydraulic temperature, engine water temperature. You can actually check all your codes and everything through here. You can set up everything that you need to set up as far as owner codes, courtesy lighting settings, basically fan reversal intervals. All of your settings are done through here. Once again, our competitors, they share that screen. And when you try to put everything in there, you don't get it all in there. So once again, the dedicated camera system and the separated gauges. Once again, I'm Drew Shirley with SunSouth. When you think equipment, think SunSouth.
More from Francisco




Desh Ke Superhero | Mr. Madhava Rao | Faster Pole Installation with GreenSystem™ Post Hole Digger



En CasaToro John Deere encuentras el respaldo que necesitas para mantener tu maquinaria lista



