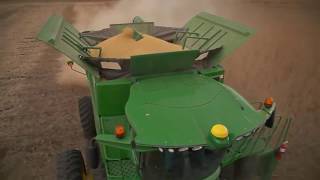
This is a YouTube video titled "John Deere Combine Go Harvest: Yield Calibration Procedure" created in January 2018. It provides a detailed instructional guide on performing yield calibration for John Deere S Series combines, covering safety instructions, temperature and moisture calibration, mass flow vibration calibration, and weight calibration steps to ensure accurate harvest data. The content is technical and focused on agricultural machinery operation and calibration procedures.
Performance, productivity and exceptional harvest experience. Go Harvest. Get the most out of your S Series combine today before beginning any procedure, follow safety instructions and understand all safety decals according to the operator manual. Always use seat belts when operating the machine or riding as an observer. If you are parking and leaving the machine, move the multi function lever to the neutral position, Disengage the harvesting unit and separator and shut off the machine. Apply parking brake, remove the key and lock the operator's cab. The following video is a quick reference guide for the yield calibration procedure on S series combines. Temperature and moisture calibrations should be completed before attempting an accurate yield calibration. The moisture sensor is located within the elevator mount unit on the side of the clean grain elevator. The mass flow sensor is mounted on the transition housing inside the grain tank. There are four steps to an accurate yield calibration performed in order. They are temperature calibration, mass flow vibration calibration, moisture correction and calibration and weight or yield calibration. The temperature calibration should be an accurate measurement of the surrounding air temperature. This measurement should be taken at least once a season. Be sure that the moisture meter is empty. From the combine homepage, press the B icon. Next, press G for user calibrations. Then select Moisture Sensor Temperature from the calibration list and press Accept. Use the plus or minus button until the sensor temperature matches the surrounding air temperature. Select Accept when complete. Next calibrate Mass Flow vibration. First select the correct crop type. Because this calibration will be saved under the crop identified in the combine setup. This calibration also needs to be performed with the correct head on the combine for the crop being harvested and be performed for each type of crop. From the combine homepage, press the B icon. Next press G for user calibrations. Then select Mass Flow Vibration from the calibration list and press Accept. Follow the instructions in the calibration. Engage the header and separator. With the header in the harvesting position, take the engine speed to high idle. Be sure the header is not resting on the ground and that the grain tank is empty. Temperature calibration should be performed before the moisture correction and calibration. Make sure that the moisture sensor metal plates are clean at the beginning of each season. The plates can be cleaned with glass cleaner or water. Calibrate moisture for each grain type harvested from the combine homepage, press H, then press D for moisture setup check. Mark the box labeled Moisture Correction. Next, make sure the numerical box reads 0.0. If it does not, highlight the box and change the number you may return to the combine homepage. Harvest a load of grain and note the average moisture on the harvest monitor. For example 13%. Randomly sample the grain from several locations in the grain tank to collect an average moisture sample. Then measure the average moisture of this sample using an accurate and trusted moisture tester. For example, we'll use 12%. Return to the moisture setup and enter the difference in the moisture Correction numerical box. For example, the moisture tester 12% minus the combine displayed average moisture equals minus 1.0. If the moisture readings become erratic in high moisture grain, clean the moisture sensor with water or glass cleaner to remove buildup from the metal fin shaped capacitance plates. Things to Know before performing the yield calibration Temperature and moisture calibration must be performed before weight or yield calibration. Weight calibration loads should be uniform in size and be a minimum of 3,000 pounds. A maximum 13 calibration loads can be saved for each crop type. For more accurate results, use four to eight calibration loads and harvest each calibration load at a different flow rate, e.g. 2, 3, 4 and 5 miles per hour. Calibrate for each crop type. Defined Yield Calibration Press the B icon from the combine homepage. Next, press G for user calibrations. Then select Yield from the list of calibrations and press Accept. The next screen will allow you manage your existing calibration loads, start a new calibration load, or cancel the calibration process. Select the next button to begin the calibration and be sure that the grain tank is empty. The display will list the first available load number. Begin to harvest and unload only after accumulating 3,000 pounds or more. Later, unload and record the actual scaled weight. Select the next button and enter the actual scale weight in the numerical box. Return to the Yield calibration page by pressing the Return icon. Then press the next icon to repeat the steps at different ground speeds. After completing your calibration loads, return to the Calibration management screen and check Mark the boxes next to the load ID numbers with the percent between the range of minus 3.0 and 3.0. Now press the calibration icon. Once the calibration is completed updating, press the Accept icon to exit. To delete unwanted calibration loads or make space for new loads, press the Delete icon next to the corresponding load id. This will permanently delete the calibration load. For a successful weight calibration. Make sure the moisture meter and mass flow sensor are clean before calibration complete as much of the documentation setup in the display as possible before harvest calibration. Loads should be completed near the same time. Once per season per crop, Treat wet corn and dry corn as separate crops. Calibrate in as uniform a crop as possible. Avoid calibrating when opening up a field. Calibrate to an accurate reference scale. Check and confirm calibrations from time to time during the harvest season. Do not unload on the go while calibrating. This video is intended to be a quick reference for completing yield calibration on the S series combines. For further and more detailed instructions, please consult the operator's manual or contact your John Deere dealer.