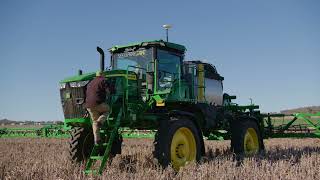
John Deere walks through the See & Spray Select system, showing how to set it up and use the app to control nozzle configurations. The system lets farmers spray only where weeds are, cutting herbicide use and costs.
This is a series of videos on See and Spray Select. It is designed for existing customers and new customers to see and spray to educate on how to set the system up, what the components of the system are, and how to get the most in terms of efficiency and productivity out of your machine. In this video, I want to run through the setup of the John Deere See and Spray select system on our display. One thing to take note of while I'm going through this is just how simple the system is to set up and how intuitive it is as well. So first thing I'll do is go into the See and Spray app, which is on our machine Settings page. And this is the basic setup of See and Spray here. So we've got four setup pages to start with. First one is broadcast modes or fallback mode. So this is what we want the machine to do when we're out of one of our parameters, such as speed or boom height. So when we pick broadcast here, what that means is every time we go into fallback mode, the nozzles will just broadcast spray. So they're on all the time. If you pick off, it means when you go into fallback mode, the nozzles turn off. We also have a sensitivity for that trigger level, just low or high. So if we pick high, we don't have to go outside our operating parameters very much for it to come on. If we pick low, the sensitivity is decreased, which means we have to go outside those operating parameters a lot before we actually go into fallback mode. So that's the first thing we've got to do. Second thing is spray sensitivity. So this is pretty straightforward in terms of we're just one to five. As we go lower, we're chasing bigger weeds as we go higher in our sensitivity. When we get up to five, we're chasing very small weeds. Typically, people spray around that three to four mark. What does happen as you increase your sensitivity setting is false triggers or the machine firing at shadows or reflections occurs. And this is common with all camera sprays. So you will get smaller weeds, but you will increase the chance of false triggers occurring. So, like I say, most people typically operate with that three as they're setting. Third one here, and also the fourth one is to do with how big that box is on the ground. We're going to spray in terms of how wide it is and how long it is every time we see a weed. So if we pick nozzle coverage, this is how wide that box is going to be. So when we pick single, as you can see in the diagram here, we've just got. We see one weed, we have one nozzle coming on. Obviously, if you had multiple weeds, then you would have multiple nozzles coming on, but one nozzle will come on just to spray one weed. So this works well in terms of when you're chasing small weeds where coverage is not as critical, and when you're also trying to reduce the amount of chemical you're using. When we pick overlapping, similar concept, but one weed, we always get sets of three nozzles coming on. So this makes that box wider. So once again, if you're worried about your coverage or if your boom's unstable in terms of you're in rough country and it's bouncing around, then we would recommend using the overlapping mode. It will give you better coverage, but will also mean you will use more chemical. So that's the width of our box. The second one is how long that box is we're going to spray with. So as you can see here, we've got 0.4 of a meter, 0.9 or 1.5, small, medium or large. So that's basically we turn on in front of the weed, then we spray after the weed. What's that total distance from front to back. Once again, in conditions where you're after better coverage or where you may have. You're worried about your boom being unstable, you would go from up to medium or then up to large. So they're the four main settings. We also do have a couple of advanced settings. And to give Australian farmers a wrap, these have been introduced, especially this dust one from requests from farmers in Australia. So basically now what happens is when we put dust detection in auto mode, if a camera's view is blocked by dust, that camera or the nozzles associated with that camera will go into fallback mode. So you can turn this off altogether. So it will spray normally or have it in auto. What. What typically would happen here is the. Not the nozzles and the camera behind the wheels, where we have a lot of dust, will be going into fallback mode in dusty conditions. The last one here is lighting, and because I don't have the engine on, it's greyed out. But basically we can turn our lights on or off. And we also have an auto mode, so we have light sensors on the boom, which when the lighting, the sunlight gets below a certain level, when you're in auto, the lights will just come on automatically. One thing I will say is when you turn your lights on, it does change the software in terms of it changes the way it looks at weeds because of the light versus direct sunlight. So if you have your lights turned on during the day, you will have a possibility of missing weeds because the software, when the lights are on, is designed for night spraying, not day spraying. So that's it for the See and Spray app in terms of See and spray specific settings. If we check on our nozzle turret here, we go into our nozzle setup. So when we click on here you can see we get to choose whether we want to be a broadcast sprayer or or see and spray. So we always broadcast out of our front nozzle or we refer to it as our A nozzle in terms of our rear nozzle or B nozzle. You've got two choices. You can either be broadcast or it can be see and spray. So that's realistically how we turn see and spray on or off. We also have the option to spray broadcast out of the front nozzle and see and spray out of the back. So this is that a B mode. So you can be doing, say, a light rate out the front, say 50 litres per hectare, and you can be doing a targeted spray out of the back. Say you've got big weeds in the paddock, you turn your sensitivity down and you chase those big weeds with a targeted spray, you might put another hundred litres on them. We are only one solution tank and one pump, so that means we can only put one product out at a time. So whatever's going out of the front nozzle will be going out of the back nozzle. What will vary is the rate. One thing that's critical to know about this is nozzle selection is important in terms of the rates you want to put out. So if you want to put 50 litres out of the front nozzle and 200 liters out of the back, your back nozzle needs to be roughly four times the size of your front nozzle. If you have an O2 in the front and an O2 in the back, you won't get that difference in what the the system will spray. So that's the the nozzle set up there. So as you can see with the See and spray system, the setup on this display is very simple, easy to use. It's the touch of a button. We can change from a broadcast sprayer to a see and spray machine simply by pressing a button. We don't have to get out and make any physical changes to the machine. We simply just use the display play. Very easy to use, very simple to use, not too hard for anyone to pick up.