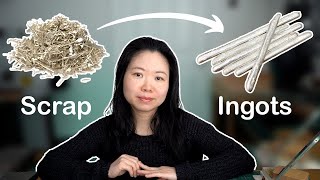
Haiyi Tan shows how to melt down sterling silver scraps into ingots at home. He covers prepping scrap, applying flux, melting at 1640°F, pouring into an oiled mold, and pickling the cooled ingot. The process loses about 1 gram of metal to oxidation.
Chapters
Recycling sterling silver can be a very sustainable way to reuse and repurpose the clean silver left over and offcuts from different kinds of projects. Sterling silver has the lowest melting point compared to any other precious metal such as gold and platinum, so it is not that difficult to recycle sterling silver at your home studio. If you know how to? In this video, I'm gonna show you how I make silver ingots from silver scrap following 5 simple steps. The first step is to prepare the scrap. In case you want to know, back to the days when I first learned hand engraving, this is also the way I make ingots for my practice piece. I recycle 4 types of scrap in my studio: old jewelry, broken items, leftover materials, and offcuts from different jewelry making projects. If the leftover material or offcuts are from a brand new piece of silver, I will need to peel off the thin plastic layers on both sides. They are for protecting the silver during the handling process. I don't recycle silver dust myself because it contains lots of small particles. And even debris. I send them out to my refiners because they have better equipment to handle them. This will also make my recycle process simpler and faster as well. Also, even if the silver dust is clean, it will attract lots of air pockets that will significantly slow down my process. It's also a very good practice to weigh the scrap before melting because that will help me to keep a track of how much silver I have lost during the recycling process. No matter how careful you are, some silver will be lost during this process. If you like this video so far, do you mind clicking the like button? Thank you. The second step is to prepare the tools before melting. Before lighting up the torch, I need to put some flux on top of my scrap. It has two functions here. The flux is to help the silver scrap melt faster and flow smoother. Basically, it makes it easier to work with. Also, it helps to remove impurities from the scrap. I like to put some engine oil into my ingot mold. This is to help my molten silver to float. As a result, my ingot later will have a higher chance to have an even shape. All the tools I use in this video are listed in the description below if you are interested. The third step is what we need to do during the melting process. Sterling silver melts at 1640°F. Which is 893°C, so I need to be really careful here. Move the flame around evenly to avoid hot spots. My casting station is made of 4 soldering boards, each measures 30 by 30cm square. They can tolerate temperature up to 2000°F. And are held together by corner brackets with screws. For the top, because it is far away from the heating area, I rest a piece of wooden board on. This is an offcut from another DIY project. It is very important to have a gap here. That is my ventilation. It's a bit like a chimney. How long it takes to melt the scrap depends on 3 factors: the room temperature, how much scrap I am melting, and how powerful my torch is. In my situation, it is winter here at the moment. It takes about 5 minutes to melt. The fourth step is how we are going to pour the molten silver into the ingot. Once the surface becomes shiny, I know my scrap has turned into liquid. I like to wait for about 15 to 20 seconds at this stage to make sure it is fully melted. When pouring, make sure there is no hesitation. The engine oil I put in earlier will also help the molten silver to float smoothly as well. Because everything is really hot here, safety is my priority. During the entire process, I ensure no one is around me. In this way, I can fully focus on what I'm doing. The final step is what we need to do after the silver ingot is formed. Because my room temperature is quite low, My molten silver takes less than 10 seconds to solidify. It takes about 20 minutes to have it cool down completely to room temperature. Sometimes there is some brown flux residue stick on the surface of the silver ingot. The one I make today is quite clean. The flux residue on the surface is not that distinct. But you can see the brown dots on the other ingot I make in another situation here. Those are flux residues. This can be fully dissolved if I leave this entire piece long enough in the acid, but this will take hours. So to make the process quicker, I like to remove them by hammer after the ingot has cooled down and before emerging it in safety pickle. With no flux residue on, my silver ingot takes less than 30 minutes to get clean in the acid bath. After rinsing the ingot in tap water to remove all the chemicals, I pat it dry and weigh it again to find out how much silver I have lost in the recycling process. As you can see, I have lost 1 gram. From here, my silver ingot can be made into different sizes of wire. When I need to make a practice piece for hand engraving, I will pour the molten silver into the other side of the ingot mold to make a roundish piece of silver. Go through the exact same process. And in the end, use the rolling mill to make it flat. Once both sides of this practice piece is filled with engraving, I will melt it down to make a brand new practice piece. It's that simple. If you like this video, you might also want to check out the one here. I will see you in the next one.