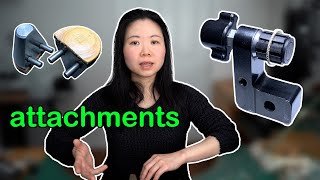
Haiyi Tan shows seven attachments for the GRS MicroBlock vise that solve specific hand engraving problems: holding thin plates, supporting rings from inside, preventing jaw marks, securing chains, and adjusting microscope height. He shares a decade of daily use experience and warns about heat sensitivity in certain gemstones.
Chapters
The GRS MicroBlock ball vise has its limit, but with the attachments, its ability becomes almost unlimited. In this video, I am going to show you what you can do with the 7 attachments. I am not sponsored. I just happen to use them on a daily basis for more than a decade. Before I know how to use them, back many years ago, I wish someone could explain them to me one by one in details to help me decide if I need them or not. With that in mind, I make this video, hoping it will help if you ever come across similar questions. The good thing about these attachments is they fit most of the GRS vices. The first attachment set is the Alexander triple edge clamp.
They are fixed on top of the micro block using the 6 screws. When you first learn hand engraving, it is common to use practice plates. It depends on the thickness and shape of the plates. If your practice plates are thinner than 2.5mm and you are engraving close to the edge, when using the 4 pins that come with the MicroBlock to hold the practice plates, they can get in your way. That is what this clamp is for. It has double-layered indentations, one with straight lines and one with semicircles. So if your practice plate is a square or a rectangular shape, you can stick them into the top layer. If your practice plate has an organic shape, it will fit inside of the semicircles. When practicing engraving or setting stones on the edges, you can put it in between these two clamps.
If you like this video, do you mind clicking the like button?
Thank you.
The second one is the inside ring holder set.
You simply use the two wrenches on the ball vise to hold on to this tool When you engrave on the outer wall of a ring, you will want something to hold and support the ring evenly from inside. This is what this inside ring holder set is for. It has been many years since I got it. I can't remember if they came assembled or not, so I have taken them into parts and show you how to choose the right mandrel. And assemble them together for hand engraving. First, you choose an expanding mandrel that fits closest to the size of your ring. This is the drawbar. There are two types of cones here. One is smooth, the other one has three little teeth sticking out here. If I use the one with three teeth, Slide the chosen mandrel on. You see that the mandrel is locked onto the drawbar and it cannot be rotated anymore. But if I put the smooth cone on before the mandrel, the mandrel can rotate smoothly. Next, you put the drawbar into the ring holder from the side with a cone shape and screw the drawbar knob on the other side Before the mandrel expands, put the ring onto the mandrel and then carry on tightening the drawbar knob. Here you can see when the drawbar knob is tightened, it drags the outer cone closer to the holder. This forces the plastic mandrel to expand and lock the ring from inside. The pressure is applied evenly in this way. I normally only use the cone that locks the mandrel and keep my ring either deadlocked or completely loose, never in between, so I don't use the smooth cone myself. There are other times that I want the ring completely unlocked but still have something to rest on from inside, That is when I'm drilling holes on the ring for stone setting. Tightening the drawbar knob and loosening it for every single hole I drill could be quite time-consuming, so I keep the ring loose on the mandrel and only use my fingers to hold on to the ring when drilling holes. This allows me to rotate the ring right after finishing drilling each hole, If you can't hold it with just your fingers, you can use the smooth cone instead of the one with 3 little teeth sticking out. It will allow you to rotate your ring with the mandrel smoothly and also give you quite a good support. But for engraving, I always want to lock the ring that tight.
This holder is designed for holding standard size rings and cylindrical pieces. It has its limits. Let's have a look at the size of this ring holder.
The area for holding rings on this holder measures 13mm wide. It depends on the diameter of the mandrel. The distance between the mandrel and the base of this holder is quite narrow. When I put a 16mm diameter mandrel on, the gap is about 17mm. But for a mandrel with 23mm diameter, it reduces to 14mm only.
So if you are working on a ring with some big details sticking out and you need to engrave on the opposite side of this ring, the inside ring holder could get in your way. That's when the Alexander ring fixture comes in handy. I have another video specially talking about that. Make sure to check it out. The next attachment is very simple because it is just an offcut synthetic leather sheet.
I roughly fold it in half, and that's it. If I put a ring between the ball vise and close the jaws tight, it's quite usual that the jaws will leave some marks on the ring. But if I put this leather sheet in between the ring and the jaw, It will not just protect it from leaving any marks, but also increase the friction between the metal jaw and my ring, so it will hold my object tighter. But when the diameter of the ring is deeper than the jaws, the top of my ring will be sticking out of the flat surface unsupported. In this case, I will need to move to the GRS leather ring clamp. You don't need any screws to put this on. There are two pegs on the bottom of each clamp. They fit perfectly well into the holes on the MicroBlock. The leather on the inner wall will not leave any mark on your ring, but it can still hold on to the ring firmly. With this clamp, the MicroBlock works a bit like the Benchmate. But because it is raised on top of the ball vise, it gives you a larger clearance underneath. This ring clamp is good for any ring with stones on the top.
If the ring I'm working on has a structure on the other side, I would not put it into this clamp. Another attachment I have here is the GRS shellac pad.
This is made of aluminum. Its section looks like the capital letter T. To use it, you simply lock the leg with the ball vise. It is originally designed to be used with SheLac or ThermoLoc. I don't use SheLac myself and prefer not using the ThermoLoc with this pad, so I mainly use this pad to support my tangled thin chains when I need to untie the knots under the microscope.
The next attachment I have here at my studio is this set of 5 plastic step risers.
With these risers, I can quickly adjust the height of my ball vise. In this way, I can reduce or increase the working distance. Between the working area and the bottom of my microscope.
The microscope does have a knob to move up and down a little bit, but sometimes it's beyond its range, and the step risers here offer a very quick and handy solution. The other attachment that I use a lot is the magical thermal lock. There are some situations which none of the previous attachments cover, That's when the thermal lock can save my day.
For instance, when I want to set this emerald onto the hairpin, this will not fit into any of the previous attachments, so I will use the thermal lock to secure the hairpin. For beginners learning hand engraving, if you don't have the triple edge clamp, you can use the thermal lock to hold your practice piece. And later use it to hold your ring for inner ring engraving, or any item with an irregular shape such as a watch case, cufflinks, you name it. The potential is unlimited.
The only thing is, if there is a gemstone on, make sure it can withstand the heat that is required to soften the Thermal Lock. Let me know in the comment below if you want me to explain how to use the thermal lock in different situations. If you like this video, you might want to check out the one here. It's about 8 tools that you can use to hold your work when you're doing hand engraving. I will see you in the next video.