8 Tools to Hold Your Work for Hand Engraving
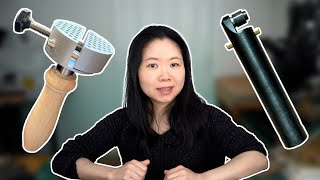
A UK jeweler with 20 years of experience reviews eight work-holding tools for hand engraving, from a basic universal vise to the GRS Positioning Vise with its 76 mm jaw. He covers price, dimensions, weight, and practical trade-offs for each. The GRS MicroBlock is his daily choice.
Chapters
In this video, I'm going to talk about 8 different tools that are used for holding objects when we are doing hand engraving and diamond setting. I will explain what they are for, how to use them, the cost, and the reason why I prefer one over the other in my opinion. Hi, I'm a jeweler, professional optical diamond setter, and a GIA graduate gemologist based in the UK. I have been making jewelry using real gemstones and precious metals since 2003. It has taken me over 20 years to get to this point. In my channel, I talk about anything jewelry related. So if you are at the beginning learning hand engraving or stone setting, hopefully this video will help you to find your ideal tools to hold your work. In my opinion, there is nothing right or wrong about each of them. They are all very useful in their own way. Stone setters and hand engravers are using them daily around the world. Which one to choose completely depends on your situation, what you are using it for, and more importantly, which one makes you feel comfortable to work with. I will talk about them in ascending order of price, starting from the one that is the most cost-effective one. To the ones that are made by the leading brand, which are much more pricey. The first one is the universal work holder. It's also called engraver vise sometimes. I have one here.
It costs $10-15. There are 56 holes on the top. It comes with 8 positioning pads like this. According to the manufacturer, it is designed for holding small objects. That needs to be engraved, carved, set, or filed. If I take this into pieces, you will understand better how it works. This holder is made of two drawers and a wooden handle. One of the drawers is built onto the base, so this drawer doesn't move at all, whilst the other drawer is attached to it by a long screw and two pads on each side. These pads act as guides to keep the jaw aligned to each other. The long screw controls how wide the jaw opens. With the long screw on one side, you can open the vise like this. At this point, the jaw is a little bit loose. It doesn't matter because once it hold on to something, it is pretty solid. You can open this jaw as much as 23mm. Due to the structure, this work holder has its limits. So when choosing this work holder, you need to have 3 things in mind. First, because it is handheld, the weight of the item you can hold on to totally depends on the weight you can hold with one hand. Also, due to how much you can turn the holder non-stop in one go, this will limit your workflow. For instance, you won't be able to turn the holder 360 degrees. Without stopping. Second, because the maximum width this jaw can open is 23mm, the surface of this jaw to the screw measures 8.8mm and 19mm to the bottom of the base. This limits the size of objects you can put inside of this vise. Third, you will have two hands doing two different tasks, at the same time, one for holding the vise and the other controlling the graver. It doesn't matter if you're doing hand engraving or stone setting, sometimes having both hands holding onto the graver will give you a better control when working on detailed designs. The good thing about this vise is it is very affordable and it is good for holding small and lightweight items for hand engraving and stone setting.
If you like this video, do you mind clicking the like button? Thank you. The second one is a Chinese-made ball vise. I got it a few years ago online for about $150. Because I want to have a second ball vise when I have a lot of things happening and being able to not change the attachment on my main ball vise. Will help me to save a few minutes here and there on a daily basis. But I decided to return it after trying it for less than 5 minutes.
It has all the elements of the equivalent GRS version, but nothing is made precisely. This results in every single part of this vise wobbling, and the movement is very stiff as well. What I would say is, if you are planning to move on to the GRS version of this ball vise later, no need to waste time on this one. But if you are going to use this one due to a limited budget, and you are going to stick to this version, you can still use this one for hand engraving and stone setting. My main problem is that I have been using the GRS version of this vise for a few years before trying this one, Downgrading on tools is normally not easy, so in the end I have returned it.
The next one is the GRS Benchmate. In today's price, it costs about $400.
To get it to work, it needs to attach to the GRS fixed mounting plate. I bought it before I got the ball vise. Since I have the ball vise and and 3 attachment sets. I don't use the Benchmate anymore, so much that I can't even remember where I have put it. I spent 2 hours looking for it this afternoon and still no trace of it in the end. So I give up and I'm going to use some basic animation to show you how it works. Basically, there are 4 screws to control its movements. With the screw in front of the mounting plate loose, you can swing the entire thing left and right. The big screw on the side controls how this handle swings backwards and forwards. The smaller screw on the other side controls whether your handle can rotate freely or not. If you loosen this screw, this handle can be slide out in this direction and only the holder left. The screw on the bottom of the handle controls how much the upper jaws open. After the upper jaws is opened, you slide your ring into the gap and then close the screw on the bottom to hold on to the ring tight. The upper jaws has a rounded surface. This one is designed for holding one ring each time, and it needs to hold it from the sides. The removable metal plate is for resting your hand if you need to.
With the GRS Benchmate, I also have the GRS inside ring holder here. It's about $130 at today's price. This is an attachment to the Benchmate I just talked about. So in another word, in order to have this inside ring holder work, you need to have the GRS Benchmate.
With the handle from the Benchmate removed, you can put this inside ring holder into the socket here, and then you put the ring into the rubber collets. When tightening the screw on the side, the rubber collets expands and holds the ring tight from inside. They come in 7 different sizes. Because the collets are quite wide, you can put a few rings of the same size in, at once. In this way, you can engrave or set the stones simultaneously for high-volume work.
The 5th workholding tool is the GRS MicroBlock that I use daily. To be honest, I don't remember how much I got it for because that is over 12 years ago. If you get it today, it costs about $400 without any attachment set. I have another video focusing on how the attachments work. I have 3 different sets here, so if you are interested, make sure you check that out.
Let's focus on this ball vise in this video. The vise itself weighs 3.7 lbs, which is a little bit more than 1.6 kg. These wrenches open up to 50mm wide. It comes with a hex key, 4 pins, 6 screws, and 1 plastic base. The jaws on this vise move very smoothly and they hold things very firmly. The quality is solid. With the help of different attachments, it holds everything without any problem. You can put this on any flat surface and reposition the entire vise if easily with just one hand. I have another video on my channel in which I talk about every single part of this ball vise and even take these jaws off the base to show you the structure. I find this micro block vise ideal for me because I mainly work with small objects and my hands are not big. If this is not your case, you may find that other versions of this vise will work better for you.
Before getting the GRS MicroBlock, I have also tried the MicroBlock XL. This is about $500 without any attachment sets. This one has the same upper jaw plate as the MicroBlock, which is 46mm, but the ball vise resting on the plastic base is bigger.
This allows the drawer to open up to 70mm. The ball vise itself weighs 7 lbs, which is about 3 kg. This makes 3 big differences from the MicroBlock. First, you can hold things directly up to 20mm wider than the MicroBlock. Second, with a heavier ball vise, it will be more stable for holding bigger and heavier items. Third, because the ball vise on the base is bigger, if you have larger hands, you will find this more comfortable to work with.
The next one I have tried is the GRS standard block. This one is about $750. The upper jaw plates of this one are 64mm.
It can open up to 76mm It weighs 21 pounds, which is about 9.5 kilograms. That is super solid. The jaw movement is the same as the MicroBlock. It is ideal for holding big and heavy items.
The last one I have tried briefly is the GRS positioning vise. This one is about $1,400. I tried this one in the trade show. The upper jaw plate on this one measures 76mm by 46mm.
This giant weighs 42 pounds, which is about 19 kilos. It is the largest workholding vise from the GRS range. This is very heavy-duty and super stable, even though the upper part of this vise can be repositioned. If you are working with big objects, you definitely need to try this out and it will not disappoint you.
If you want me to review anything jewelry related, please let me know in the comment below, and I will see you in the next video.
More from Haiyi











This ring took me 3 hours just for the stones #howitsmade #jewelry #craftsmanship