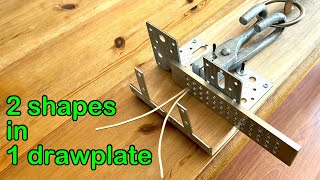
A silversmith shows how to turn an ingot into fine wire using a rolling mill and draw bench. Hammer the ingot flat, pass it through progressively smaller slots while annealing between passes, then pull the tapered wire through a series of draw plates. The same method works for gold, platinum, and different shapes like half-round or square.
Chapters
In this video, I am going to show you how to drag a silver ingot into a 2mm bronze silver wire and a 0.5mm half round wire. You can use the same method in gold and platinum and drag them into oval, square, and rectangular shapes as well. This is what a silver ingot looks like. Like. I have another video showing the entire process of how to make these ingots from scrap. The link is in the description below if you are interested. To make a 2mm round wire, there are 3 steps. First, check if the shape of the ingot's irregularities will fit into the largest slot of the rolling mill. If not, I will have to adjust the shape to make it more even. You can see there is a big lump at the end of this ingot, so I will have to hammer it to a more even shape. Using the flat section of the rolling mill will help as well. Now it will fit into the diamond shape slot better. For an ingot with a more even shape like this, I can skip this step and jump to the next one using the grooves on the rolling mill. In this step, I am going to reduce the size of this ingot using the diamond-shaped slots in the rolling mill. Feed the tip of this ingot into an opening that is slightly larger than the ingot itself. After it has gone through the slot once, Rotate the ingot 90 degrees and run it through the same slots again. If it does curl, that's okay, as far as it doesn't get in the way. But if you want to straighten it, after annealing, hammer the wire with a wall-high mallet. Now tighten the rollers 2 notches and repeat the 2 rollings. For every 0.5mm the wire reduces, I will anneal it. Keep measuring the wire with the caliper. When the upper roller is touching the lower one, you will have to move it to the next groove. If the wire cracks, remove the crack with a file. And carry on. If you like this video, do you mind clicking the like button? Thank you. Repeat this until the wire is down to about 2.1mm. This is how the section of my silver wire looks. It has adapted to the shape of the grooves on my rolling mill. In the last step, I use a round jaw plate to gradually transform the section of this wire to the perfect round shape I want. My wire measures just under 2.5mm in cross-section at this point. The hole on my jaw plate that is slightly smaller than that is the 2.4mm one. I taper the end of my wire with the most coarse file I have here, which is a cut 00 flat file. In that way, about 1.5 cm of the tip can be fed through the unnumbered side of the 2.4mm hole snugly. Try not to make it too thin, otherwise the jaw tongs will destroy it later and you will have to file it again. Place the jaw plate in front of the two L plates to support it. Grip the tip of the wire with the jaw tongs on the other side. I pull the wire slowly and smoothly with the heavy-duty draw bench I made myself. I have a video showing how I made it. All the materials cost me less than $75. $35. That is much more affordable than any of the draw benches you can find in the market. The link is in the description below if you're interested. If you don't have a draw bench, you can hold the draw plate with a heavy-duty vise and drag the wire with your hand. I don't know about you, but I'm not that strong, So without a draw bench, I can simply forget about it. The draw bench works slower than the rolling mill. That's why the slotted rolling mill offers a great convenience when I need to reduce the size of any wire. To apply lubricant, you can cut a small piece of cotton from an old cloth. Moist it with some engine oil. And then clip it onto the wire with a peg. If you don't have engine oil, olive oil from your kitchen will work as well. I anneal the wire once for every 2 holes it goes through, or whenever I feel the wire becomes tough and springy. You can coil the wire closely to avoid melting it when when annealing. Keep checking with the caliper. I only want this to go down to 2mm diameter. Don't jump holes on the jaw plate. You will risk breaking the wire. If you replace the round jaw plate with a jaw plate of other shapes, you can use this method to make oval, square, and rectangular wire. For my half round wire, I need it to be 0.5mm wide. 4 steps altogether. The first step is the same as making the round wire earlier. I forge the ingot so the shape is more even. In the second step, I use the grooves on the rolling mill. The only difference from making the 2mm round wire is I run it all the way from the biggest groove through the smallest one on my rolling mill. This brings my wire down to about 1.1mm wide with a rounded square section. Make sure to anneal the wire for every 0.5mm it goes down to soften the silver. I don't need a very long wire, so I cut 30cm of this long one. I cut 2 of them. Next, I'm going to solder the ends of these 2 wires together. Cut an inch of stainless steel wire to wrap the 2 ends and solder them together. I'm using Easy Solder here. Clean the fire stay off with safety pickle. In the final step, I taper this end with a file so it can go through a hole on the round jaw plate. Feed this end through the unnumbered side of the plate into the first hole it fits snugly. Pull it through the plate in a circular motion. In a slow and smooth motion. The rest is the same as how I drew the normal round wire earlier. Move the wire one hole each time, and we file the tip when it doesn't fit the next hole anymore. I found that when the end is too thin to be held by the jaw tongs, it will be thin enough to drag it through the jaw plates by hand. Repeat this until it is 0.5mm. You can use this method to make rectangular wire using a square draw plate. If you like this video, you might want to check out the one here. I will see you in the next video.