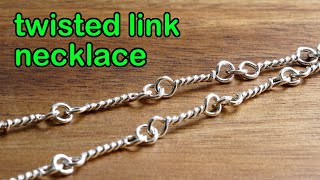
Learn to make a twisted-link silver necklace from scratch using 0.8 mm wire, a ruler, and basic pliers. The creator shows how to solder jump rings with a borax cone instead of liquid flux, twist them into links with a drill bit, and assemble the chain with a lobster clasp.
Chapters
There is something especially satisfying about making chains, and they are very easy to make as well. In this video, I am making a necklace with twisted links. You only need some very basic tools and very minimal skills to make this. It is an ideal project if you are at the very beginning of learning jewelry making First, I need to make some oval jump rings. This is some round wire. It measures 0.8mm diameter and has been annealed, so it's quite soft to work with. If yours has not, it won't make much of a difference in this case. Here's my stainless steel roller. It has a very thin layer of foam on the back to prevent it from scratching the surface. It's about 19mm wide and 1.3mm thick including the foam. You can use anything you find in your place. As far as it has a rectangular profile, it will work. I wrap my wire around this ruler. Each round will make one link. Each link will measure about 16-17mm long. To make each jump ring have an even shape, try to make the wires sit tight next to each other. But this is not a science project, 1mm difference won't matter a lot. To start with, I wrap my wire around the ruler 8 times, slide it out of the ruler, cut off the excess wire, and this is what I have. Separate each of them with a wire snipper. I cut it at the place where the bend is, so later if I have put too much solder on, it will be easy to remove. I adjust the wire so the tension in the wire is pushing the two ends against each other. This is only a 0.8mm wire. It only needs a tiny bit of solder. This is no more than 1.5mm long. You can get liquid flux. The reason why I bother to grind the borax cone every single time I solder is that when I was pregnant, I really worried if the chemical I was using was safe or not. For convenience, I was using some liquid flux at that time, so I called the supplier to ask if the liquid flux I was using was safe to use during pregnancy. It was a lady answering the phone. She said she didn't know, and needed to get in touch with the manufacturer. A few days later, she got back to me and I was told to not use the liquid flux, only use the traditional borax cone instead. Since then, I have been grinding my borax cone every single time I solder, often many times a day, trying to put the joint exactly on top of the solder. In this way, Gravity will hold the solder when the water evaporates, and the solder will melt exactly in place. As I haven't put too much solder on, there is close to nothing to clean. If you have put too much on by accident, that's not a problem. Simply filing any excess solder off will be fine. In the same way, I carry on soldering the rest. That's my first batch. With my oval jump rings ready, I am moving on to make my links. These are some random drill bits I have. It doesn't matter what they are for, their shafts all measure about 2.3mm diameter. So they are all the same for what I am going to use them for. This is one of the oval jump rings I just made. Put the drill bits inside of the loop, one at each end. Twist the drill bits in opposite directions and keep twisting until the wire is tightly coiled. This is what I got. I know it looks quite wonky, but I will get it fixed. Here are the 4 types of pliers I'm going to use in this project: chain nose pliers, flat nose pliers, round nose pliers, and parallel pliers. Adjust the shape with these pliers. I want the middle to look straight, the two circles at the end to align with each other. And the structure flat. Like this. If you want the holes to be a bit more even, you can push a scriber in to even out the circles at both ends. That's how I make a lot of these links. With all those links ready, I move on to make some jump rings to connect them together. This is a steel rod I have. It has a very similar diameter to the drill bits I used earlier. If you don't have this, knitting needles work quite well for making jump rings as well. You can use a jump ring maker, but I don't have one here. This is an old manual hand drill I collected many years ago. These days I don't use it to drill things anymore. I fix it on a bench vise and use it to make jump rings instead. There are less than 30 links to join, so I am going to make 30 for this necklace, with a few spare just in case. It depends what tools you have and which method you prefer. You can use a separating disc or a saw to cut these jump rings out. I use a snipper here. It takes just an instant. Join all the links together. I find making chains very satisfying, especially after a few inches in. I feel I can keep going on forever. This is how my chain looks. Every link is alike, but not exactly the same. That's the character of handmade chains. To make it 19 inches long, I need to make another 8 links. Many of you commented that you would like me to include my mistakes or mishaps. Here are the 4 links I failed. They all broke when I twisted them. Another mistake I made was that I only noticed the jump rings were not soldered after the chain was cleaned with pickle. So I have to go back to solder all the jump rings and clean the chain to finish. If you prefer, you don't need to solder the jump rings. but I always solder every single one to strengthen my chain necklace. This is how my 19-inch chain looks. Not like machine-made chains, which are all identical. If you pay close attention to the individual links, none of them are 100% the same as each other, but they all look more or less the same. That's the beauty of handmade. You won't find that in any machine-made chains. I have added a lobster clasp to finish my chain necklace. Hopefully you like this video. I will see you in the next one.