A UK jeweller and GIA gemologist maps out how to learn hand engraving from scratch. Start with arm conditioning using dumbbells, get the right tools (a third of the work), then spend six months drilling straight lines for 10 minutes daily and circles for 50 minutes. He shows how to make two gravers from high-speed steel and warns about metal dust inhalation.
Chapters
If you're learning hand engraving from zero, all you need to do is to follow 8 simple steps. Hi, I am a jeweler, professional optical diamond setter, and a GIA graduate gemologist based in the UK. I have been making jewelry using real gemstones and precious metals since 2003. It has taken me over 20 years to get to this point. I'm going to share with you in this video what I would do if I'm going to learn hand engraving from the very beginning. No previous experience is required. All you need to do is to follow 8 simple steps religiously. After that, you'll be able to master the arts of hand engraving without any problem. The first thing you will need to do is to get a pair of dumbbells. Each of them need to weight 3 kilograms. After that, you need to do 10 reps for each section, 2 sections a day, one in the morning and one in the evening. The idea of that is you will need to build some muscles on here. Okay, so just do this. There are 2 reasons for this. The first reason is that especially for beginners, Every time you practice, you better to practice for at least 1 hour in order to build up some muscle memory, which means with some muscles on your arm, it will really help. The second reason is you are going to hold the ball vise with one hand, and the ball vise weighs 1.6 kilos, which means 3.5 pounds. I know you're not going to put the weight of the ball vise on your hand, but you are going to hold it tight for at least 1 hour to practice. With the other hand, you are going to hold the handpiece tight. I remember when I first started, I felt the handpiece vibrates so much that all the effort I put on was to hold the handpiece tight. I know these days I don't feel that anymore. These days I feel I am just guiding the handpiece and let the graver do the job. But back those days, especially in the first week, I put all the effort on holding the handpiece tight. So with some muscles on both arms, it's going to help you a lot. That's the first step. The second step is to get the right tools. I have a video here showing what you will need to get as a beginner to start learning hand engraving. Getting the right tools is really important. Believe it or not, with the right tools, 1/3 of the job is done for hand engraving, because sometimes it is the tools that prevent you from doing what you want to do. The problem is not you at all in this case. If you like this video, do you mind clicking the like button? Thank you. The 3rd step is you need to understand that You only need to learn engraving straight lines and curved lines because everything is made of straight lines and curved lines. If you can do both, what else can you not do? The fourth step is you will need to learn how to make a graver to cut straight lines. As a beginner, all you will need to do is to learn how to make an oblique graver using an HSS bobber. The reason for using HSS instead of carbide is carbide is much harder. For beginner, that will be much harder to make. If you can practice using HSS, which is softer than carbide, once you have mastered the skill, you will have no problem making one with carbide. The reason to make it from a bobber is it will be much cheaper to practice. Another benefit of using HSS is because it's easier to break, that means you got more chance to practice. I'm gonna show you how to make one from a bauble.
Here I break the tip of this bauble using a bent nose pliers. This pair of pliers is not the one I use for jewelry making. It is for general use only. After taking the tip off, the section looks a bit rough. Next, I'm going to use the grey diamond wheel to make this section flat, and then shape the tip, and then polish the tip using the yellow diamond wheel. I don't want to make this video too long, but if you are interested in knowing all the details, I can make a new video explaining them. Let me know in the comment below. This is what the tip looks like. Because it is mirror finished, any tiny dust or smudge show up quite obviously on the surface. To have it last longer, I lightly touch the tip of the graver on the yellow diamond wheel. Without doing this, the tip breaks easier. If you want to have a sample on hand when practicing making yours, I have this graver listed on my website for sale. All links are also in the description below.
The 5th step is to learn making a graver for cutting curved lines, and I'm going to show you how.
When you grind any tools like this, make sure to have a vacuum to suck all the metal dust away. You can see the dust coming off my diamond wheel flying towards the right top corner here. That's where my vacuum is. You don't want to breathe this dust into your lung because there is no way to get it out. This is one of the most common health hazards for self-taught engravers and jewelers. I have a video talking talking about all the other common health hazards. If you want to check it out, in the description below. The tip is the same as the one for engraving straight lines. The difference is the front facet of this graver is at an angle. You can see it from this view here. The next step is to polish it to a mirror finish. This is how it looks at this stage. When polishing gravers, only the part touching the metal needs to be mirror polished. The rest doesn't need to. I have a video showing how it was made from scratch. In order to engrave curved lines, I'm using the yellow diamond wheel to give this graver a heel. You can see the hill at this angle.
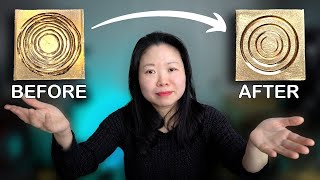
Having your graver polished right, you have another 1/3 of job done. The 6th step is with the graver for straight lines ready, you are going to practice engraving straight lines for 10 minutes a day. Don't skip this. The 7th step is with the graver you just made for engraving curved line, you are going to practice engraving circles for 50 minutes a day. 5-0. The 6th and the 7th step are really important if you are going to learn hand engraving seriously. You would need to put in the hours to practice. 1 hour a day, 10 minutes for straight lines and 50 minutes for circles. With the practice, the last 1/3 of the job is done. The last step is to do this for 6 solid months. I guarantee you that if you have no experience at all, the first week is going to be extremely hard. It made me cry, it was so hard because my muscle ached so much and the circle is just wrong and the straight line didn't work. But trust me, gradually it will become much better. After 1 month, you will see significantly improved. After 3 months, you'll be fine. And then the last 3 months is to solidify the muscle memory in your brain, and after that you don't need to practice anymore. Because you know how to do it. You can close your eye, no problem at all, any curved line, any circles, and then you just suddenly realize how come the circles are so perfect. These are all the 8 steps you will need to follow in order to master the art of hand engraving. If you like this video, check out the one here. It's about the 8 jewelry making and hand engraving tools I have regretted buying in the past 20 years. See you in the next video.