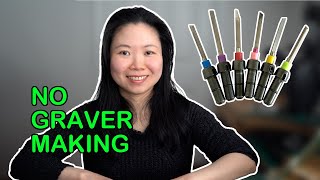
Hand engraving requires learning to polish your own gravers, not just using them. Start with a No. 4 straight-line graver and carbide over steel because it's more forgiving. Practice straight lines and circles for an hour daily, then add graver polishing after two months once you have the basic steady-hand technique down.
Chapters
When I first learned hand engraving, I thought, can I learn hand engraving without having to learn graver polishing or graver making? All I want is to learn hand engraving, not how to make a graver. Second, why start with an oblique graver? Third, why do you choose a number 4 graver to begin with? Fourth, what is the benefit of practicing using a carbide graver as a beginner? Finally, why do it by hand? Is there any other options? I only understood that after I had mastered the skill that learning graver making is crucial if I want to learn hand engraving and if I want to engrave well. Here are my answers to the questions raised by the younger me. First, why do I need to learn polishing a graver when I only want to learn hand engraving?
All the gravers sold in the shops are unpolished, and their shapes are not ready to cut properly. For instance, this is how an ornate graver looks after it comes out of the package. This won't cut curved lines. Second, this brand new graver is machine finished with matte surfaces. When doing hand engraving, the old saying of Confucius from about 2,500 years ago is very true: to do the job well, one must first sharpen their tools. Because how well your graver is polished will directly affect the quality of your engraved work. You want your graver to have a mirror polish surface. Third, it depends on what material you are engraving. Your graver will get dull from time to time. For instance, if you're working on platinum, it will get dull quicker than if you are engraving silver, especially if you are in the middle of a job. Who is going to polish that for you? Fourth, lots of gravers are specially made by the engraving artist to do certain cuts, such as the cobra graver.
If you like this video, do you mind clicking the like button? Thank you. Then Why start with an only graver?
First, compared to curved lines, straight lines are the easiest to handle when you are a beginner. An only graver is the one for engraving straight lines. Second, while a V-point graver is designed for creating deep cuts, an only graver is ideal for making even cuts. Which is perfect for beginners learning how to control the graver. You want the straight lines you engrave to have an even and consistent look, just like how you do it with a pen.
Why start with a No.
4 graver? Because this one is not too small to see the structure or too chunky to handle. So once you understand the principle and know how to polish a No. 4 graver, you will be able to handle narrow gravers and chunky ones.
What is the benefit of practicing using a carbide graver as a beginner?
First, you can use an HSS graver to practice on silver if you have someone there to repolish the graver for you every time you destroy it. If no one is there to repair it for you, you should use carbide because that requires less maintenance. Second, if you are practicing on copper and there is no one there to back you up, as a total beginner, you can completely forget about using an HSS graver on your own. If you don't break the tip of a carbide graver on copper for the first 8 hours of practicing engraving curved lines, you should be very proud of yourself.
Why do it by hand then? Are there any other options?
The quick answer is— doing it by hand is the best choice possible. Here are the 3 big whys. First, doing it by hand is much cheaper. You can use the machine called graver hone to do it, but you don't just need the graver hone itself. You will need more than one big diamond disc to put on that machine, and you will also need a sharpening fixture. The entire system cost more than $1,500. That machine can only be used for polishing engravers, nothing else. On the other hand, if you polish your engravers by hand, all the tools you need are only about $400. That's almost a quarter of the price for the graver home system. The flex shaft and handpiece you use for polishing the gravers can also be used for other projects. Second, if money is not an issue, I envy you, but you still need to learn how to make the graver cuts properly. It is not like you can just put you put a brand new graver into the system, press a button, and a ready-to-use graver will pop out from the other end. Third, if you have the stamina to learn hand engraving, learning how to polish the graver is not that different. Both require your hands to be still. If your hand can engrave well, in order to use the two small diamond wheels to polish the gravers, you just need to understand how and have a bit of practice. That's it.
So basically, learning how to polish a graver is crucial when learning hand engraving, and it is ideal to start with a No.
4 only graver.
By failing to prepare, you are preparing to fail. Benjamin Franklin. If you are a complete beginner, polishing a graver freehand will be harder than engraving a straight line. I would recommend starting to practice making gravers 2 months after you have started practicing engraving straight lines and circles for 1 hour a day. That is to build up some muscle memory, so your hands and arms will start to get used to staying still for a long period of time. If you like this video, you might want to check out the one here. I will see you in the next video.