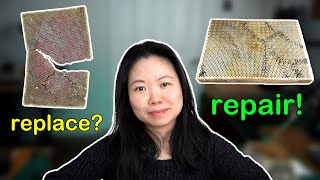
In this instructional video, UK‑based jeweler, professional optical diamond setter and GIA‑qualified gemologist Haiyi Tan explains her philosophy of repairing, rather than replacing, the essential tools she uses in her jewelry‑making studio. She walks viewers through the most commonly broken tools—various tweezers, a ceramic soldering block, a textured hammer, and a bench/shaving brush—detailing why each tool fails, how often the failures occur, and the step‑by‑step repair techniques she employs (grinding flux from tweezers, bending and reshaping tips, sewing a broken soldering block with 22‑gauge stainless wire, inserting a nail to expand wood in a hammer head, and gluing a brush head with a cocktail stick). Throughout, she shares practical tips such as choosing wire gauge, timing repairs, and handling materials safely, while encouraging viewers to consider repair as a sustainable, cost‑effective alternative to replacement. The video ends with a brief channel call‑to‑action and a link to a hand‑engraving tutorial.
Chapters
When any of my jewelry making tools break, I always try to repair it before thinking about replacement. In this video, I am going to show you what kind of tools I repair in my studio, what they are for, how often they need to be repaired, and how I repair them. So if you break yours, you will have more options whether you want to replace them or to repair them. If you are new here, I am a jeweler, professional optical diamond setter, and a GIA graduate gemologist based in the UK. I have been making jewelry using real gemstones and precious metals since 2003. It has taken me over 20 years to get to this point. In my channel, I talk about anything jewelry related. I use my tools every day. Each of them is like a very good friend of mine with special skills. They help me finish different kind of jobs in various projects. That's why I would like to keep them around as long as possible, but they do break from time to time. The things that I need to repair the most often at my studio are the tweezers. I have many types of tweezers in my studio. These are the precision tweezers. They are for picking up solder during the soldering process. Because each of the solder pieces is between 1 to 2mm, their tips need to meet up precisely. If the tips dip into liquid flux, then get heated up by my torch, the flux will turn into a black lump sticking around the tip of my tweezers like this. When this happens, I cannot use them to pick up any tiny things anymore. In this case, it is the flux between the tips that stops the tweezers functioning properly. So I will grind the flux away like this. The second type of tweezers got their tips destroyed when I accidentally dropped them onto the floor, and unfortunately, the tips hit the floor first. It depends on the angle it hits the floor, the tips got either bent or completely broken. Sometimes just one tip. On my lucky days, both. When this happens, I will have to bend the tips back to align them first and then grind the inner wall of the tips in order to make them meet up nicely again. This happens once every few weeks. Sometimes I have too many things going on and don't have the time to repair them immediately. That's why I have a few pair of these hanging around. Once one pair gets destroyed, I will put it aside till I have gone around destroying every single one and no good one is left. Then I will sit down to repair all of them in one go. This happens every 3 to 5 months. This is another type of tweezers I use. They are made of stainless steel. I use them to pick up ingots spoons, and wire rolls in my casting station. They got destroyed when the ingot was stuck inside of the casting mold and I used the tips to force the ingot out. After a while, you can see that the tips got bent badly. When this happens, they don't function at all. I can only use the upper part of the tweezers to hold on to things. Because one tip is broken, I will have to cut the longer one to meet the shorter side. In order to have them pick up things again, the inner wall of the tips have to meet up nicely. At this point, you see that they only meet at about 3mm away from the tips, so I bend the tips inward. In this way, they will be able to pick up things again. Because the items I use them to pick up are much bigger than the solder pieces, the tips doesn't need to meet up as precisely as the other type of tweezers, and I don't need to grind the inner side of the tips. I normally repair them once every 2 to 3 years only. If you like the video so far, do you mind clicking the like button? Thank you. The second type of tools I repair here is the soldering block. Here I know I have a much bigger soldering board underneath, but personally I prefer how the ceramic soldering block reflects heat. That's why I always solder or anneal on top of this one. Some people prefer using the charcoal soldering block, I have one here, almost brand new. But ceramic soldering block is always my top choice. I think that is a really personal preference. In my opinion, once you have got used to any type of soldering block, they are all good. I once dropped this block by accident, then I sew it back with stainless steel wire. After 2 years, the wire broke. So here I am to remove the old wire and sew the pieces back again. At this rate, I would say every 2 years I will have to repeat this process. Before this block was dropped, I had it for 5 to 7 years. The stainless steel wire I use here measures 22 gauge. I use it for holding things together when soldering. If you use a thicker wire to repair the soldering block, it will last longer. I have had this roll of wire since 2003, so I didn't bother to buy a brand new roll just to fix the soldering block every 2 years. Holes are all around the pieces. Sewing it back is not much hard work. Just make sure the sewing space are even and stitches are tight. That's it. I push the end of the wire back into a hole nearby. In this way, it will not scratch me by accident. It looks a bit like Frankenstein's monster from this angle, but it will not affect how it functions. The third tool that I repair here is the hammer. I have about 10 different hammers here, and normally they are all very well made. The only one that ever required repairing is this textured hammer. The head became loose. It was about to fall apart from the handle. This is to do with the wood shrinking. When the temperature changed. To fix it, I simply hammer a nail into the wood here. This forced the wood to expand and fill up the gap between the hammer head. I have this hammer for over 10 years and I have only repaired it once. When it needs to be repaired again, I will let you know. The last tool that I repair here It's the bench brush. You can tell that it's actually a shaving brush. I use this to brush away metal dust when sawing, hand engraving, and stone setting. The brush head came off the other day when I was brushing the silver dust away from my bench block. Now I have to stick it back together. This happened once a few years ago. So this is the second time I had to do this in the past 12 years. You can see this here, my glue expired 2 years ago, but it should still work. I think I can still use a little bit of it. Use a cocktail stick to apply evenly around the base of the brush head. As far as it doesn't come off, that would be good enough. I think this will do. Push it back to the handle. Leave this to dry for 48 hours. Once it is dry completely, get rid of the excess dry glue. Try to avoid cutting the hair of the brush. Now it's as good as brand new. If you like this video, you might want to check out the one here. It's about how you can learn hand engraving properly. I will see you in the next video.