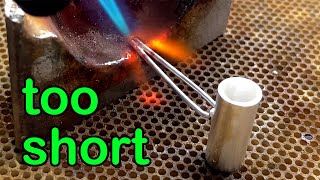
Haiyi Tan solders a safety catch for a toolbox clasp, but cuts the wire too short. He redesigns the V-shaped catch with a wider angle, re-solders it with borax paste, and files it smooth. The video covers soldering technique, cleaning joints with pickle solution, and finishing work to avoid sharp edges.
Chapters
When I was making the safety catch for the toolbox clasp, I cut the wire too short. That almost led me back to square one. I had to change the plan and modify the design in the end. I didn't mention that episode when showing how to make the safety catch. In this video, I show you what originally happened. If you make a mistake like I did, you don't need to throw away the material and start from the very beginning. When I cut the wire for the safety catch, I wanted the end of the safety catch to finish here. The original idea was to solder both wires together and melt them to a bead shape, so I cut off the wire where I wanted the catch to end. At that point, I didn't notice what I had done wrong. I push both ends past each other to create some tension to push them together. This is how it looks up to this stage. Next, I rest both ends of the wire on a crucible to provide some support during the soldering process. And brush some borax paste on. I put a small piece of solder on top and try to solder both ends together. The first 2 attempts didn't make it. The solder either went to the wrong place or just simply drop off. It finally worked on my third attempt. This is how it looks after it's soldered. I cool it down with some water, then clean off the fire stain and flux residue with safety pickle. I'm not allergic to the chemical, so I pick it up directly with my bare hands. Don't do this yourself if you're allergic to it or if the pickle is too hot to touch. I rinse off the chemical before moving on. As the end is quite sharp, I filed the corner off. Believe it or not, up to this stage, I still didn't know what I had done wrong. I started with a coarse file and moved on to using a smoother one. If you like this video so far, do you mind clicking the like button? Thank you. In the end, I was actually quite pleased with the shape and the finish of the surface. Only when I put the other half of the chew bone Did I figure out? There is no way this will fit onto the existing knob because it is too short. If I want to keep this design, both wires need to be about 1cm longer. To make this work, I needed to make the V shape wider. So it will fit around the knob. It ended up with me breaking the soldering joint with my round nose pliers. I felt like I was making it worse and worse. At that point, I thought, it's just the wire that has gone wrong. Worst scenario, I recycle this wire. And make a new one. As I had prepared to abandon this broken wire, I had nothing to lose. I bent the end of both wires inwards with the same pair of pliers so the distance between them was wider, making sure both ends were touching each other. I put it on a surface to support it, brush some borax paste on, and put some solder in the gap. At this point, I didn't know if it would work. I just wanted to make the distance between the two wires wider. Finally, solder the ends together. I just try again. I put both sides of the clasp together. Now the wire could pass the knob, so I simply pinched both sides of the wire next to the knob. Up to this stage, it was just a matter of some small adjustment for the shape of the wire. And a cleaning job to finish the clasp. I'm glad I didn't put the wire in to recycle, but change the plan and try again. Always rinse any chemical off. When finishing the piece. Clean up the solder before polishing so my safety catch will have a nice smooth finish and no sharp edges to scratch our skin. The safety catch worked in the end just fine. If you want to see the entire process of how I make the catch or the toolbox clasp. The links are in the description below. If you like this video, you might want to check out the one here. I will see you in the next one.