Build ANYTHING with Base44 and n8n AI Agents (beginner's guide)
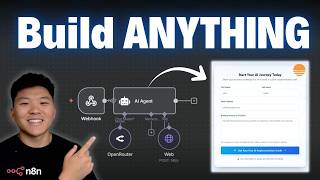
Dr. Violet Howard builds an AI-powered lead-magnet system by combining Base44's no-code web builder with n8n automation. She creates a landing page that captures visitor details, then uses two AI agents (one with OpenRouter's O3 model, another with Sonnet 4.5) to generate a custom roadmap and email it back as HTML. The workflow connects everything via webhooks and Gmail.
Chapters
Today we're going to be talking about how you can build anything with Base44 and n8n AI agents. If you've never heard of Base44, it allows you to spin up really beautiful looking web apps with just your words. So it's almost like you're just having a conversation with a software engineer. They've also got some native integrations in there like OpenAI Text to Image, monday.com, Slack, Google Places, and a few others. But it lacks some of those really custom integrations and workflows that you can build with n8n. So when we combine Base44 with n8n, we're then able to have our AI agents power the backend of our entire web app. It gets really, really powerful and the possibilities are truly endless. So what we're gonna be doing today is a live build of an AI-powered lead magnet system. If you wanna actually go ahead and follow along with this video, I'm gonna do everything, like I said, live in front of you guys, and I'll have all the prompts and resources that you'll need to follow along in my FreeSchool community. The link for that is down in the description. But anyways, what we're building today is a lead magnet system. And so let's say you are an AI consultant and you're trying to get some clients. We're gonna create a front end with Base44, and this front end is going to allow the client to put in their name, their email, and describe a problem they're having. The idea here is that you're gonna be able to capture them in and provide some free value. So say, hey, go to this website, put in your information, and then I'll give you a free report, a free AI implementation audit. And so the data that the client enters into our Base44 app is going to be sent to an NNN AI agent that's going to be trained on how to conduct an AI implementation roadmap. and then from N8N it'll get sent straight to that client's inbox and it's gonna be really professional looking. And then at the bottom of that email it's gonna say, hey, if you want more, book in a call and let's talk. So this is actually a system that I would spin up for myself if I didn't have a lot of inbound coming from YouTube, but this would be a great way to add some credibility to yourself and give out some free value. So then even if a client doesn't initially decide to work with you, they still have you in your mind as like a good person. Anyways, don't wanna waste any time, so let's hop right into Base44 and start building our front end. Alright, so here we are in Base44. If you guys want to check it out, there'll be a link down in the description you can use to sign up. We've got the interface right here where it says, what would you like to build today? And all we have to do is describe the app that we want to create. You can see up top we have app templates that you can choose from if you want to start with one, just get some inspiration, and then customize it further. And Base44 was actually recently acquired by Wix, and Wix has been around for a long time, and it's been known for being able to spin up landing pages and websites really easily. and if you've ever vibe coded with some of the other apps out there that do something like this, you may notice that sometimes they look very vibe coded or you can tell they were built with AI. So what I'm gonna do today is make sure that our app does not look like it was vibe coded. You can also see we have some integrations here. So we have native integrations with OpenAI Text to Image, eToro, Gemini, Resend, ElevenLabs, Claude, Twilio. So like I said, there are some native integrations within Base itself, but where the power really comes in is when we connect it to AnyNN and we can do actually anything. You also see that you have styling instructions right here. So if you wanted to choose like a Neo-Brutalism type of style or Neo-Morphism or Glass-Morphism, you could just click add style instructions. And now you already have these specs in here so that the web app is spun up with that type of style. But we're gonna start and just do this pretty raw. I'm not gonna use a style guide. We're just going to describe what we want, and then I'm gonna show you guys how we can customize it to make it look really cool. So I'm just gonna go ahead and say I need a professional looking landing page for my AI consulting company, AI Automation Society. I want it to say up top, AI Automation Society, AI consulting, get your free AI implementation roadmap. And then the main section of this landing page will be where they fill in some information. So we'll want to collect their first and last name, their email address, and then a larger text box for entering in a business process or a problem they're having, and they would like to figure out how to automate it or how to implement AI into it. And then there'll be a button at the bottom that says get your free AI implementation guide, and they'll click on that to submit their information. After they submit, it should just basically take 'em to a different page that says your information has been received. Expect your guide in your inbox in 3 to 5 minutes. The main color for our brand is light blue. Okay, so that is my very, very brief prompt that we put in here. One tip that you could do is you could first put this into something like Claude and say, hey, can you help me create a project requirement document for a website build? And then it would give you a more detailed one. But I'm just gonna start with this for now. We're gonna send this off. And what's happening now is on the right-hand side, you can see it's creating our app. And so this is where we're gonna see a preview of our web app. And on the left-hand side, we have just like a conversation thread. So it'll, you can see here, it's telling us what it's doing, and this is where we can talk back and forth and make sure that our website is turning out how we want it. So I'll check back in with you guys in just a sec here when we get our first iteration of our site. All right, so we just got back our first iteration. We have AI Consulting Excellence, AI Automation Society, AI Consulting. That's a lot of AI. Get your free AI implementation roadmap. Okay, nice. You can see the background is kind of like a light blue and white gradient almost. We've got custom strategy, fast delivery, expert guidance. And then down here you can see we have start your AI journey today, first name, last name, email address, and then describe business process. We've also got get your free AI implementation guide. Cool. So this is a great place to start. It's, it's really nice. It's very clean, but you can definitely tell that this was Vibe Coded with AI. So we want to change up a few of these things and make it look more professional. So what I'm going to show you guys is this cool site called 21st.dev, and it has a ton of cool website elements that we can basically just copy the code to and put it into our app in Base44, and it will just make the changes. Okay, so here's a cool one I found. We've got these display cards where when you hover over them, they sort of pop up, and I was thinking that this could look really cool as these 3 cards instead of them being spread out like that. So all I'm going to do is go into here and I'm going to click on copy prompt in the top right. You can see that it lets you choose your prompt for Bolt, Claude Code, Cursor, Lovable, Replit, and VO. So we're just going to go with Lovable for now and we're just going to copy this prompt. Now back in Base44, I'm going to click on this button down here that says visual edit, and I'm basically going to select all 3 of these div containers. So these 3 cards, and I'm just going to say apply this effect to the selected div of the 3 cards. Okay, so you can see I pasted in that code from 21st.dev, and now Base44 is just going to think about how to do it. It's going to execute that code, and then we should see in this preview section that we have that integrated. So I'll check back in when we get that. Okay, so we just got that change, but you can see there's like a duplicate card in front of each of these. So I'm just gonna ask it to get rid of that. And there you go. I literally just said there's a weird blank card in front of the benefit cards, please remove that. And now we have these 3 that pop up. Looks really nice. We might just want to add a little bit of spacing right here after these cards and before the text box starts. All right, cool. So I just said, please add some space between the benefit cards and the text boxes, and you can see it added space and it still kept this effect. So that's looking really nice. So what you guys will notice is it's never going to be perfect. No matter which of these AI coding assistants you use, it's never going to be perfect. You just have to figure out how to work with it to go back and forth a little bit. And now you can see in a matter of 2 minutes, I have this cool effect on my website. All right, so now I found this little animation that can come behind our main text. So I'm just going to copy this prompt once again, and I'm going to come into Base44. And I probably want this animation to be up near the top, and usually they call this hero text. So what I'm going to do is just say to add this effect behind the hero text. Okay, so it's applying those actions right now. Let's see how it turned out. Okay, cool. So it came through, and you can see now we have that little thing up top, although I don't like how it just cuts off here so abruptly. So I'm going to have it blend it all back in together. And it's probably because I specified the hero text. But one thing you will notice is the colors are still consistent with the rest of our page. All right, so there we go. It just basically blended that into the whole background. And I think that looks a lot better than what it previously was. We have our effect here. We've got our background that when you basically load in the page, that's when it sort of like has that animation where it falls down and floats down. So I think you could argue that maybe I'm going a little too overboard with 21st.dev. The point being, I want to show you guys how quickly you can spin up these landing pages and add some really custom effects so it doesn't look like it was just an AI-built website. And of course, you can also make changes without even using the AI chat. So like, let's say you wanted to change the font of this text right here. I could select it and I could just basically come here and choose to change the font right here. We have all these different options. I could underline it if I wanted. I could cross it through. I could also change the color. So instead of this gray, I could make it white. but that looks horrible because then you can't see it. But anyways, the point being, you can use this visual edit and you can select exactly what you want to change. All right, so the last thing I'm gonna add is this little border thing where you can see when my mouse is near the border, it's going to sort of have this little light. What you can see here is in the example, this is rainbow, and I'm curious to say if we put a border around this div container here, if it's gonna make it rainbow or if it'll make it blue to match the theme of our site already. So I clicked on visual edit. I'm going to select this container and just say to add this effect to the selected div. Okay, so just made those changes. Let's see. So we do have this glowing effect, but it's like really sharp. So I think it took it a little bit too literally when I selected that container. All right, perfect. So now you can see it's a much softer blue glow, which it did do the blue color, but now it's actually applied to the card. And what happened was I basically said to apply the effect. I then said it was too sharp and then it came back and then it was too light. So I said, now I can hardly see it. Also, don't highlight the fact that I used the wrong effect here. Super embarrassing. But anyways, this was all spun up in about 10 minutes of work and we've added some pretty cool custom animations and effects. I'm not saying I'm a master of design. There's a lot here that I would want to change. But once again, the point is this has been 10 minutes of work. Now let's say we are a lead and we fill out this information, right? We have name, we have email address, and then the problem. And what they'll do is they'll click get your free AI implementation guide. It now opens up the screen that says your information has been received. Expect your guide in your inbox in 3 to 5 minutes. It says our AI specialists are gonna review, we're gonna create a custom roadmap, and you'll receive that via email. And then you can also click to go back to the homepage. But the issue is when we just submitted that information, it actually didn't go anywhere. So we need to give Base44 our N8N webhook, and then our N8N workflow can actually receive that information. So let's real quick hop into a new workflow in N8N. You can see we have nothing here. What I'm gonna do is we're gonna add a webhook, which is going to start the workflow. A webhook is basically just an ear that's always actively listening, and so whenever sound comes in, it basically just grabs it and then it can do something with it. So what we have in our webhook is a test URL. We're gonna grab this test URL, and actually before we grab it, I'm just gonna change the method to POST. I'm not gonna dive into why we're doing that right now. Essentially, it's so that Base44 can post or send data to this webhook. So it's a POST method. I'm gonna click on this to copy it. And now back in Base44, I just need to say when a user clicks on the Get Your Free AI Implementation Guide button, send the data to this webhook as a POST request. And so then now I will paste in my webhook and then I'm going to add one more thing. Send over the following 4 fields in the body of the POST request: first name, last name, email address, and prompt. Okay, so we're going to shoot that off. And basically what it's going to do is it's going to change the code so that when someone clicks on this button, We're gonna get all of this data that the user input into our N8N workflow, and then that's where we can set up an agent on the backend to create that AI implementation guide. Okay, so it claims that it has done that. I'm gonna go into N8N and we're just going to real quick hit execute workflow, which means that this webhook is now listening. When you make it an active workflow, it will always be listening, but right now we're just in test mode, so I have to make it listen manually. But you can see it says waiting for you to call the test URL. So if I go back in here and I click this button, this should send the data to NN because we configured it to. And if we go back into NN, we can now see that we did capture this data. So that's perfect. We know it's working. And now we can see we got first name, last name, email, and we got the prompt, which is what I entered. So this is the problem that the user's having, and this is what we need to use to give them their roadmap. So what's next is real quick, I'm gonna pin this data so we don't have to keep sending data from Base44 to NN. We can just play with it here. And I'm going to create two separate AI agents. The first one is gonna take that incoming prompt, which is very minimal, and going to create a full AI implementation roadmap. And then the second one is going to style it up in HTML and send it to them via email. So the first one we're gonna do is an AI agent. This is going to be our AI consultant. We have to give it access to a brain, so a chat model. So I'm gonna click on the chat model button and I'm gonna go ahead and grab an OpenRouter chat model. Now, if you've never used OpenRouter before, you just need to go to openrouter.ai, make an account. In the top right, you'll go to keys and then just create an API key. It will give you this long string of numbers and letters, and all you need to do is create a new credential and put that in right there. And now you'll have access to tons and tons of different AI chat models. Just make sure you have billing information in your OpenRouter account. And what I'm gonna do for our AI consultant is I'm gonna use OpenAI-03 because it's a reasoning model and it's gonna be good for us to have lots of reasoning going through this AI consultant. I'm also gonna open this up and we're gonna configure a few things. The first one is what do we want the agent to read? And what we want it to read is in the body request, we want it to read the prompt. So this is whatever the user typed in, in this big text box right here. So we were able to drag in from the left to the right, the prompt, and now the AI agent's looking at that. The next thing we need to do is give it a system prompt, which is basically telling it its instructions. And I'm just gonna paste in this system prompt, which is basically telling it that it's an expert consultant, how to think about what to do, what it should break down, inefficiencies, design the roadmap, frame ROI clearly, all this kind of stuff. And then at the end, it needs to say, close by saying, if you'd like to take the next step, book a discovery call with me here. And then it will actually attach that discovery call link in the full email. And if you want to be able to copy this prompt, it will be in my free school community, like I said, with all the other resources that you need to follow along with this build. So now what I'm going to do is I'm going to go ahead and click execute step, which is running the agent. So the agent has now read the webhook request. It's now using O3. and it's going to output some information back to us, and it's going to be a full implementation guide. All right, so that just finished up. Let me click into it and make sure we do have our guide. So we've got diagnosis of the problem, and you can see this is pretty lengthy and it ends with our discovery call. So that's perfect. I'm gonna go ahead and pin this data so we don't have to run that agent again, and we're gonna make the next one, which is going to style it up in HTML. So once again, we're gonna add an AI agent. We're going to have it read the diagnosis. So I'm gonna change this to define below, and we're gonna drag in the output of the first agent. Right here, that's what the stylist agent is going to read. I have to go ahead and give the style agent a style guide of how to write HTML. So I'm gonna go ahead and paste that in here. As you can see, if you guys wanna access this, it'll be in my free school community with all the other resources. And then what I wanna do is actually give this agent a different chat model. So I'm going to once again use OpenRouter, but instead of using O3, I'm gonna grab a Sonnet model. We're gonna go with the new Sonnet 4.5 model because I really like the way that it writes and it's gonna be good at generating HTML. So I'm gonna go ahead and click the play above the agent. So it's gonna start to run. It's right now looking at the output of the consultant agent, and it's gonna turn that into HTML style for us. And so one other thing that I wanted to call out, this flow doesn't make us send any data back to Base44. If you wanted to do that, it would be super simple. You'd come into your webhook. You would basically right here, it's kind of grayed out, but it says respond immediately. Instead of immediately, you would change it to say respond using webhook node or using respond to webhook node. And that means that we could have Base44 send data to N8N. We could have Base44 wait until we send something back. So if we wanted to actually have the, the person get their report right here in this interface, we could have it send back and then the person could just view it right here. That's not what we're doing in today's example, but if you wanted to, it'd be super easy. You would just have to tell Base44 to wait for N8N's response and then display it when it gets it back. But anyways, the style agent is now done. So I'm going to go ahead and real quick pin this data so we don't lose it. and you can see we have, you know, DOCTYPE HTML. We have all of this with different colors and padding and margin and texts. So what we need to do is real quick, add a Gmail node so we can actually send it over as an email and see what it looks like in HTML. So we're always gonna be sending the data to whoever entered in their information. So we can grab the email from the webhook and put that right there. For the subject, I just went ahead and put your free AI implementation guide by AI Automation Society. We're leaving the email type as HTML, not text, because we formatted it as HTML. And then the body of the email, I'm just gonna drag in that output of the style agent. And then finally, I just want to change the append NNN attribution, toggle that off so then the bottom of the email doesn't say that this was sent by NNN. So now that that's filled out, I can go ahead and execute step and it's going to send that email as HTML. And let's go take a look and see how it turned out. Okay, there we go. So we have your free AI invitation guide. Email Automation Strategy Report: Intelligent Email Processing and Response System. We start off with the problem diagnosis. It's a very manual workflow with 5 repetitive steps: reading each email, determining the intent, locating relevant background documents, composing or copy-paste response, and then file email for future reference. It analyzes the inefficiency, so it's calling out a pain point, which is 3 to 10 minutes per message, which could equal 2 to 8 hours per week if there's 50 emails. Lots of context switching, 100% true, inconsistent quality and knowledge fragmentation. We then move into the roadmap. So we start with Phase A, which is a quick win or MVP in 1 to 2 days. We highlight how we'd actually do that. So we'd start with a trigger. We'd have LLM intent classification, we'd have auto-labeling and then template-based drafting. And an expected result would be 60 to 70% of emails handled instantly without document search required. Then Phase B, we kind of move up to a 2 to 4 week solution. Now we have a central knowledge base with all of the documents and stuff that we need. We have a unified email processor. We have a feedback loop and a dashboard. And then we move on to Phase C, which is long-term improvement. We've got private LLM hosting, continuous learning, multi-channel expansion, CRM integration, and compliance layer. And this is really cool. It then goes on to talk about the return on investment. So we have a daily time spend, we have monthly cost, as you can see, and then we have monthly savings, which can get up to $3,000. We have infrastructure costs and we have net monthly benefit. Now, one thing here is take this with a grain of salt because our consultant agent made this data and the consultant agent doesn't yet know how we would charge or, you know, what we would price the solution at. So this kind of stuff, these figures are a little bit made up. In order to really do an ROI analysis, you'd need to prompt for more information about how much manual time it's really taking. But with the very, very limited and minimal prompt that kicked off this whole flow, this isn't too bad. And it shows how our agents could lay this in a table format to make this really digestible. For the potential client. It ends the bottom off with implementation steps. We've got 5 steps right here, and then we have the call to action to book our discovery call, which takes us to the Calendly link to book in a call. If this ever loads up, there it is, as you can see. So we were given a really, really tiny bit of information about a person, and we were able to directly to their inbox, give them a lot of free value and hopefully convince them to book in a full call. So now that we have this workflow set up, What I'm gonna do is unpin all of this data and hit save. And now I'm going to activate this workflow. So now it is turned on and it says, you now make calls to your production URL. So what we have to do is go back into our webhook and we have to switch this to production and grab this production URL. Now, keep in mind, it's always going to, by default, when you open up this webhook node, it's always gonna look like it's on the test, but don't worry about that. As long as you give your front end base64, as long as we give it this production URL, it will call it. And I'll show you guys what I mean by that right now. This is all saved. I'm going to go back into our website and I'm going to say, please update the webhook to this following webhook. Everything else can be the same. So hopefully it understands what I mean by that. I'm going to shoot that off and it should be basically updating this button to go to this new webhook address rather than the old one that we gave it. So it says that it updated the webhook to the new endpoint. We see that our workflow is active, and what I'm gonna do now is just make another request and we'll see if it's actually capturing it or not. Okay, so I filled in some information. We're gonna go ahead and submit that. We can see your information has been received. I'm gonna go to our Anywhen workflow and I'm gonna click on executions, and we should see— nice, it is running. So this is going to run for, I don't know, maybe a minute or so, and once that's finished up, we'll see that it's done, and then we'll go take a look at our email that we should have gotten from this landing page. Also, one quick thing that I felt obligated to make sure you were all aware of. If you are doing this and you're giving out your link to random people, when they submit a request on your site and your webhook captures it, this is going to be using your API credits. So if someone decides that they want to submit 1,000 requests on your website, you would be the one paying for those 1,000 requests when it comes to running those AI models in N8N. So just wanted to make sure you guys were all aware of that and just something to keep in mind. All right, so you can see that this just finished up. I just wanted to real quick prove to you guys that this is the one that we just submitted. As you can see, This came from Nate, Nate, Nate Hurk@gmail.com, and this was exactly what I typed in there. And the email has been sent, so let's hop over and see what it looks like. Okay, so we got your free AI implementation guide once again, meeting prep automation, proposal, and roadmap. Notice that the HTML style is consistent with the last one, so we always have this basically being the format that matches our brand. We have transformed 20 minutes of manual research into automated intelligence. We start off again by diagnosing the problem, so 20 minutes per meeting manually. We're pulling the information from LinkedIn and Google. We're hunting through the CRM system for deal history and transactions, and we're creating talking points and formulating relevant questions. The time impact is at 5 meetings a day. This represents almost 2 hours lost daily, which could be 8 hours a week. We then once again highlight more pain. Why is this current process inefficient? And then we move into our 3-phased automation roadmap. We start with a quick win MVP, which is 1 hour before every meeting, we should receive a single DM, which is a prep sheet for that meeting. This is a really cool table. We have the component, we have the tech, and then we have the function. So it breaks down the trigger, the data enrichment with Apollo or People Data Labs, the CRM integration, the AI summary, the news content, and then the delivery. We also move into our scalable solution once again, which is 1 to 2 weeks. We have things like a cron job, result caching, cost optimization, and a dashboard. And then we move into our long-term enhancements. We have things like our real-time meeting assistant, automating follow-ups, knowledge base RAG, and analytics layer. And keep in mind, what you guys would do here is you would prompt your AI consultant to maybe even dig into your database so that it knows a lot about you and your business and how you like to do business so that your actual implementation guides are more accurate and specific to you. Down here, once again, we have estimated ROI. We can see that you would get, you know, payback within 3 days. You would make around $2,500 a month off of this system in ROI, that is. And you would save about 36 hours a month. Of course, it's going to list out some next steps and then the nice call to action here. Ready to reclaim 8+ hours per week and never walk into an unprepared meeting again? Well, book in a discovery call right here. So that is the example of what we have. And you can see in total that took me like maybe 30 minutes, if that, to build a front-end landing page like this. That's very professional looking. This took less than 10 minutes. And just imagine where I could get if I spent another hour on it. And then we built a backend automation that only utilizes two agents, one to do the consulting and one to do the style. And once again, this took me less than 10 minutes. So all you would need to do is create your own landing page and then create your own AI consultant, and then you can start throwing this out there as a value-add lead magnet. And back in Base44, what you see in the bottom left is ready for a custom domain. Just go ahead and connect one. So if I wanted to connect one, all I'd have to do is buy a new domain or connect it here. So any single domain you have, you can make it host your Base44 web app. You also can see analytics, you can have users, you can add security, you've got logs, all this kind of stuff that you can add. So you can manage your full website and of course send all of your data to a backend automation like n8n. So the way that this works is through credits, and you can see you can start for $20 a month and you can get 100 monthly credits. And just for reference, you're getting charged a credit every time you basically send it a message. So the more detailed you are, the better. But you can see in just this web app, I probably only used 10 credits. There's a link down in the description if you want to check out Base44 for yourself. So go ahead and get over there. So if you guys want to spin up a lead magnet like this and you're looking for some support, or you're looking to connect with some other people that are already doing something like this, then definitely check out my Plus community. The link for that is down in the description. We've got a great community of over 2,500 members who are building with N8N every day. A lot of these people are also running businesses with N8N every day. We've got a classroom section with 3 full courses. Agent Zero is the foundations of AI automation for beginners. We've got 10 Hours and 10 Seconds where we dive into N8N, and then we have a new course for annual members called One Person AI Agency, where you learn how to lay the foundation for a scalable AI automation business. So I'd love to see you guys in these live calls in the community, but that's gonna do it for today's video. If you enjoyed or you learned something new, please give it a like. It definitely helps me out a ton. And as always, I appreciate you guys making it to the end of the video. I'll see you on the next one. Thanks so much, everyone.










