Build Your First RAG Pipeline for Better RAG (step-by-step)
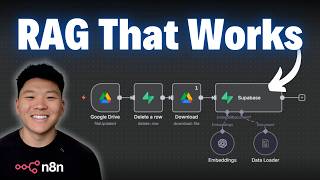
Dr. Violet Howard builds a RAG pipeline in n8n that monitors a Google Drive folder, converts PDFs to embeddings with OpenAI, and stores them in Supabase. The pipeline handles three workflows: ingesting new files, updating existing ones by re-embedding, and deleting vectors when files move to a recycling-bin folder.
Chapters
Today we're gonna be talking about RAG pipelines and the importance of keeping your database up to date. At this point, I'm assuming you've already built some sort of vector database RAG agent before. If you haven't, I built a full course on that. You can go watch that video up here. And then when you're done with that video, come back over here and we're gonna build out a data pipeline. In today's example, we're gonna make sure whenever we drop a PDF into a Google Drive, it gets put into our vector database. Whenever we update that file in Google Drive, it will also get put into our database and the old one will be deleted. And then of course, if we delete the file out of Google Drive, it will also be deleted out of our vector database. So I don't wanna waste any time. Let's get into the video. All right, real quick before we hop into NNN, I wanted to do a few slides about why data pipelines matter for the success of your AI agents. The idea of setting up a knowledge base that all of your agents can pull from is that the knowledge in there is accurate and up to date. So if your data is messy, outdated, or scattered everywhere, your AI agent's gonna struggle to deliver actual real answers. So what we need to do is we need to design automated RAG pipelines to make sure that they're constantly checking to make sure that the vector database is accurate or wherever the data's being stored. So when I think of a data pipeline, I think of 3 steps. I think of the raw material that we take in. I think of the processing line of what actually happens to that raw material. And then I think of where it ends up sitting. So quick practical NNN example of this is in this workflow, I've got my transcript pipeline. So the raw material that I'm giving it is I'm uploading a URL of a YouTube video right here. And then we move into the processing flow where I get the transcript from it, I'm extracting the actual transcript and I'm extracting the timestamps, merging that back together. And this was basically me cleaning up and getting the data ready to be ingested into the final product, which is our Supabase vector database right over here. So we've got 4 essential components to be thinking about. The first one is the trigger. What actually starts the process of getting data into a vector database or deleting data from a vector database? This could be new emails come in and you want those to get vectorized. This could be a new row in a Google Sheet. It could be a file upload, or it could even be some sort of criteria is met. And let me show you again what I mean by that with a real example of this YouTube transcript pipeline. After we get a YouTube video into our vector database, we then put it in a Google Sheet. And so the Google Sheet would look like this where we'd get the title, the URL, and the transcript. And then also we would have a status. So it would be processed, or if I changed it to remove, then that would trigger off this second flow down here. This would go off whenever a row status equals remove, and then it would filter out all the other rows, and then it would get rid of the vectors where it came from that video. So hopefully that makes sense. If it didn't, you can go ahead and watch this YouTube transcript video, which I'll tag right up here. But that's just a way for me to make sure that my vector database is only having YouTube videos that I want to chat with. And then we have inputs, and these are the data sources that we need to process. You really want to know exactly what your data sources look like and how they're going to be coming in because predictability is your best friend. Are they going to be PDFs? Are they going to be CSVs? Are they going to be both? Are they going to be images or is it just going to be text? You need to understand this stuff in order to make that middle portion of your RAG pipeline actually good. And then of course we take those inputs and we process them, we clean them up, we remove duplicates, we make sure that they're ready to go. We give them metadata, stuff like that. And then we actually shove them into our vectorizer. A vector database or a relational database, wherever we actually wanna keep them. So I really just wanted to preface this stuff because it's really, really important to think about what data am I currently processing, and then later, how can I scale this up? So a great example today is we're just gonna be building a flow to handle PDFs, but later on, if we knew, okay, we might also need Word docs and Excel files and stuff like that, then you could come in here and build a system like this where you're watching a Google Drive folder, but then you also have a switch to handle PDFs, text files, Excels, and all of them get processed differently because they're different types of files, but then ultimately they all go into the same vector database. So that's just an example I wanted to show you guys real quick of what I meant by understanding these core components and why predictability is your best friend. So now that we got all of that boring stuff outta the way, let's get started with this build. So the first thing we're gonna build is the pipeline that takes a new doc that we drop into a Google Drive folder and it puts it into a vector database. So super simple. We're gonna start off here by grabbing a Google Drive node, and we're gonna grab a trigger that is on changes involving a specific folder. First thing here after you connect your Google Drive account is to choose the folder. So after you connect your Google Drive account, you want to choose the folder that you're gonna be looking in. We are going to grab one that I just made called RAG. There we go. And then what are we watching for? We're watching for a new file being created in this folder. So what I'm gonna do real quick is go over to my Google Drive and we're gonna take this policy and FAQ document. and I am just going to move this into our folder called RAG. As you can see right here, moving into RAG. And then when we go back to NN and I hit fetch test event, we should now see that that folder has arrived. Or sorry, not the folder, the file. You can see if I scroll over somewhere, there it is. It is called policy and FAQ document. So we've got that data here. What I'm gonna do now is just pin this to keep it here for now. The next thing we're gonna do is actually download this file because all that came back here was like metadata about the file, its ID, its title, all that kind of stuff. So I'm going to grab another Google Drive node. We're going to do download file, and I'm gonna change the file we're looking for to be by ID. And then all I have to do here is find the ID of the file that triggered this workflow. Okay, so I had to scroll down a little bit, but I found it. It is right here. I'm gonna drag that into the box, and now we have this variable which represents the ID of the incoming file. And I'm just gonna click execute step. and now we should see the binary over here. Actually, I forgot that this is a Google Doc. So what I'm gonna do is I'm going to add an option down here where I can actually download any Google Doc as a PDF. So I can click on Add Conversion, and rather than turning a doc into HTML, I can turn a doc into PDF. And if I run this again, we should now see right here that this is coming through as a PDF. So perfect, we've got what we want. And now it's as simple as that. I'm just going to add a Supabase step. We're going to add a Supabase vector store and we're going to add documents to it. So I'm choosing the table to put it in, in Supabase, which is called documents. As you can see, here's my environment and this is the table we're going to put it in. We don't need to add any other options. We just need to add our default data loader. And this is important because right now it's looking for JSON, but what we actually want to give it is binary. As you can see, we have our PDF right here as binary. So I'm going to change that to binary. We're going to leave everything else up here as default for the sake of the example. But we are going to add some metadata. This is going to be very important for us later when we need to update and delete files. So I'm going to add metadata. The first thing that I'm going to add is filename. So I'm going to do— so I'm just going to do some camelCase there, put in filename, and then we just need to go back to the schema of this file and find its name. So if I scroll down here, we can see the name is policy and FAQ document. I'm gonna throw that right in there. And then we're gonna add one more metadata property, which is going to be date. And then I'm just going to type in two open curly braces and do $now. So whenever we get a new piece of information put into our vector database, we can see the exact date and time that it was uploaded. That way we can just later on validate that if we update a file in our Google Drive, that it updates in Supabase as well. Okay, cool. So we have filename and date as our metadata. That's all we're going to do for now. And then I'm going to add an embedding. So I'm going to choose OpenAI. I've already got this all set up. We've got text embedding 3 small, which has to be the same as your embedding model for your database. So we're good to go here. And now I'm just going to run this and this is going to put that policy and FAQ document into our Supabase. Cool. So it says 5 items should be there. So we should refresh this and see 5 items. Oh, there They popped up right there. And if we go to the metadata and open this up, we can see that we have title and producer because it, I guess it got that from the binary data itself. But we also have the metadata down here that we added, which was date and filename right there. And instead of filename, you could have also done file ID as long as you have some sort of unique variable that you can reference later. And you guys will see exactly what I mean by that when we do this next pipeline. Real quick, before we build that next pipeline, I'm just gonna build a really, really quick AI agent so we can validate that it is able to read this document. Okay, so set that up real quick. I'm just going to ask it, what is our shipping policy? Shoot that off and we should get an answer from the vector database. I didn't even give the agent a prompt or anything. We just hooked it up to a tool and look how smart this guy is. So we've got our shipping policy. Orders are processed within 1 to 2 business days. Standard shipping takes 3 to 7 business days. And you can see right here that it is Correct. All right, cool. So the next step is we now need to create a flow that when we update this file, it will also update in our Supabase vector database. So what we're going to do is we are going to add another trigger, which is going to be another Google Drive trigger. So you might think to just do on changes to a specific file, which is fine if your vector database only has one file. But what we're going to do is on changes involving a specific folder instead. Just in case you drop in many files in this folder. So we're gonna choose that same one again, which was called RAG, and we're gonna be watching for a file updated rather than a file created. All right, so I just changed the name. It used to be Tech Haven, as you can see in the vector database, the policy and FAQ doc store name is Tech Haven, but I just came in here and changed it to Greengrass. So now when we test this trigger, it should pull in that file because the file had a change made to it. So we got this information back, but now before we download the file, what we want to do is want to get rid of all of the vectors in Supabase where the file name equals policy and FAQ document, because these are now outdated vectors. So to do this, we're going to add another node and this is going to be a Supabase node, not a vector store node, just a regular Supabase node. And we're going to choose delete a row. So once again, we need to choose the table, which is documents. And keep in mind, this is a table that has embeddings, so it is a vector store. but we're able to use the regular Supabase node here. So what we want to do is delete. We're going to delete a row in this documents table, but instead of build manually, we're going to choose string. And then I'm going to change this to an expression and paste in this expression right here, which is metadata—file name, which is the metadata field equals like period asterisk. So kind of a mouthful and not a super intuitive string, but this is how it's going to work. And what we need to do now is just go down to grab the filename of this file. And like I said, you could use the ID, you could use anything that's unique to this file. I just decided to go with name because it looks a little less intimidating for the sake of the demo. So now we have any, any vectors where the metadata of filename equals this, it's going to delete. So if I hit execute step, we should see 5 items were output. Because we had 5 vectors right here, and these should disappear any second now. There you go, they're gone. So now we know our vector database is clean of old vectors, and now all we have to do is same thing up here, download the file, and then put it into Supabase. So I'm actually going to copy this Supabase right here and just put it right here, and then I'm going to grab another Google Drive node in order to download the file. And we just need to download by ID once again, and we're going to choose the ID from the Google Drive file that triggered this workflow, which is at the bottom right here. Same thing actually though, I'm gonna do the file conversion and make sure the doc is getting turned into a PDF and then download it. Okay, one thing did happen though, which let me explain what happened. So we pulled back 5 files, but they're all the same one. And the reason why that happened is because when we deleted 5 rows from Supabase, this has 5 items, which makes Google Drive think that it needs to output 5 items as well. So we're going to click onto this node, we're going to settings, and we're just going to say execute only once. And now when we run this again, it's only going to have one, as you can see. And now we're able to just hook that puppy into Supabase. And when we run this, I believe everything should be set up. We should still in our data loader have the metadata, but we need to fix this because the name is not mapped correctly. So we're going to go back to the Google Drive trigger. We're going to scroll down to get to the name, which is all the way near the bottom. They make it so hard to find. There it is. Policy and FAQ doc. So now this flow has the right metadata and you can see now it's good. We're passing over a new date and time and then we're going to go ahead and run this one as well. And because it's basically the same file, it should still be 5 items. We should go to Supabase and wait for these to pop in. And you can see now that the vector is updated because it's a store name is Greengrass rather than Tech Haven. And once again, we could come up here and chat with the agent and say, what is our store name? Send that off and it should hit Supabase right here and come back with Greengrass. There you go. Our store name is Greengrass. Okay, so we now have our flow that puts a file into Supabase when it is put into a Google Drive folder. We've got one that when we update that file, it's going to delete the old records and then put the new ones into Supabase. And now the last thing we need to do is what happens if we actually just delete that file or we want to delete it? How do we make sure Supabase deletes them? So we have a bit of a Band-Aid fix, but it does work. And also keep in mind what I'm trying to show you guys here is the idea of building these pipelines, not saying that this is the optimized way to chunk and split and embed data into a Supabase vector store. We're just keeping it simple here with the main foundational high-level concepts. So anyways, the fix we have here, because as you can see, when we go to Google Drive and we go to triggers, and we do on changes involving a specific folder, there's not one— sorry, let me just grab the folder. There's not a watch for file deleted. Not exactly sure why. Obviously they have something on their end which is like sending over the data off of their webhooks and triggers, whatever. But there's not that option there. So what we do is we're going to go file created, but we're going to choose a different folder. We're going to choose a new one that we made called the recycling bin. So now it's watching a separate folder for anything that gets put in the recycling bin. So what I'm going to do is go over to this policy and FAQ doc. We're going to go ahead and move it once again. So I'm going to move this to the recycling bin folder. As you can see now, it's gone from there and it should have gone into our recycling bin right here. Same file though. And now if we go into N8N and we fetch test event, we should see that we got this file, which was once again, hopefully the policy and FAQ document right here. And then it's actually really simple because we don't have to ingest anything. We just have to delete. All we have to do is throw this right in here and make sure that everything's mapped up correctly, which is metadata file name, like name, execute that. We should get 5 items over here and then we should see them be deleted from Supabase just like that. So it was really that simple. And now we have 2 different Google Drive folders that as soon as we either drop something in, update those contents, or move it from there to a recycling bin folder, our Supabase vector database will be taken care of. Once again, this wasn't for showing you how to optimally process data and put it in. This was more about the idea of it and how you can think about creating these different triggers and using metadata to actually filter and delete things. So I hope you guys were able to watch this one, understand what's going on, and follow along. As always though, you'll be able to download this exact workflow. I'll also have like sticky notes and a setup guide and stuff. All you have to do to get that for free is join my FreeSchool community. The link for that will be down in the description. Once you get in there, it will look like this. You'll just need to navigate to the YouTube resources, and every single one of my videos here has some sort of resource. So right here is my developer agent, and you have the developer agent JSON to download. And if you're looking to dive a little deeper with a more hands-on learning experience, then definitely check out my Plus community. The link for that is also down in the description. Got a great community of over 2,500 members who are building with n8n every day and building businesses with n8n. It's a super active group. We've been having some really fun calls and discussions lately, and we also have a full classroom section where we dive into the foundations with Agent Zero, end it in with 10 Hours to 10 Seconds, and then a new course for our annual members called One Person AI Automation Agency. So I'd love to see you guys in these calls in the community, but that's gonna do it for the video. If you enjoyed this one or you learned something new, please give it a like. Definitely helps me out a ton. And as always, I appreciate you guys making it to the end of the video. I'll see you on the next one. Thanks everyone.










