Building an AI Agent Swarm in n8n Just Got So Easy
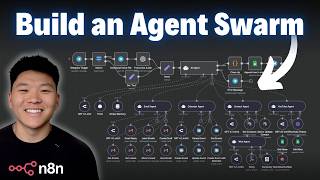
Dr. Violet Howard shows how to build an AI agent swarm in n8n where one user request gets split among specialized sub-agents. A main orchestrator decides which agents to call, each with its own LLM brain, and n8n v1.103 now lets them all live in the same workflow for easier debugging and shared memory.
Chapters
Today I'm going to show you guys how you can automate anything with N8N Agent Swarms. This type of multi-agent system is insanely powerful and you don't need any prior coding experience to set one up. So I'm going to be walking over a few live examples of me using this executive agent swarm, then I'm going to talk about how it works, how I built it, and I'm also going to give you everything you need to set this up for yourself for completely free. So make sure to stick around and I'll show you how you can access that. All right, so I've got Telegram pulled up on my phone and I'm going to go ahead and send our agent a message. Please find me 4 high-performing YouTube videos about N8N, and then send that as an email to Dexter Morgan. And then finally, also let me know about the weather today in Chicago. All right, so I just sent that off, and now our agent's basically gonna get that transcribed audio, and now it's gonna decide between its 5 different agents which ones to call. So you can already see it finished up calling the web agent to get the weather, it called the contact agent to get Dexter Morgan's email address, and now it's calling the YouTube agent in order to actually find YouTube videos that are high-performing and about NNN. And so that's the power of an agent swarm. This main orchestrator parent agent, all it has to do is understand, okay, I have 5 different agents, which ones should I use? Rather than saying, okay, I have like 30 tools, which tools do I use? And this framework makes our results more consistent and higher quality because each agent is very specialized. And now that the agent has all it needs, it decides, okay, now I can call the email agent to send that email to Dexter Morgan. So you can see it just fired off that email with the send email tool, and now it's going to log all of its outputs and respond to us in Telegram. All right, so just finished up. I got my Telegram message back, but I'm just going to pull it up on my desktop so you guys can see it as well. Said, I have found 4 high-performing videos about N8N and sent them in an email to Dexter Morgan. I also included today's weather in Chicago, which is overcast clouds with a temperature of 81 degrees. If I look outside right now, I can see that it is indeed overcast clouds. When I hop over to my email, we can see that we just have one sent to dexter@miami.com, and it has 4 high-performing videos about NNN. Each of these include the title, the channel, a link to the full video, how many views it has, how many likes, and how long the actual video is. So that's awesome. It did what we wanted it to. It called the right agents. But not only did it do the right tasks, but it also logged everything so we can look and have full visibility. So that's exactly what's going on in this portion of the workflow. So if I head over to this Google Sheet, you can see that we have the time of the run, we have the inputs, we have the outputs, we have the actions that were taken, and then also how many tokens were used up. So in the actions, this is really cool because we can see first it called the contact agent and it basically got Dexter Morgan's email, which was dexter@miami.com. Then it went to the web agent to get the weather in Chicago and it got the weather. Then it used the YouTube agent to find 4 high-performing YouTube videos about N8N. and then finally it called the email agent to send that email to Dexter Morgan. And we can see it called different agents, it had different prompts it had to run through, and it costed us a total here of 5,000 tokens using GPT-4.1 mini. So that's a cool little system so you can see what actions your agents are calling and stuff like that. But let's head back over to the workflow and let me start to break down how this actually works. So if you've seen my channel before, you may have come across this video where I built an ultimate personal assistant. Which is kind of similar to what we're looking at today. The main difference here is that n8n just released an update which allows us to keep our agents all in the same workflow rather than in this version where the Ultimate Assistant calls this sub-workflow and we can't really see what's going on and this is basically the workflow it calls. Because of this update, which was like 1.103, we can now keep all of our agents in the same place and we can visually watch everything happen on the same screen. And what's cool about having a swarm framework where we have different agents for each different task the main one only has to think about, okay, if the user wants something to do with email, I'm not going to worry about which tools. I'm just going to send it to the email agent and the email agent will figure it all out. Because as you can see here, every single agent has its own brain. They each have their own chat models, and that means that they also each have their own system prompts. So we're able to split up all the system prompts and make each agent's job very specific and increase the quality of their outputs. It also gives us the flexibility to have different chat models for different agents. In this case, I'm using GPT-4.1 Mini for all of them, But if something's really simple, maybe like grabbing contact information, we could switch this out for a cheaper model like Google Flash. And if you notice that your emails sound too much like AI and you want them to be written better, you could maybe switch out to something like a more expensive Anthropic model. So not only do you have more flexibility, but like I said, higher quality outputs. And so if you're thinking to yourself, okay, so there's 6 different agents, there's 6 different memories, they're not going to work very cohesively as a team. Well, you'd be wrong. What we can do is we can have all 6 agents hooked up to the same memory. In this case, I don't, just because each of these subagents' jobs are super specific to like a one-time task, like sending an email, creating an event, doing research. So they don't really need full context. But as you can see, each agent has the ability to add memory, just like our main agent right here has memory. And the way that memory works is it's stored based on a session ID. And I don't want to get too technical here, but basically think of a session ID like a contact. In your phone, you have different contacts, and each contact, you have different conversations. So as long as we have all of the agents hooked up to the same session ID for their memory, they'll all be looking at the same conversation when they're taking action. So depending on the situation, your agents may need to all be linked together with some sort of session ID for memory. But in this case, where each agent is basically just getting a task, doing the job, and then moving on with their day, we don't need them to be linked together. But the reason I wanted to bring that up is because in the past, when you wanted to pass over a variable like a session ID from main agent to a sub subagent, you'd have to pass it through as a separate variable. But here it's really easy because everything's in the same workflow. I could easily add a memory to the email agent, and all I'd have to do is reference the actual Telegram trigger chat ID that I was using in the earlier memory. So now that that's linked up, we would basically have our email subagent and our main agent always looking at the same conversation. So they're basically linked up. Let's do one more example that's even a little more complex to show you guys how the agent handles it. All right, so our agent's listening. I'm gonna send it another message in Telegram. Please get my YouTube video ideas from the database, do some research on them with Tavily, and then send that research brief in an email to Michael Scott. And then make a calendar event for today at 4 PM to go over that research with Michael Scott. All right, so I'm gonna send that off. This is a pretty loaded task, so we'll see how the agent handles it. It's gonna have to call multiple different agents here. You can see it's calling the YouTube agent to get our ideas. It called the contact agent to get Michael Scott's contact information, and now it's calling the web agent and it's going to do some research on those YouTube video ideas. I think I told it to use Tavily, but it probably transcribed it a little bit poorly, so it decided to use Perplexity. But that's completely fine. The agent made the decision and it's going to do some research on our YouTube video ideas either way. It's finishing up that research and now it's going to call the email agent and the calendar agent to make that calendar event and send off that email. Okay, so just finished calling the calendar agent and everything's finished up. I'm gonna go ahead and switch over to our email and we'll take a quick look. Okay, so here's our sent email to mike@createscott.com. We have 3 different YouTube video ideas and you can see inbox to action, auto scrape leads, YouTube content engine. These are the video ideas that existed already in my YouTube video ideas database. And for each of these videos, what it did is it used Perplexity to research them and basically helps me figure out how I can make these different workflows for a YouTube video. And if you remember, we asked the agent to create a calendar event as well with Michael Scott. So if I go over to my calendar, we should see that we have review research brief on YouTube video ideas at 4:00 PM. And we added Mike at Great Scott as an attendee to the event. And of course, the final piece of the puzzle here is that the agent should have logged everything in the Google Sheet. So if we come over here, we can see we had a new run at 11:36. We have the input, we have the output, we have the tools that were called, which in this case was all 5 agents were used in this run. and then this one cost us a total of 8,500 tokens. So I don't wanna waste the whole video with demoing all the different use cases. I hope you guys can see how cool and how powerful this agent swarm is. And now what we're gonna do is step by step build one together, just a really mini version of this one so that you guys can get a taste of how you can come in here and build your own executive agent swarm. All right, so here we are in a fresh blank canvas, and what I'm gonna do is hit tab and I'm gonna grab in an AI agent. So here we have our AI agent, and the first thing we need to do is connect a chat model, which is basically gonna be the brain for the AI agent. And so what I like to do is I like to use OpenRouter. So if you go to OpenRouter.ai, go ahead and make an account. And in the top right, what you're going to want to do is go to your keys. In here, you'll be able to create an API key, which is kind of a fancy word for a password. And what you're going to do is create your API key, name it whatever you want. And then once you create that, you're going to get this unique value, which you will copy. Once you copy that value, you're going to go into NN, add a chat model. You're going to scroll down to OpenRouter. And all you need to do is create a new account and you're gonna paste in your API key right here. Once you've saved, it should go green. And basically this tells us that our agent has access to some sort of brain. Just make sure in OpenRouter you have billing information inserted, otherwise you won't be able to use it. And so now if I click into this node, I can basically choose which chat model I want to use. And as you can see, there are a ton. So that's why I like to use OpenRouter. So from here, what we're gonna do is add our first agent, which is going to be an email agent. I would basically add this agent as a tool. And now what we can do, rather than what we used to do in this version of the Ultimate Assistant where we called a sub-workflow as a tool, what we're able to do is literally just type in AI agent and we can add an AI agent as a tool. So we have a whole agent baked in right here and we're gonna have to connect a chat model. We'll have to do all the other things. So now this main agent is basically just in charge of this sub-agent. So once again, real quick, I'm gonna add a brain to this guy. So I'm gonna scroll down to OpenRouter and we already have our credentials set up, so it's that easy. So like I said, we're gonna make this agent an email agent. So I'm just gonna name it email agent. I'm gonna put a description in here that says email agent to take action with email. And then what I'm gonna do for the user message is I'm just gonna hit this button right here that lets the model define this parameter. What this means is that when the main agent decides, okay, I'm gonna use the email agent, it's basically gonna say, here's what you do. And that is what's happening right here in the user message. And just to show you guys an example of that to make it make a little more sense, we had this main agent, right? And it decided to call the YouTube agent. And so when it called the YouTube agent, it filled in the user message with, get my YouTube video ideas from the database. So it's basically just the main agent telling this sub-agent what to do. And if it hasn't quite stuck yet, let's also look at the contact agent. The main agent said, okay, I'm gonna use you, Mr. Contact Agent, and what I want you to do is get contact information for Michael Scott. Okay, so hopefully that all makes sense now. And now what we have to do is just connect an email tool to our email agent. So I'm gonna click on Tool, I'm gonna type in Gmail Tool, and now we just need to set this thing up as well. So if you haven't connected to any of your Google tools before, I'm gonna link a video right up here where I explain how that works. But then once you finish that, come back here and we'll set up this Gmail tool. So similar to what we just did with that user message, I'm basically gonna let the AI agent decide Who's it going to? What's the subject? And what is the actual body message? I'm also real quick gonna change the email type to text, and I'm gonna add an option down at the bottom which lets us turn off the NNN attribution at the bottom of an email. And it's that simple. We already have this Gmail tool set up. So what I'm gonna do is I'm gonna chat with this agent to see if it's able to send an email. And one thing I want to call out to you guys is that we haven't put any system prompts in either of the agents. So this is just to reiterate how easy it is to build this stuff nowadays. When you start to build out more agents and more tools, you will have to system prompt it. As you can see in this main agent, it has a big system prompt right here where we explain, here's your job, here are the tools you have, here are your instructions. And then every single sub-agent as well has a prompt. So this email sub-agent, we basically tell it, here are your tools, here's when to use each one. But like I said, for simplicity's sake, just to show you guys how we start off building this kind of stuff, I don't even have any system prompts in any of these agents yet. So I'm gonna open up the chat and I'm gonna say, send an email to nate@example.com asking him if he's having a good day. So once we fire this off, we're gonna see the main agent decide I need to use email agent. Email agent decides I need to use tool, although we can see we got an error with this tool. So let me check in on what happened. We can see that it's red. I'll click into here and basically what it says is that the email address is invalid. So the AI model decided to fill in the to with just Nate rather than nate@example.com. So now we know it made a mistake. Let's add a little bit of a system prompt in there. So I have two options. I could basically come into the email agent, I could add an option, add a system message, and I could say, hey, by the way, whenever you're sending an email to someone, it basically needs to be a valid email address. But an even simpler way to do that is basically come back into the tool, go right here and add a description to the to field. Where I can just tell the agent, this must be a valid email address. So honestly, I believe that this simple fix will be enough, and let's test it out again. So there's a little arrow above this message. I'm just gonna hit that, which basically sends it off again. And now we'll see if the email agent can get it right. Okay, so I just figured out what's actually going wrong. The email agent isn't messing up, the main agent's messing up. Because what happens is the main agent is getting this message that says to send an email to nate@example.com, And if we click on the logs, we can see what it does. And we can see here that it basically calls on the email agent tool and it passes in as the input, "Hi Nate, I just wanted to check in." So what happened here is the main agent decided, I want to make the email rather than saying, okay, Mr. Email Agent, you do all this work. So all we have to do is probably system prompt the main agent to tell it, you don't need to take action, you don't need to send emails. You just need to delegate the task to the right tool. So I'm gonna add a system message and basically just say exactly that. So here you can see I gave it 3 short sentences about what its role should be. And once again, we're gonna save this and just try again. All right, so I just shot off the exact same message. We didn't change anything else. And now you can see that it went through. And I know this may be a little bit overwhelming or a little bit confusing at the moment if this is one of your first agents that you've built. But once again, let me just walk through what just happened. So we'll click into the main agent and we're going to go to the agent logs. When you read through the logs, this is basically how it works. The first thing that it did is it calls its brain in order to read the system message to understand what to do next. Once it read that, it called the email agent, and this time what it did is it sent over this message to the email agent. Send an email to Nate@example.com asking him if he's having a good day. So now we can see that the main agent isn't creating stuff itself. It's just delegating the task. Which is exactly what should be happening in an agent swarm. From there, the email agent then uses its brain, decides, okay, I need to create an email, and then it passes over these parameters to its send Gmail tool, which are here's who it's going to, here's the subject, and then here's the actual body. And then basically that gets communicated back to the main agent, and then the main agent responds to us. So there's really 3 key things that you need to master in order to build agent swarms. The first one is going to be understanding how to read through the agent logs. That's super, super important for debugging and making sure that your agents are doing what you told them to do. So you guys just saw me basically run into an error, try to fix it, it didn't work. So what I did was I looked at the logs to figure out where exactly in this chain of command is something breaking. So the more experience you get with reading agent logs and understanding what's going on, how data is being passed between different agents, the better you'll get at understanding how you can build things that work. Now the second thing is going to be prompting, because what happens is it's gonna work fine when you have one agent and one tool, but as you scale them up, you're going to have multiple more things to include in your prompt. For example, with this guy, we have, we have one main agent and we tell it, okay, you are basically an orchestrator delegator agent and you have 5 agents to work with. It understands that now and it does its job pretty well, but I wasn't able to just throw the prompt in and have it work like magic. What you're gonna really have to do is understand the aspect of reactive prompting. I actually did a full video about reactive prompting and I'll include this entire PDF along with all the other resources that you'll get to create this system, but this goes over some really key things about basically debugging one error at a time, scaling up slowly, adding tools one at a time in order to make sure that everything's working rather than basically throwing in 20 tools and a huge system prompt at once and hitting run. You won't know exactly where things are going wrong. And then the final element to understand is the tool calling. Basically all of these different tools, what we're doing is we're letting the AI model decide how to fill in the parameters. So to give you guys some more context here, what happens with like a send email tool is the AI model decides who's it going to, what's the subject, and what's the body message. So as you can see in this Gmail tool, we let the AI model decide who's it going to, what's the subject, and what's the body message. So if we wanted to add something else like a calendar agent, we'd basically add another tool. We'd add an AI agent as a tool, and we would call this one a calendar agent. So we gave it a description, we gave it a name, and then what I'm going to do once again is let the main agent decide what message this calendar agent receives. So we let the AI model decide that. Now we would basically need to give the calendar agent access to a brain once again. So I can actually drag this little thing into a different brain. So now the email agent and calendar agent use the same chat model. And then what we can do is add a calendar tool. So if I go to the tool button right here and I type in Google Calendar, we'll grab this guy and we will basically do a create event operation. I would choose the calendar that I want it to access, and then we have a start time and an end time. And what I'm able to do is basically just say, okay, AI model, you're gonna decide when this event's gonna start and end. Okay, so I just asked it to create a calendar event for today at 1:00 PM for lunch. You can see the agent called the calendar agent. You can see the calendar agent called the create event tool. Everything looks like it worked. So if I go over to my calendar, we don't see the event. So this is where you need to understand, okay, things look like it worked, but I'm not seeing the actual result that I was looking for. Now what I need to do is I need to look at the tool, I need to look at the different agent logs and see what actually happened, and then we'll figure out where things went wrong. So that's exactly what I'm gonna do with you guys, and I'm gonna start by looking at the tool to see what actually happened in our Google Calendar. So if I click into the tool, what you can see happened is the agent created an event for 1 PM, but it made it for April 27th, 2024, which was, you know, over a year ago. So now I would think to myself, okay, why did it do that? And to understand why it did that, I would go to the main agent, I would click on the logs, and I would just start to go in order. So first of all, it calls its brain, and then from there it decides, okay, I need to use the calendar agent. When it calls the calendar agent, it says create a calendar event for lunch today at 1 PM. So now I'm thinking to myself, okay, the agent doesn't actually know what day is today. And that's exactly why when it goes to fill out the parameters for the calendar tool, it makes it for a year ago. A lot of times when I'm building things and I'm trying to figure out what's going wrong and how to fix it, this is gonna sound really obvious, but I promise you it's a really, really good way to think, is just think about if I face this problem in real life as a human doing this manually, what would I do? And so in this case, what I would do is I would look at my phone and figure out, okay, I was told to make an event for today. What day is today? I would look at my phone, I'd realize that today is, you know, July 25th, and then I would basically make the event for July 25th. So the way we're going to fix that here is I am going to give both agents access to today's current date and time. And to do that, I would come into the system prompt of this main AI agent. I'm going to make sure it's an expression so we can put in a live variable. And I'm just going to say today's date is colon two curly braces. And then we have a little variable right here, dollar sign now. And all that does is it gives the agent the current date and time no matter what time you're using it. And so I'm just going to copy this little sentence that I made. I'm going to go into the calendar agent and I'm going to give it the exact same information, make sure it's an expression, and just say today's date is blank. So now that I've saved that, if I open up the chat and I run this exact same message, I'm pretty sure it should be able to do this correctly. It decides which agent to use. The agent decides which tool to use. And now if we go into our Google Calendar, we can see we have an event here today at 1:00 PM, although we don't have a title. So same thing, I would basically think about, okay, why is there no title? Let me go look at this actual Google Calendar tool. I can see that the agent is automatically populating two parameters, the start time and the end time, but there's no parameter here for title. So what I would do is I would want to add an additional field. I would basically come down here to Summary. I think Summary is how it shows up in Google Calendar as a title. And then I would just let the AI agent decide what's the summary. So now that I've saved that and we know that the agent's going to send over start time, end time, and title, I can send off this query that's asking it to make an event for 6 PM for dinner. The agent's calling the right tool, and now we can go ahead and check our calendar and we can see we have an event for 6 PM called dinner. Okay, so now we've basically built out this mini agent swarm where we have a main orchestrator agent and we have an email agent and a calendar agent. What would be next from here is you'd start to scale up these agents by giving them access to different email tools and different calendar tools. But I've made it really easy for you guys because what you can do is you can leverage all of the tools and system prompts in this Agent Swarm that I've already built. You could basically come into the email agent and you could copy this exact system prompt and then put it into your email agent. You could also then copy all of these tools, go into your workflow and paste them in, and then just drag and drop and connect these tools to your own agent. Now, one thing to note if you do take this route is that within these tools, because I built these a while ago, what I have is these little fromAI functions. And I just wanted to show you guys that these fromAI functions are the exact same thing as what we set up together where we click the button to let the model define. They're doing the exact same thing. N8N just made an update where they made it even easier than typing in a fromAI function. So whether you want to set them up yourself and use that button, or you want to just copy in these tools that I already have with the From AI functions, don't worry about it. They're doing the exact same things. Real quick, guys, while I'm editing this video, I thought of something that I wanted to make sure I mentioned. These agent swarms are super cool, and it is doing a great job at making it really, really easy and more accessible to people to build these agents that call other agents. But ultimately, I think that the majority of automations that you can build for yourself or for your business or whatever it is don't need to be agents and don't need to be agent swarms. There's a big difference between building an AI agent and building an AI workflow. And I think that the majority of business problems can be solved with a really good AI workflow. The difference here is that with a workflow, we're still using AI, we're still using tools, but we're basically controlling the exact flow. So we know that the process goes 1, 2, 3, 4, 5, 6, and there's literally no way for the process to go 1, 4, 2, 6. It has to follow our exact instructions every time. So if you're trying to automate a deterministic and predictable process that follows a step-by-step guide every single time, you want to go with a workflow. Agents are really cool because they use AI as a reasoning and a decision-making aspect, and that's when we have processes that are unpredictable, non-deterministic, and we need that assistance from an AI. So I would encourage you to think about, am I building something that needs to be an agent, or am I building an agent because I think it's cooler? I've gotten caught up in the hype of AI agents and built agents when they could have been workflows for sure. So I just wanted to throw that out there real quick. If you want to watch a full video, I've done a full video on this exact topic, which I will link right up here. But let's get right back to the main video. So now I need to tell you guys about how you can actually access this and the agent log sheet right here that you see in order to basically duplicate this exact system. What you're going to do is go to my free school community. The link for that is down in the description. And once you get in here, you can get all of my resources from every single YouTube video I've made for completely free. You'll click on YouTube Resources, or you'll search for the title of the video using the search bar. And once you find that post for this video, you'll basically click on it. And what you'll have right here is a JSON file. This JSON file can be downloaded, and then it can be imported into your own Annotate instance. And when you import it, you'll basically just see this right here. Once you import it, you'll be on your own to set up your own credentials and connect to your own Google Suites and everything like that. But there will be a setup guide as a sticky note right over here, and it will walk you through everything that you need to go set up. And then I also said that I would be giving you guys this Google Sheet template so that you can plug it in and start tracking your agent actions as well. So there will be a link to this in the post I make in my free school community with the template, and I'll also include this attachment as a PDF if you want to go ahead and learn more about reactive prompting. So with all of those resources and, you know, watching a ton of other videos on my channel, you'll be on your way to setting up your first Agent Swarm, even if you don't really have a technical background. And in the process of setting up your Swarm, if you need free tech support and you're looking to take your learnings a little bit deeper, then check out my paid community. The link for that is also down in the description. We've got a great community of members in here that are building with N8N every single day. And like I said, it's free tech support. So as soon as you get stuck, you can make a post in here. You'll have members helping you out. I'll help you out. And people that are officially on my support specialist team team. We've also got a classroom section with two full courses. Agent Zero is the foundations of AI automations for beginners, and then 10 Hours to 10 Seconds, where you learn how to identify, design, and build time-saving automations. So I'd love to see you guys in these communities, but that is gonna do it for today. If you enjoyed the video or you learned something new, please give it a like. Definitely helps me out a ton. And as always, I appreciate you guys making it to the end of the video. I'll see you on the next one. Thanks, guys.










