From Zero to RAG Agent: Full Beginner's Course (no code)
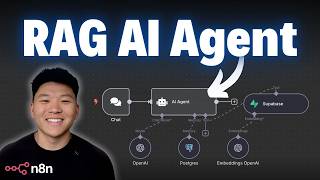
Dr. Violet Howard builds a RAG chatbot in n8n without code, ingesting a 22-page PDF into Supabase, creating 77 vectors with OpenAI embeddings, and connecting it to GPT-4 to answer questions from the document. The system adds memory to retain the last five interactions per session.
Chapters
By the end of this video, you'll have built your very own RAG AI agent, even if you're starting at the complete beginning without having to write a single line of code. So we're going to break all of it down. I'm going to explain it as simply as I can. We're going to walk through the build step by step. And by the end, I think you're going to be really shocked at how much simpler this all is than you initially thought. Let's not waste any time and get straight into it. So just wanted to start off with a quick definition of RAG since it's probably a term that you've been hearing but may not completely understand. So RAG stands for Retrieval Augmented Generation. And the simplest way to think about it is retrieving information in order to answer a question accurately. Accurately. So if someone asks you how many feet are in a mile and you don't know, you'd probably Google it, you'd retrieve that answer, and then you'd respond to them. And so when I say RAG agent, we're basically just building an intelligent AI agent that has access to different data sources so that when you ask it a question, it's able to look up the information, look up the right answer, and then provide a response to you. So I just wanted to clear that up because I think a lot of people associate RAG with explicitly vector databases, but that's definitely not the case. RAG just means getting more information to intelligently generate an answer. However, today we are going to be building a RAG agent that works with a vector database. If you don't understand what a vector database is, don't worry. Here's what it is. A vector database is a multidimensional space where we have different vectors everywhere. And those are all of the dots that you see right here. And all of these vectors represent different chunks of text and they're placed in this space based on the meaning. So over here we have apple and banana. So all of the vectors that are in this area probably have to do with fruits. And then on this side, we have wolf, dog, and cat. So all of the vectors on this side of the vector database probably have to do with animals. And right here, you can see a query coming through that's kitten, and it's placed near the other animals. But I'll explain the whole query concept in a few slides later. So anyways, I said we're going to be setting up a vector database for our AI agent. And in order to do that, we need to set up two different things for this vector RAG. The first one is going to be a RAG pipeline, which basically just means we need to get data into our vector database. And then the second part is going to be the actual RAG agent, where that's when we actually get to talk to the data in our vector database. So the first part of what we're doing here is the RAG pipeline. And it's really simple, so let me break it down. So here's a visualization of a RAG pipeline. We start off with a text document, and this is what we want to put inside of our vector database. Then we have to do 3 things. We have to chunk it so that all of the pieces get split into different chunks. And each of those chunks is what's going to be associated with one vector, one of those dots in the graph. After it's chunked, we run it through an embeddings model. And this basically just means we're turning that text into a bunch of numbers. And then with those numbers, with those embeddings, we're able to vectorize the information. And that's how they get placed based on the meaning. So in this case, we can just pretend that the first top chunk has to do with company information. The middle chunk has to do with finances. And then the bottom chunk has to do with marketing. So that's why they're placed in different areas in this vector database. And we're going to be building our RAG pipeline and our RAG agent in a software called N8N, which lets us to drag and drop, no code, super easy. And this is what it's going to end up looking like in N8N. So it's super simple. We're going to be getting our document from Google Drive. And then once we have it, we have to chunk, embed, and vectorize. So we're going to use this data loader to chunk it, this embeddings model to embed it, and then this Supabase node to vectorize it and put it in our vector database. And as you can see, it's a really simple setup. It's only 5 different nodes and no coding will be required. And now the second part of the system, once our data is actually in that vector database, is we have to build an agent that can talk to it. So here's a visualization of how a RAG agent works, and it's a very similar process. So the agent gets triggered when we make a query. So that's how it would start off. Let's say in this case, our query is, what is company X's mission statement? The agent then takes that query, and then it's basically going to send it off to the embeddings model to get embedded and turned into numbers. And we run it through the same embeddings model that we did earlier in the pipeline so that everything is consistent and matches up. Once that query is embedded, it basically gets vectorized and placed in that vector database. and you can see right here, because we asked about Company X's mission statement, it gets placed near the other vector that had to do with the company information. From there, we pull back the company vector because it's close to this one. We pull back the actual query that was asked in the first place, and then the AI agent uses its AI brain to generate an answer for us. And so that's why back in this slide we had the query equals kitten, and that's how we know it got placed near other animal-related vectors. So what is this going to look like when we get into NN? As you can see, once again, not too difficult. We have a chat trigger right here, and this is how we can talk to the agent and we trigger it with a query. From there, the agent takes our query and it has to send it to the embeddings model to be embedded. After that, it's going to send it back to Supabase to be vectorized. The agent's then going to look at our original query, the vectorized information, and then it's going to use its brain to generate an answer for us. And for this specific use case, the document that we are going to vectorize is going to be a 22-page PDF going over the rules of golf. So once again, this process is we're going to chunk up the document, we're going to embed it and vectorize it, and that's how it gets in our vector database. And once we have all the information in the vector database, we can talk to it through our AI agent. So that's the example that we're going to build out today together. But just so we can zoom out real quick, the actual data source for the vector database does not always have to be a text-based document. And the way that we talk to our agent doesn't always have to be a chat trigger. Data sources could be whatever we want. It could be whenever a new record or a new ticket in HubSpot is submitted, we turn that into a vector. Could be an Airtable trigger. It could be every single email we get, we want to put that into a vector database. There's tons of different use cases. Same thing with the agent trigger. It could be something where the agent only works when we talk to it and we send it like a text message. Or it could also be, okay, whenever I get an email, I want the agent to read the email, look up information in my vector database, and then respond for me. Or it could just be every morning the agent's gonna go off, look in the vector database, and send me some sort of summary. Or the agent could also be triggered on something like a form submission. So there's lots of ways that you can bake in RAG and RAG agents into whatever sort of flow you're looking to automate. And finally, just wanted to touch on real quick, there's different providers for vector databases and they all kind of have their strengths and weaknesses. What we're going with today is Supabase. I'm not gonna dive too deep into exactly why I'm choosing Supabase today. It has more than just vector database capabilities. It also lets us to do relational database stuff. And what we're gonna do today is we're gonna use Supabase for the vector store, which is built on top of PostgreSQL. So it's kind of a two-in-one, and we're gonna use PostgreSQL for our short-term memory. So I'll show you guys all of this. Let's go over to initn and get set up. All right, so here we are at supabase.com, and if you haven't set this up before, don't worry, we're gonna walk through that together. But what I'm gonna do is just click right here on this green button that says Start Your Project. You can see that I already have a project set up, but what I'm gonna do is just go ahead and create a new one. I'm going to be able to spin up this one for free. I'm just going to call this one test, and then I need to give myself a database password. So I've given myself a password, and don't forget this password because we're obviously going to have to use this later to connect NN to our Supabase. All right, so right now you can see our project is going to be spinning up right now, and this will eventually go green. So while we're waiting for this to get set up, let's hop over to NN and create a new workflow in order for us to start this whole RAG pipeline. So like I told you guys, what we're going to be putting in our vector database today is this PDF that's in my Google Drive. Called The Rules of Golf Simplified, and it is a 22-page PDF. Real quick, guys, I figured that it would be a better experience to go through this video using the exact same PDF that I've got right here just so you can follow everything I'm doing step by step. So I'll have a link to this PDF in my free school community. The link for that will be down in the description. You'll join the free school, and then when you come in here, just search right here for the title of the video or go to YouTube resources. And when you find the post associated with the video, you'll see there'll be resources right here. So that was a bad example, but in this one you can see there's a JSON file, and this is where I'll attach the PDF for you to use. So in order for us to access that PDF, we are going to have to connect to Google Drive and then, and then, so what I'm gonna do real quick is hit tab. I'm gonna type in Google Drive. I misspelled Google a little bit. Click on that, and then I'm gonna open up the actions, which is going to be download file. Now that I'm in this node, all I have to do is connect to my Google account. If you don't know how to do that or haven't had that set up yet, go ahead and check out this video. I walk through it step by step. It'll take like 3 minutes. Once you finish that and you're connected to your Google Drive, all we're gonna do is look through our list of different documents in our account. And ours was called Rules of Golf, so I'll type in rule and we should see it pop up right there. And now I'm going to be able to pull in this PDF. So if I execute step, we should be able to see it come through on this right-hand side. And there it is. It is our binary data, which is our Rules of Golf PDF. And what you'll also notice is when you ran this node, it automatically added this when clicking execute workflow trigger, which basically means whenever I click this button down here, it's going to run the rest of the nodes that we have linked up. So we have our PDF right here, and all we have to do next is actually put it into Supabase. So it's gonna be super simple. I'm gonna click on this plus button after the Google Drive. I'm going to type in Supabase, and we can see we have Supabase, and this is where we have like our relational tables and stuff. But what we want to do is access a vector store. So I'm gonna click on Supabase Vector Store. I'm going to click on Add Documents to Vector Store. And now what we're gonna have to do is set up our Supabase credential and also in Supabase create a vector database table. So in order to create our Supabase credential, I'm gonna open up this dropdown and click on create new credential. And what it asks us for is a host and a service role secret. So all I have to do is go back into Supabase. You can see now our project status is green, everything's healthy. And on this left-hand side, I'm gonna go over all the way down to settings. In here, I'm gonna scroll all the way down on this left-hand side to data API. And then right here, this project URL is actually our host. So I'll click on copy, we'll go back into n8n, and we will paste the host right there. And then in order to get our service role secret, we're going to go back into Supabase. I'm going to click on this left-hand side right here where it says API keys, and then this button right here, service role secret, you'll hit reveal, you'll copy it, and then you'll paste that into the section. So I just copied that key, pasted it in here, and now if I hit save, we should be connected to Supabase. Then it's always best practice to name that credential either your email or the date or whatever it is, just so you can keep them all separate. So we've officially connected to Supabase, and now what we need to do is set up a table. If I click into here, you can see that there's no tables in our account. This may seem technical, but it's gonna be super easy. You're just gonna click on docs right here. You're gonna scroll a little bit down where there is a quick start for setting up your vector store. And then once we get to this page, all we have to do is scroll down a little bit and copy this SQL command right here. And go back into our Supabase. And on the left-hand side, we're gonna go to the SQL editor. Once this opens up, we're just gonna click on New SQL Snippet, paste that in there, don't have to change anything, and then hit Run. And this is basically going to create a vector database for us called documents. If you've already run this command before and you want to create a different table, all you have to do is get rid of this first two lines that say CREATE EXTENSION VECTOR because you've already created the extension. And then right here where it says CREATE TABLE documents, you'll just change that name. Instead of documents, you'll put in the name that you want for your table. And then you'll just have to change every instance in the rest of the command where you see documents. You'll put in whatever you typed in right here for your table name. But now if I go on the left-hand side and go to table editor, you can see that we have a table right here called documents and it's waiting for us to put in our vectors. So back in NN, I can open this up and we should see if we just refresh this list, maybe we should see our table right here called documents. And I don't want to confuse you guys. So if you followed all the steps I just did, you won't have to worry about this. But if you did create a different table, let's say you created a table called test, you would just make sure you change this right here to match_test rather than match_documents. And now that we've connected here, we just have to do two more things. We have to chunk and then embed so that we can actually vectorize. The first thing we're going to do is chunk. And in order to do that, we're going to click on this plus right here under document. This is going to open up some document loaders for us. And I'm going to choose default data loader. Now what's happening here is we're just basically telling Supabase, here's what I want to vectorize and here's how I want you to chunk it up. And the good news is we can basically just leave the text splitting as simple, so it splits up every 1,000 characters with 200 characters of overlap. If you wanted to get more custom, you could always create custom, you know, 500 characters, 2,000 characters, whatever you want. But right now we're just going to keep it as simple. And then one more thing that's kind of tricky is we have to tell it what document to look at to actually embed, and it's set by default to JSON. And we can't do that because our PDF is right here, and if you'll notice at the top right here This PDF is being stored as binary, so we want to change the type of data to binary. Now we should be all set up when it comes to loading data and chunking. So now that we have our chunking set up, we just need to connect our embeddings model. So I'm going to click on the plus button right here. I'm going to click on Embeddings OpenAI. And if you don't have an OpenAI account, all you have to do is click on Create New Credential and you just need an API key. So what you have to do is go to OpenAI API in order to make an account. This is different than just having a ChatGPT plan because you'll have to add billing information to your OpenAI API account. And once you get here, you'll just go to your dashboard, you'll click on API keys, and you'll create a new key. And all you have to do is copy that key and then you'll paste it right there and you'll be connected. And now all we have to do is choose model Text Embedding 3 Small. If you followed all my steps, you should be good to go. But if you did set up a vector database with different dimensions, you'll have to make sure that those line up right here. but I don't want to confuse you guys. If you did what I did, then you won't have to touch that at all. Okay, so everything looks like it should be set up. I'm going to hit the play button above our vector store, and what this is doing is it's chunking, it's embedding, and now finally it's vectorizing, just like we saw earlier on that slide. And what you can see is that we got 77 vectors. So that 22-page PDF that we were looking at right here, it ended up splitting and chunking into 77 different vectors. So if I go into my Supabase table and we give this a sec, There we go. We should have 77 rows of information about the rules of golf. And if you want to see the data that's actually in each vector, you would look at this column called content. And if I open this up, you could see here's the first vector, the rules of golf simplified. Rule 1, you start the game within the tee and ground and hit the ball until it ends up in the hole, blah, blah, blah. So here's this first vector, here's this 10th vector, and then here is, you know, the 41st vector. In this column we have metadata, and then in this column we have the actual numerical representation, which is our embedding. So we have our data in here, which was the first step. That was the RAG pipeline. Now let's head back into NN and let's create an AI agent that can actually talk to the information in here. So what I'm going to do is hit tab and I'm going to type in AI agent and grab that agent right there. Now, as we talked about, the way we want to trigger this agent is just through a conversation. So I'm going to grab a chat trigger. Which is right here. And then all I have to do is hook up this chat trigger right into the front of the agent, and now it will be able to get our messages when we talk to it. Now we need to connect a brain to our AI agent. So if I click on the plus under chat model, I'm gonna scroll down here and grab OpenAI chat model. Just because if you are setting all this up for the first time, you already know how to get there and get your API key, and you already have that credential set up. And now we just need to choose a model to use. I'm gonna stick with GPT-4.1 mini, and now our agent has a brain. and the final step is just to give it a tool so that it can actually look in this vector database. So we're gonna click on tool. We are going to type in Supabase vector store. The operation's already set to retrieve documents as a tool for AI agent. The description, I'm just going to say, call this tool to look up the rules of golf. So this is just me telling the agent what this tool does and when to use it. And then once again, we just have to choose the right table to look through, which in our case is called documents. And then the limit is basically how many vectors do you want it to actually pull back. Right now we'll just stick with 4. And then the last thing we have to do is actually connect another embeddings model because as you guys know, the query has to get embedded as well. And something that's really simple is we already have an embeddings model set up down here. So I can actually just drag this into that exact same one from down here. You don't have to do that. You could add a new one, but just to show you guys that they use the same one, I'll do it like this. So without even giving our agent any sort of instructions or system prompt, let's test this out and see how it works. All right. So here we are in the PDF about the rules of golf. And what I'm going to do is just ask it basically about the practice rules. So I'm just going to say, what am I allowed to do for practice? Let's see if the agent understands that we're talking about golf and that it needs to use the Supabase vector store, which it did. And now it's going to take that information and return an answer to us. And then we'll basically validate if it is correct or not. So right here we get our answer. According to the rules of golf for practice, before or between rounds you can practice on the course the day of each match. You cannot practice on the course the day of stroke play tournament or before playoff on the course. And also during the round, you cannot hit a practice shot while playing a hole or between holes. And if we go over to the PDF, you can see that's pretty much exactly word for word what we were looking for. And just to show you guys what actually happened behind the scenes, you can click into the agent and you can click on logs. And this will show us exactly what just happened. So the human asked the AI agent, what am I allowed to do for practice? That's what triggered the workflow. The agent uses the Supabase vector store and sends off the query practice rules in golf. And then this gets embedded using the embeddings model right here. And then what we get back after that gets embedded is the answer, which is these 4 different vectors, which is the actual content in the vector database. So then the AI agent will look at all this context and it will think about the question that was asked in the first place. And then it will actually give us an output, which is what we saw down here in the chat message section. So now that we've validated that the AI agent can look through the Supabase vector database, we have one issue, which is it has no memory. So we literally just asked it about the rules of golf. So now if I asked it, so I can't hit a practice shot between holes, it should be able to just use its memory because it just looked that up already and answer us. But what it's going to do is it's going to go ahead and search the vector database again. Because it's treating each of our messages as a completely individual, unique conversation. So it's fine because it got the answer right again, but ideally it would be able to look through its memory and realize we just talked about this. I don't have to look up anything. I can just provide them an answer. So the way we're going to set up that memory is we are going to use Postgres because we've already set up our whole Supabase thing. So I'm going to click on the plus under memory right here, and you can see we could use a simple memory which would store everything in N8N. But if we want to be able to look through the different interactions that we're having with our AI agent and store that in Supabase, what we're going to do is connect to a Postgres chat memory. So the first thing that we actually have to do though is connect to our Postgres credential. So to set up this credential, I'm going to open up the dropdown, click on create new credential, and you can see it's a little bit different than that original Supabase one, but just follow what I do and you'll be all set. I'm going to go into Supabase and at the top of the screen, you can see there's a connect button. So I'm gonna click on this and I'm just gonna scroll down a little bit where we have right here the transaction pooler. I'm gonna click right here on view parameters and then we just have to grab a few of these things. So the first one is going to be the host. I'm gonna copy the host and we're gonna go back into n8n and just paste that in right here. The database I can leave as Postgres because if you can see right here, the database is Postgres, but the user, we're gonna copy this and go back in and paste that in as a user. The password is gonna be the password that you set up when you created your project earlier in the video. So let me type that in real quick. And then the last thing we need to do is the port, which if we go back into this screen, we can see right here we have the port 6543. So all I have to do is come in here, paste that there, and then if we hit save, we should go green. Connection tested successfully. And so once we start chatting with our agent once again, it's going to store not only what we ask the agent, but it's also gonna store the agent's response to us in a different table in Supabase. So let me chat with the agent and then I'll show you guys that. So now if I'm talking to my agent and I say, hello, my name is Nate, we're gonna send that off. It's gonna check if we've talked to it before. It's now going to answer us. And we can see that if I go into Supabase, there's gonna be a new table right here. If I just refresh this real quick called n8n chat histories, and if I click into that, it's basically going to have human content. So every time we talk to it, it's going to store that here. And then it's also going to store the AI agent's response to us every single time. And so now if I was to come into the AI agent and say, what's my name? It's going to look in the Postgres memory and then it will be able to answer us because it actually has that context window. Your name is Nate. How can I help you today? Two things though, to keep in mind real quick. The first one is that in this Postgres chat memory, the context window length is 5. So every time we talk to it, it's only going to remember the 5 most recent interactions. But you have the ability to adjust this context window length. But then the AI would just be processing more tokens. And then one other thing to keep in mind, in Postgres, what it's doing is it's going to store these messages with a session ID, and that's how it looks it up. So if we are to go into n8n and clear the session, it's going to start a new session and it's no longer going to remember that. So if I now say, what's my name, it's not going to be able to get that. Because it's looking through a different session ID. I don't have access to your personal information. And then if I go into the Supabase table and refresh, we can see that these two interactions that we just had were a different session ID than these four previous ones. So it's not a huge deal because right now we're just chatting with the agent using this chat trigger. But if you were using, you know, like Gmail or you were using text message or something, you could store the session ID as someone's email address or someone's phone number. and that's how the agent could actually retain all of that context with that individual person. Okay, so you officially just built your first RAG pipeline where you got data into a vector database and you built a RAG agent that can talk to the data in there as well. There's lots of ways to expand off of this type of system. I'd say the next one would be actually creating it so it's a little bit more dynamic so that whenever you drop a new doc into a Google Drive folder, it would automatically get pushed into Supabase. And then creating a second pipeline down here where whenever you update that document, It basically deletes the old vectors, the outdated ones, and then it puts the new ones into the vector database. And that's so you can make sure the information that the agent's actually looking at and using to answer you is accurate and real-time and relevant. Then another thing you'd want to do is have a different system over here where whenever a file is deleted, it's also going to delete all those vectors from the database so you can keep the whole database very clean. So if you're interested in seeing this type of build, let me know in the comments and I'd love to make a YouTube video to cover how simple this would be to set up. But I also just did a live build of this system on my paid community. The link for that would be down in the description. This is a really great community of members who are building with N8N and sharing their challenges and their wins every single day. We've also got two full courses in here. One's called Agent Zero, which is like the foundations for AI automation, and then 10 Hours to 10 Seconds, where you learn how to identify, design, and build time-saving automations. Anyways, I'd love to see you guys in this community, but that's gonna do it for this one. If you enjoyed the video or you learned something new, please give it a like. Definitely helps me out a ton. And as always, appreciate you guys making it to the end of the video. I'll see you all in the next one. Thanks so much, guys.










